Ankle Fracture Reduction and Splinting
Ankle Fracture Reduction and Splinting Notes:
When to reduce and splint ankle fractures?
- Unstable ankle fractures (discussed nuances later)
- Any subluxation or dislocation (Any loss of joint congruity)
- Any deformity
- Any skin compromise (must reduce fracture fragment or bone causing skin tenting)
- Open fractures
- Regardless of what future surgical management the patient may require (if it all), you should perform a reduction in the ED in order to provide pain relief, reduce swelling, protect the skin/soft tissues, and protect cartilage from further damage (any mm subluxation of the talus out from under the plafond of the distal tibia can increase joint contact forces by 3-4x fold).
When to use sedation versus hematoma block
- Plan to use IV sedation or via hematoma block (A hematoma block is where you inject lidocaine into the ankle joint in this case)
- Use sedation when:
- someone is not cooperative or intoxicated (you have to think of your own safety handling needles around someone violent for example)
- Highly anxious patients
- When someone tells you they will not be able to tolerated a procedure (sometimes it is best to heed their warnings, other times you can coach them through it).
- Any ankle dislocation or severe subluxation (having relaxation that comes from the sedation can help you reduce the ankle joint)
- Consider in high fibula fractures (in Weber C fibula fractures the lidocaine will not diffuse into the fractures site from the ankle joint)
- Weber B fibula fractures can often get adequate pain control from a hematoma block because the fibula fracture is at the level of the ankle joint
- Distorted anatomy (very swollen and you’re not confident you can enter the ankle joint, very high BMI ankles)
- Polytrauma patients (Multiple fractures on the same extremity or multiple areas of the body that require reducation/procedures)
- Very stiff patients (muscle tension, parkinsons as an example. Sometimes sedation can help)
- Allergies to lidocaine (don’t waste your time trying to find unique formulations of lidocaine, just do a sedation)
- Use a hematoma block when:
- When you need pain control for the procedure (some ankle fractures are stable, some are highly comminuted and do not require a reduction, an example is that some pilon or distal tibia fractures can be done without sedation).
- you believe the patient will be able to tolerate the procedure
- Okay to use in patients with mild to moderate joint subluxation (can be used with severe joint subluxation, but it can distort anatomy, so proceed with caution)
- Patients are not safe for a sedation
- No sedation or hematoma block
- Minimal manipulation necessary
- Patient is not able to experience pain (sedated in ICU, paraplegic…etc.)
- Emergent situation (example disvascular foot in the trauma bay that is severely deformed and vessels are kinked off, just pull the foot back in place, save their limb/foot rather than wait 30min for sedation).
*More on IV Sedation for ankle reductions:*
- This can be achieved with either ketamine or propofol. To note, propofol is generally used for everyone except children and adult patients with low blood pressure.
- The main problem with propofol is its side effect of decreasing blood pressure and patients going apneic. If patients stop breathing on propofol that means their muscles are perfectly relaxed for you to be able to reduce to your heart’s content. Oftentimes ED doctors will be slow to give patients enough propofol for you to effectively perform the reduction, so it can be a struggle to get enough sedation (this is often a problem with hip reductions because there is much more muscle mass in the hip than the distal radius or ankle).
- Ketamine, on the other hand, can dissociate patients without decreasing blood pressure. So in trauma situations some doctors will do ketamine or ketamine and propofol (sometimes they will ask you what you want depending on your institution).
*Hematoma Block*
- Hematoma blocks are when you inject lidocaine or another nerve blocking derivative into the fracture hematoma or joint that communicates with the fracture
- When to use hematoma blocks?
- The elderly typically do well with hematoma blocks
- Hematoma blocks are more time efficient when it comes to performing multiple hematoma blocks, rather than waiting for the sedation team to follow you to the next room. (Block 3-4 at a time, then go start applying splints)
- Floor consults (sedations are possible on the floor, but difficult to mobilize)
- When patients aren’t safe for sedation
- Poor candidates for hematoma block
- Allergies to lidocaine/ available derivatives
- Subacute fractures (>1-2 days old) may not do well with hematoma blocks because blood at fracture site is clotted. (Sometimes it is still worth trying)
- Stiff patients that can’t relax: Parkinsons, strokes (stiffness, muscle rigidity, and/or contractures can make the reduction quite difficult), sometimes direct muscle relaxation via propofol could help (it won’t help contractures)
- Highly anxious patients: Young men and women <30-40 years old
- Some are fine, this is when you need to just talk to the patient and see how they are doing
- If highly anxious I like using Versed (midazolam) or Ativan (Lorazepam, safer for patiens with liver problems) with my hematoma blocks more than short acting opiates like fentanyl (often you can’t use both because it can be too sedating and fits the criteria for an official sedation if you use both) – this is likely hospital dependent
- Open fractures/ Polytrauma patients
- Summary: If there are any snags with getting someone a hematoma block such as local anesthetic allergies, extremely anxious, uncooperative, just jump to a sedation.
Ankle Hematoma Block Technique
Materials:
- 10ml of 1% lidocaine
- 18g fill needle
- 18g non filter sharp needle
- 10cc syringe
- Alcohol swab (chlorhexidine or iodine works too)
- Gauze
- Sometimes fluoro is helpful, but not necessary
- Position patient, move patient down to the foot of the bed and lateral edge
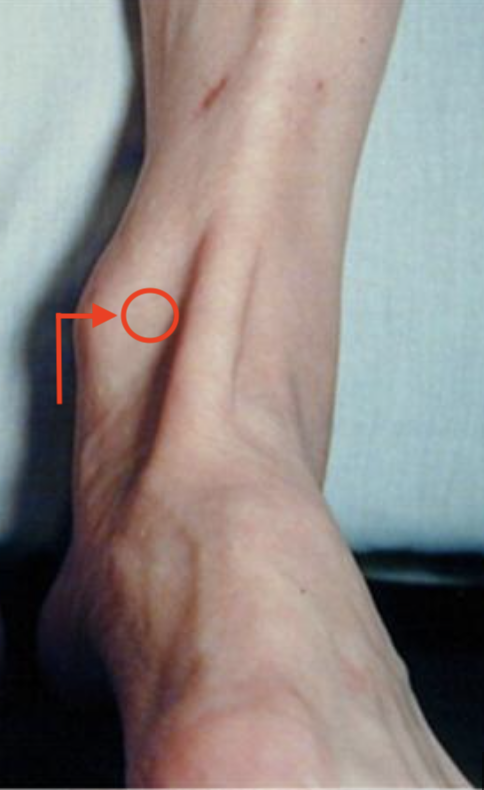
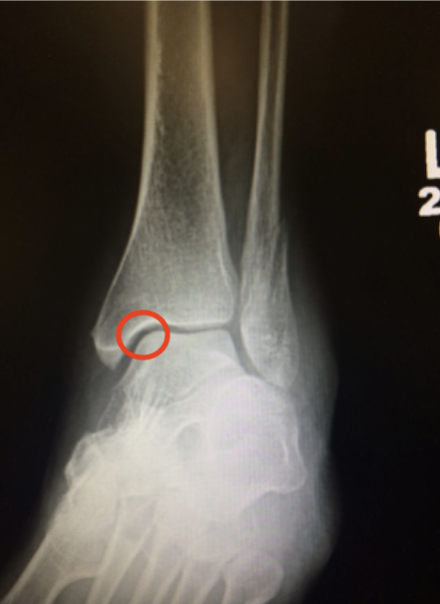
- Find and mark startpoint: Just medial to tibialis anterior in the soft spot at the level of the ankle joint
- One thumb breadth proximal to tip of medial malleolus is a good estimate of ankle joint height (hard to tell in swollen and deformed ankles)
- The tib ant is the most medial tendon of the anterior ankle (and easily visualized, have patient attempt to dorsiflex ankle and the tib ant will become more prominent
- Plantar flexing the ankle slightly can help give you more space for your needle
- Sterilize the skin
- Needle trajectory is aiming slightly distal from perpendicular with the tibial shaft, and 10-15 degrees medially
- Pull back the plunger when you feel the needle go through capsule to check for blood (blood in the syringe means you are where you are supposed to be)
- Good blood flow into the syringe means you are in the joint and are good to push your lidocaine, it should flow freely
- Cover injection site with gauze, in general you do not want to put bandaides or other other dressing items under a splint. (the exception is for open wounds you need non stick or saline soaked gauze, these open wound trauma splints are temporizing measures)
Operative Indications for Ankle Fractures
- Knowing the operative indications will help you counsel patients in the ED what to expect for future surgery and if it may be required
- Memorize this information below
- Emergencies:
- Open fractures
- Vascular compromise
- Irreducible dislocations (Bosworth in case of fibula, or tibiotalar joint in case of tendon blocking reduction)
- Skin tenting/ compromise
- Non emergent indications
- Isolated medial or lateral malleolus fractures if:
- any skin compromise
- >3mm displacement (debated)
- Any talar shift/subluxation on static or stress view (we get stress views on lateral mal fractures, no medial mal fractures)
- Bimalleolar ankle fractures
- Trimalleolar ankle fractures
- Unstable bimalleolar equivalent ankle fractures (talar subluxation despite no medial malleolus fracture)
- Unstable massoneuve type ankle fractures (high ankle sprains)
- Posterior malleolus fractures criteria
- >25% of articular surface
- >2mm articular stepoff (depends on size of posterior mal)
- Syndesmostic instability (the posterior syndesmotic ligaments attach to the posterior malleolus, so fix the posterior mal = fixing the syndesmosis)
- Posterior subluxation of the talus
- Isolated medial or lateral malleolus fractures if:
Reading Ankle Xrays
To reduce and splint ankles you have to understand the xrays and anatomy that you are working with. It is simple once you understand it, but until you do it is easy to get confused and make bad decisions with poor quality xrays.
Go read more on how to read ankle xrays here: How to Read Ankle Xrays
Ankle Fracture Reduction and Splinting Technique
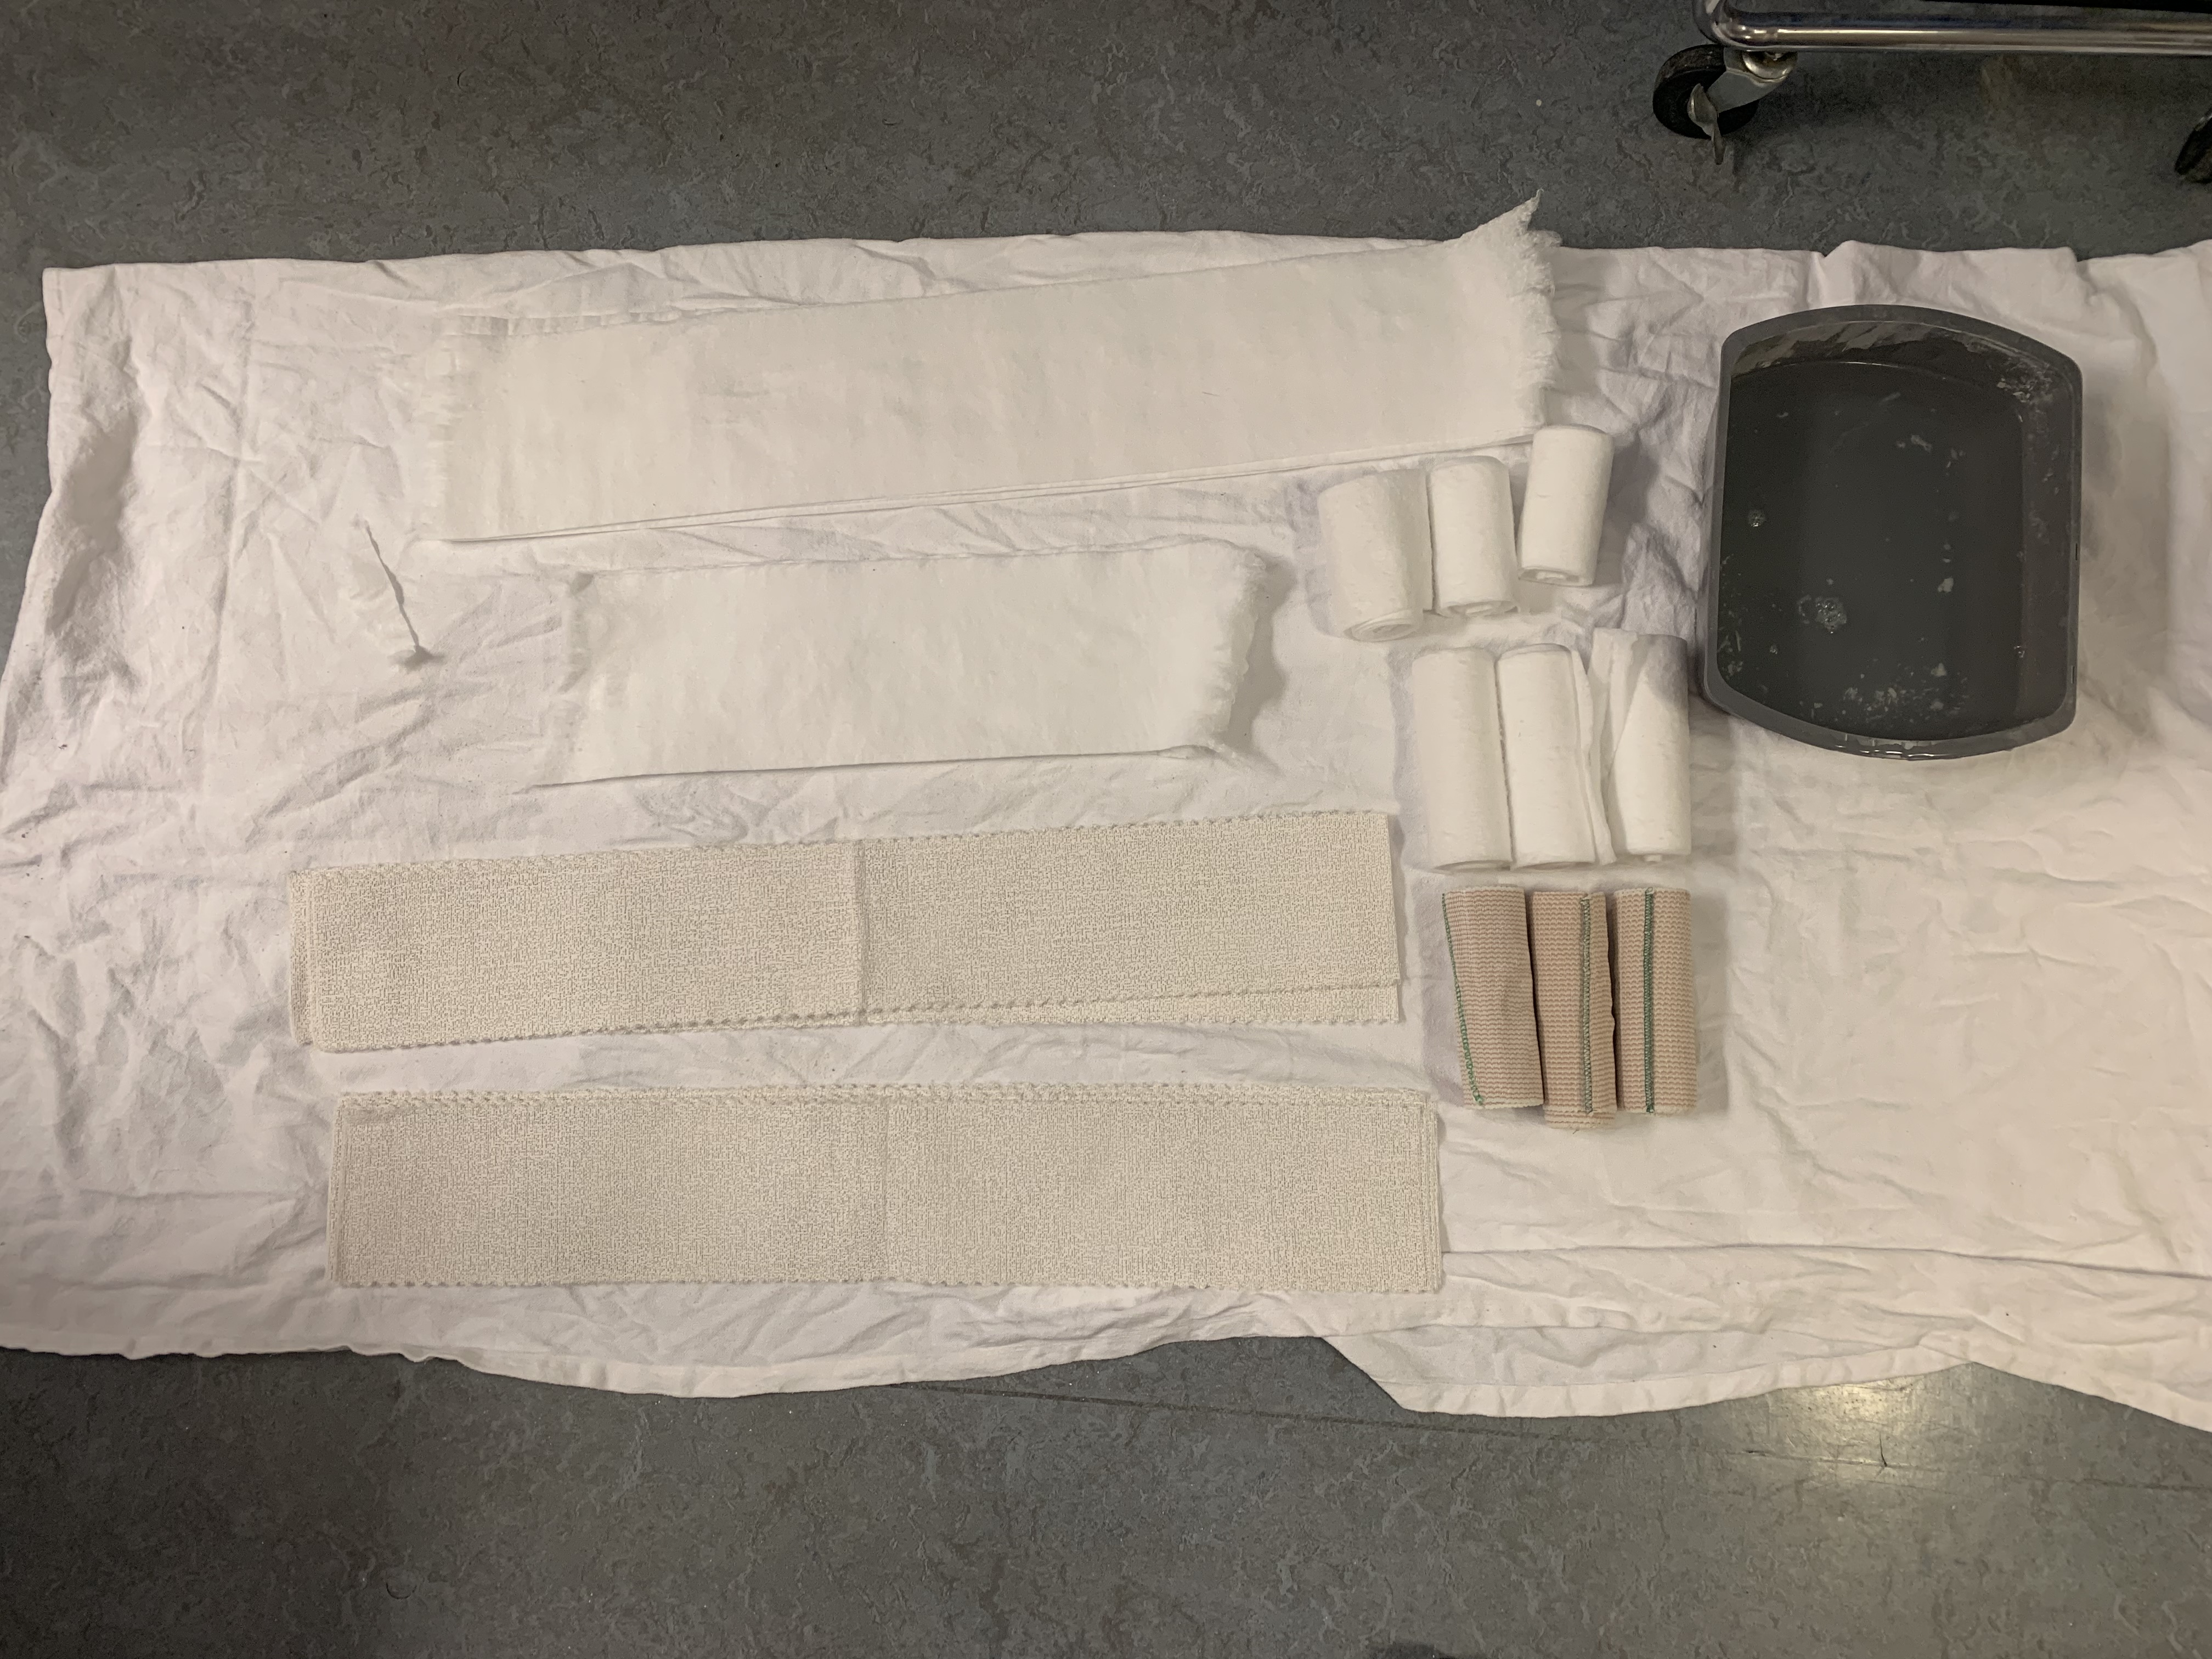
Materials
- Injury xrays (have the fracture pattern memorized, always have xrays prior to reductions)
- Ace wrap (4” Flexmaster works really well)
- x3 - 6 inch webril
- x3 - 4 inch webril
- two stacks of 10 layers of precut 5”x30” plaster (You can roll out 6” plaster instead)
- 2 stacks of 4 rolled out layers of webril
- Warm water in bucket to dip plaster
- C arm (very helpful for precise reductions)
Room Set Up
Move the patient down the bed to the very edge.
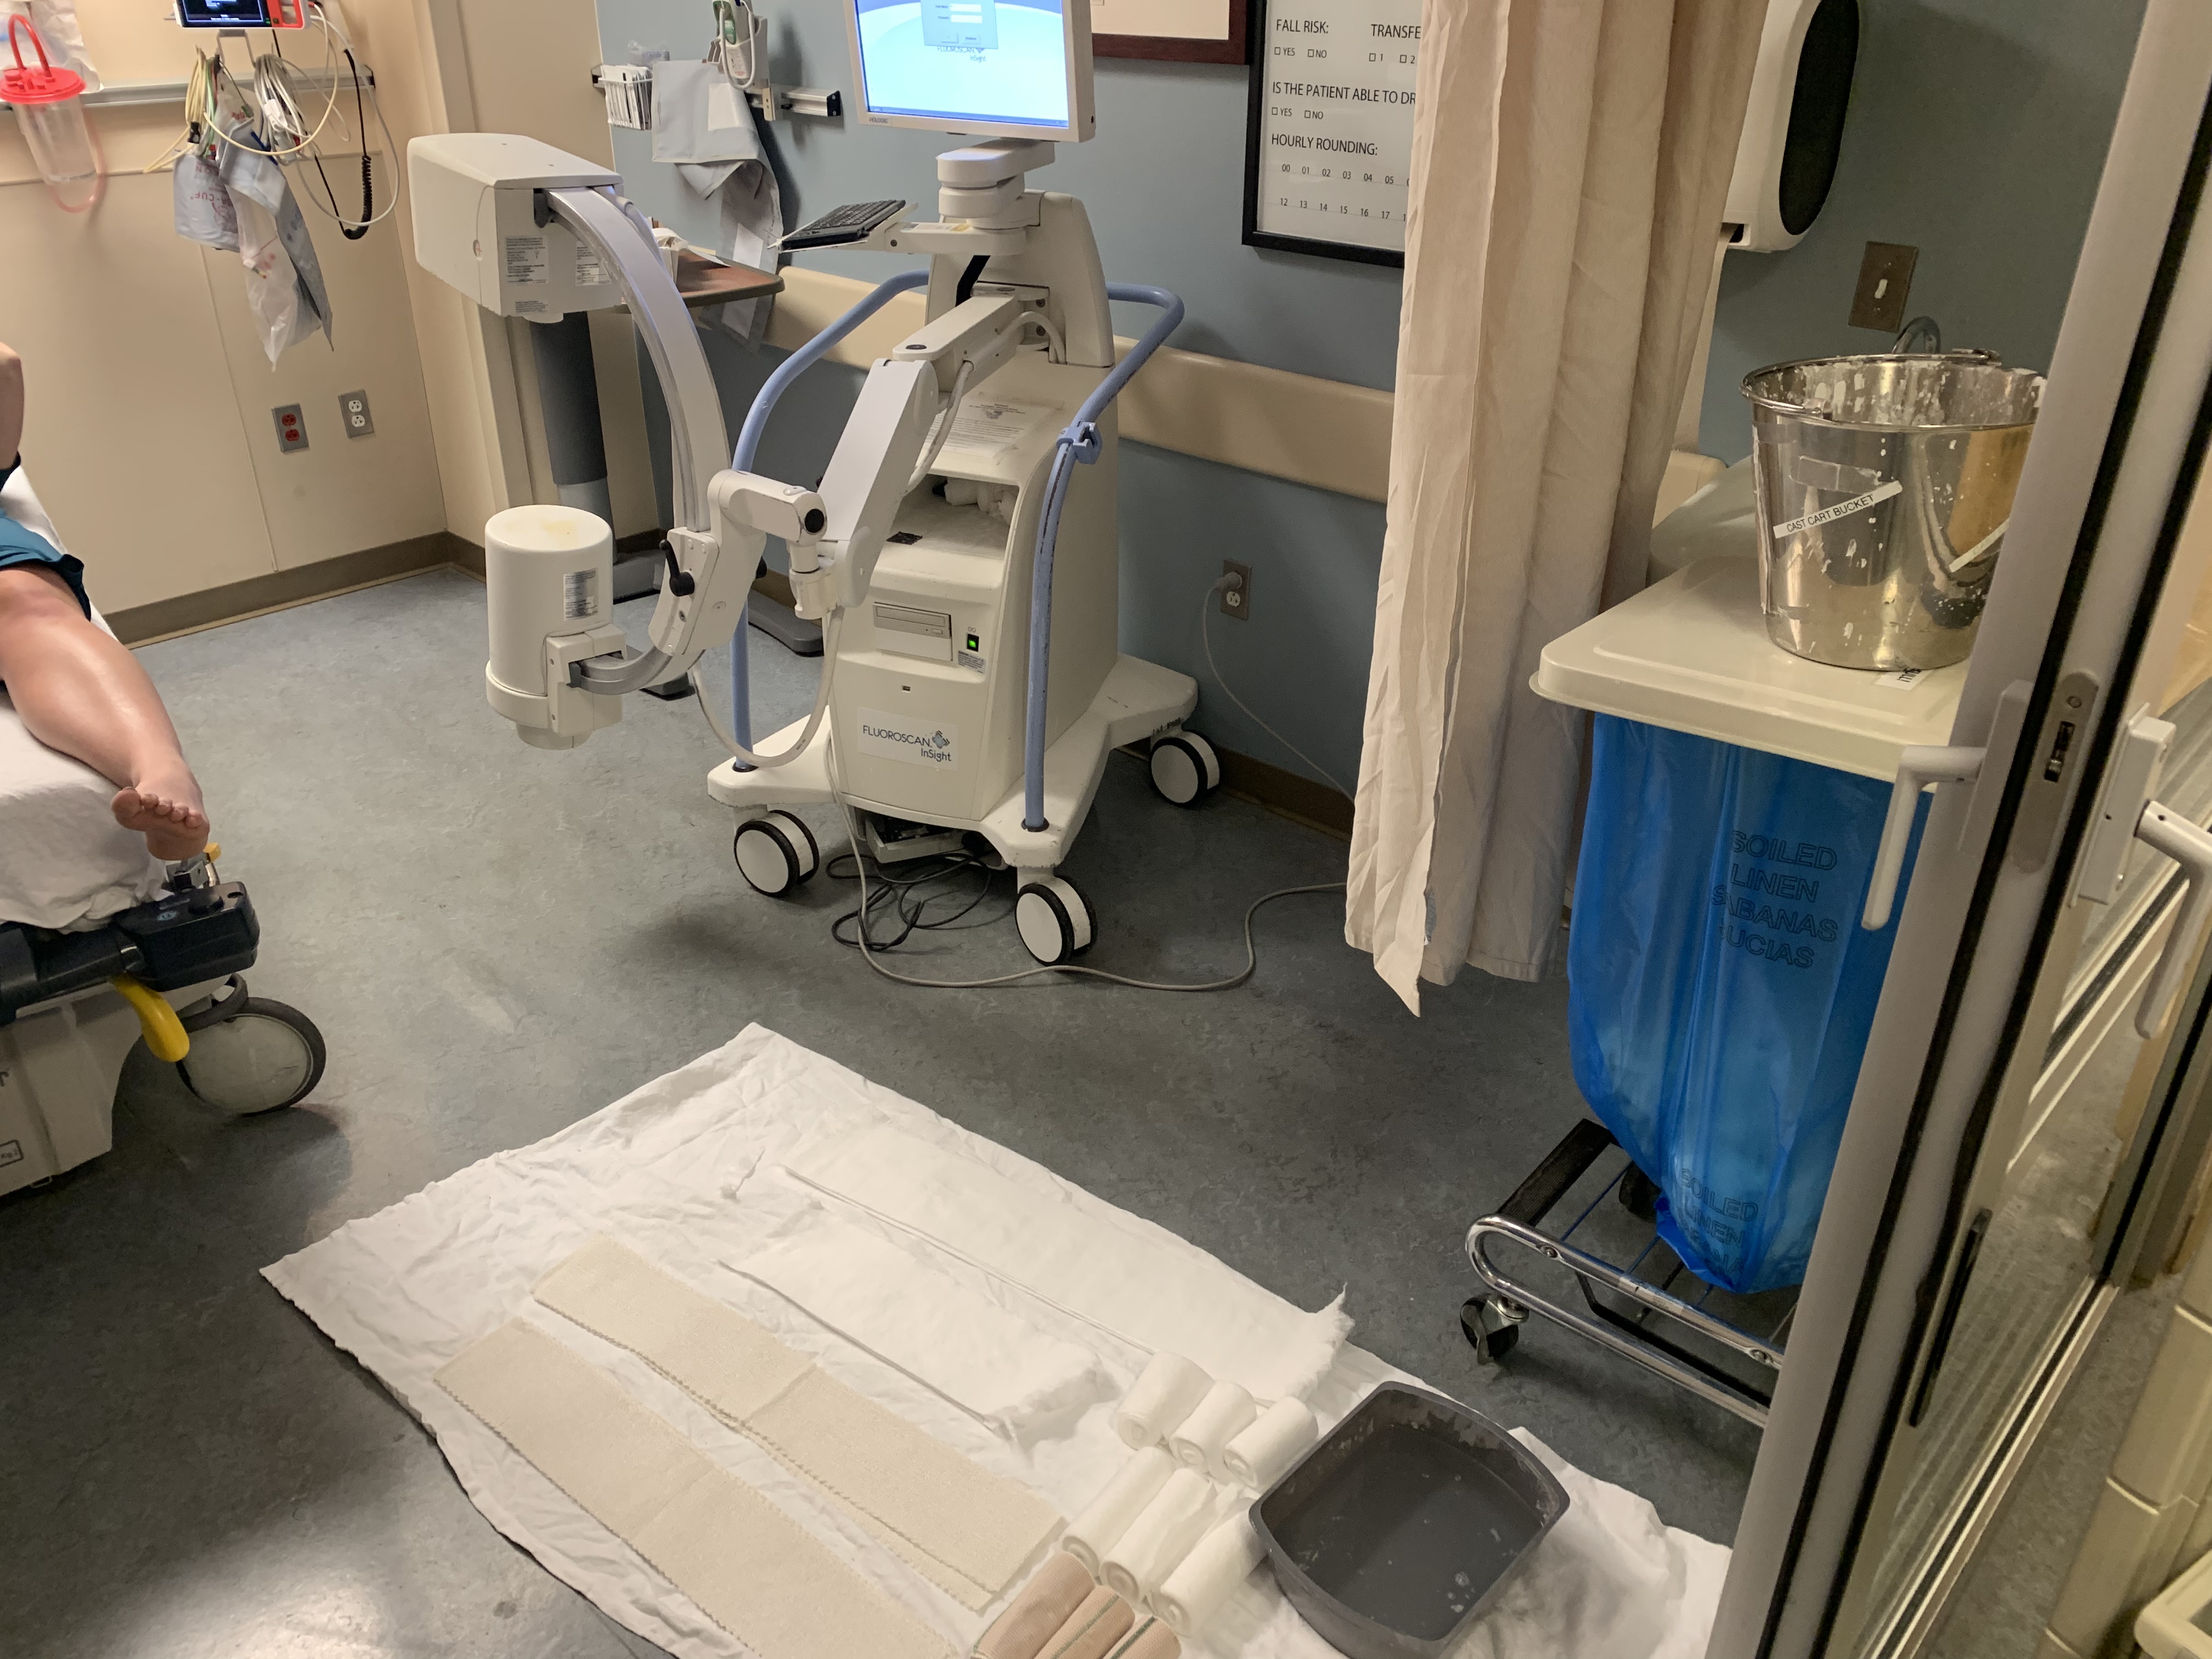
Bring the c-arm in to ensure the screen is viewable from where you stand for your reduction with the arm coming in from the side where you can easily control it.
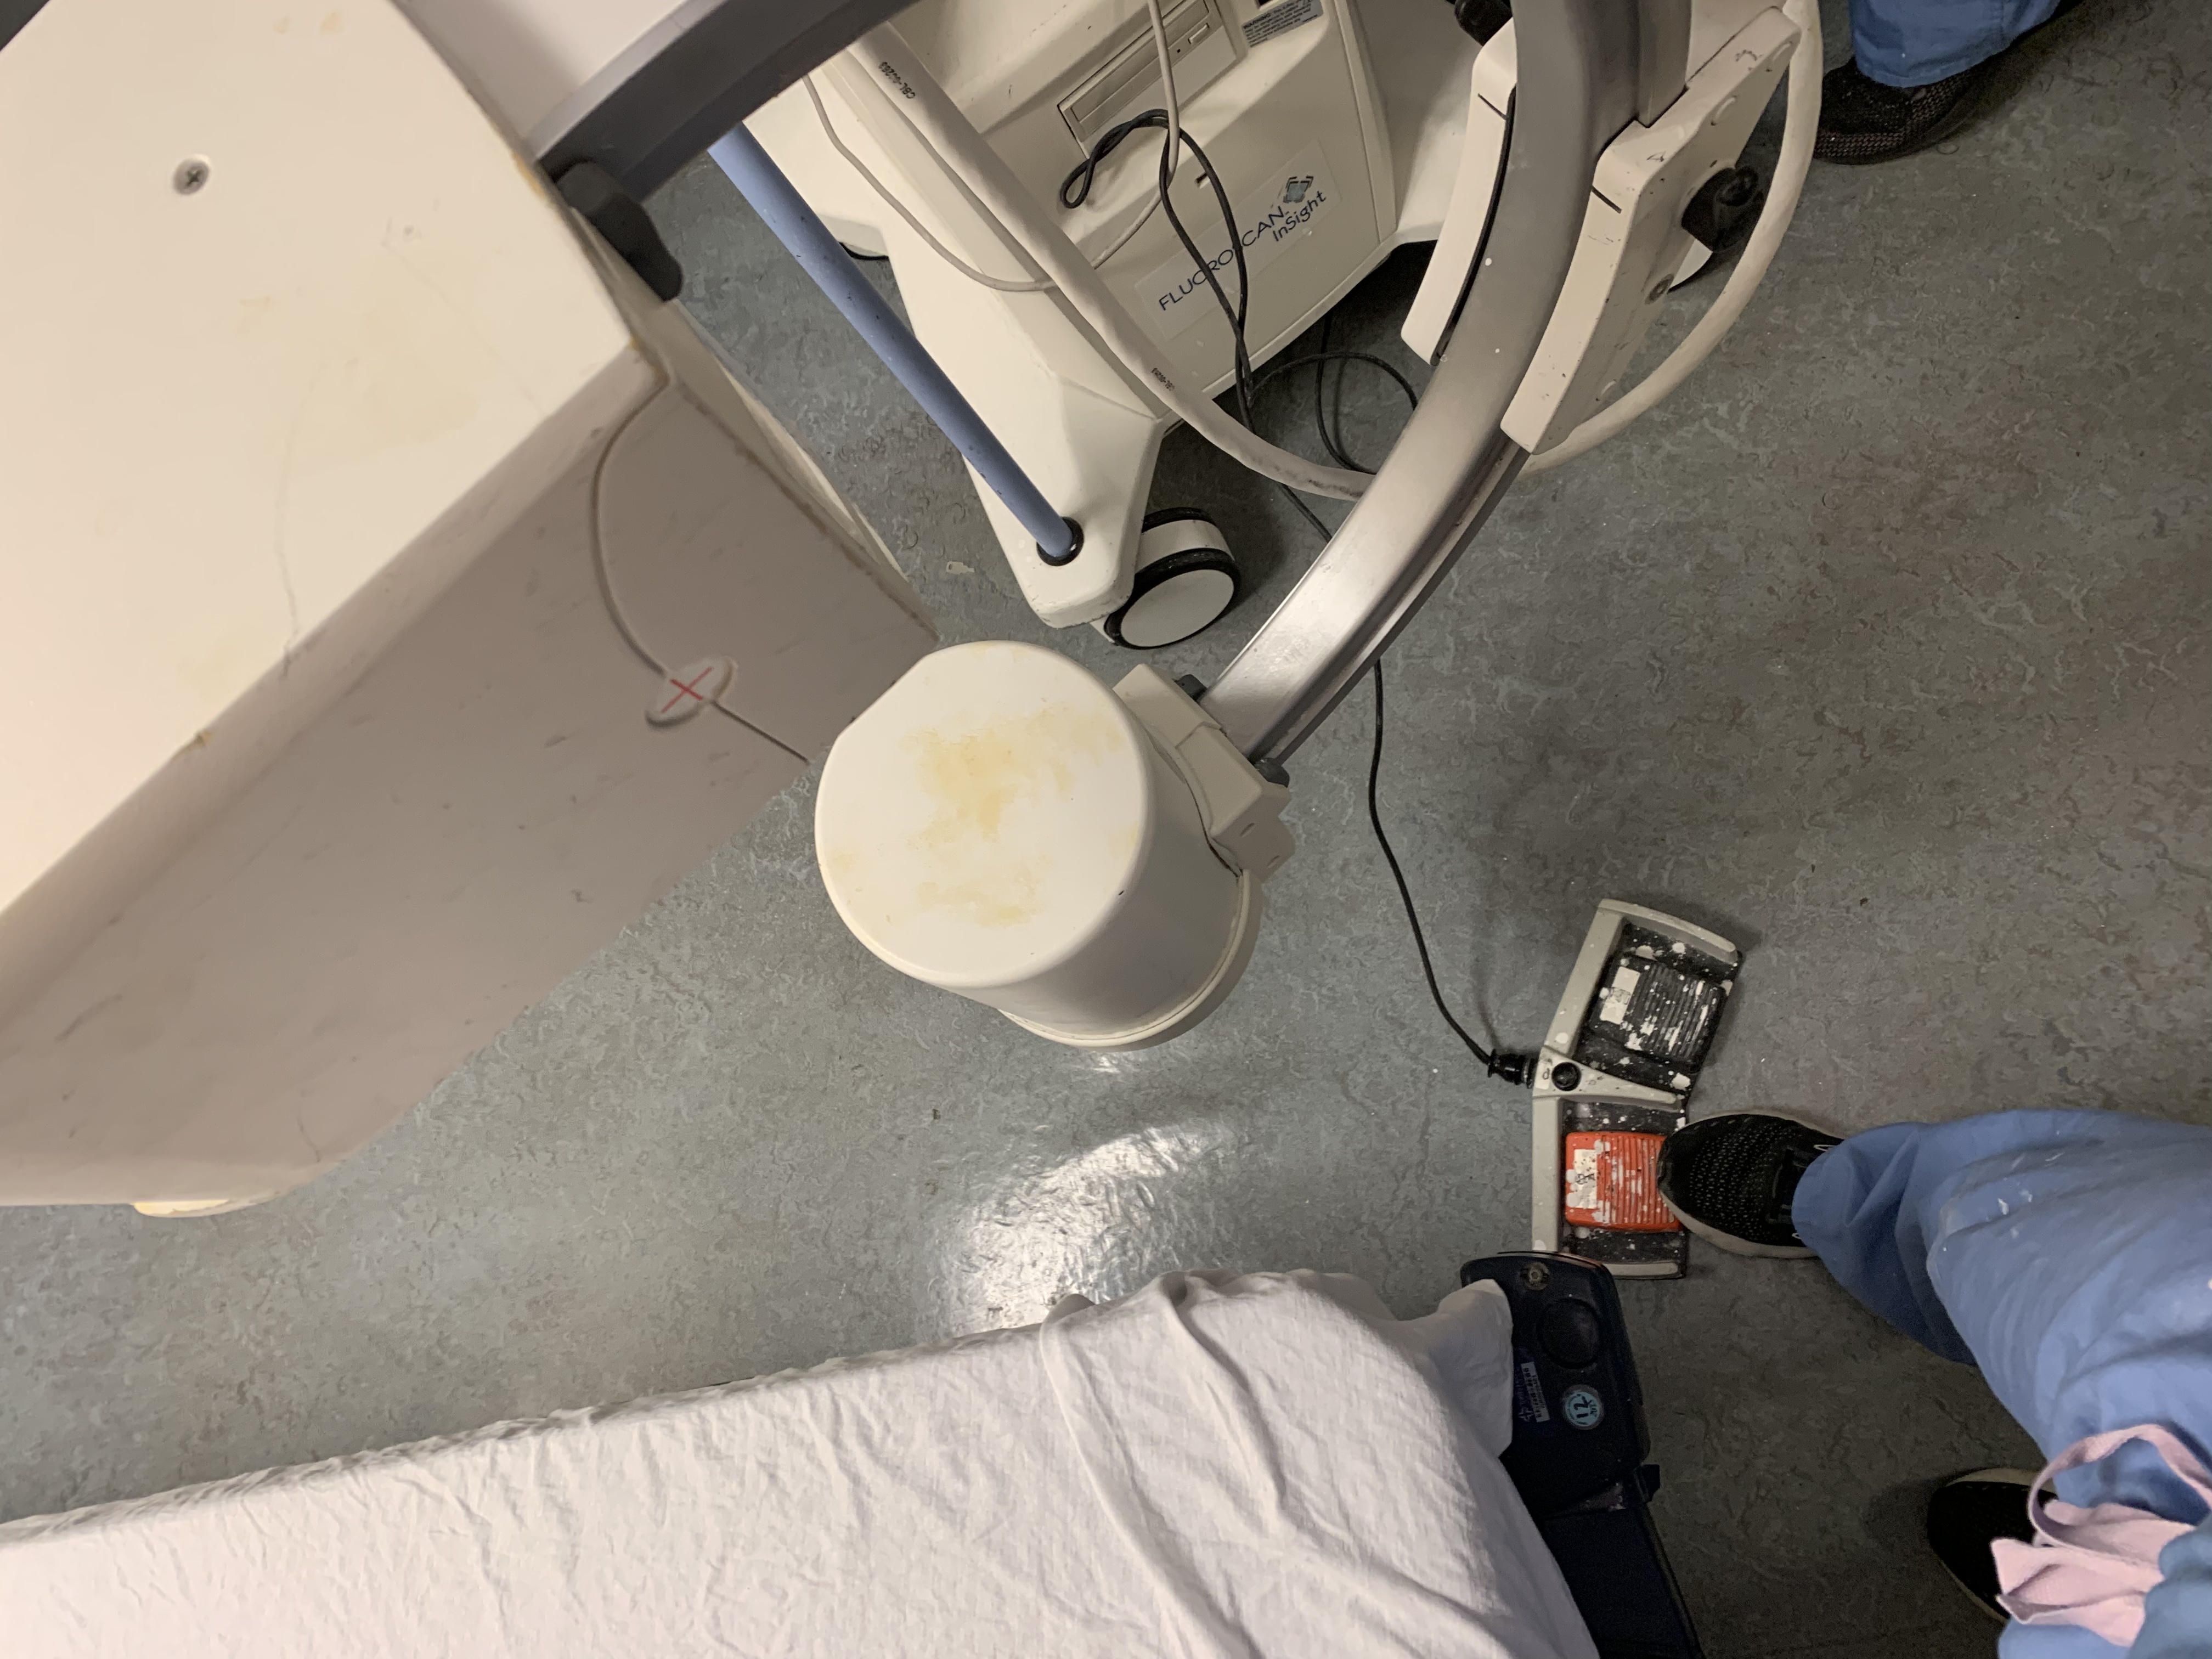
A foot pedal is helpful when taking xrays to keep your hands free. I like to put it at the base of the bed where my right foot can reach it.
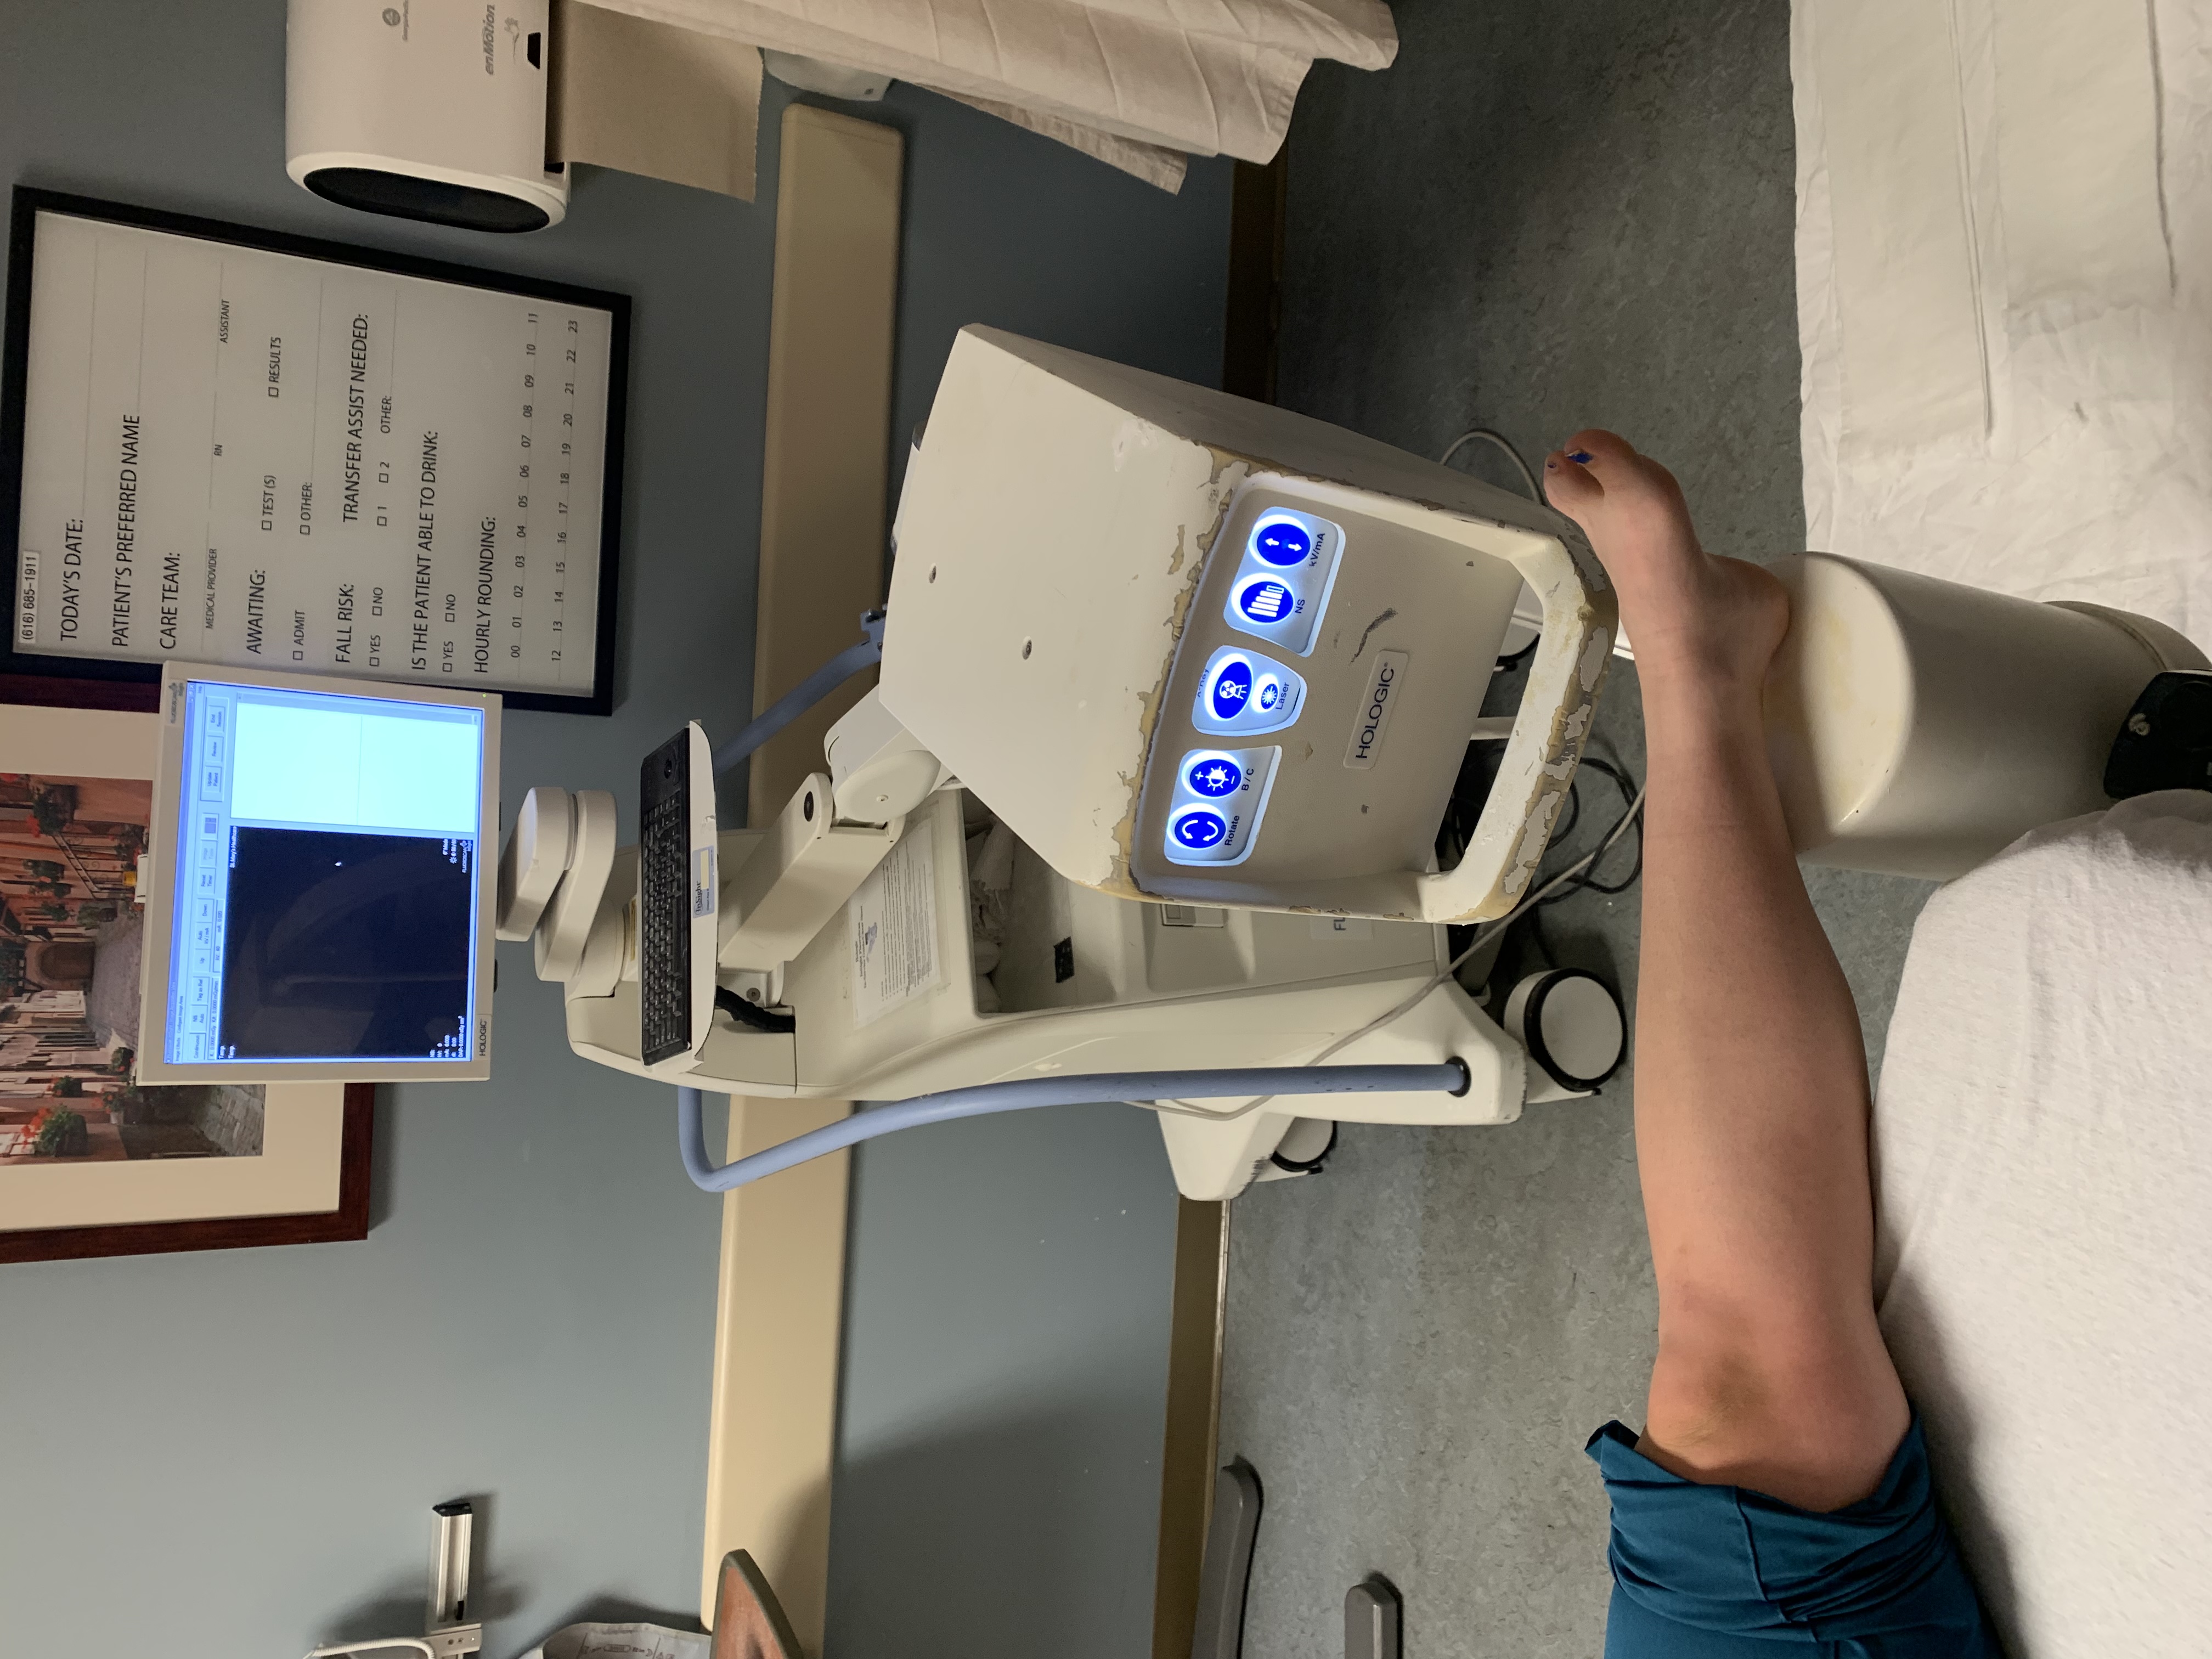
Set up your supplies so they can easily be reached.
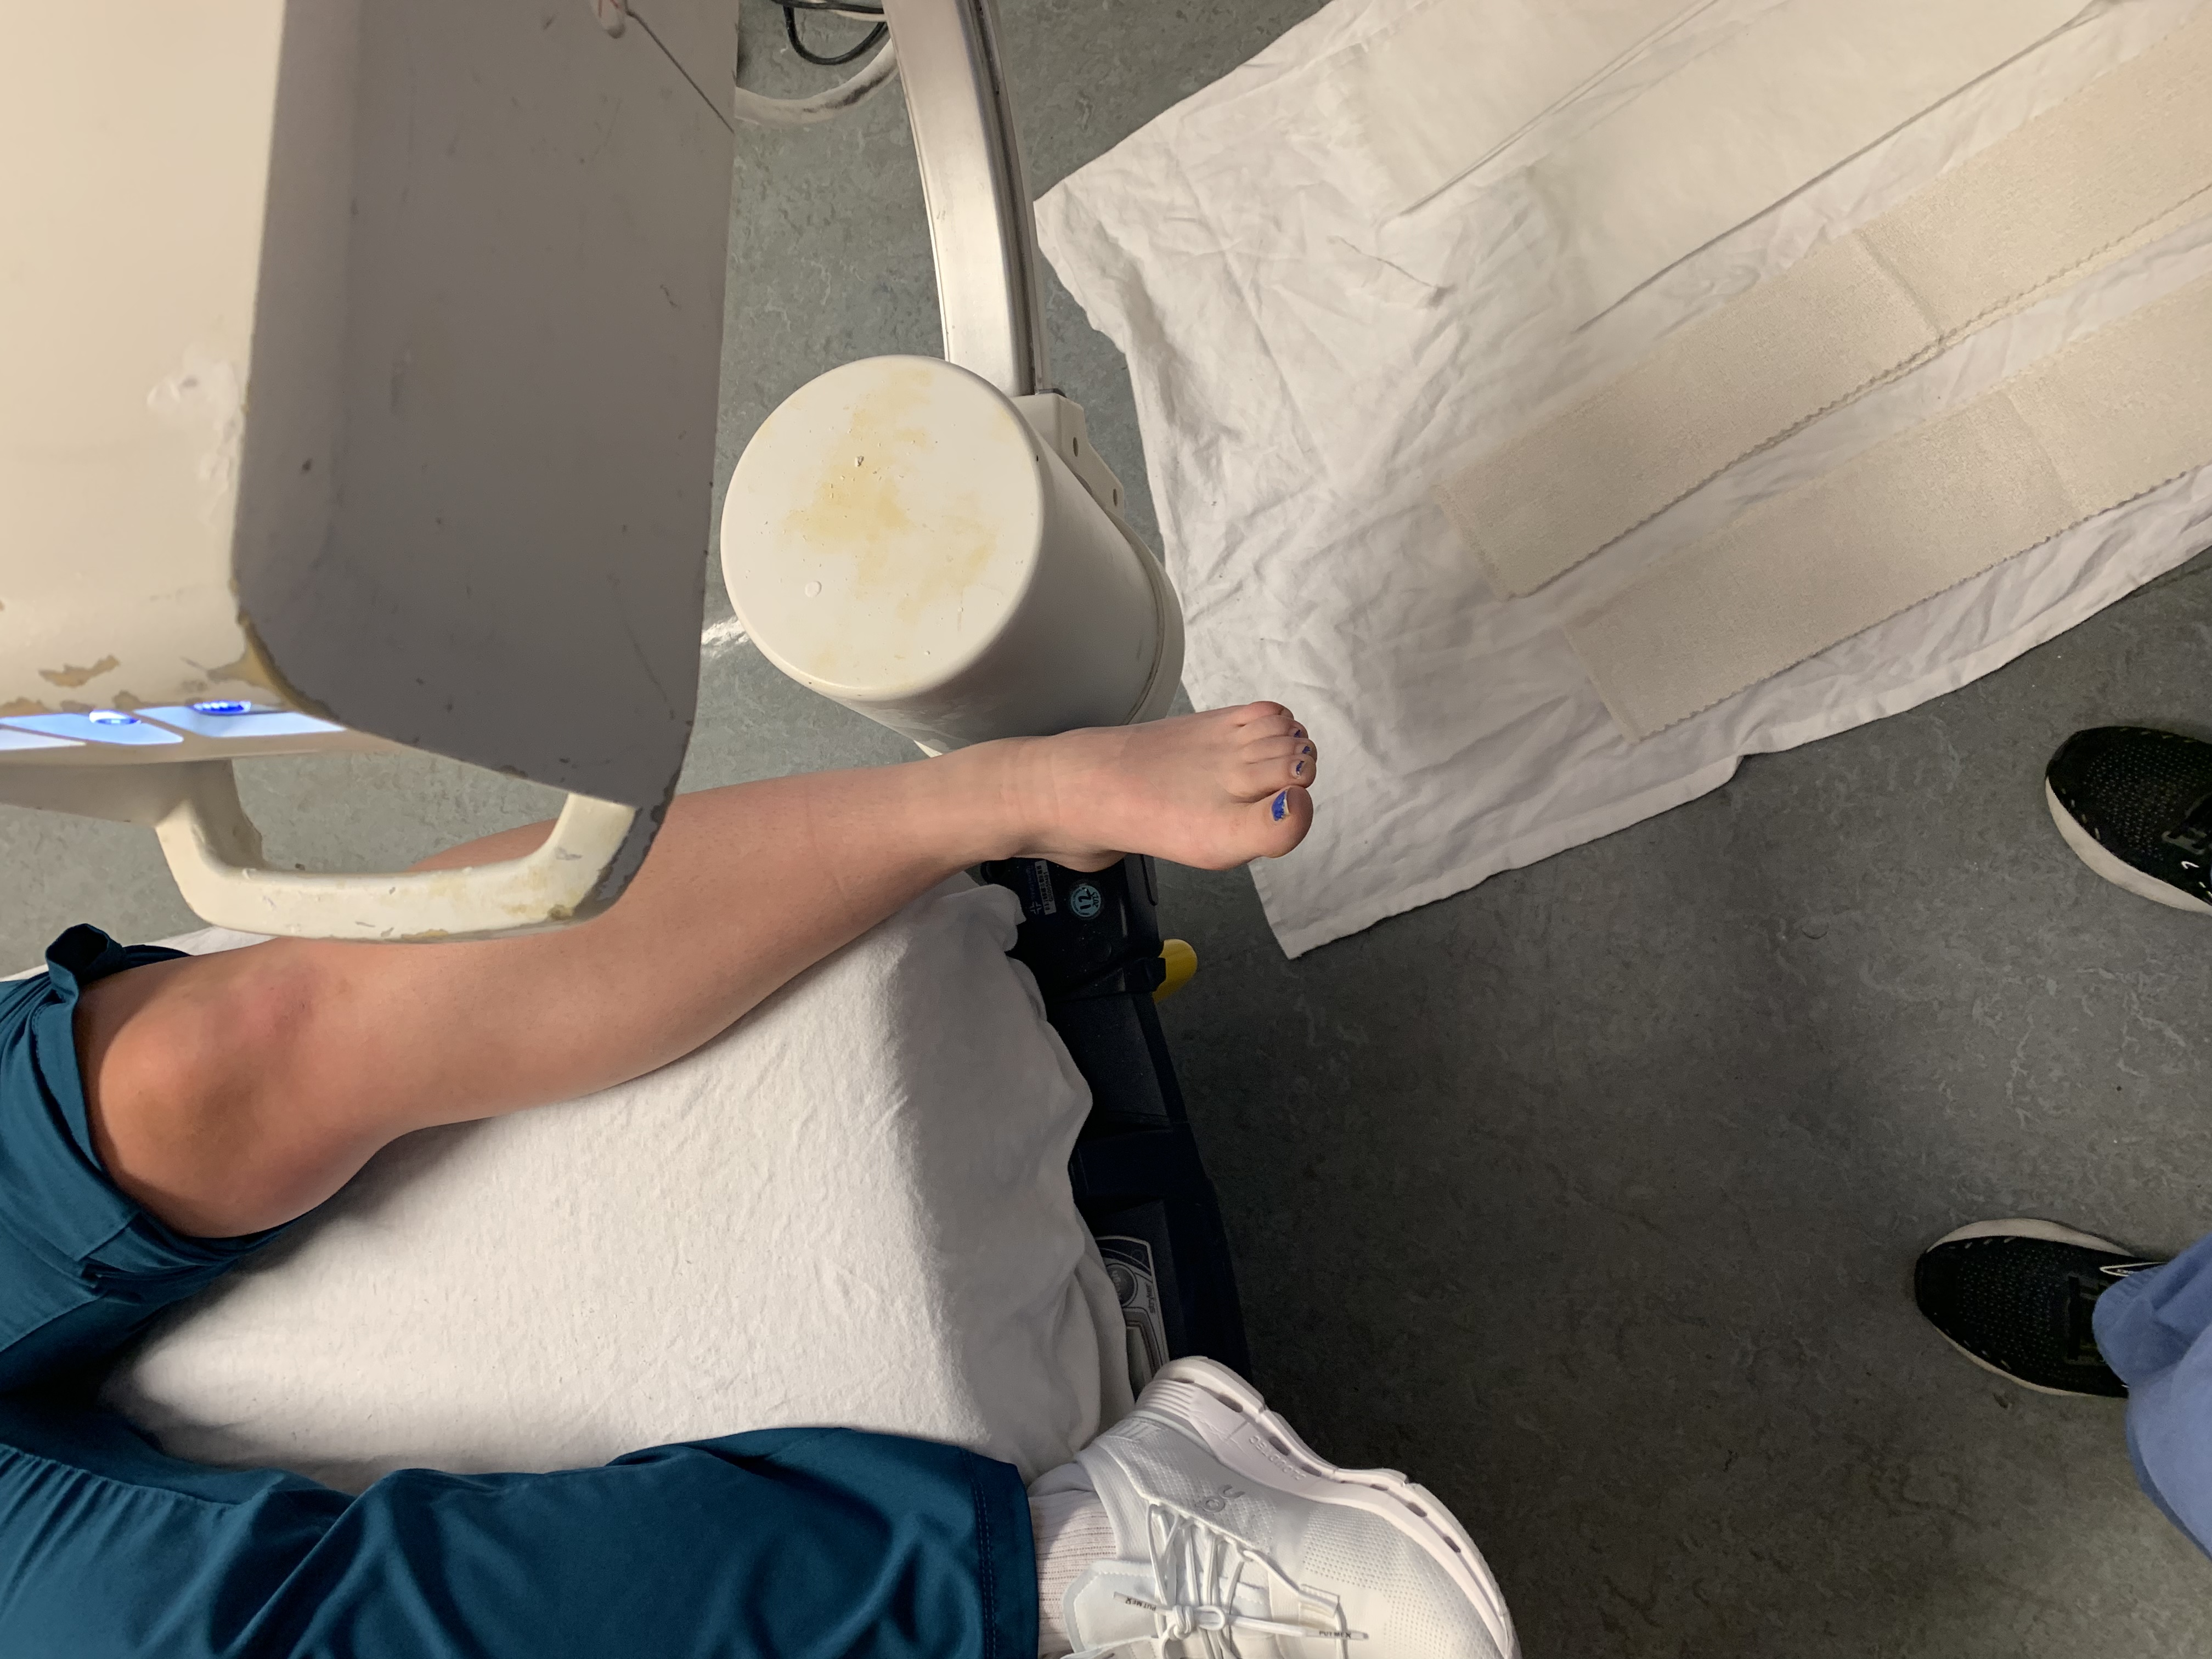
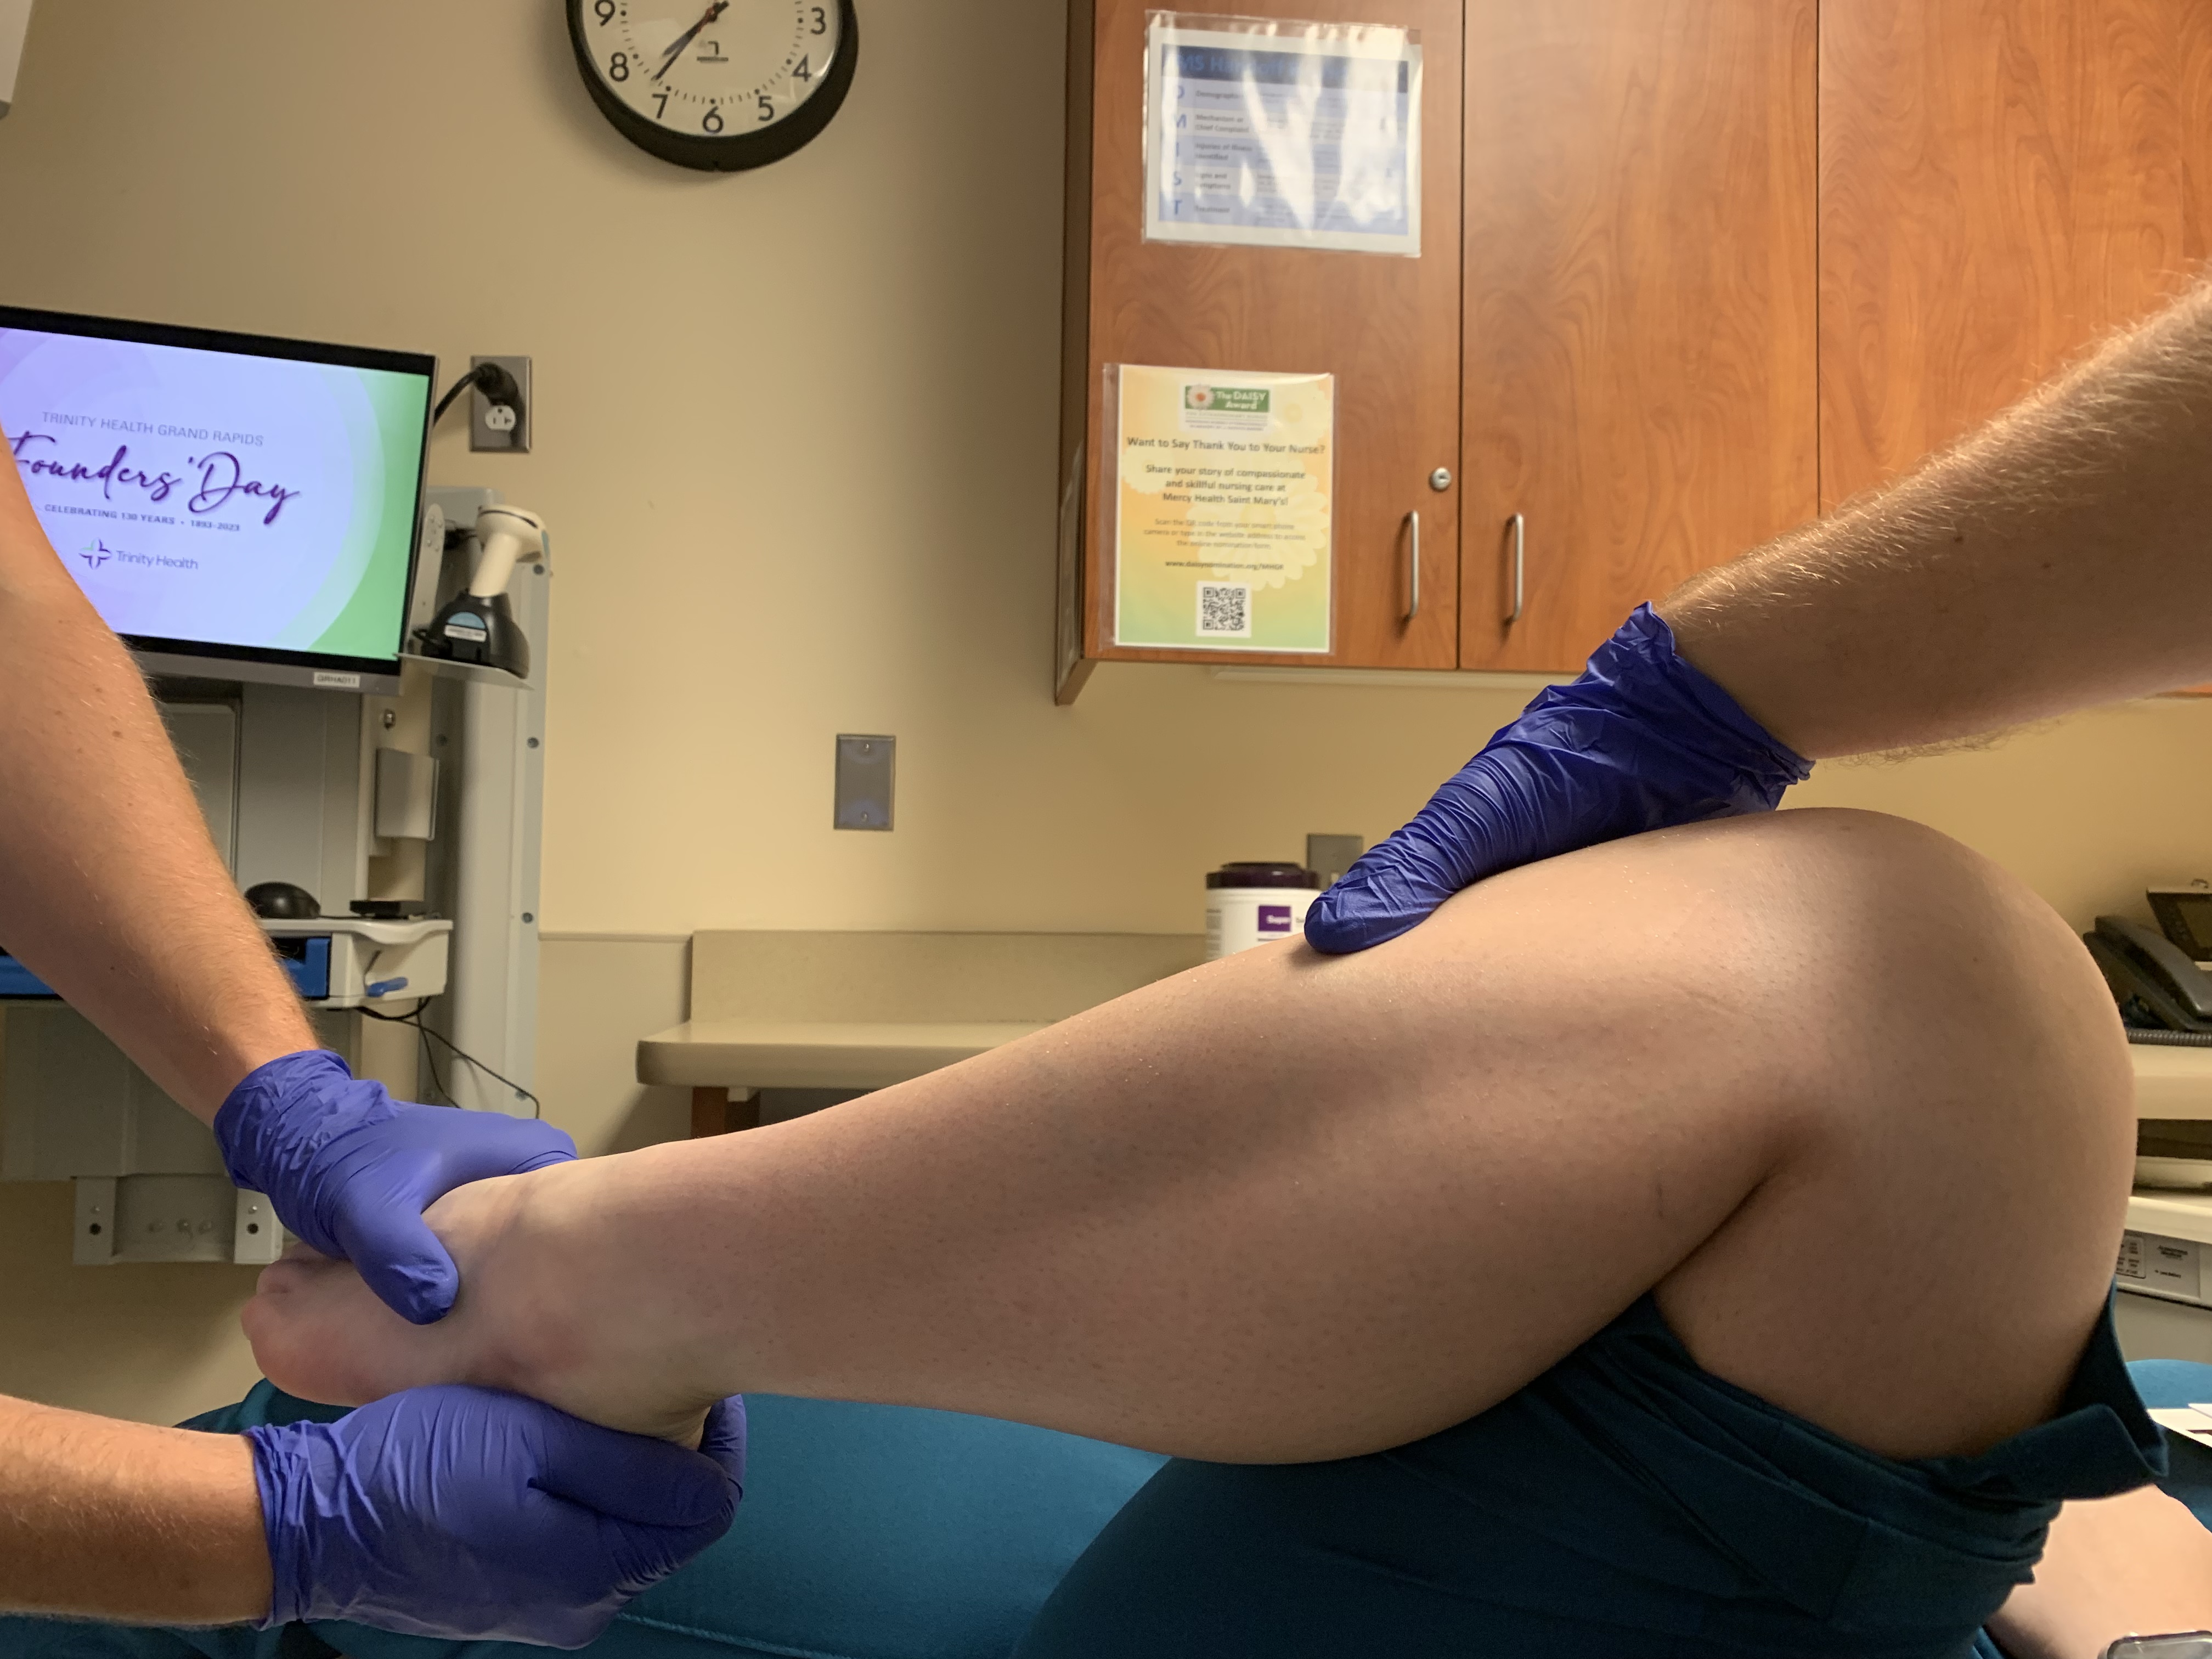
Have your helper stand at the patient’s hip as shown, holding the toes grabbing over the top, with the knee flexed to 90deg (relaxes the gastroc making the reduction easier, be careful with total hips not to flex the hip to far combined with internal rotation).
With the other hand holding the thigh. This allows room for the splint to be placed.
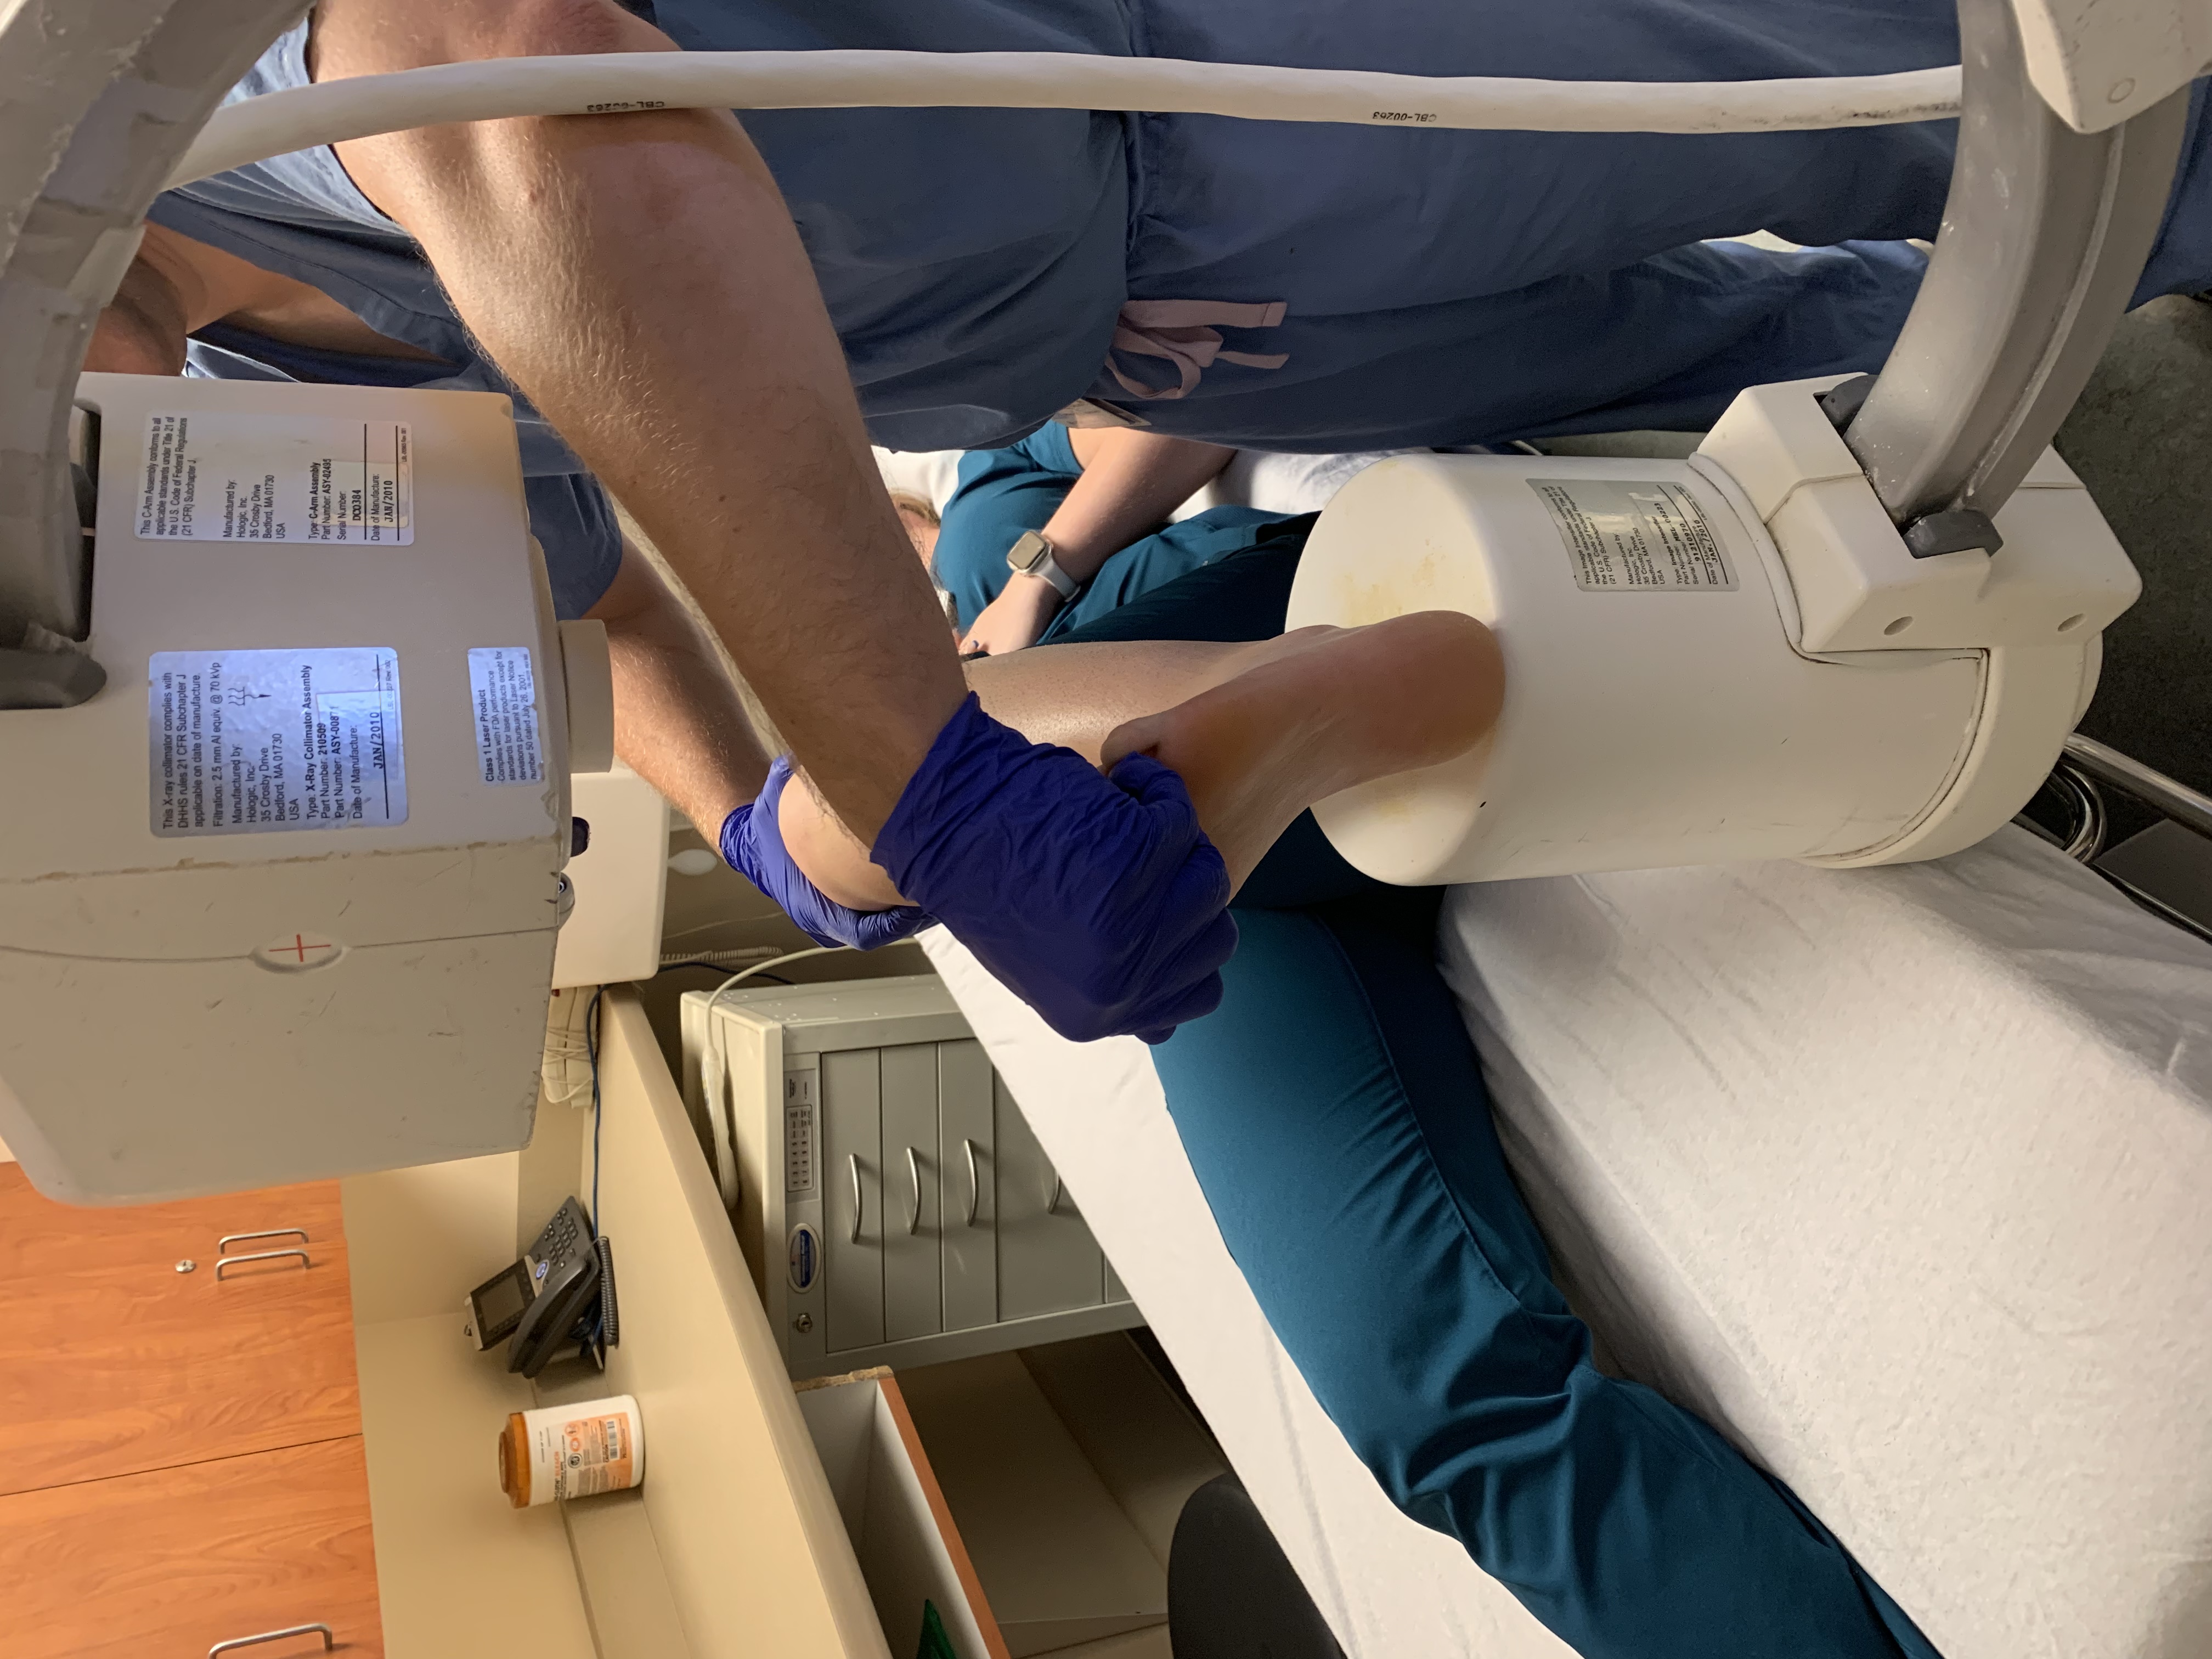
Ensure you can place the leg into the positions to give you the most important xray shots, the Mortise and the Lateral. (Go here to review: How to Read Ankle Xrays)
The xrays you get must be high quality or you will be fooled into thinking you have a great reduction when you do not.
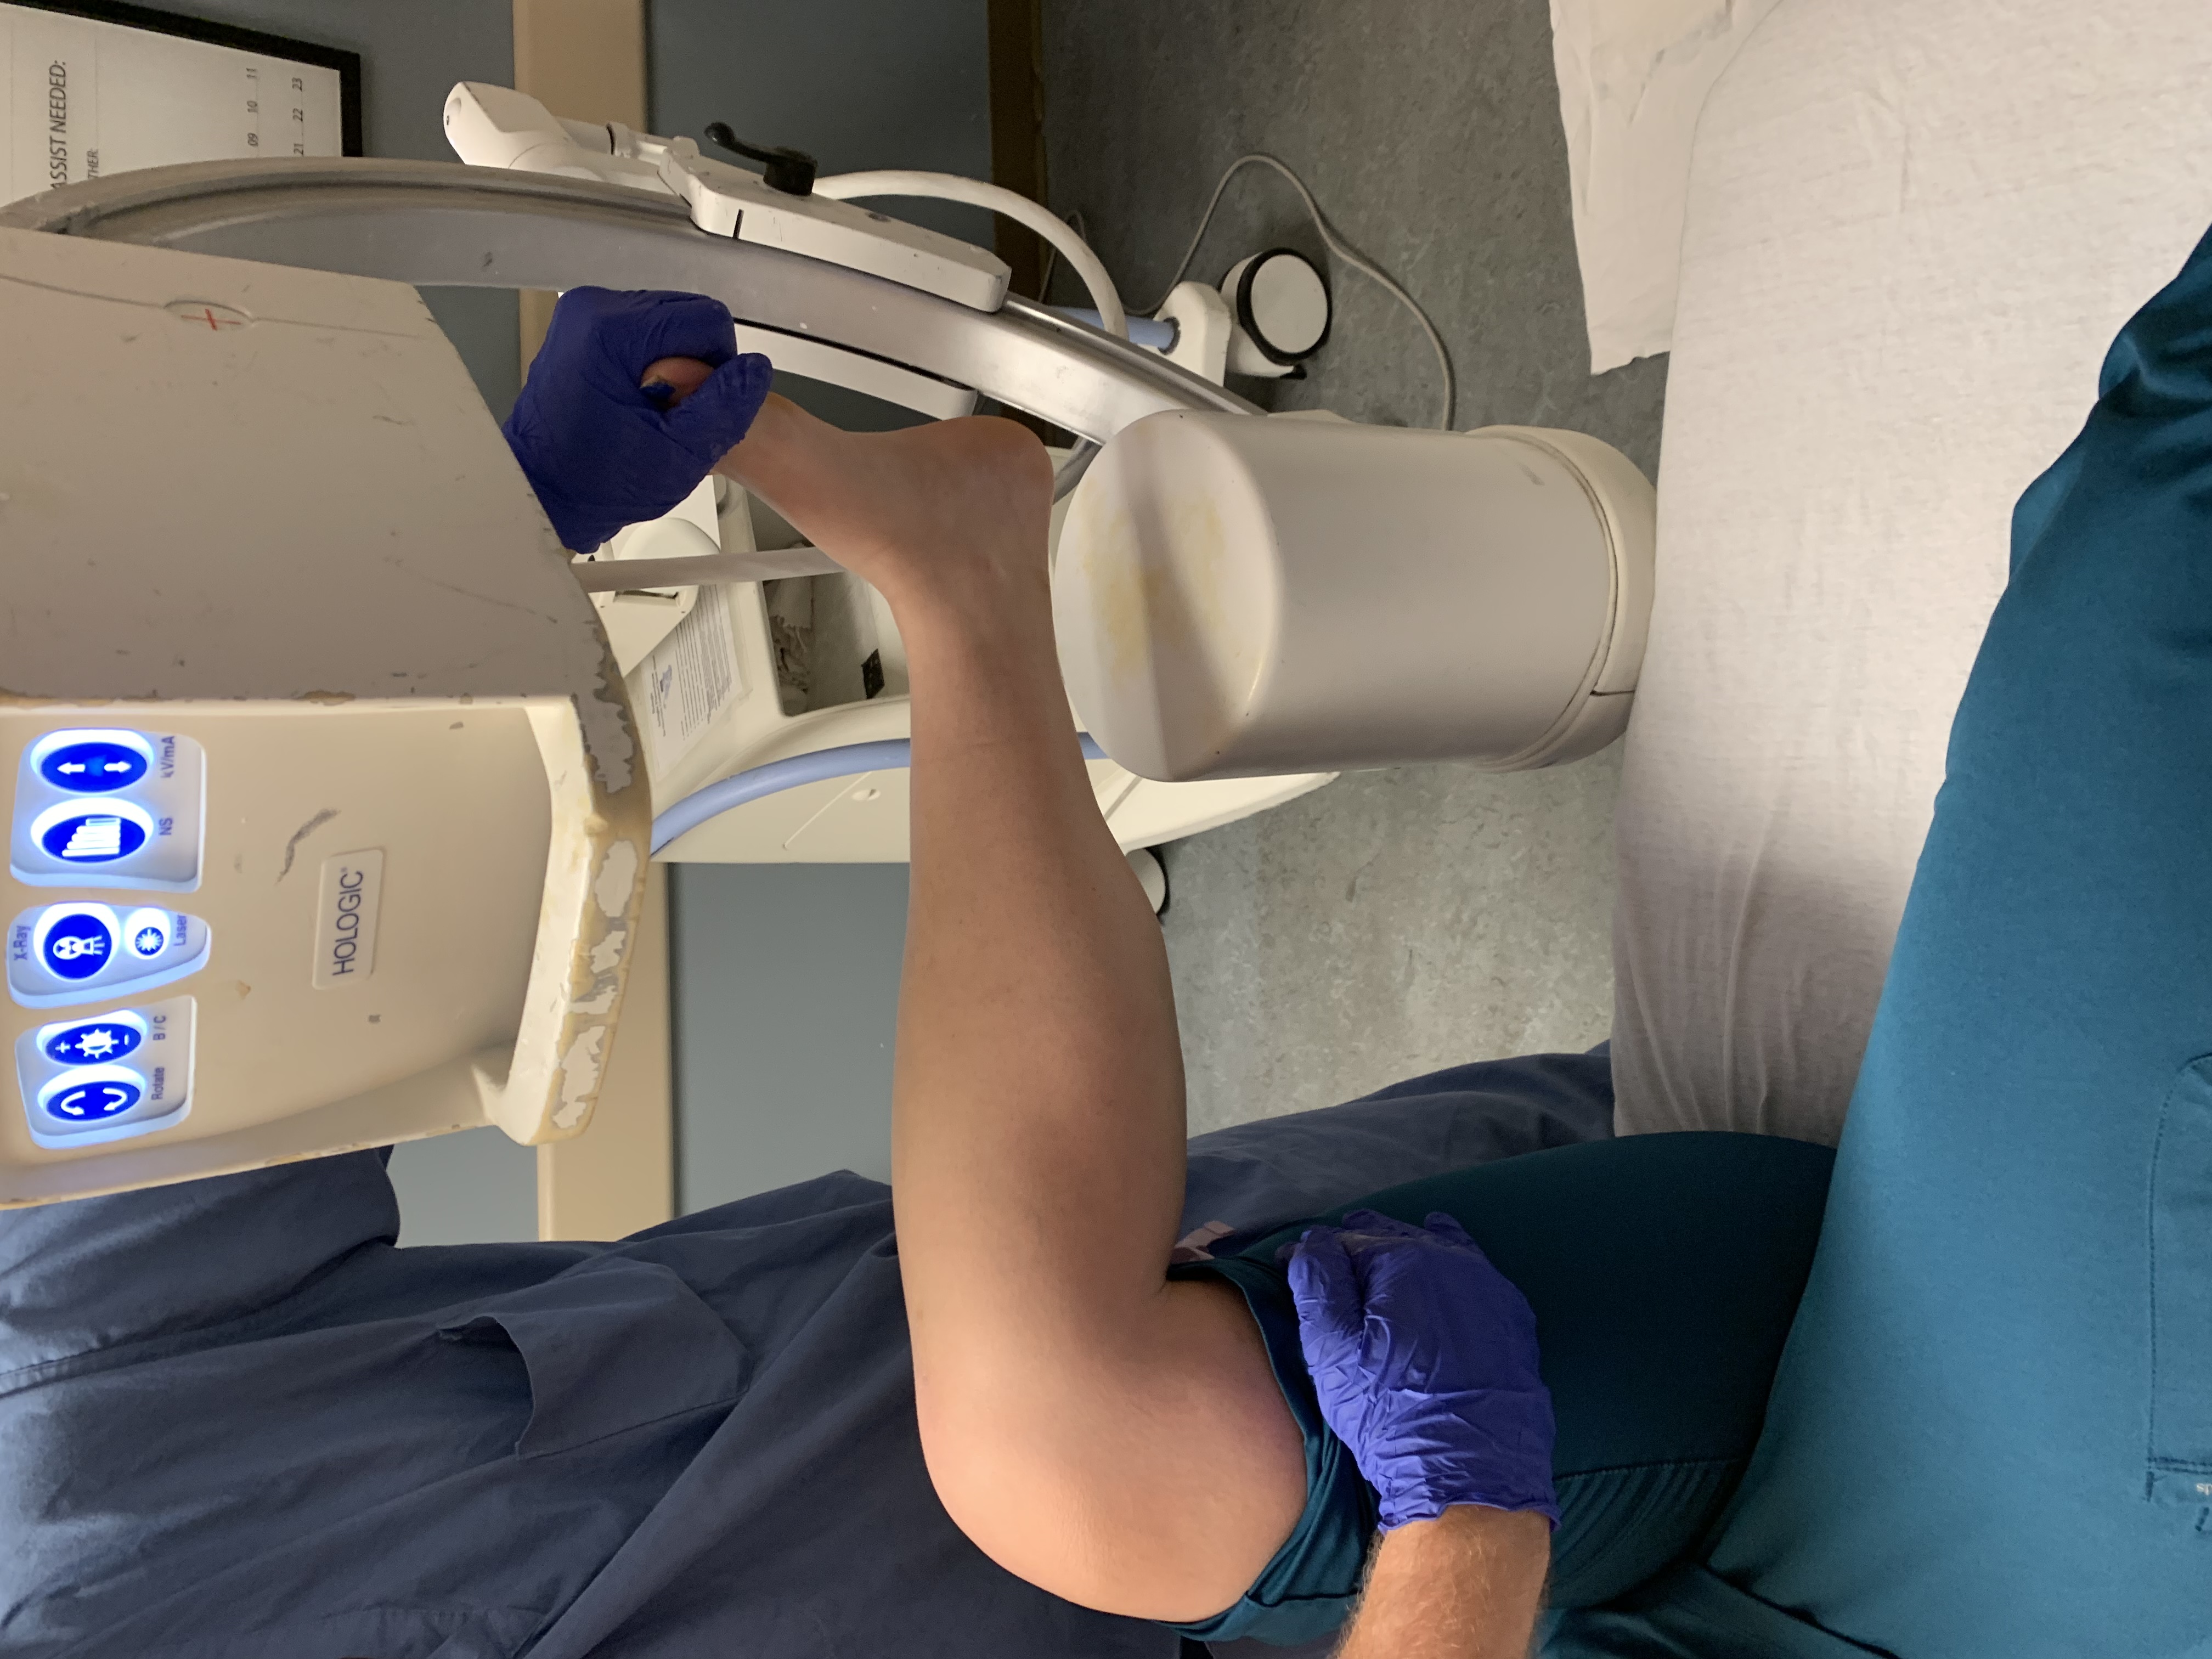
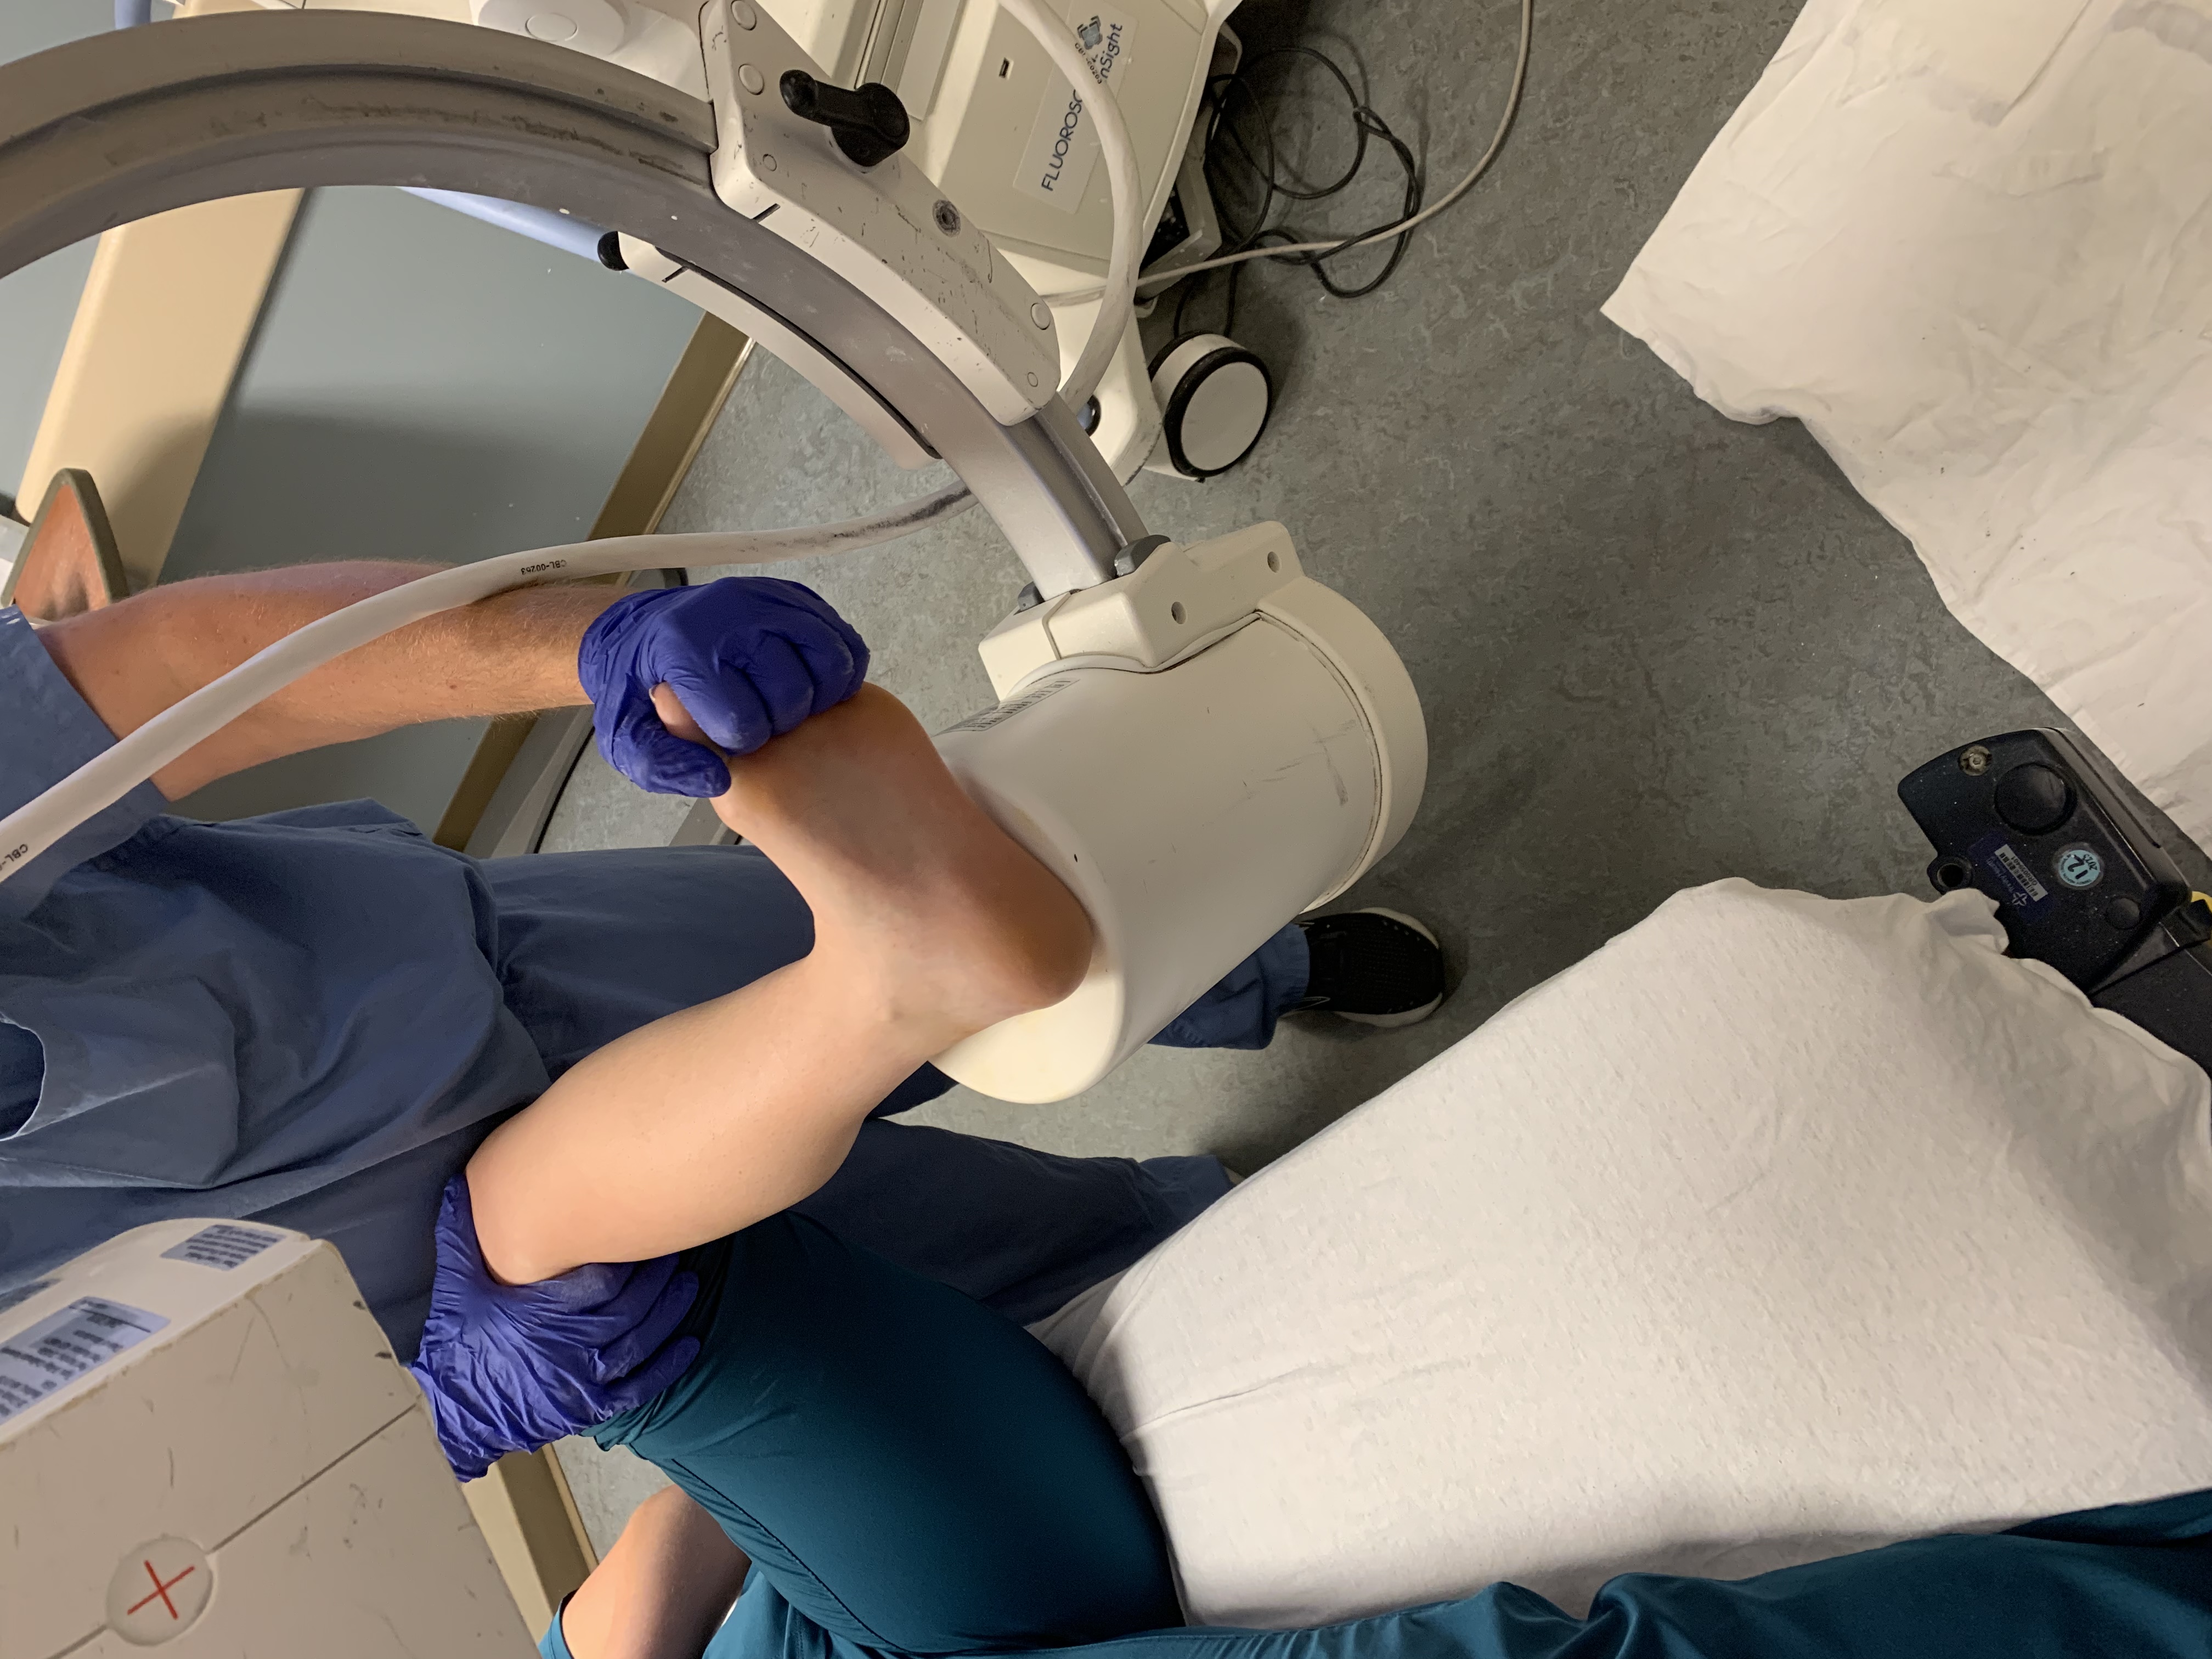
Mortise xray position, hip internally rotated ~15 degrees. (Teach your helper that this is the target position).
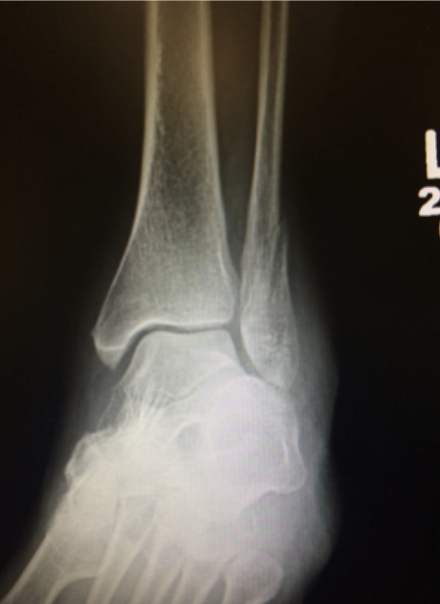
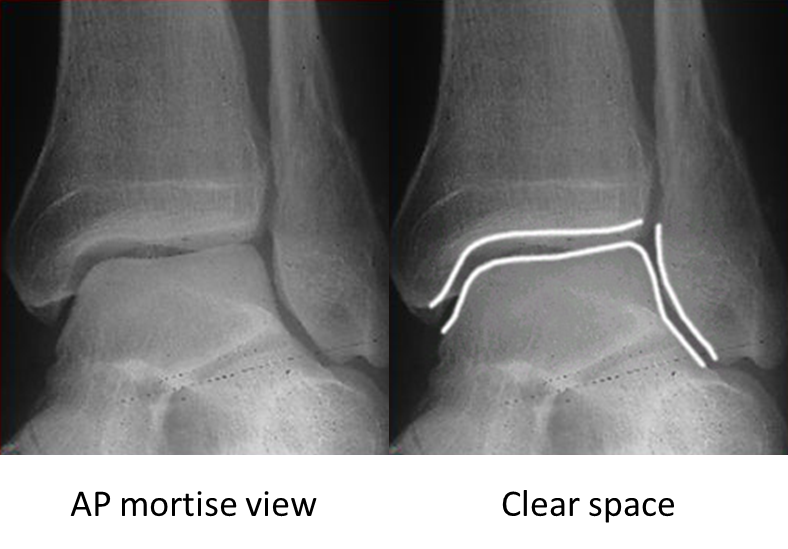
Example mortise xray view (internally rotated by ~15 degrees):
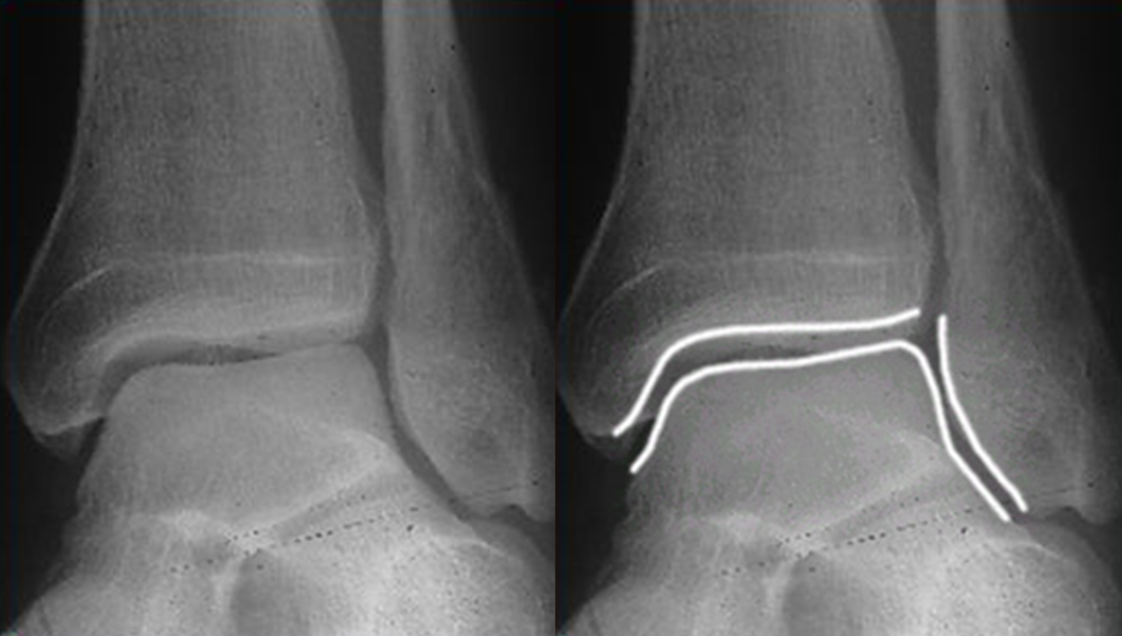
You are looking for a congruent joint, no extra medial clear space widening. The medial clear space should be the same distance as the other joint areas across the plafond <~4mm.
Lateral xray position.
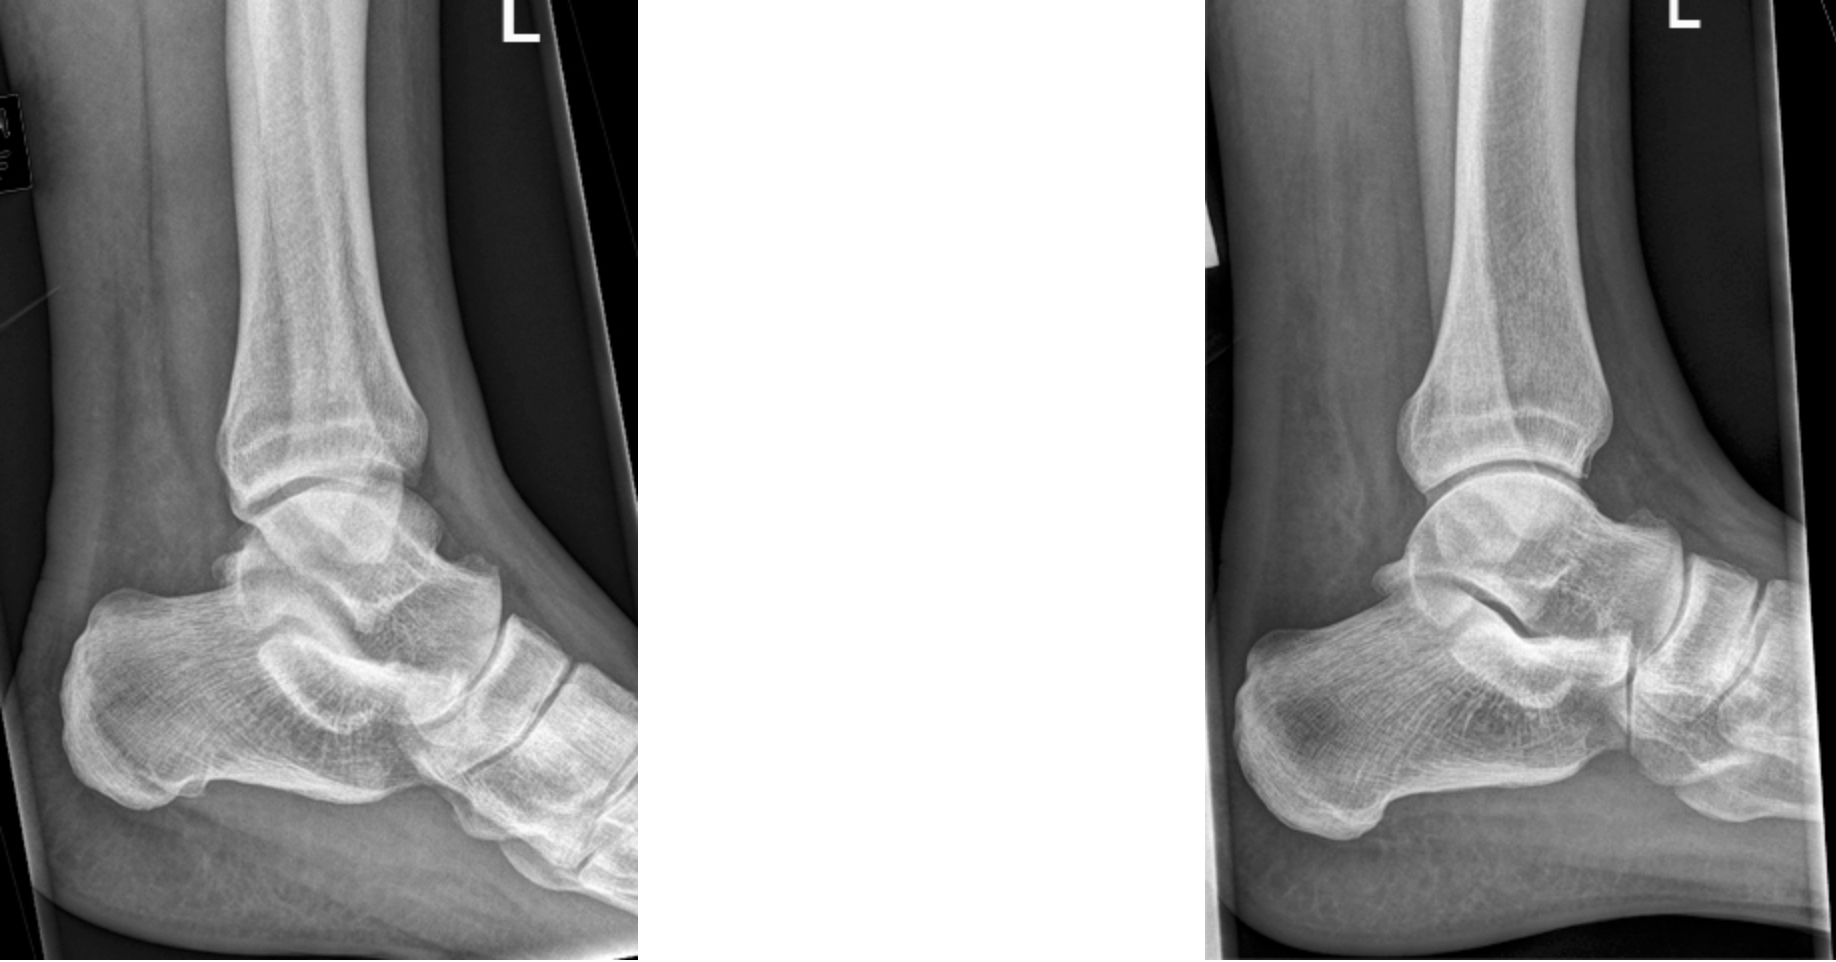
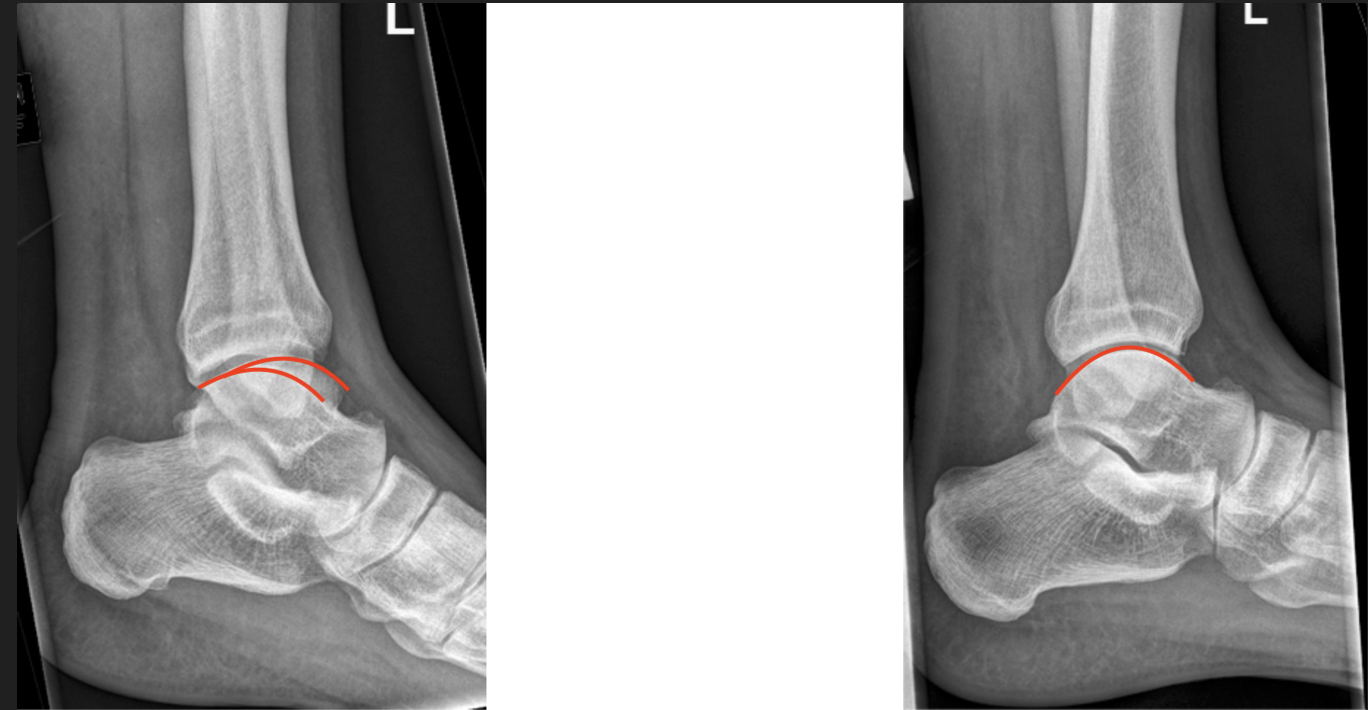
Example lateral xray, The left xray image is low quality because it is incorrectly rotated, you can tell by looking to make sure the medial and lateral talar domes are lined up perfectly.
Left image incorrectly lined up (red lines outlining the talar domes are not lined up), image on the right is correctly lined up.
Reduction
Memorize the fracture pattern, always have xrays prior to reductions (may not be possible in emergent situation).
Your helper must stabilize the thigh, pulling against you.
The best assistance is a good sedation/ good pain control (good sedations relaxes skeletal muscle, good hematoma blocks keep pain under control allowing the patient to stay relaxed).
Basic reduction technique:
- Pull traction (this is done in a smooth motion concurrently with the next step)
- Keep the knee flexed, this relaxes the gastroc allowing more movement of the ankle.
- Flex the knee deeper than 90 degrees to allow for more movement at the ankle
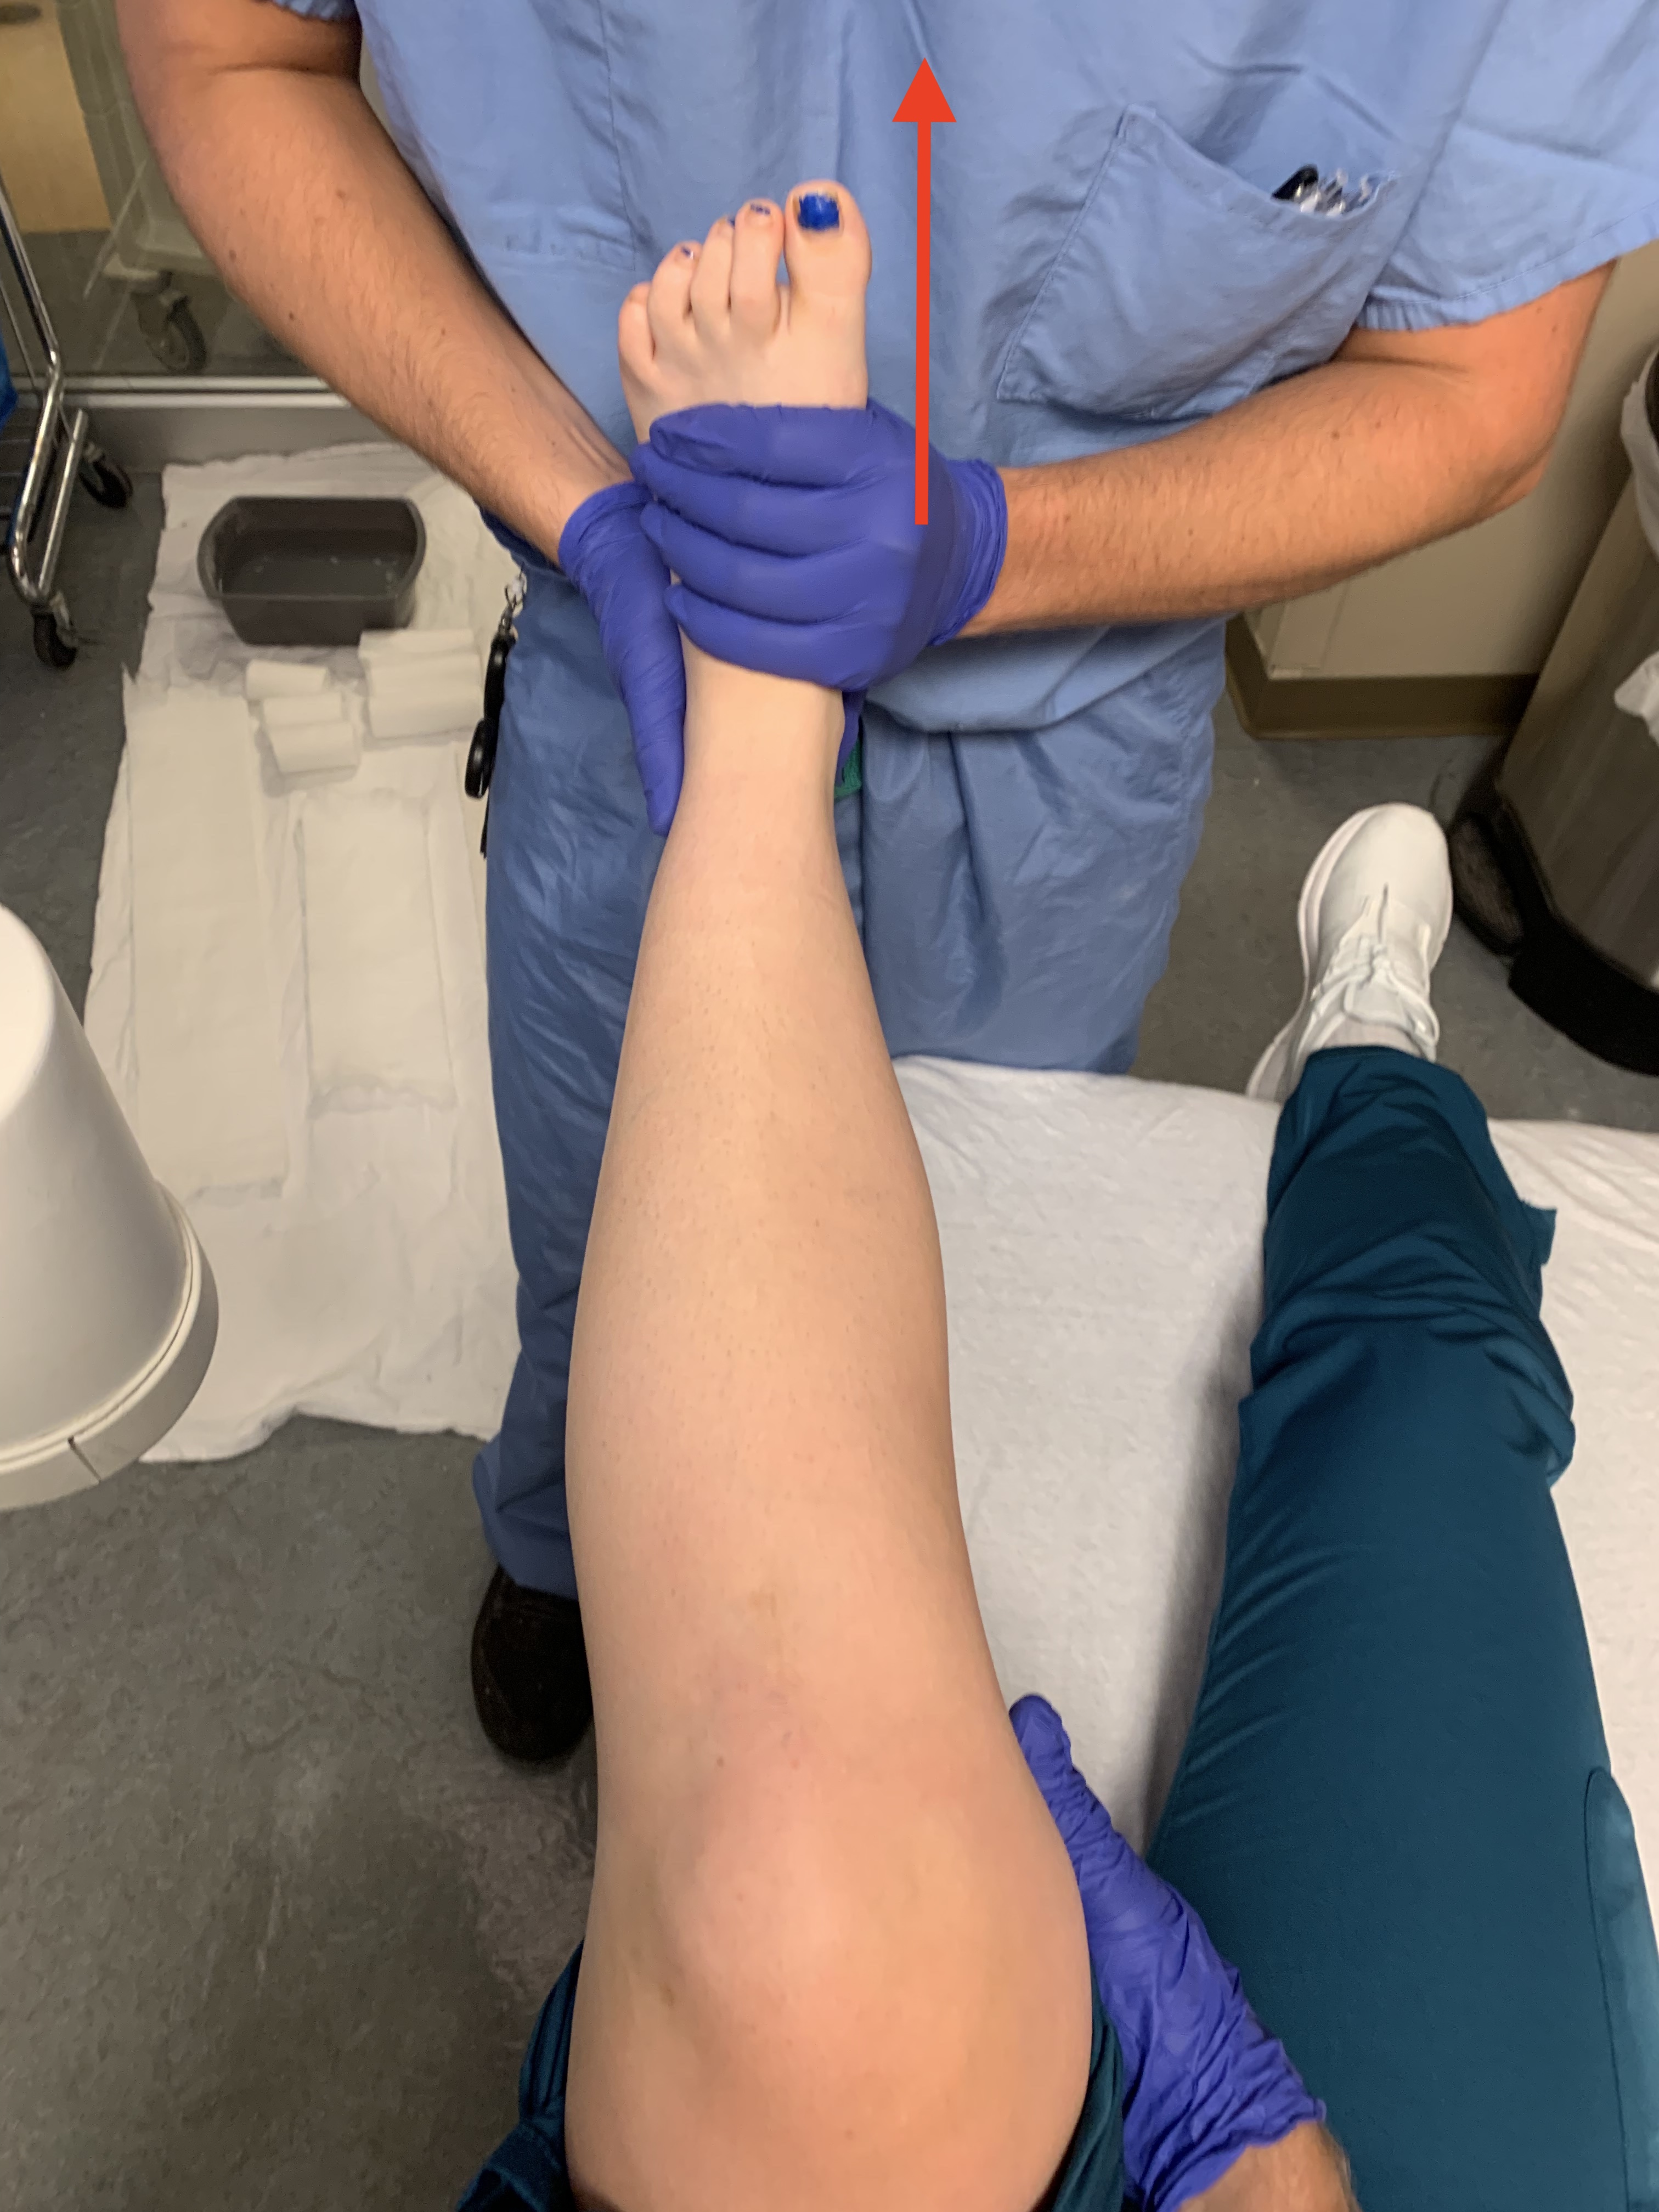
- Move the foot/ ankle into the reduced position
- While pulling traction you want to move the ankle into its reduced position
- “Recreating” the fracture, or moving the ankle in a position that makes it worse can help disengage the fracture allowing it to move into position
- This is one smooth pull and reduce motion
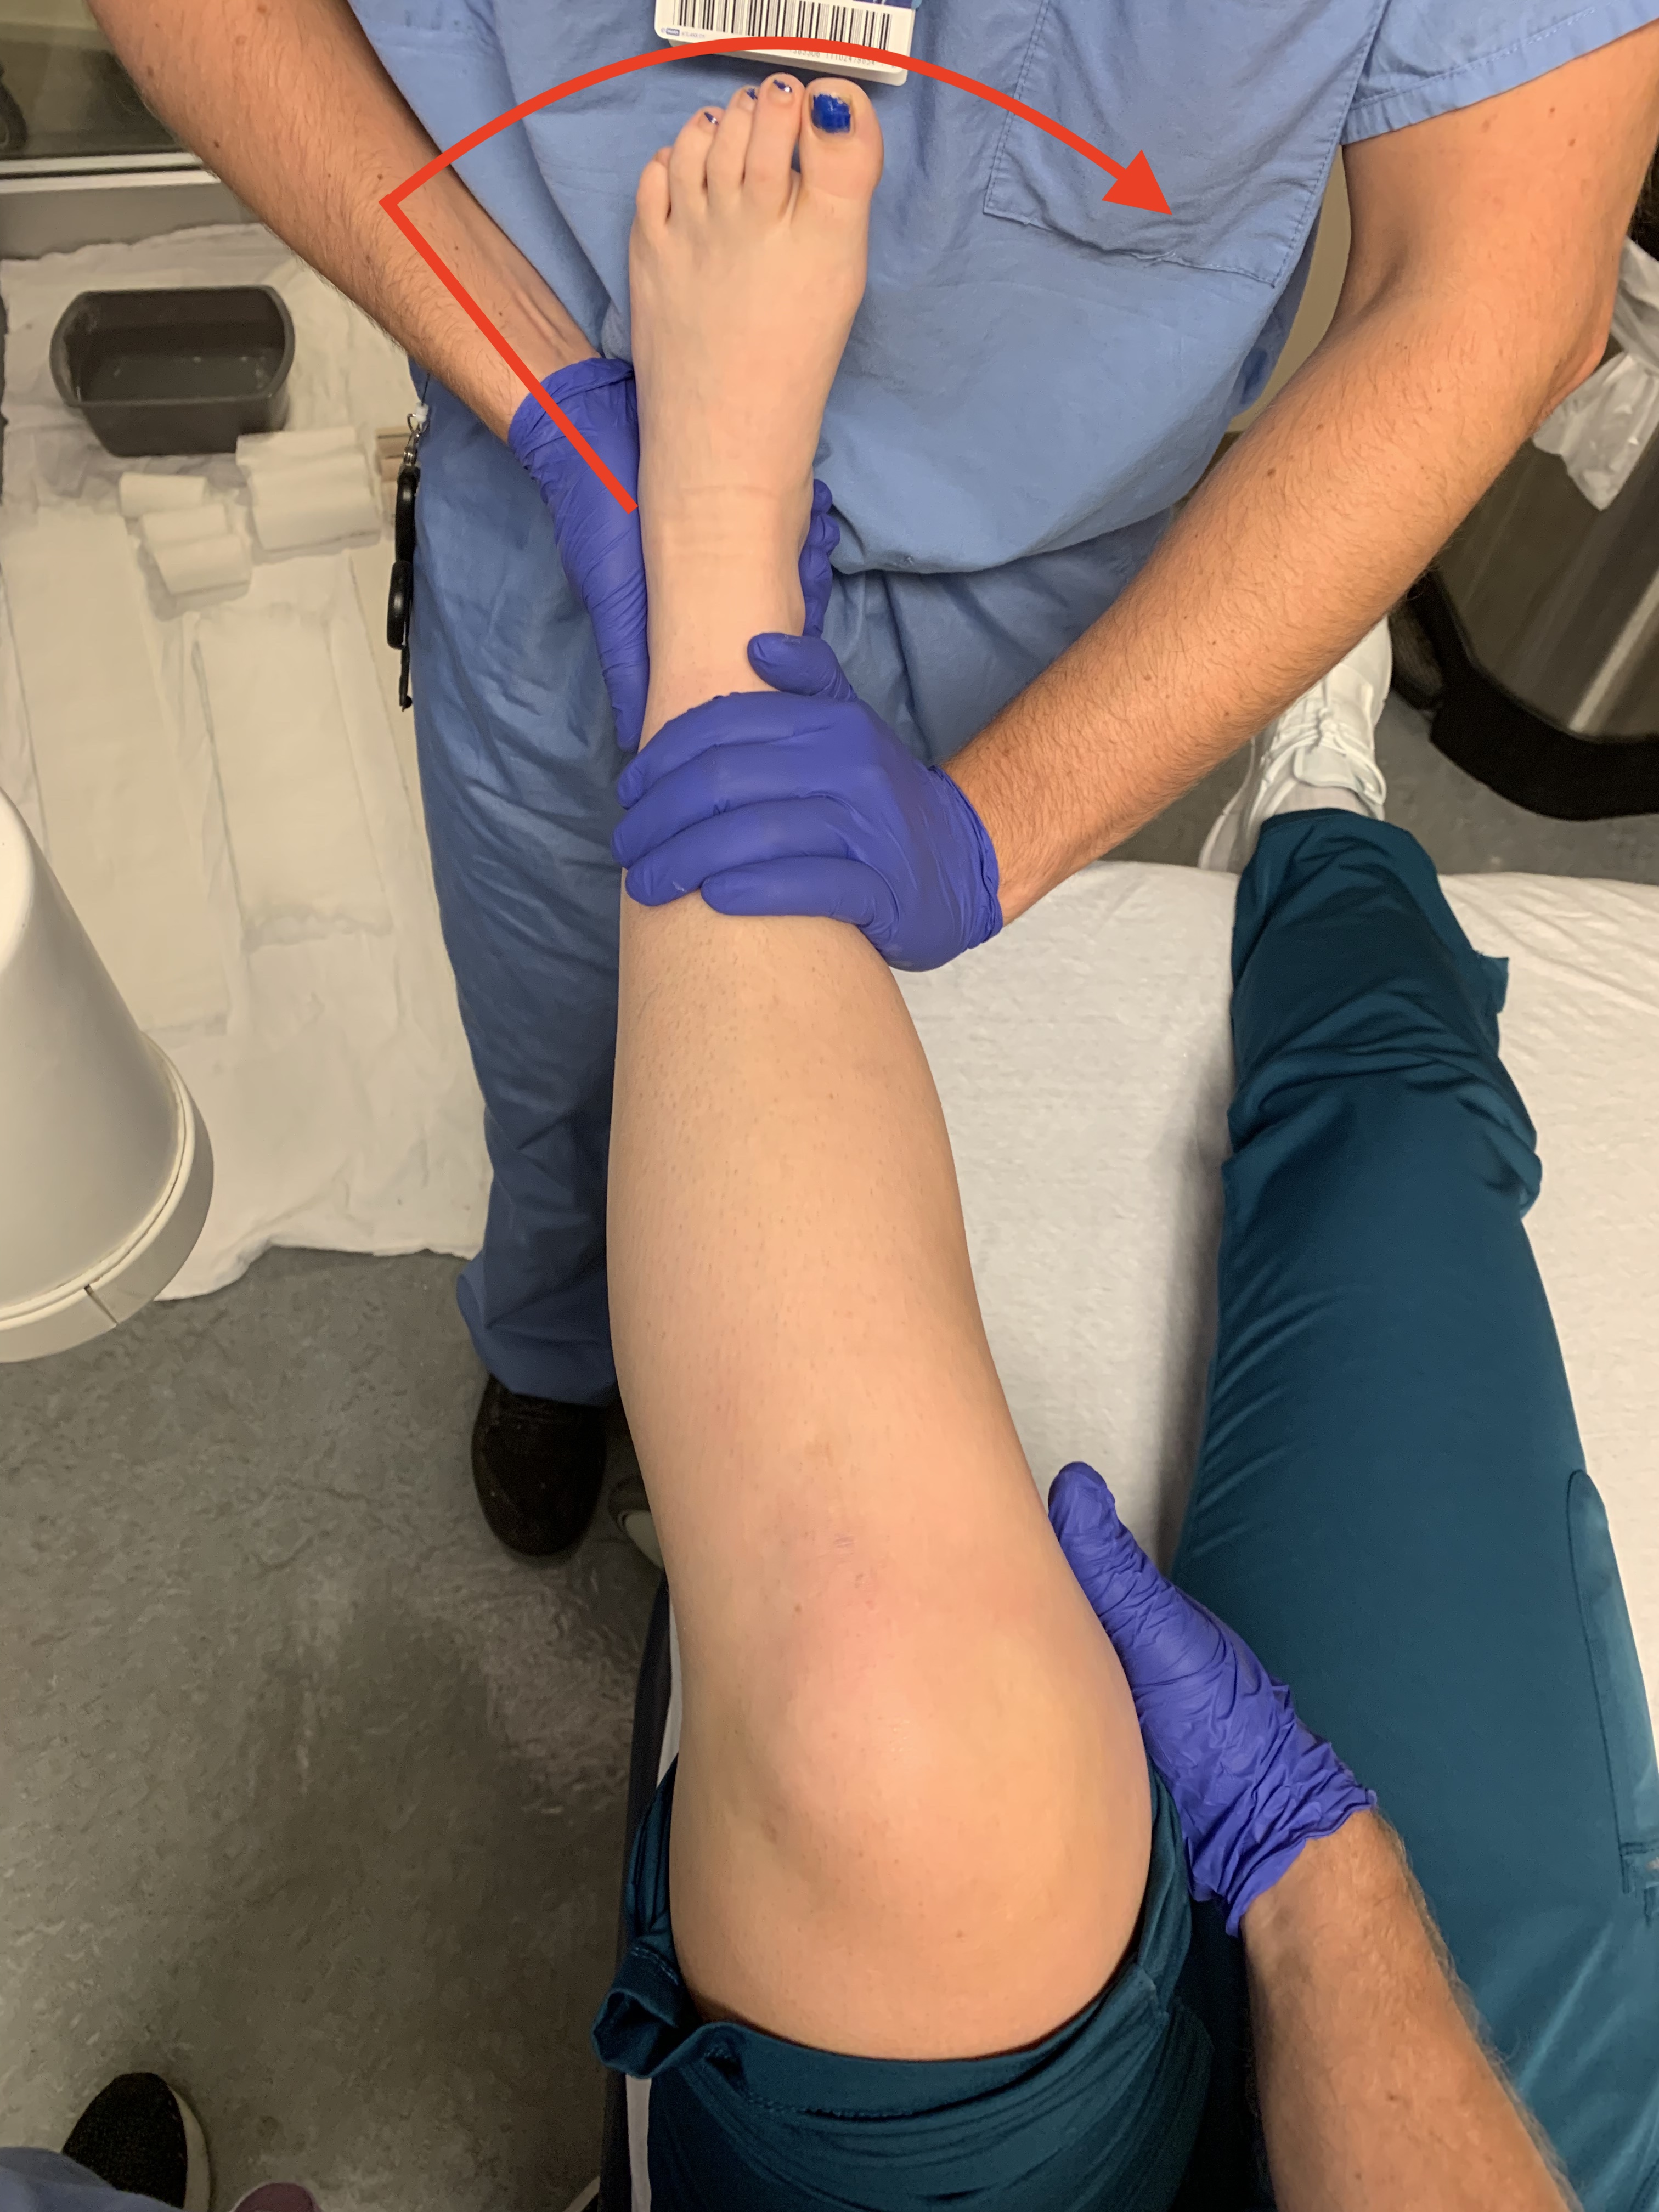
- Push the ankle into the final reduced position
- The most common reduction requires a varus mold in the hand position shown below
- Pushing the heel anterior relative to the tibia is also helpful for some fracture dislocations (commonly required in tri-mal ankle fractures)
- The arrows show the pushing force with the right hand in the image below. This is the direction and hand position for a varus mold.
- Remember, varus is the distal limb going towards midline
- Valgus is the distal aspect of the limb going away from midline
- Use your other hand as counter pressure
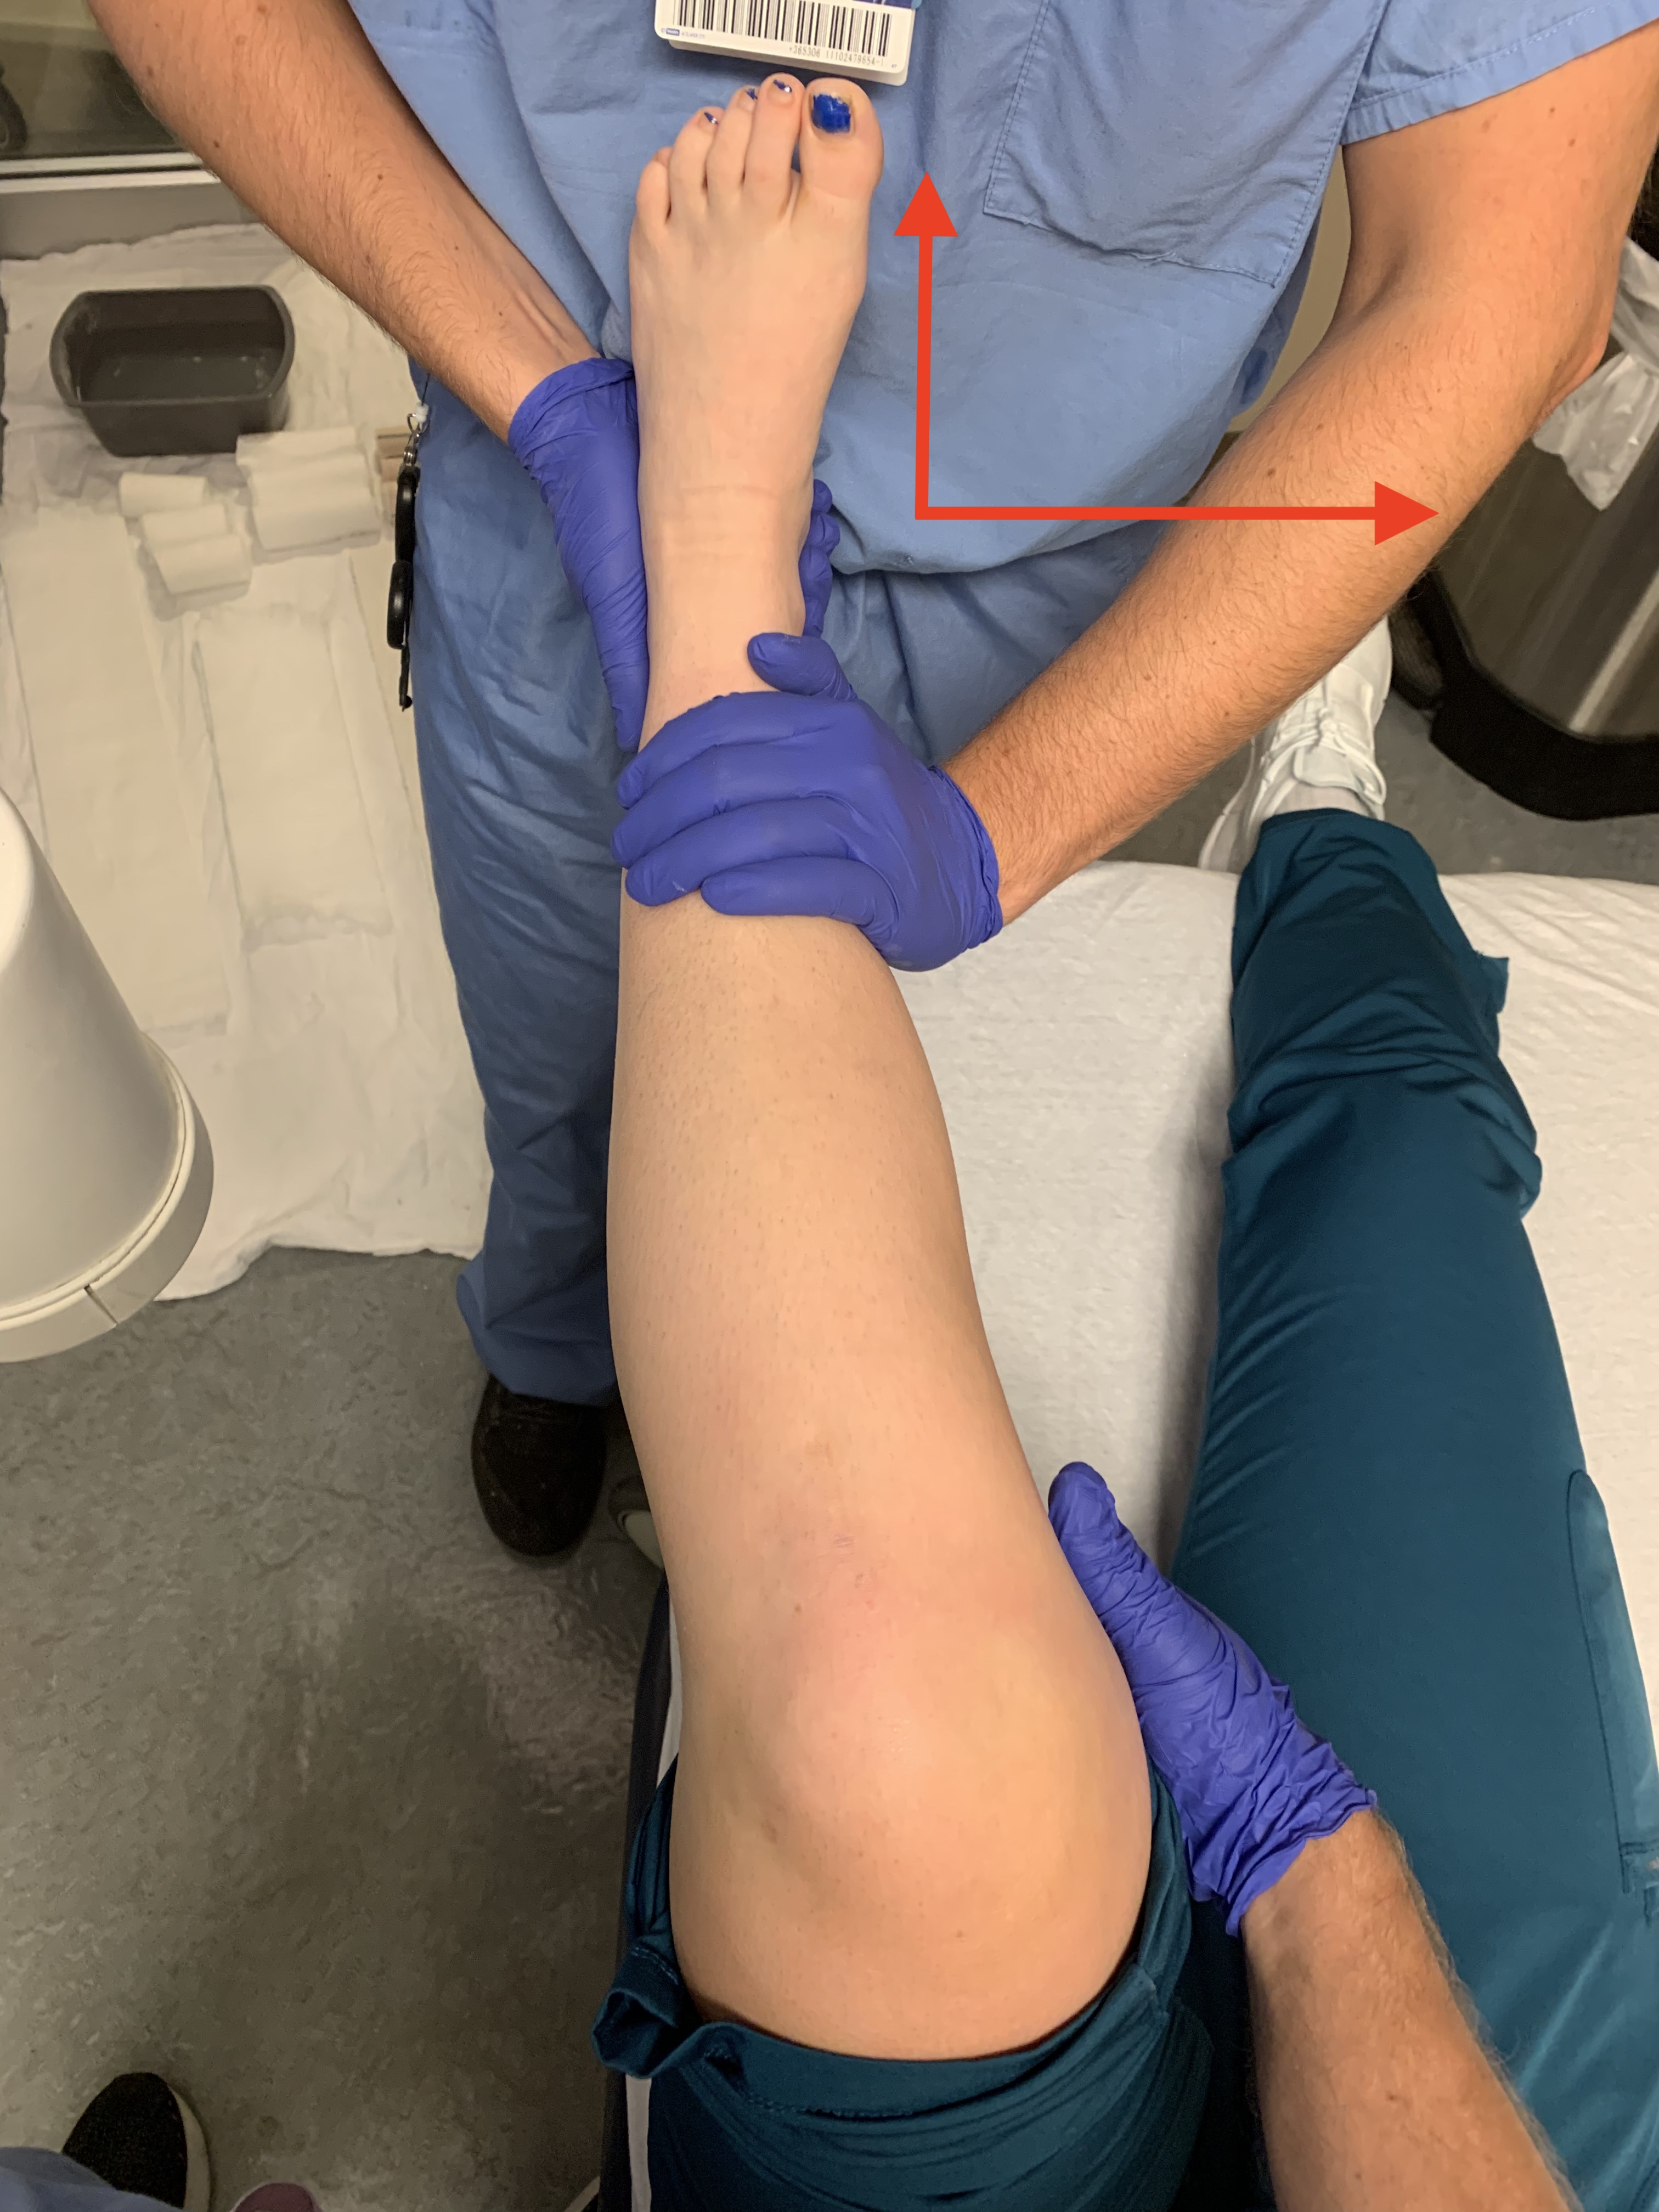
Hold your reduction and get xrays
Ensure the fracture is reduced on your mortise and lateral views before moving on to the splint application.
Note: Some ankle fractures require a valgus reduction maneuver and valgus mold. Specifically the Supination Adduction (SAD) ankle (Lauge-hansen classification). Read more on Lauge-hansen here: How to Read Ankle Xrays
Splint Application
Hand your reduced fracture to your helper ensuring that they are holding the fracture reduced as they hold.
Remember, the knee needs to stay flexed, this helps the ankle stay dorsiflexed during the splint application (you want the patient to have ankle dorsiflexion in the splint when possible, so they do not lose their range of motion).
The helper can keep the ankle reduced by using the toes to keep the ankle in varus as depicted below. (aka. the Quigley maneauver)
Coach the helper to let you know if they need to reposition their hand, so you can keep your reduction while they readjust.
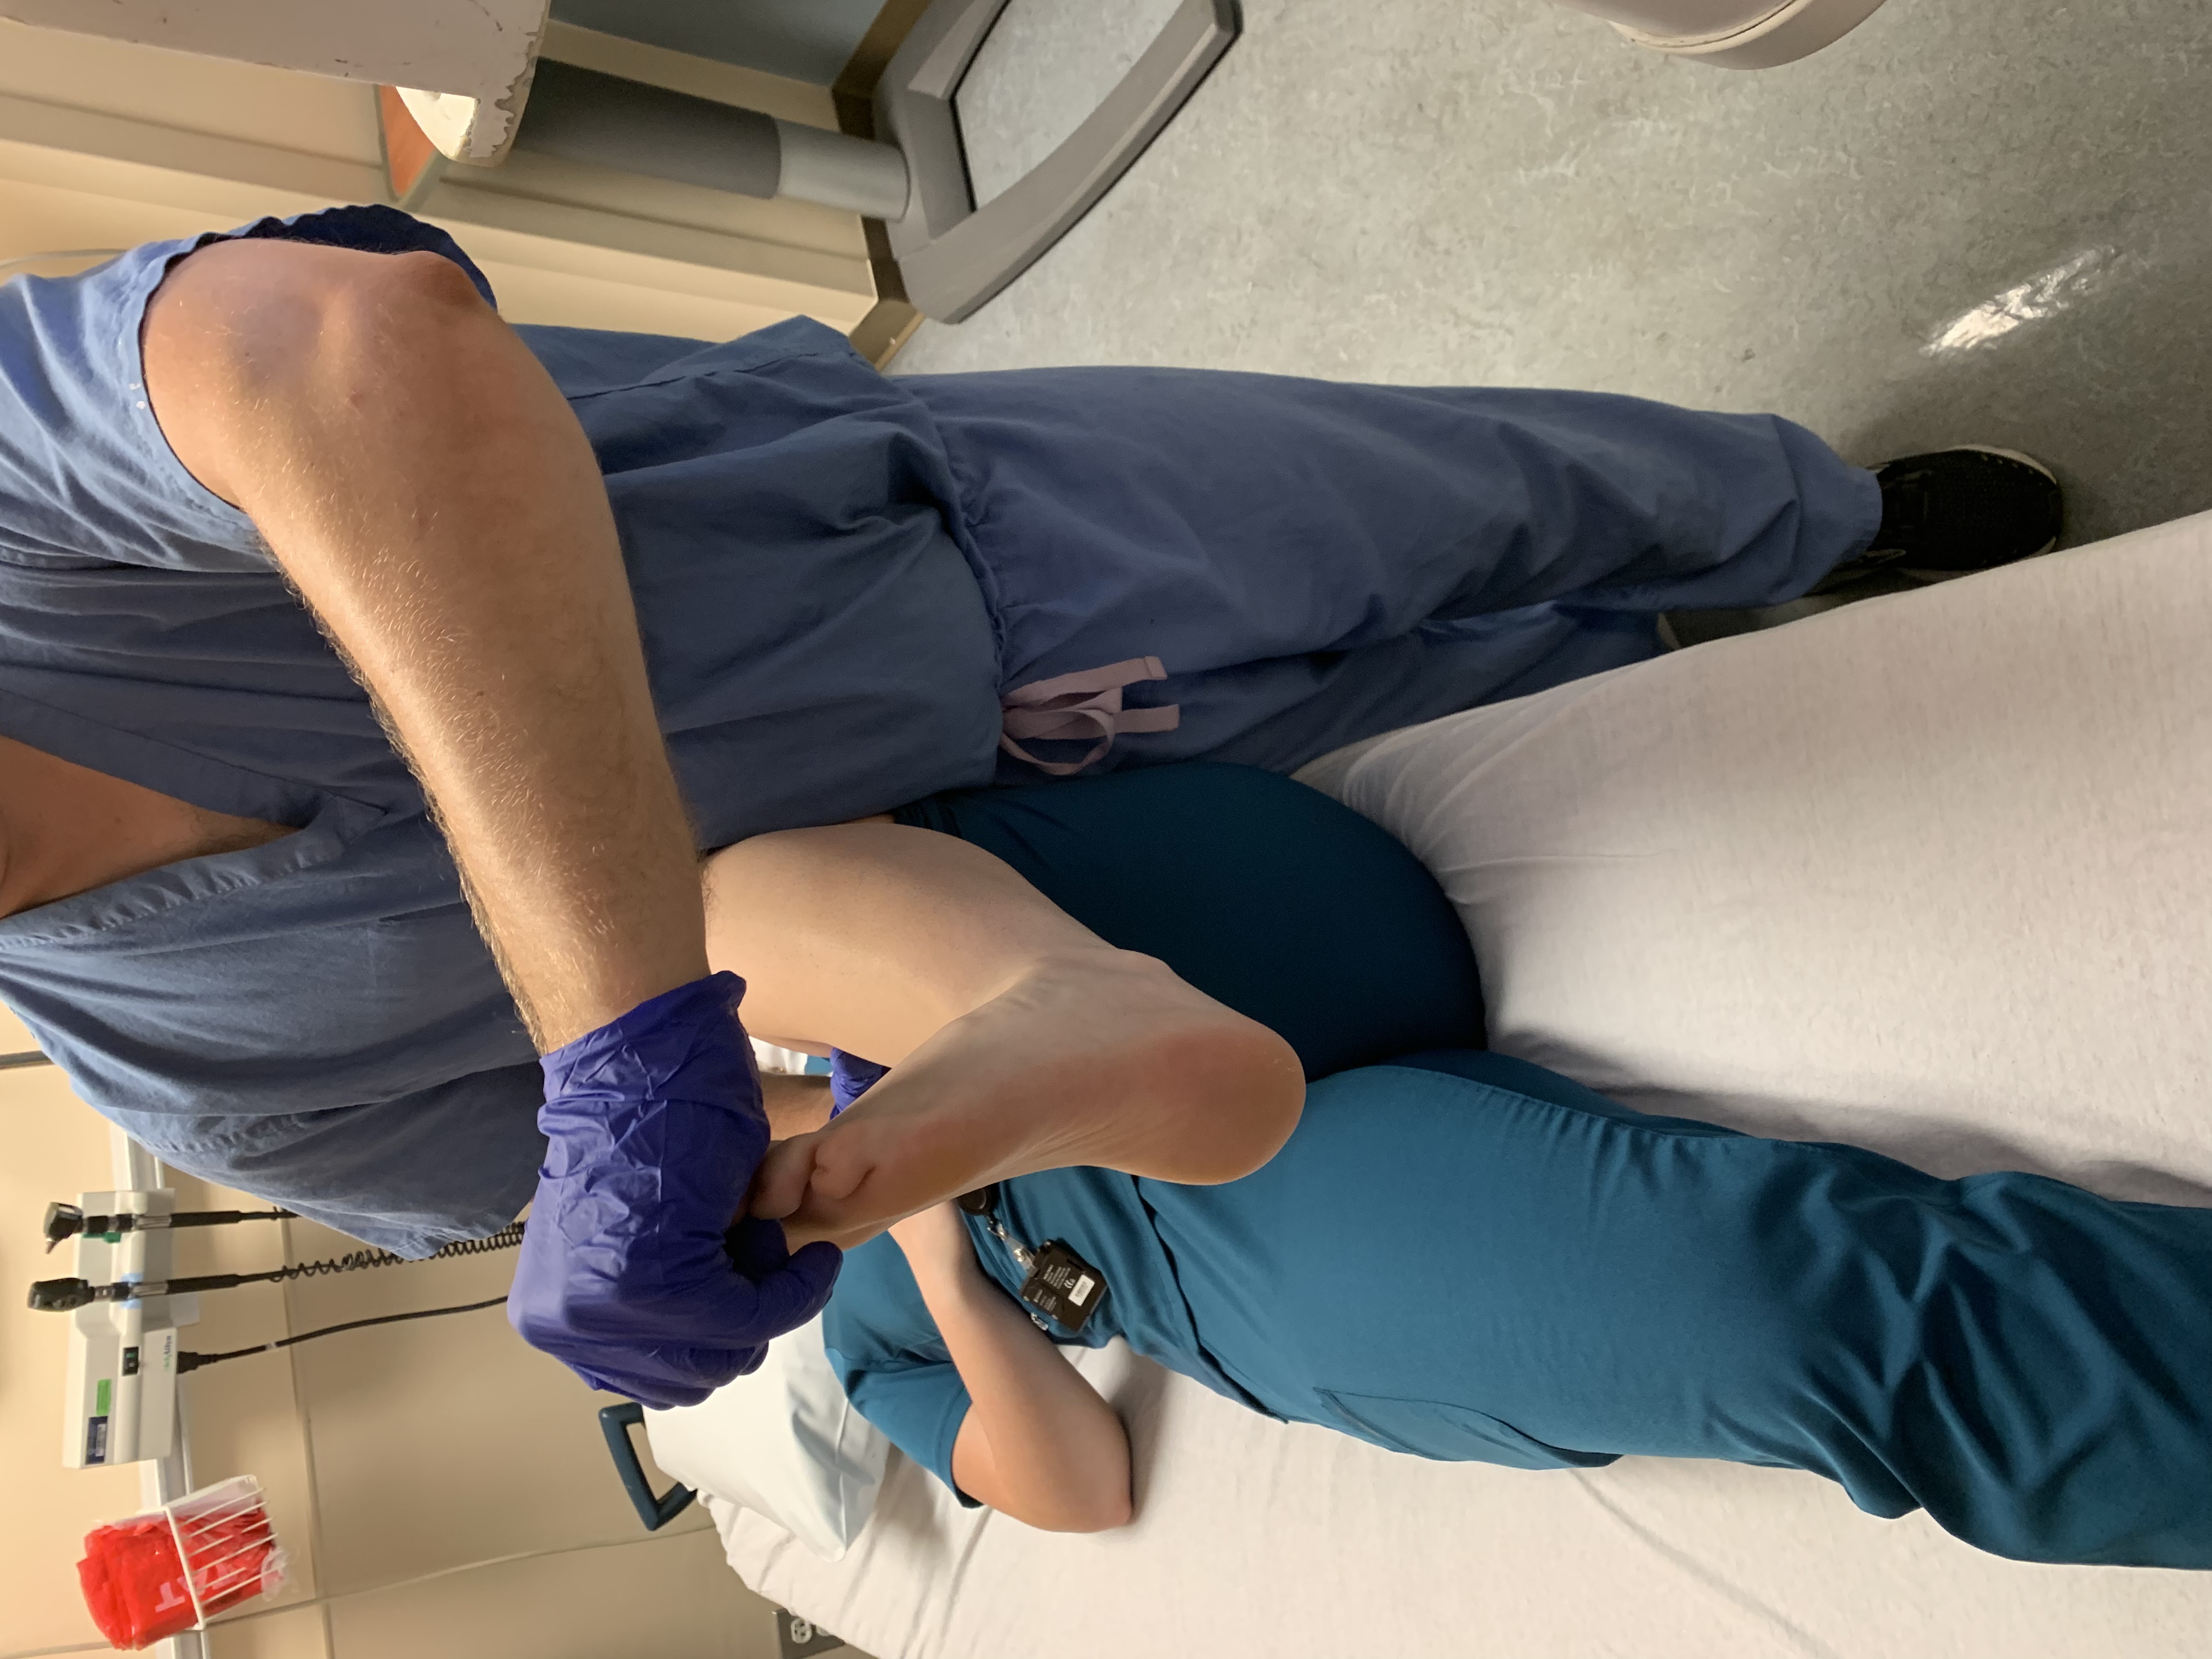
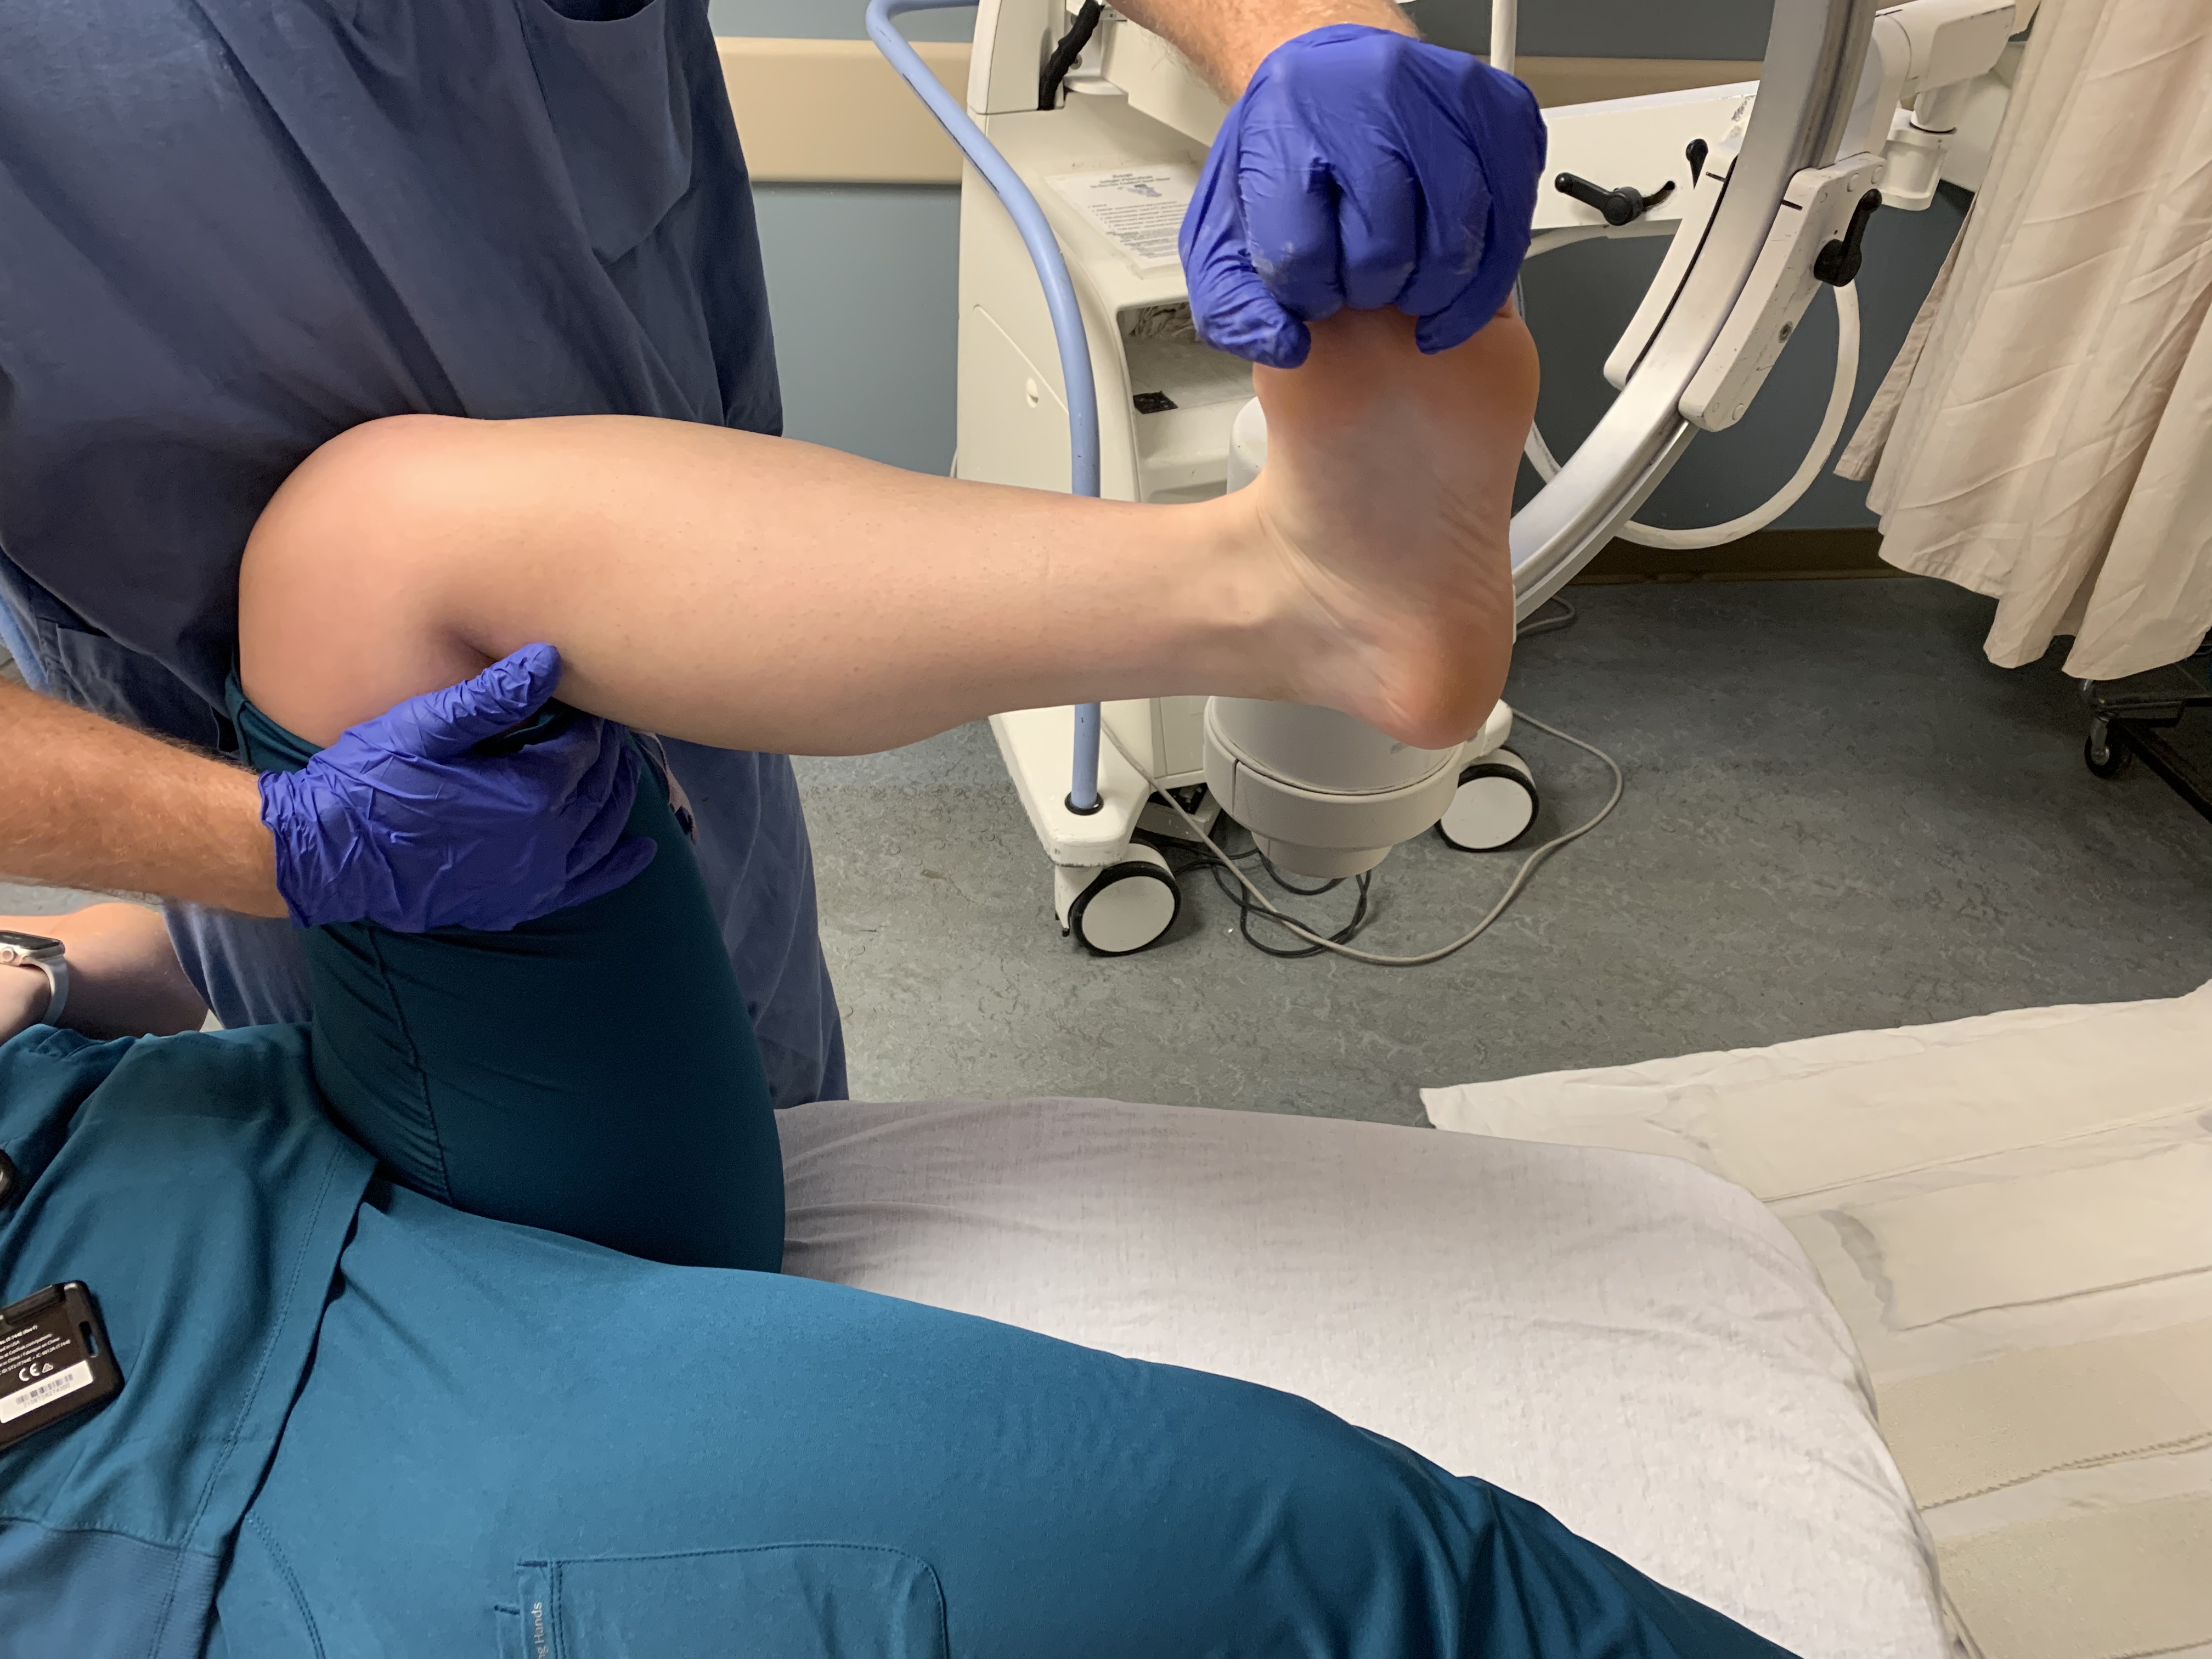
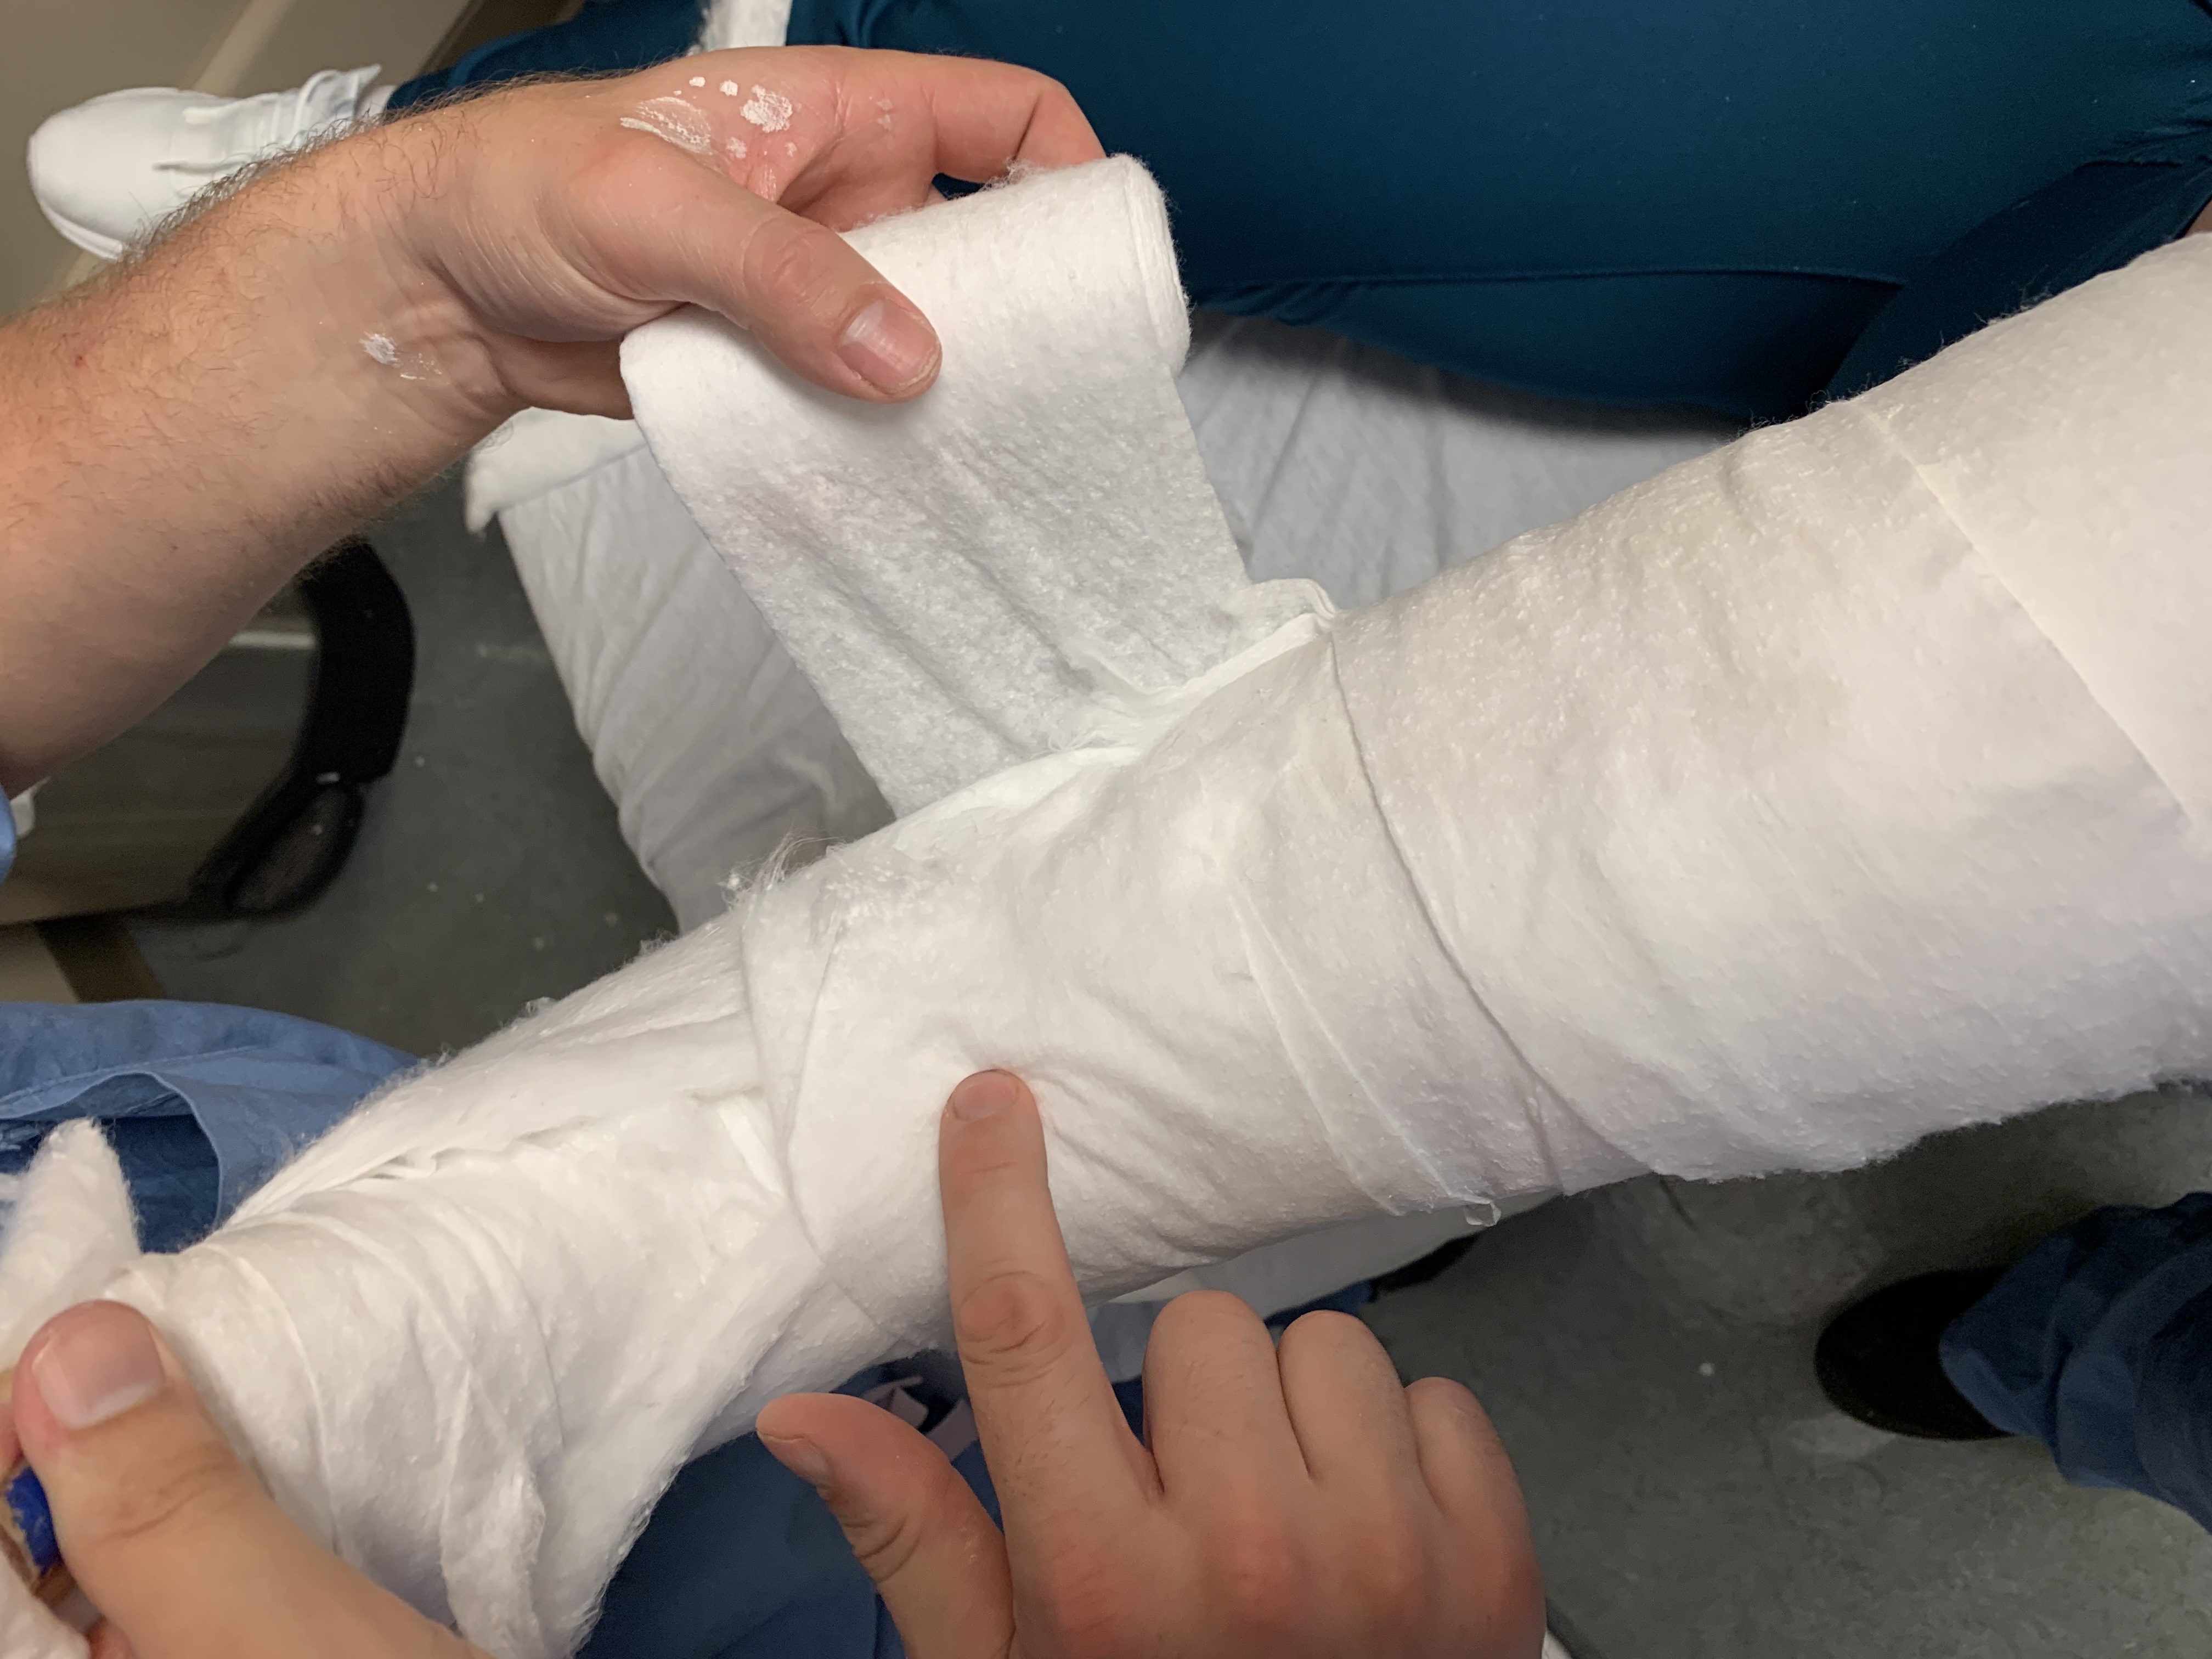
The webril is the first step of the splint.
The first layer should cover the skin and lay flat (large wrinkles can cause pressure sores).
Webril thickness varies with brand, we shoot for 4 layers everywhere covering the skin and 5-6 layers over the bony prominences (ankle malleoli, heel, sole of forefoot).
Tear, rip, bend the webril to lay as flat as possible on the first pass.
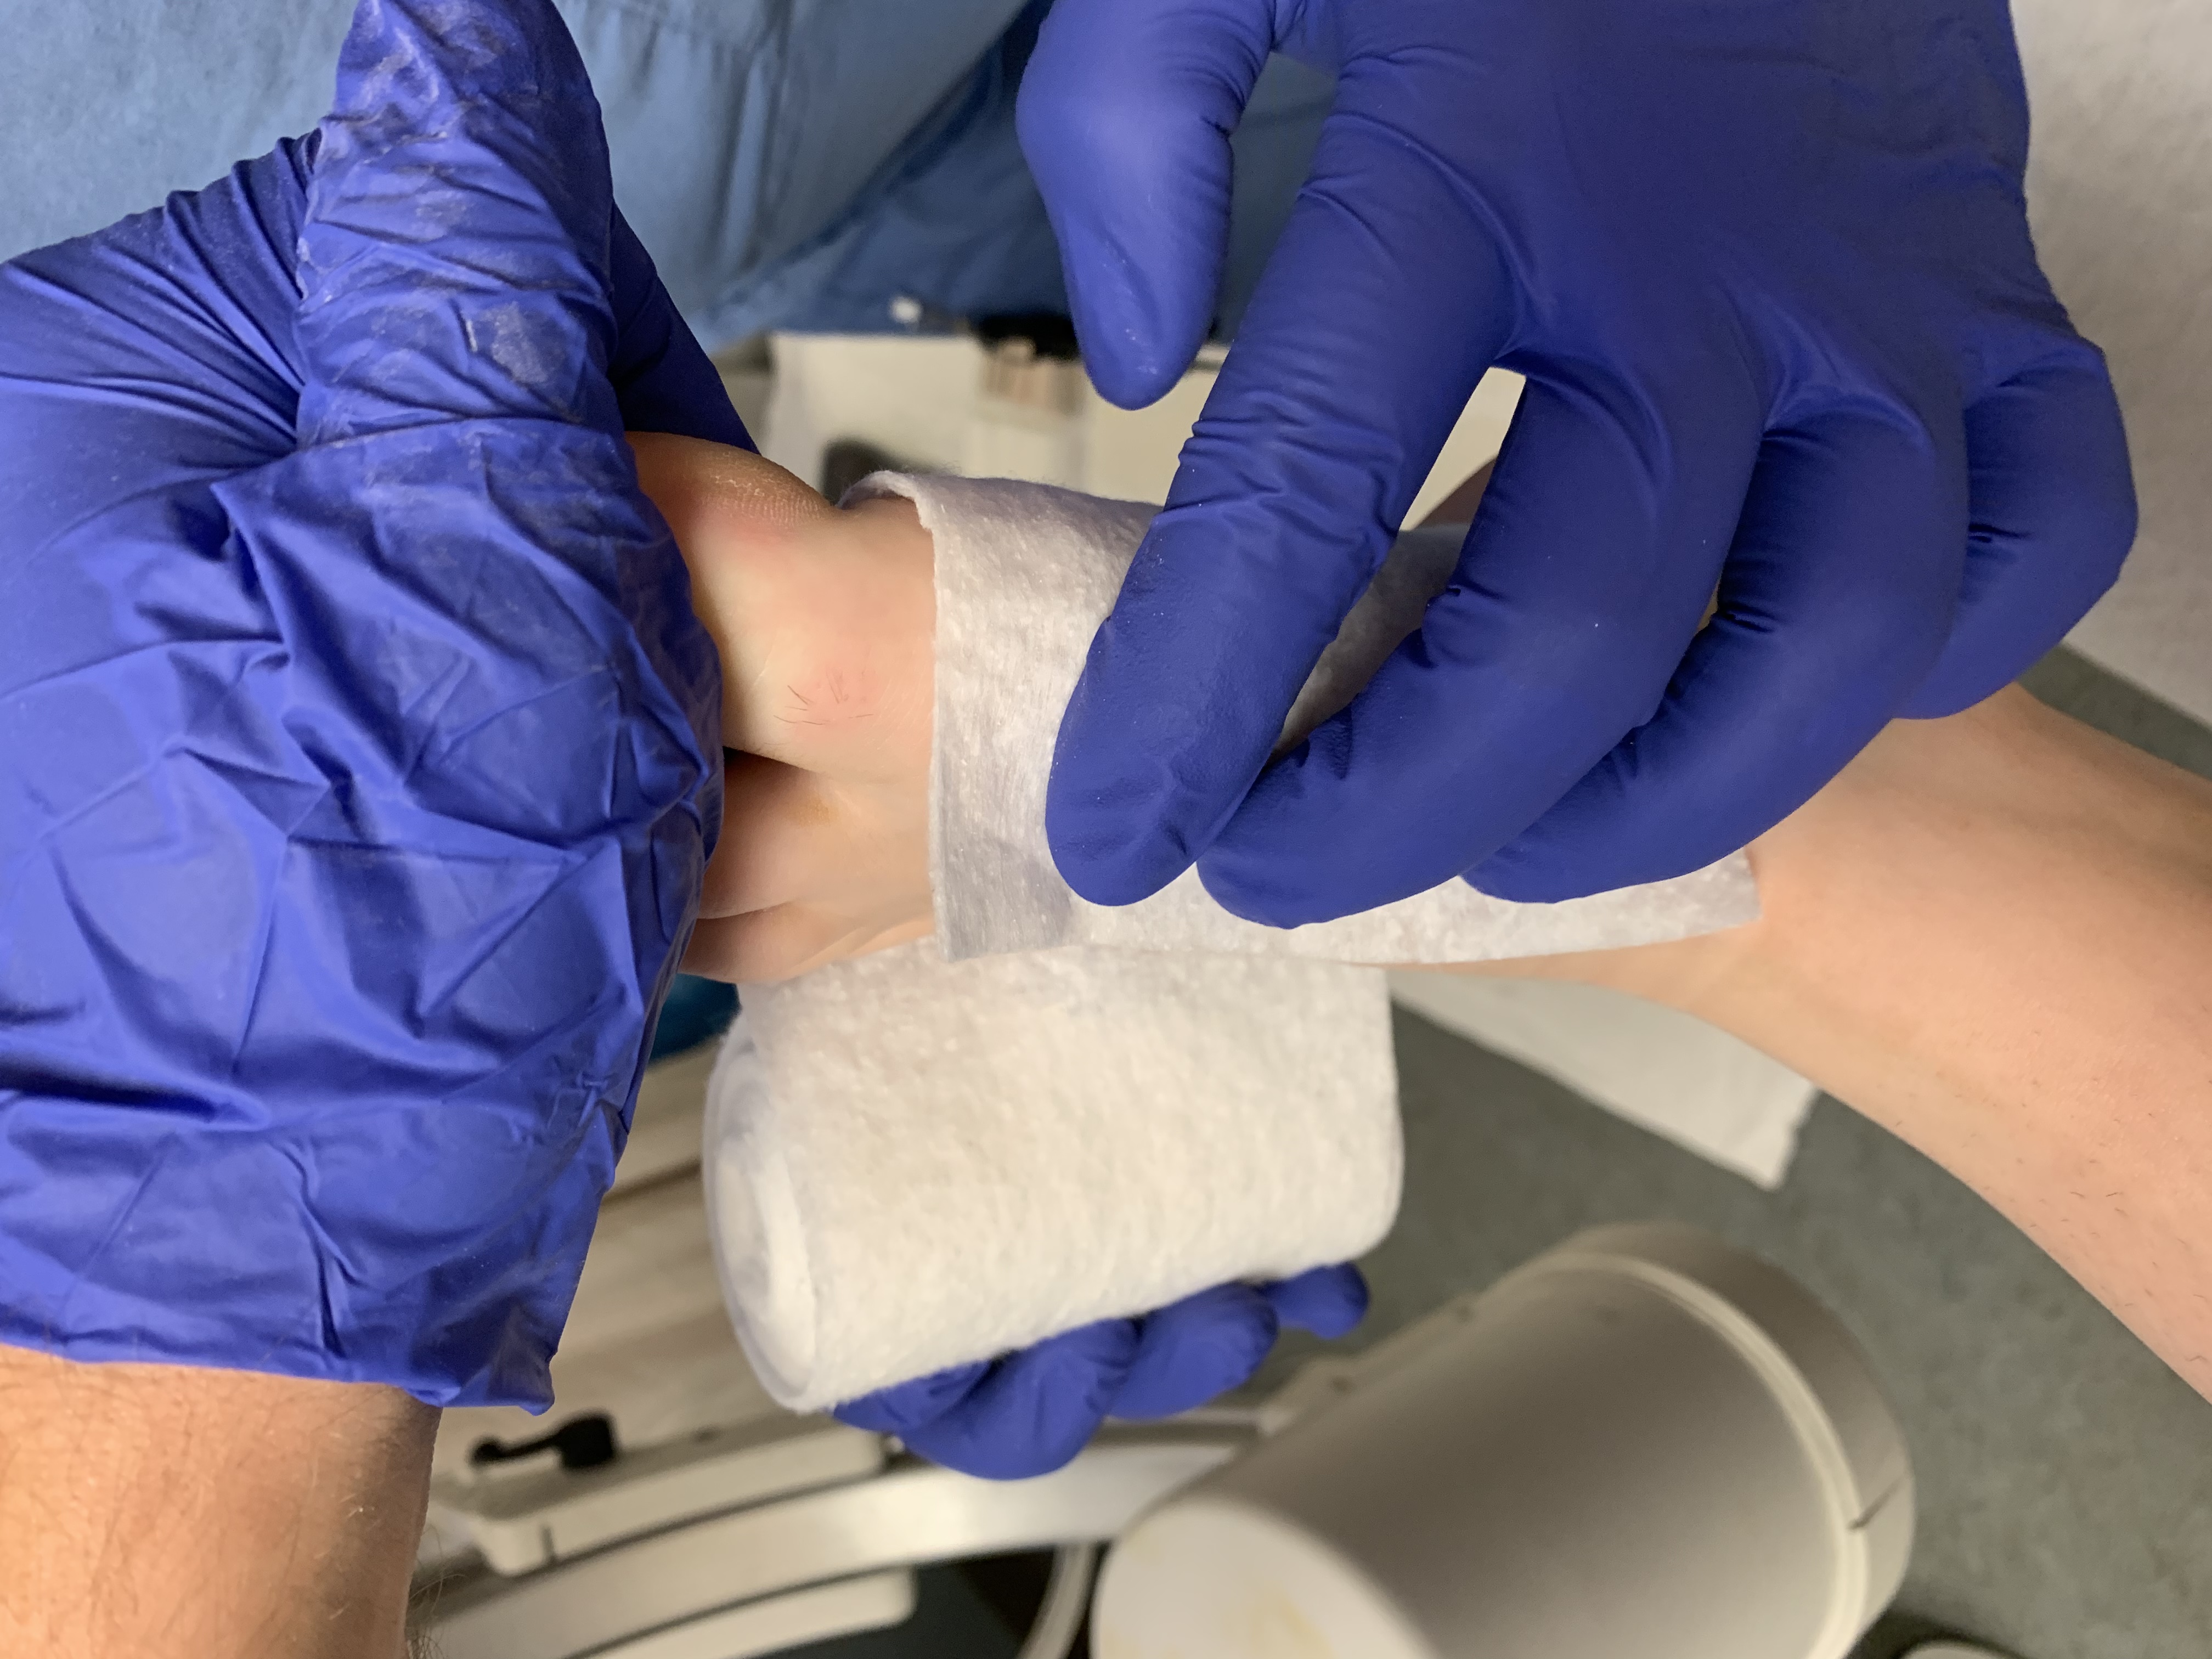
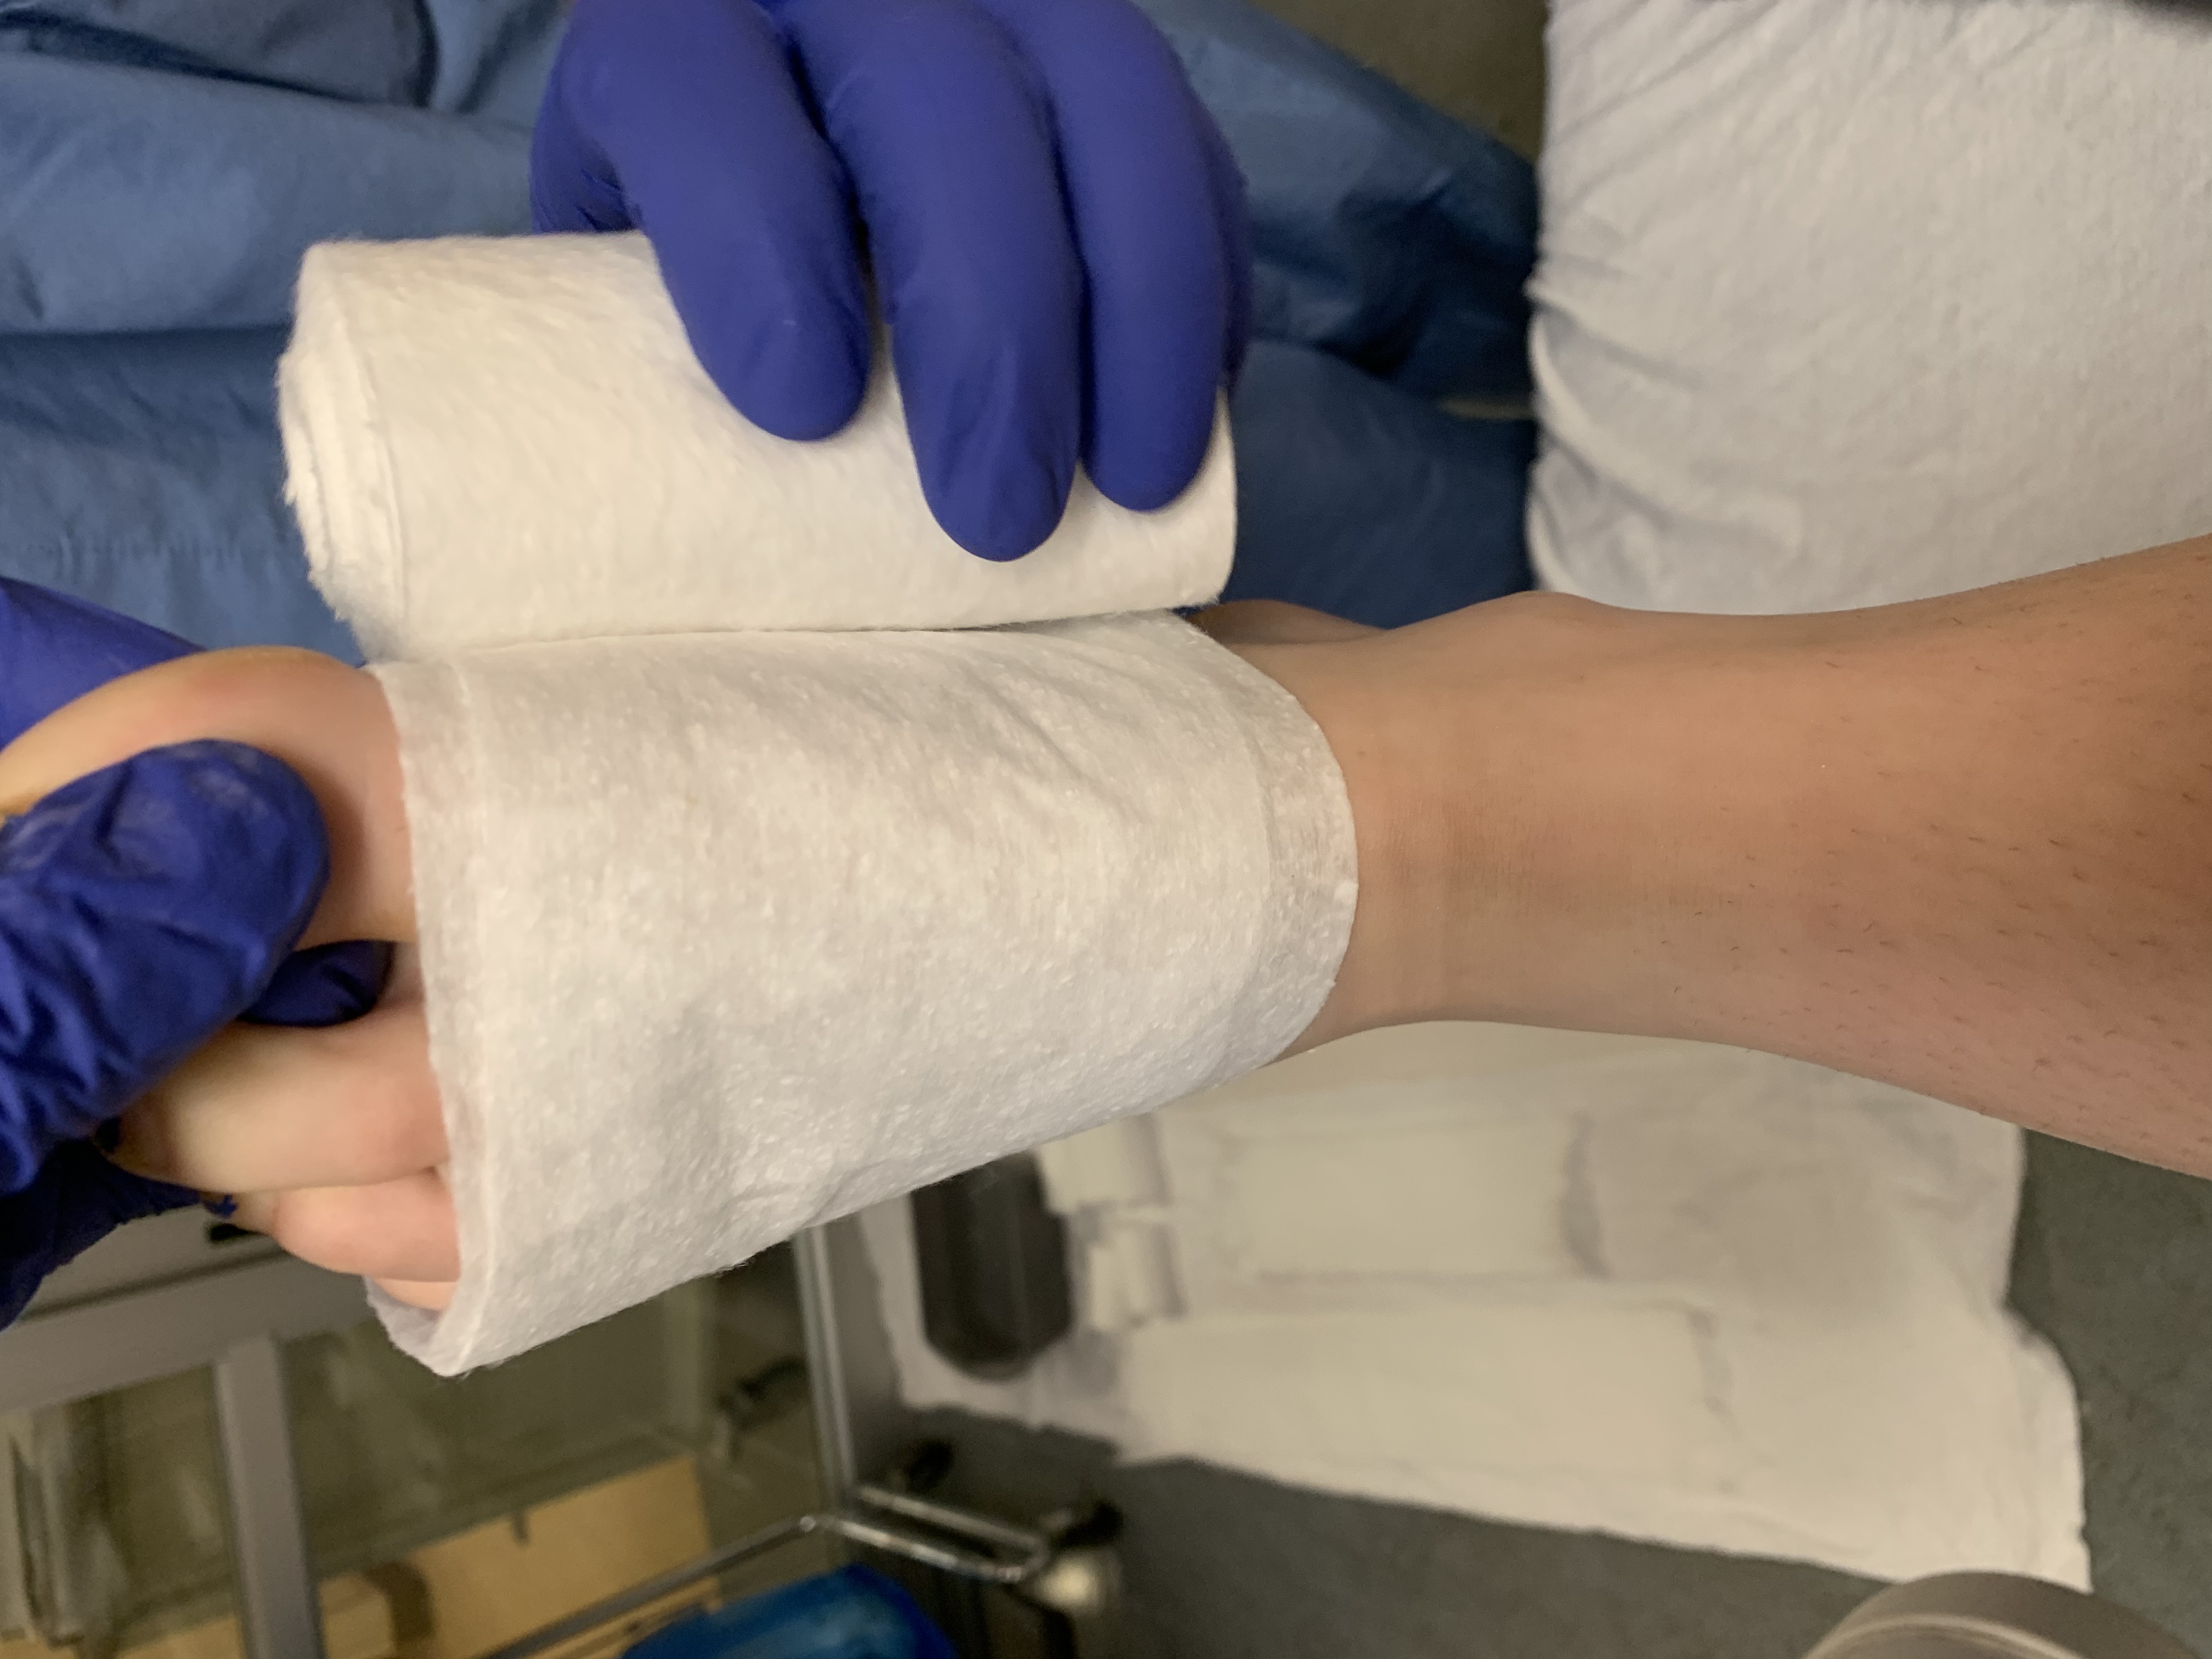
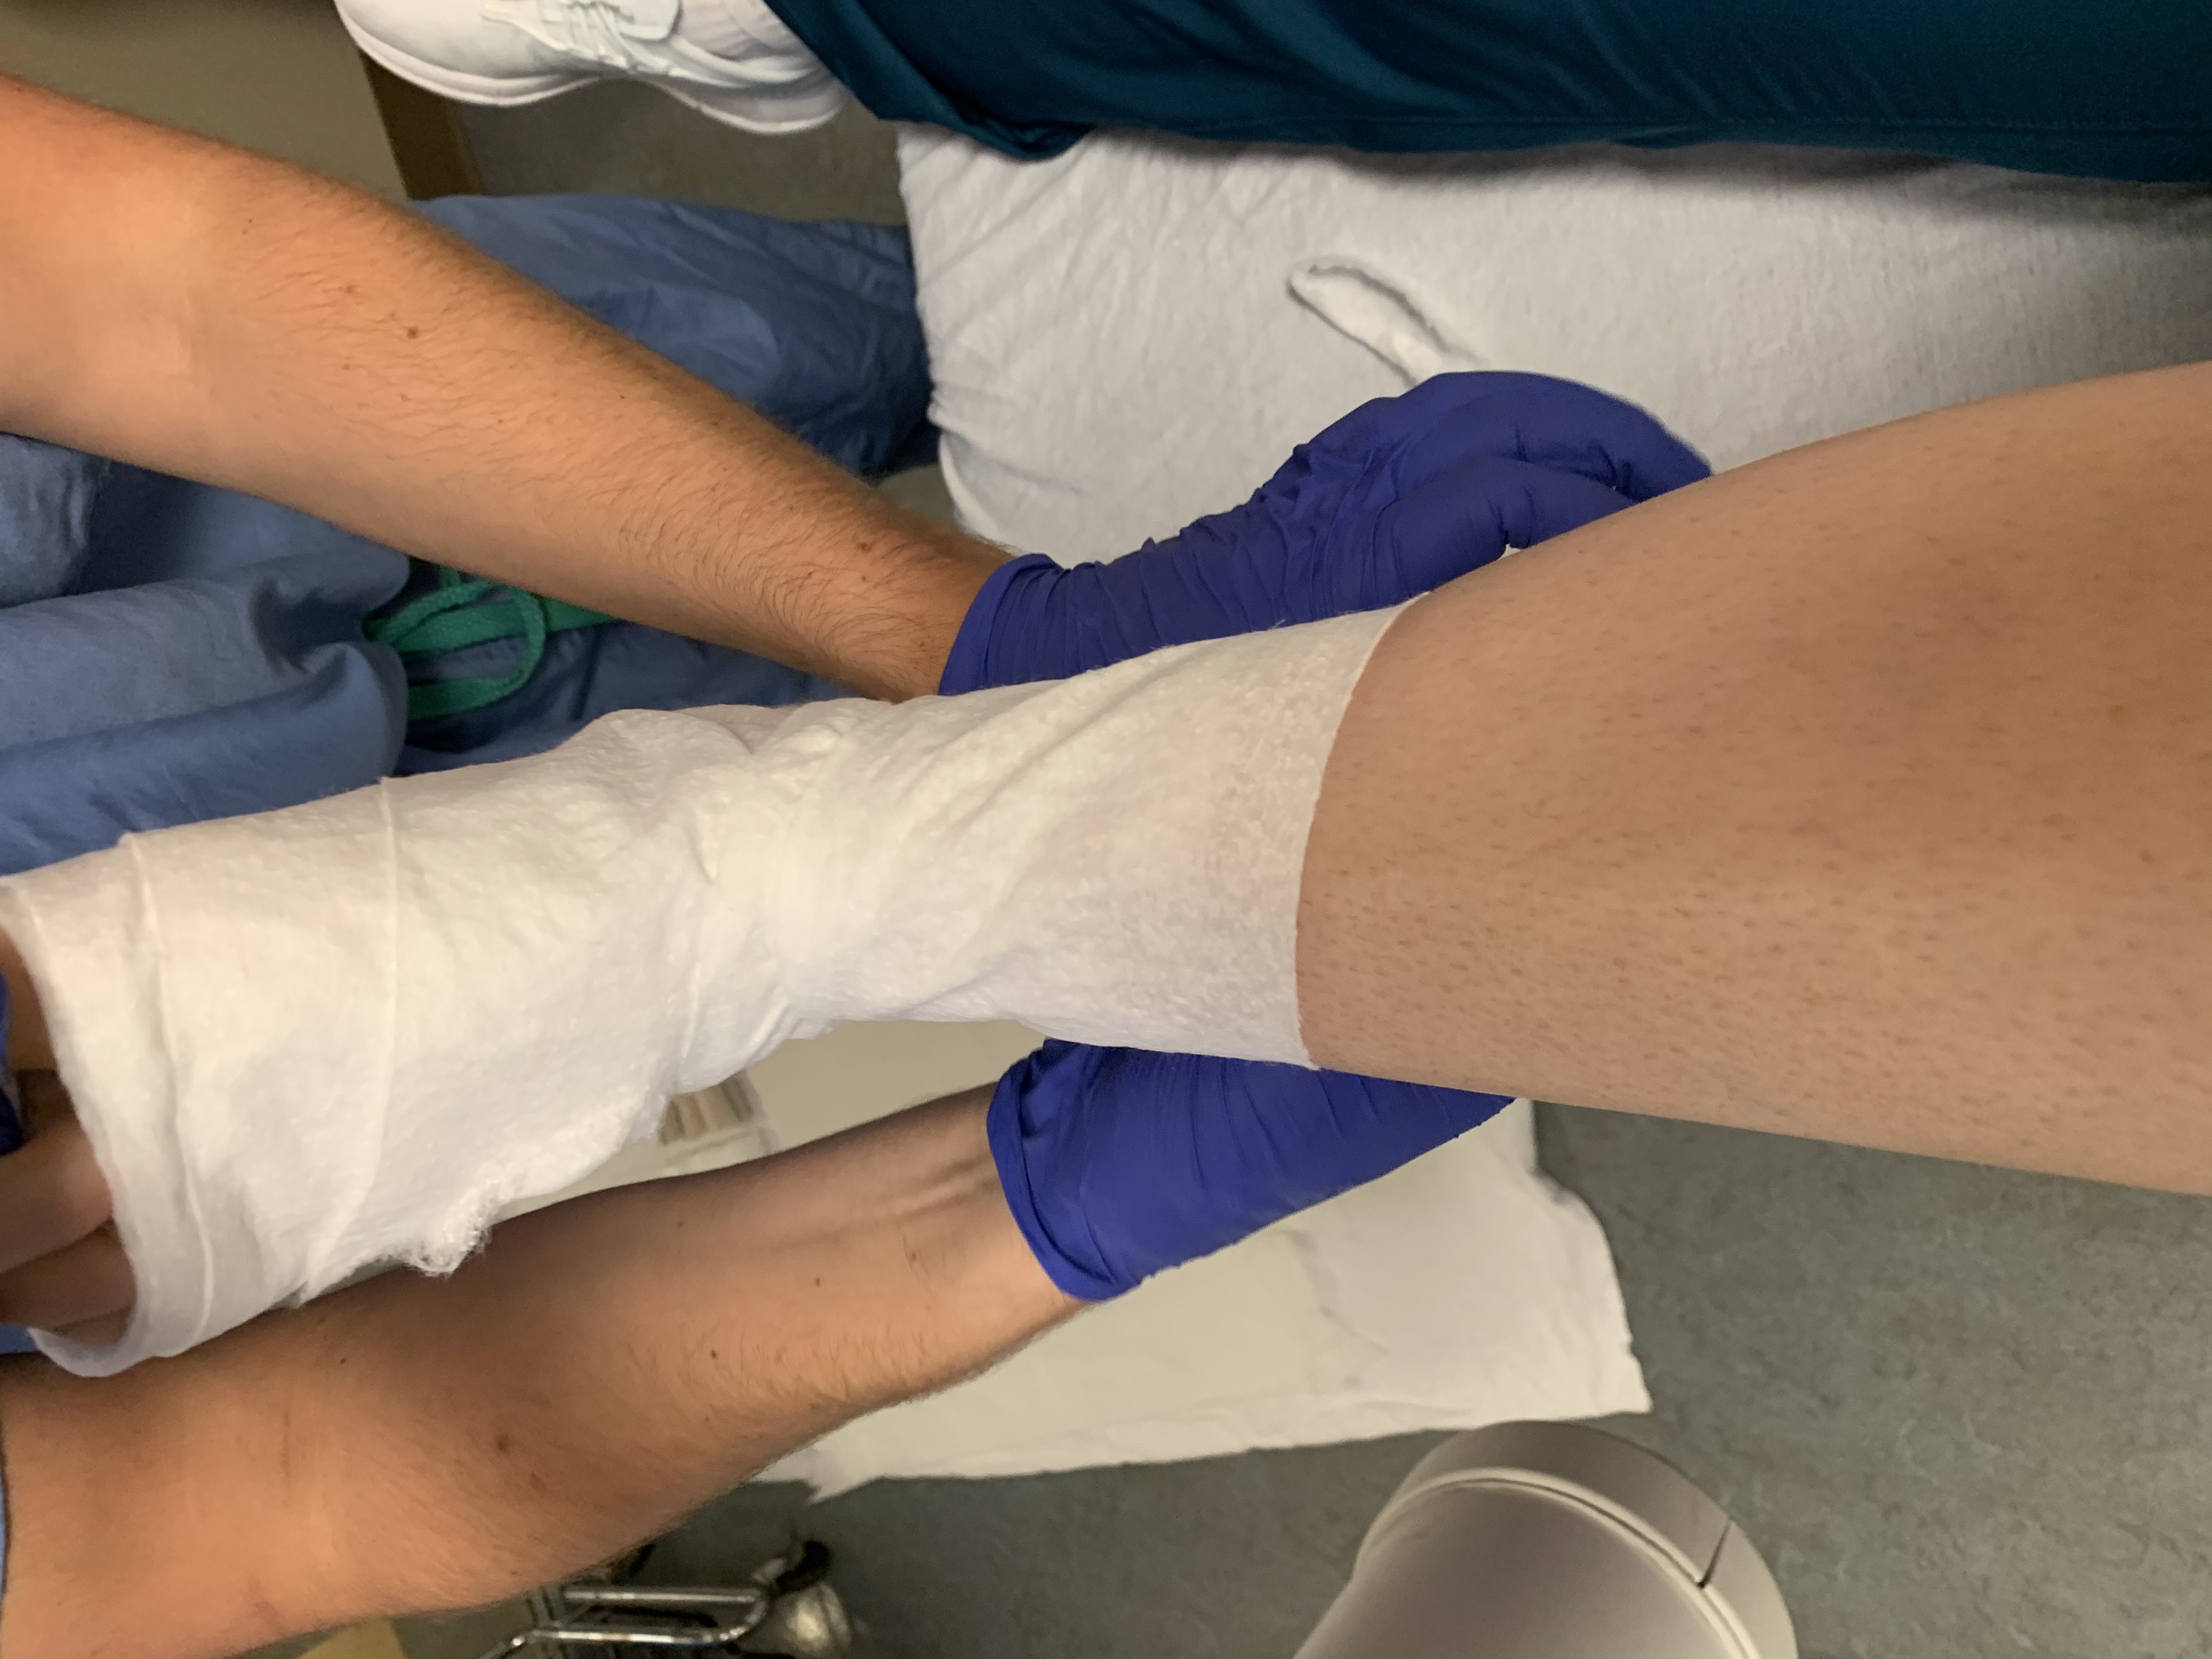
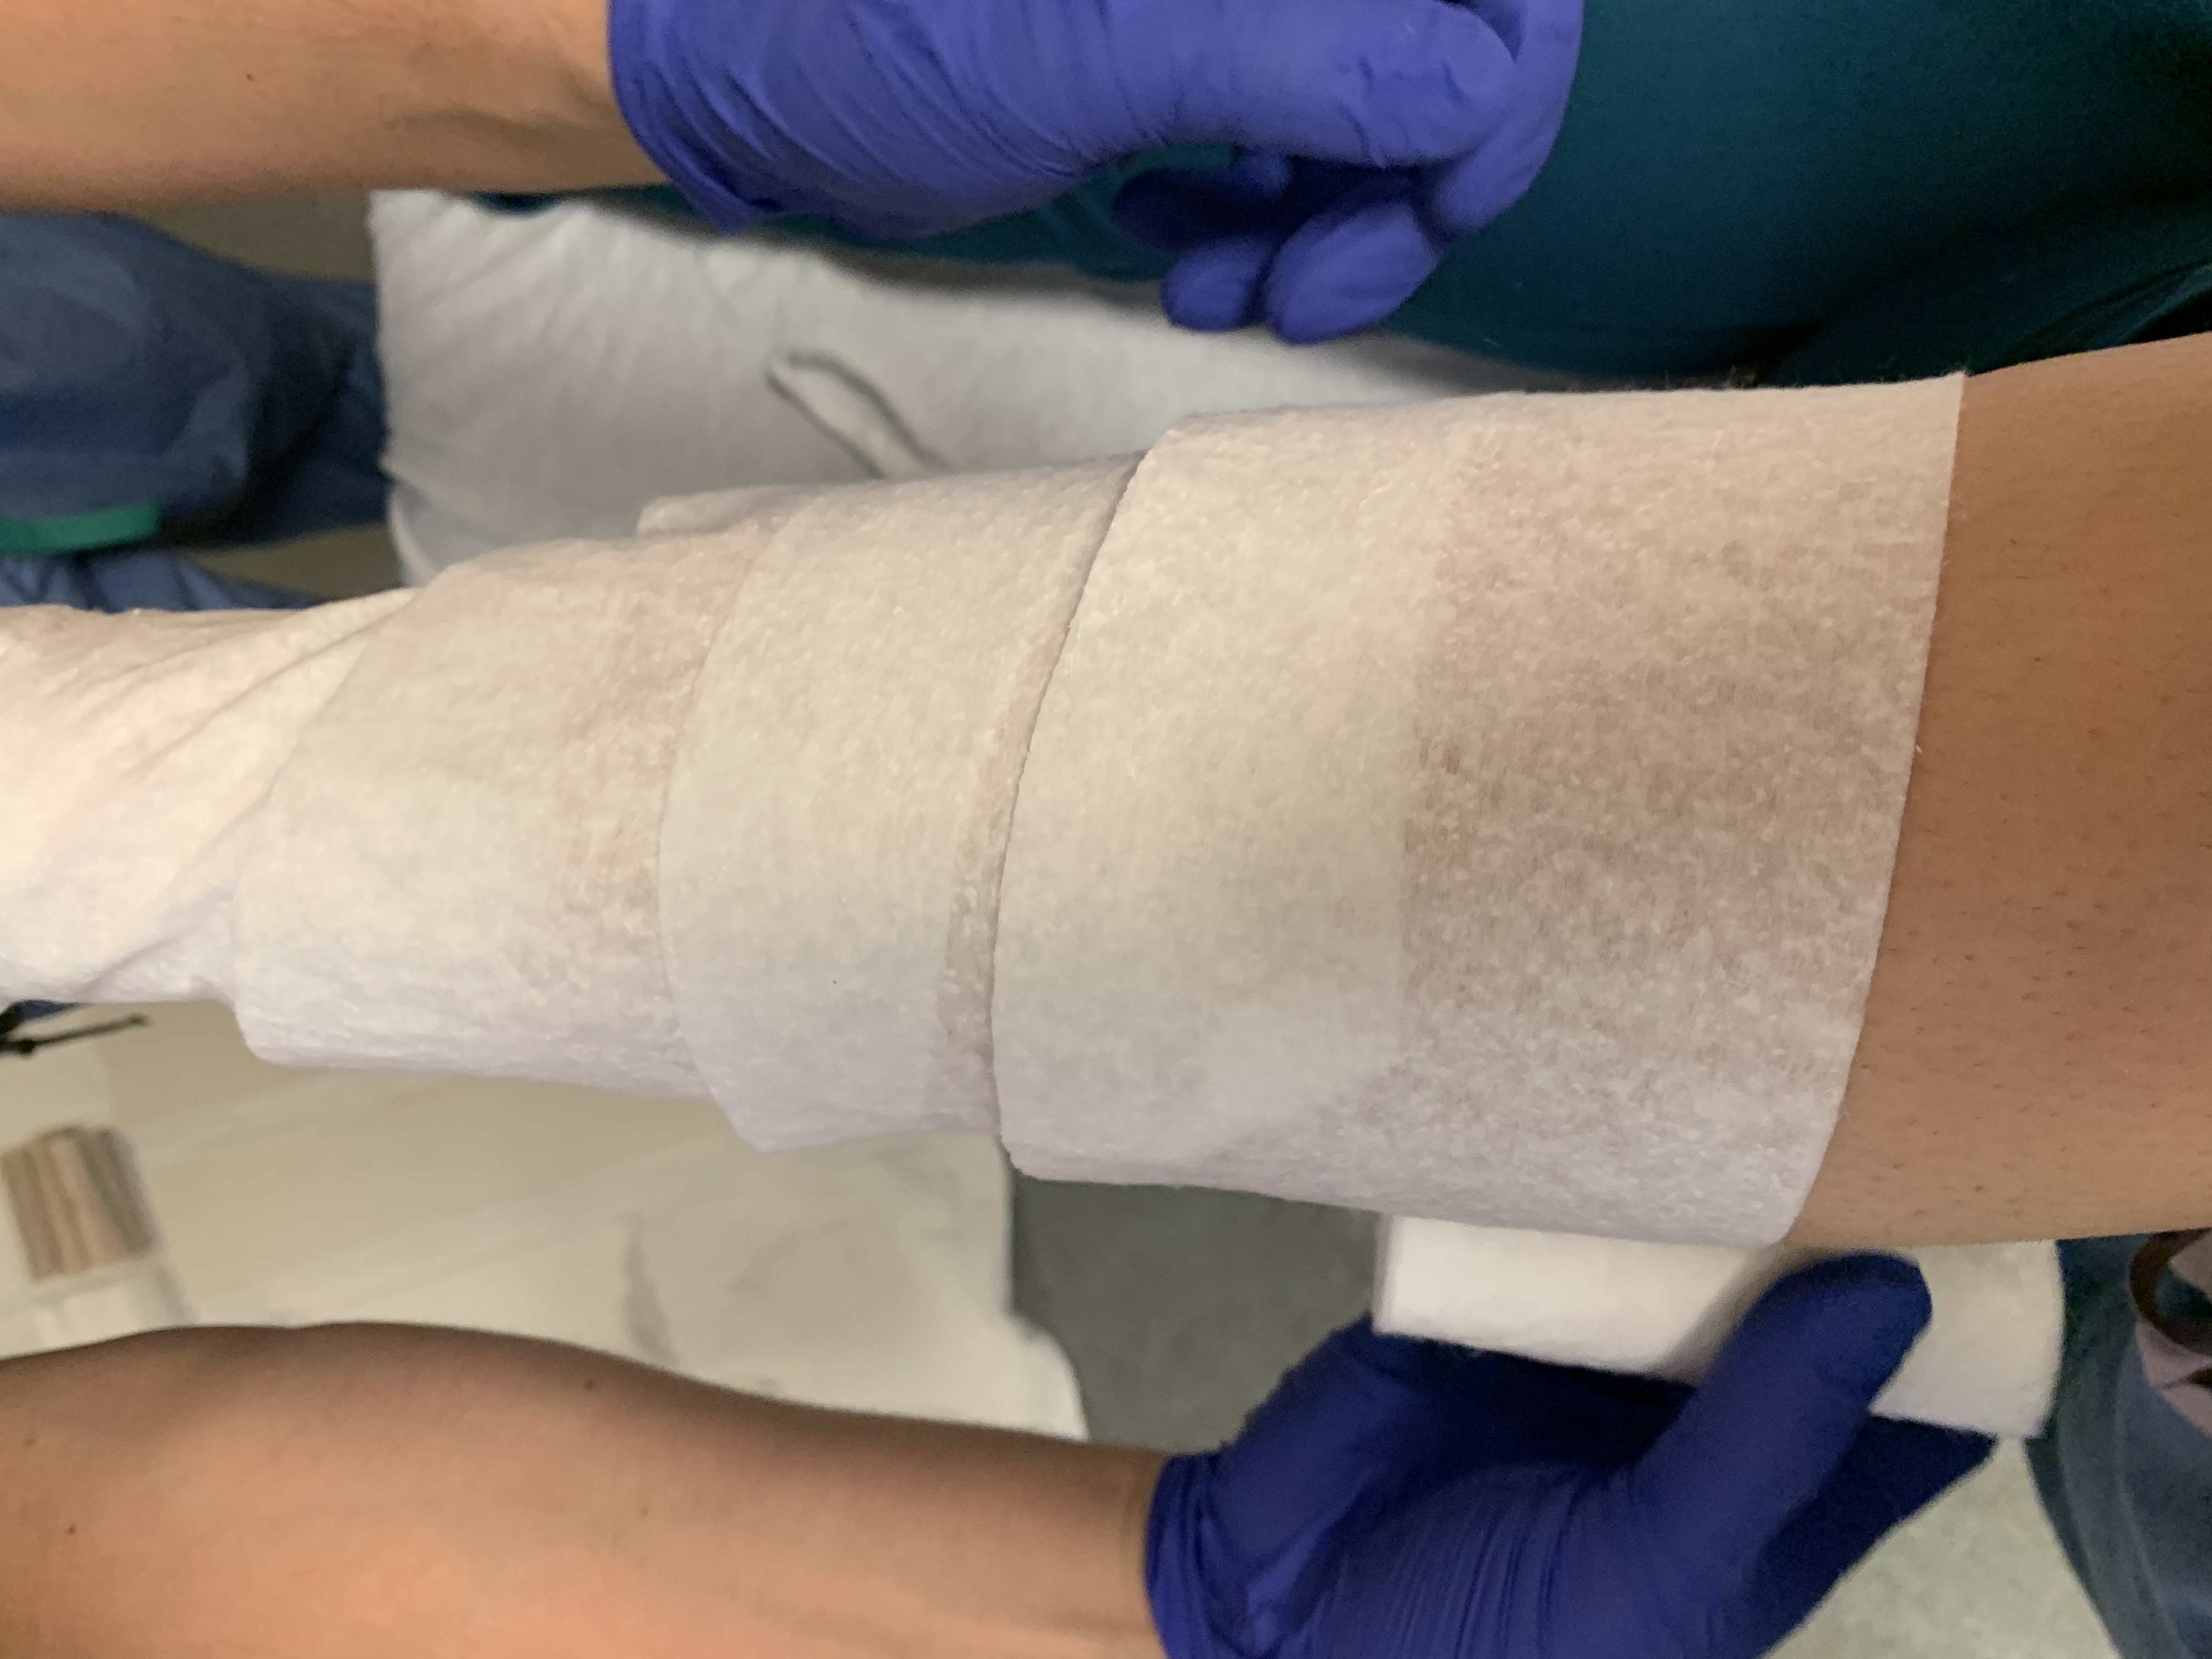
Place “cuffs” at the ends of the splint proximally on the calf and forefoot (~6 layers). This provides extra protection from the edges of the plaster.
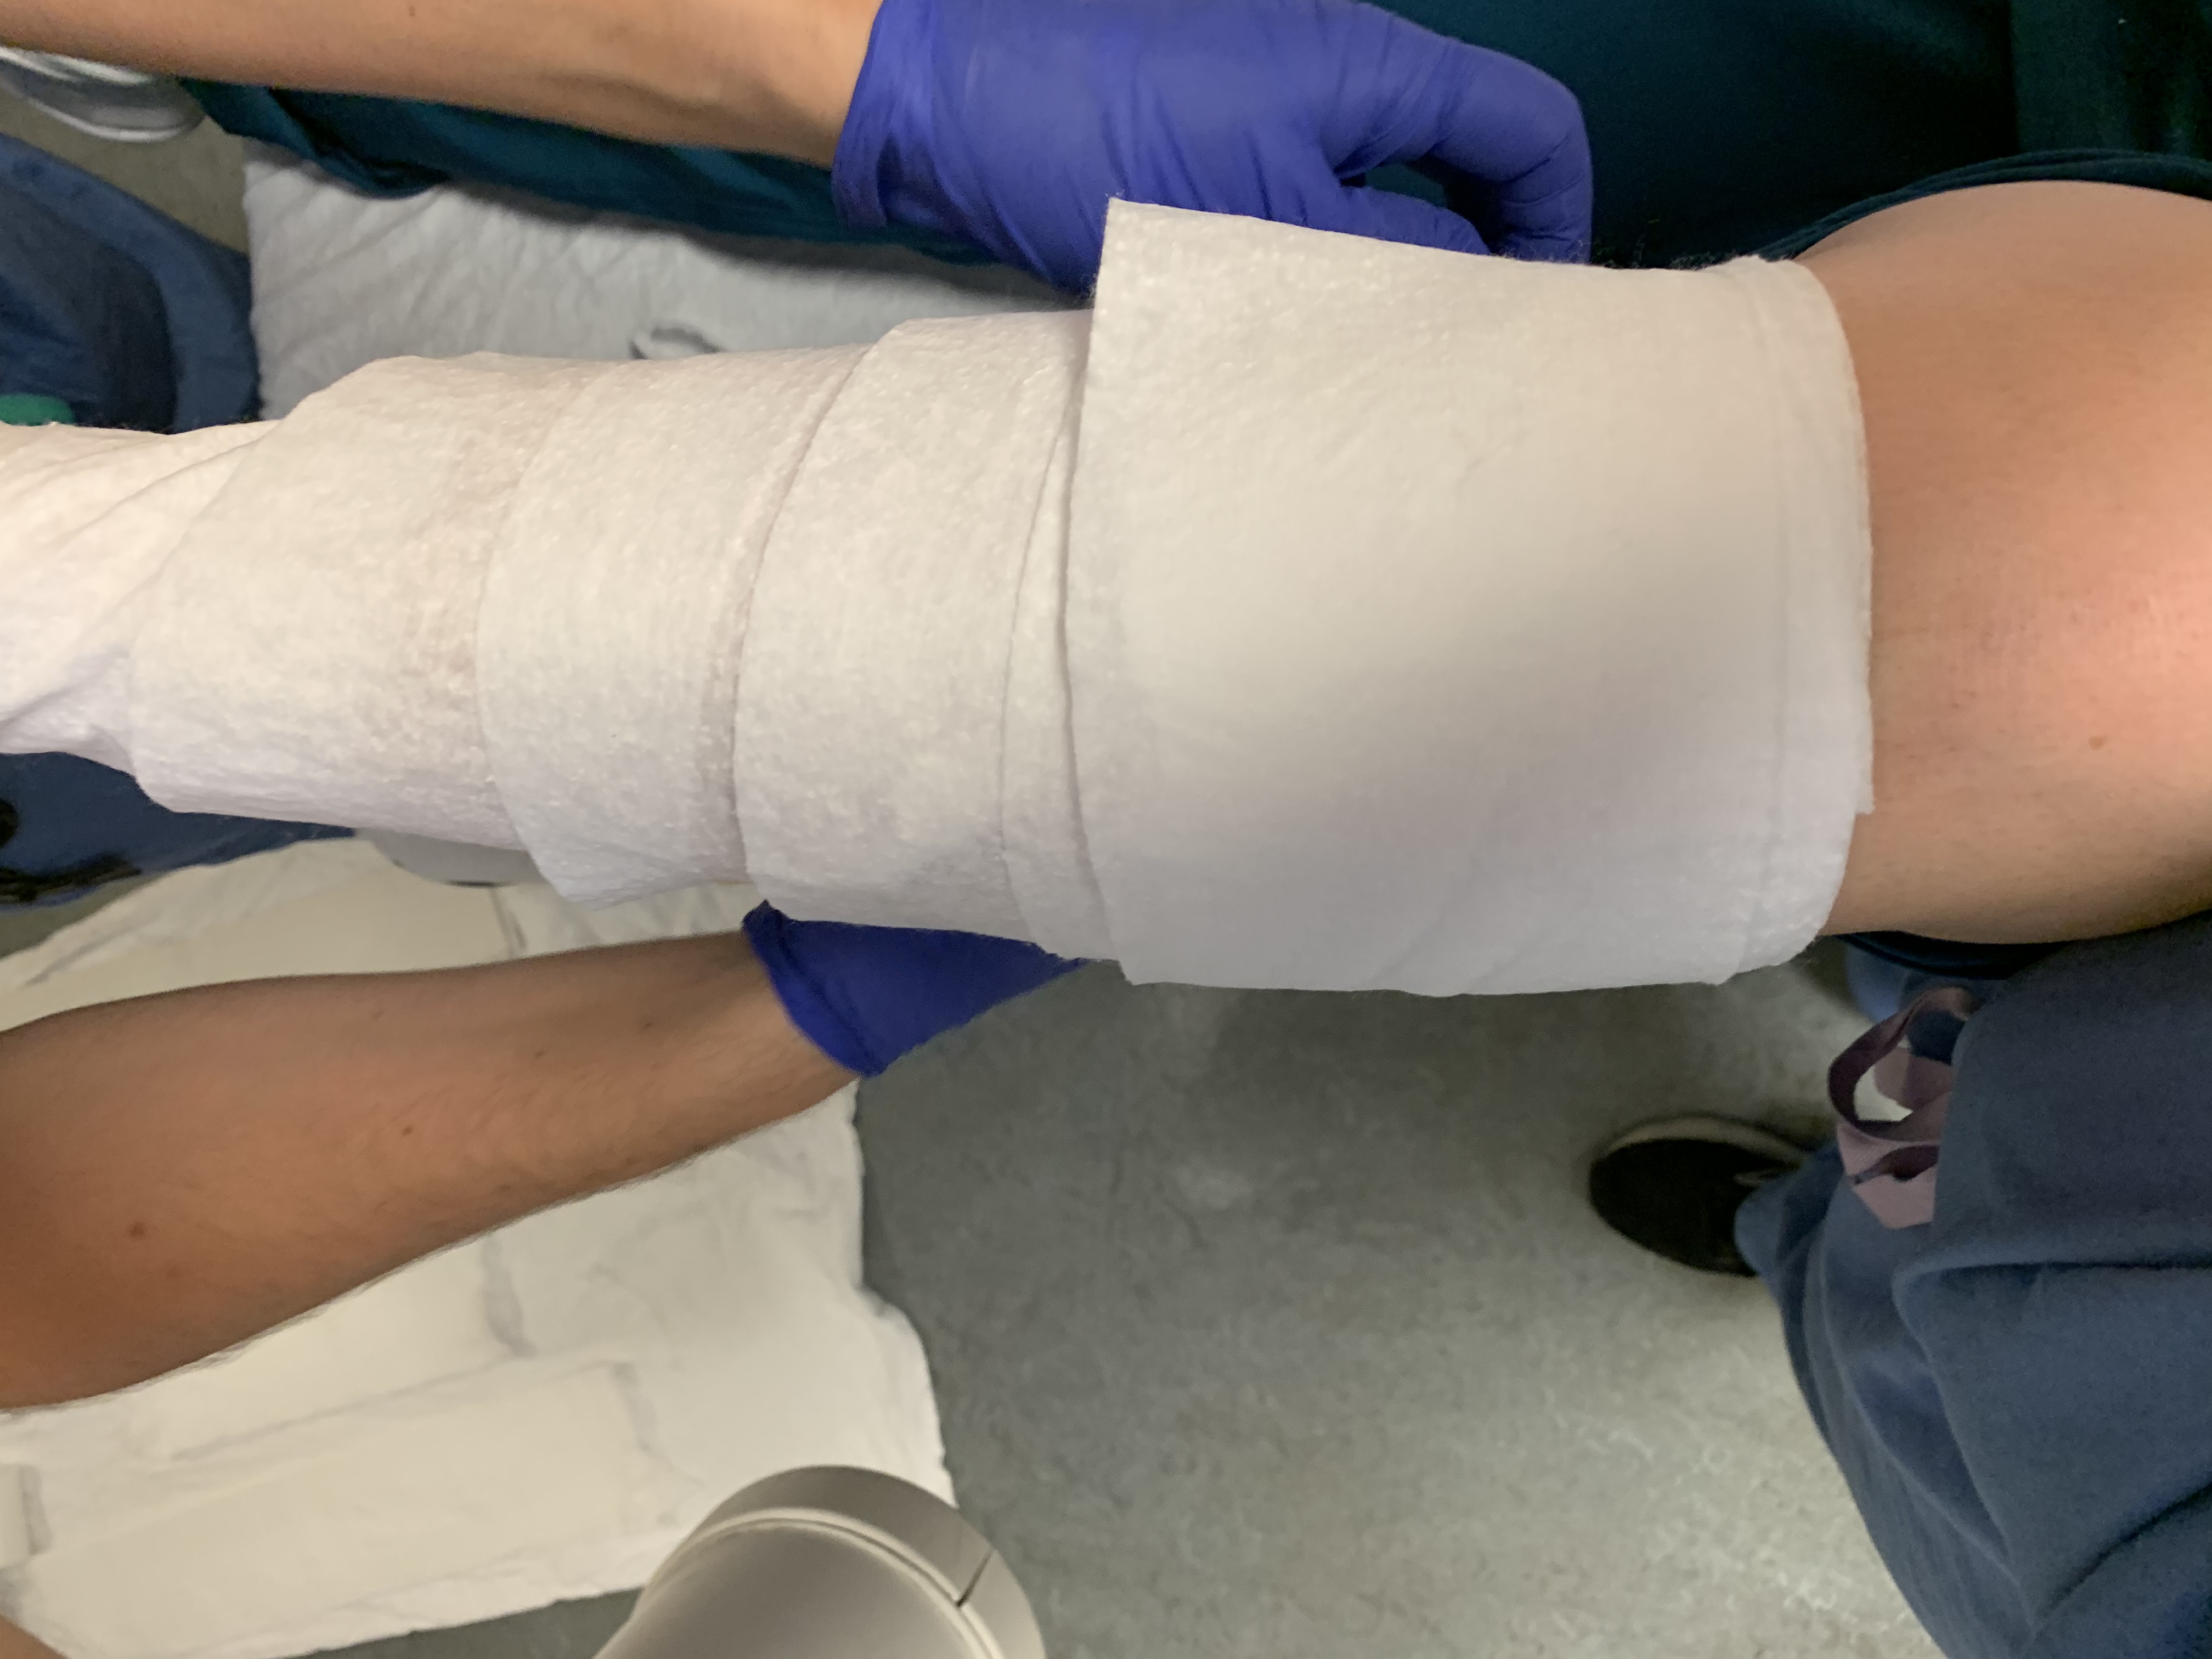
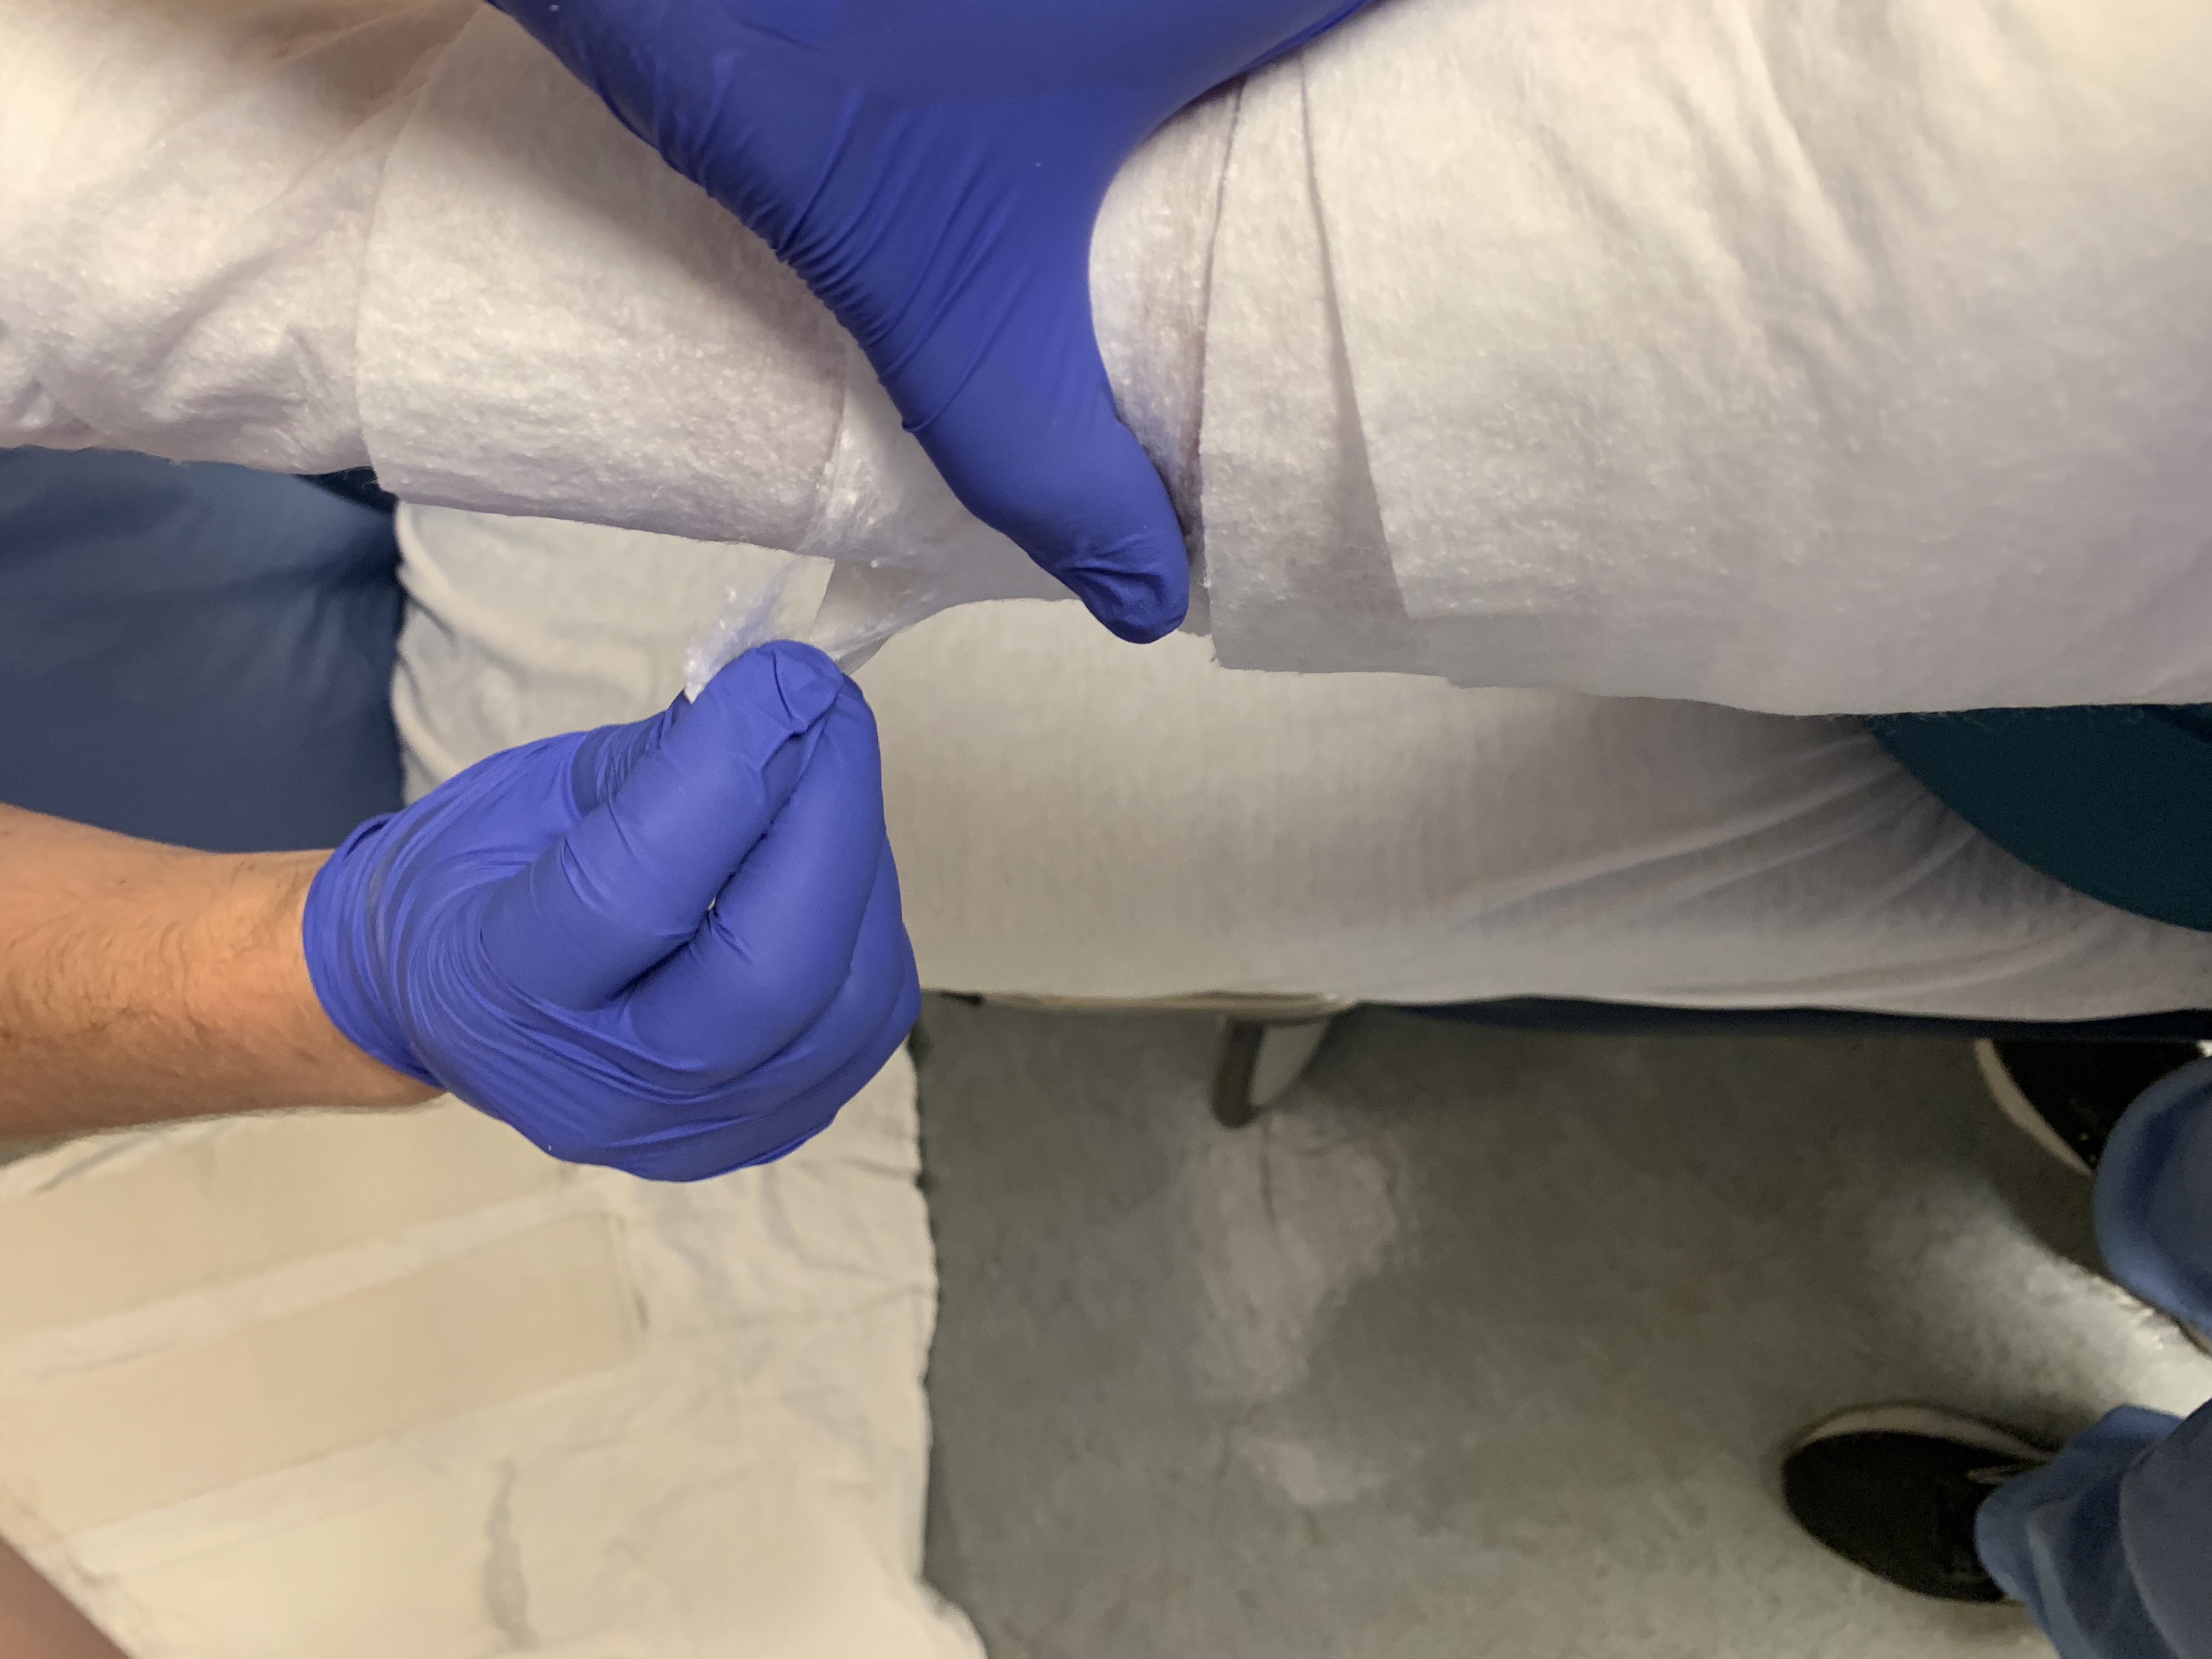
Wrap back down the leg and foot, at this point you will have ~4 layers of webril everywhere with ~6 layers of cuff on both ends.
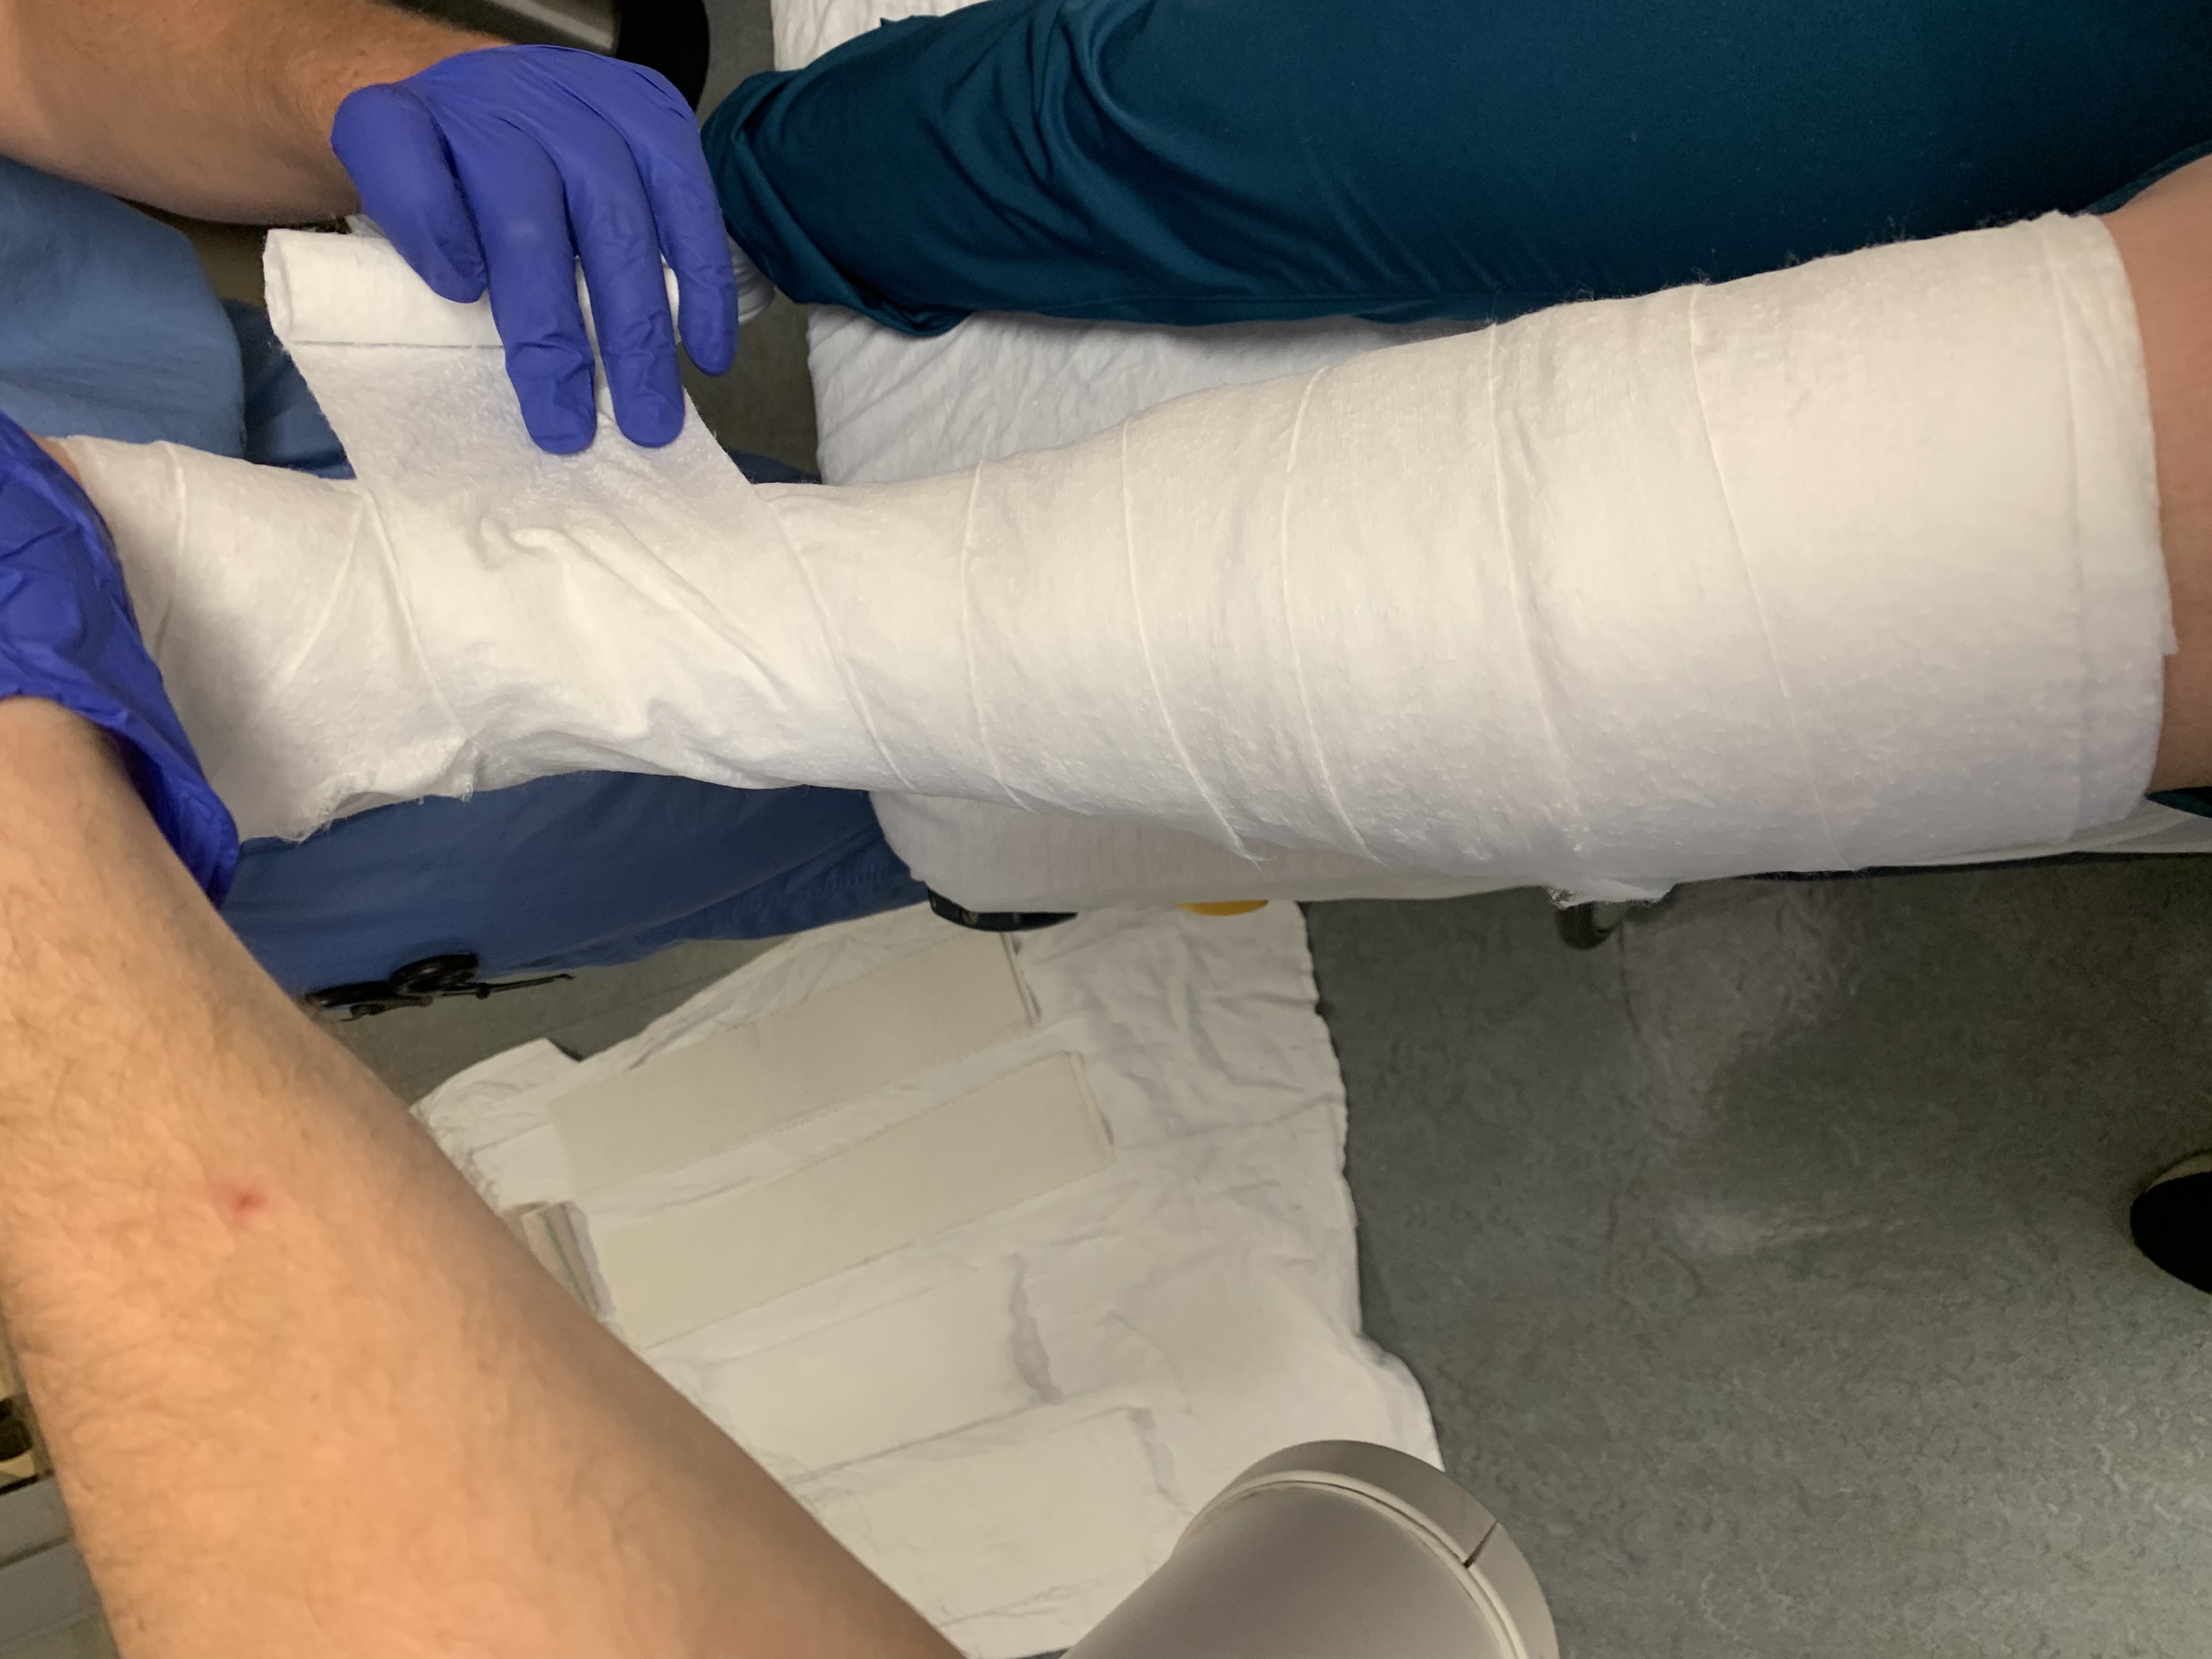
The anterior ankle is prone to skin wounds from these splints, so you can debulk the cotton in this area. (This is not required if you keep the knee flexed and the ankle stays in same position during the wrap through until the end of the splint placement, over doing the ankle dorsiflexion can cause bunching of the webril and lead to skin breakdown)
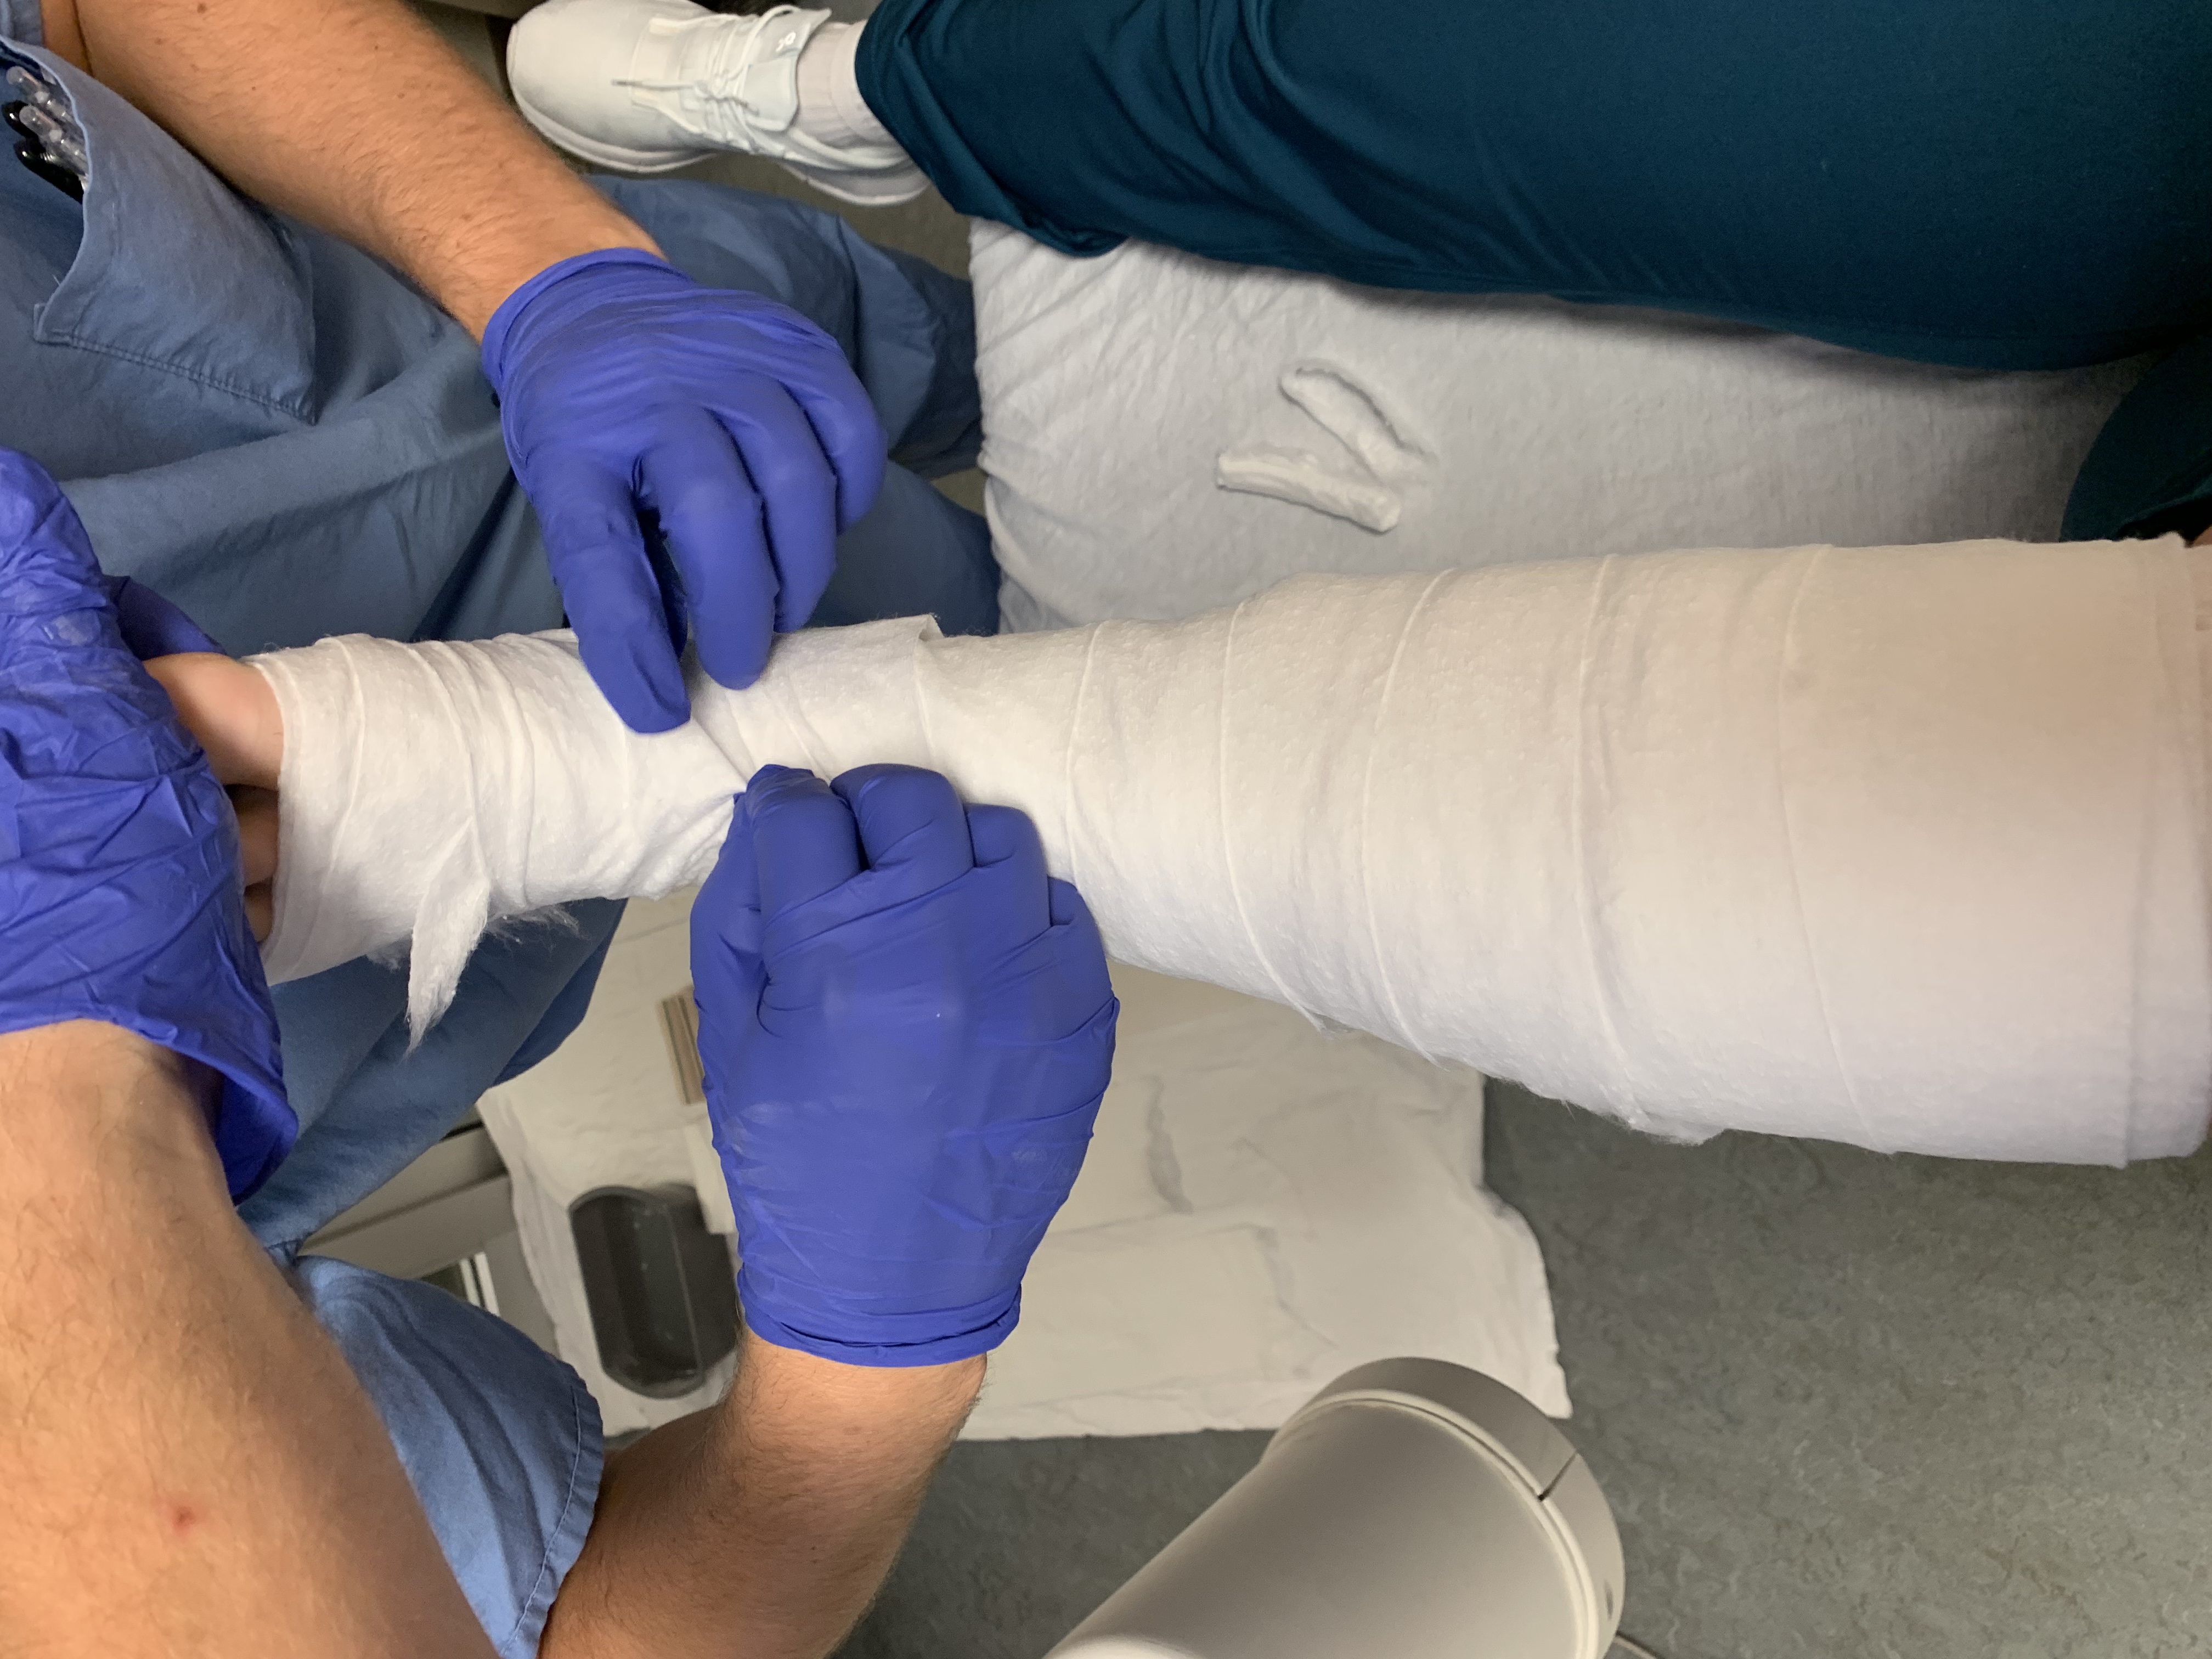
Take your pre-rolled out webril (4 layer sheets) and place them over the ankle prominences, one in stirrups, the other along the posterior aspect of the heel and toes (if doing a toe box).
Rip the excess cotton to make it lay flat as depicted. (note: some brands of cotton do not rip easily, so it may be necessary to skip the ripping step and just ensure you do not have excess cotton in places you do not want it to be).
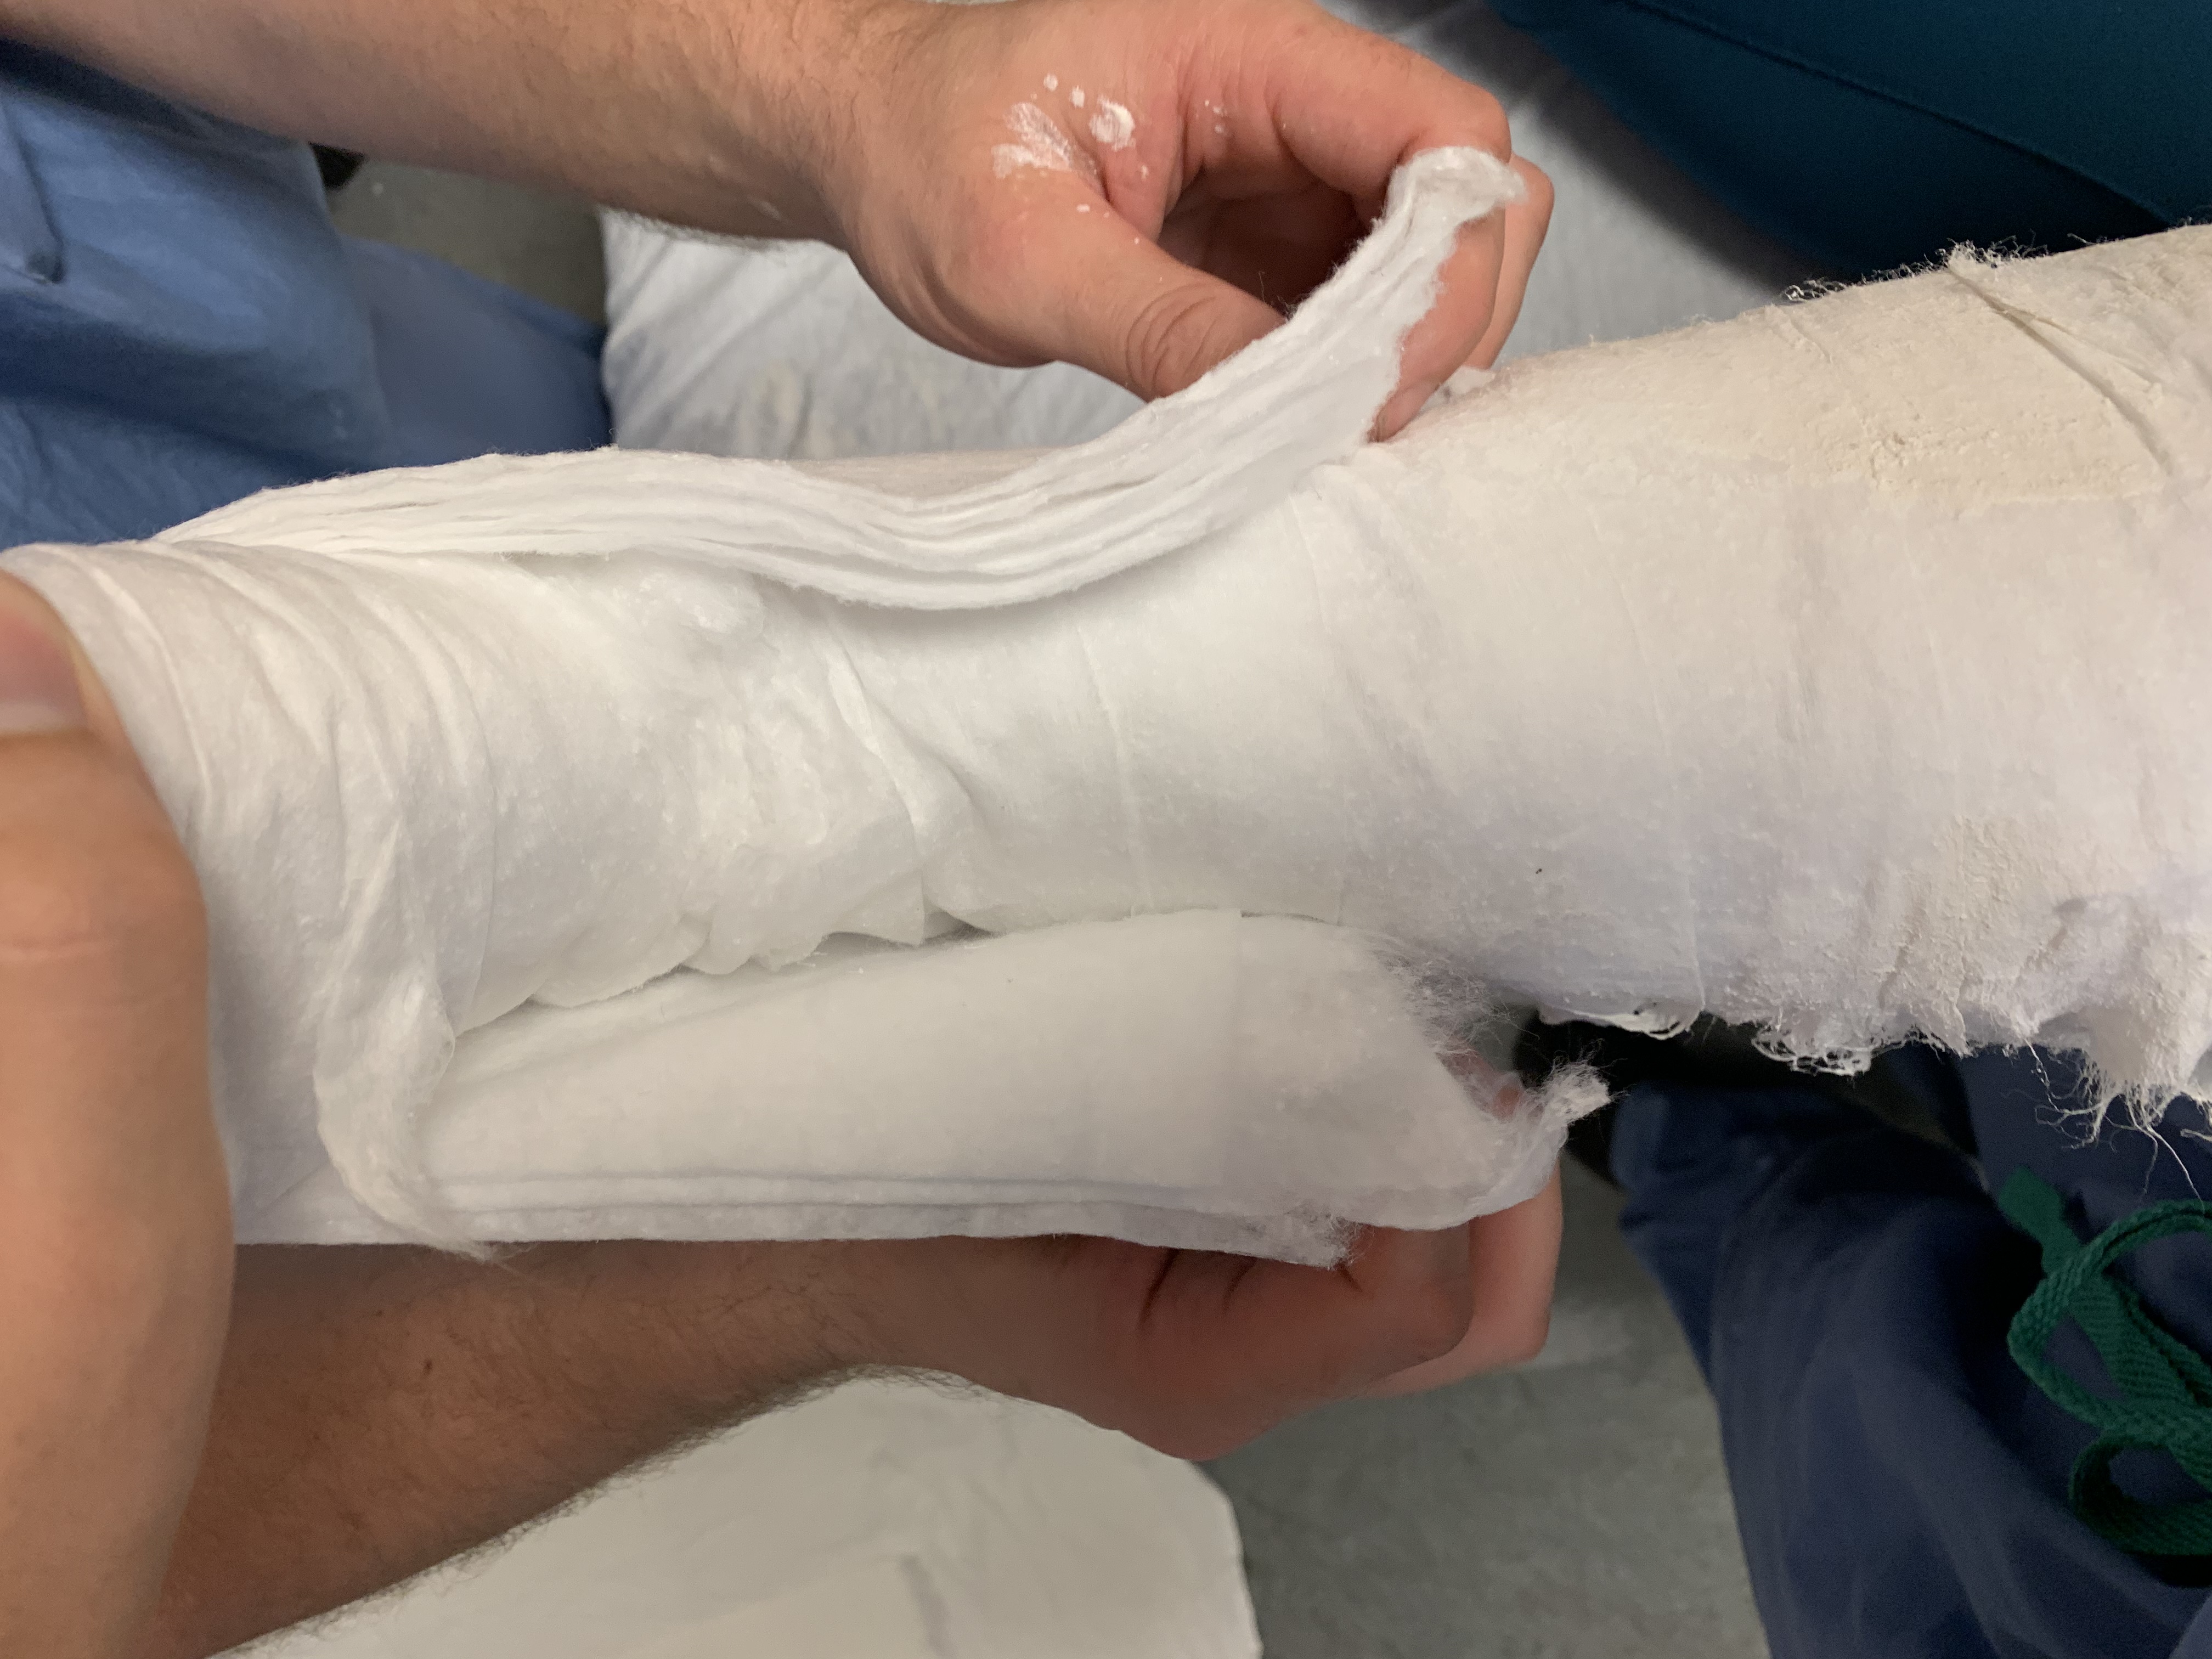
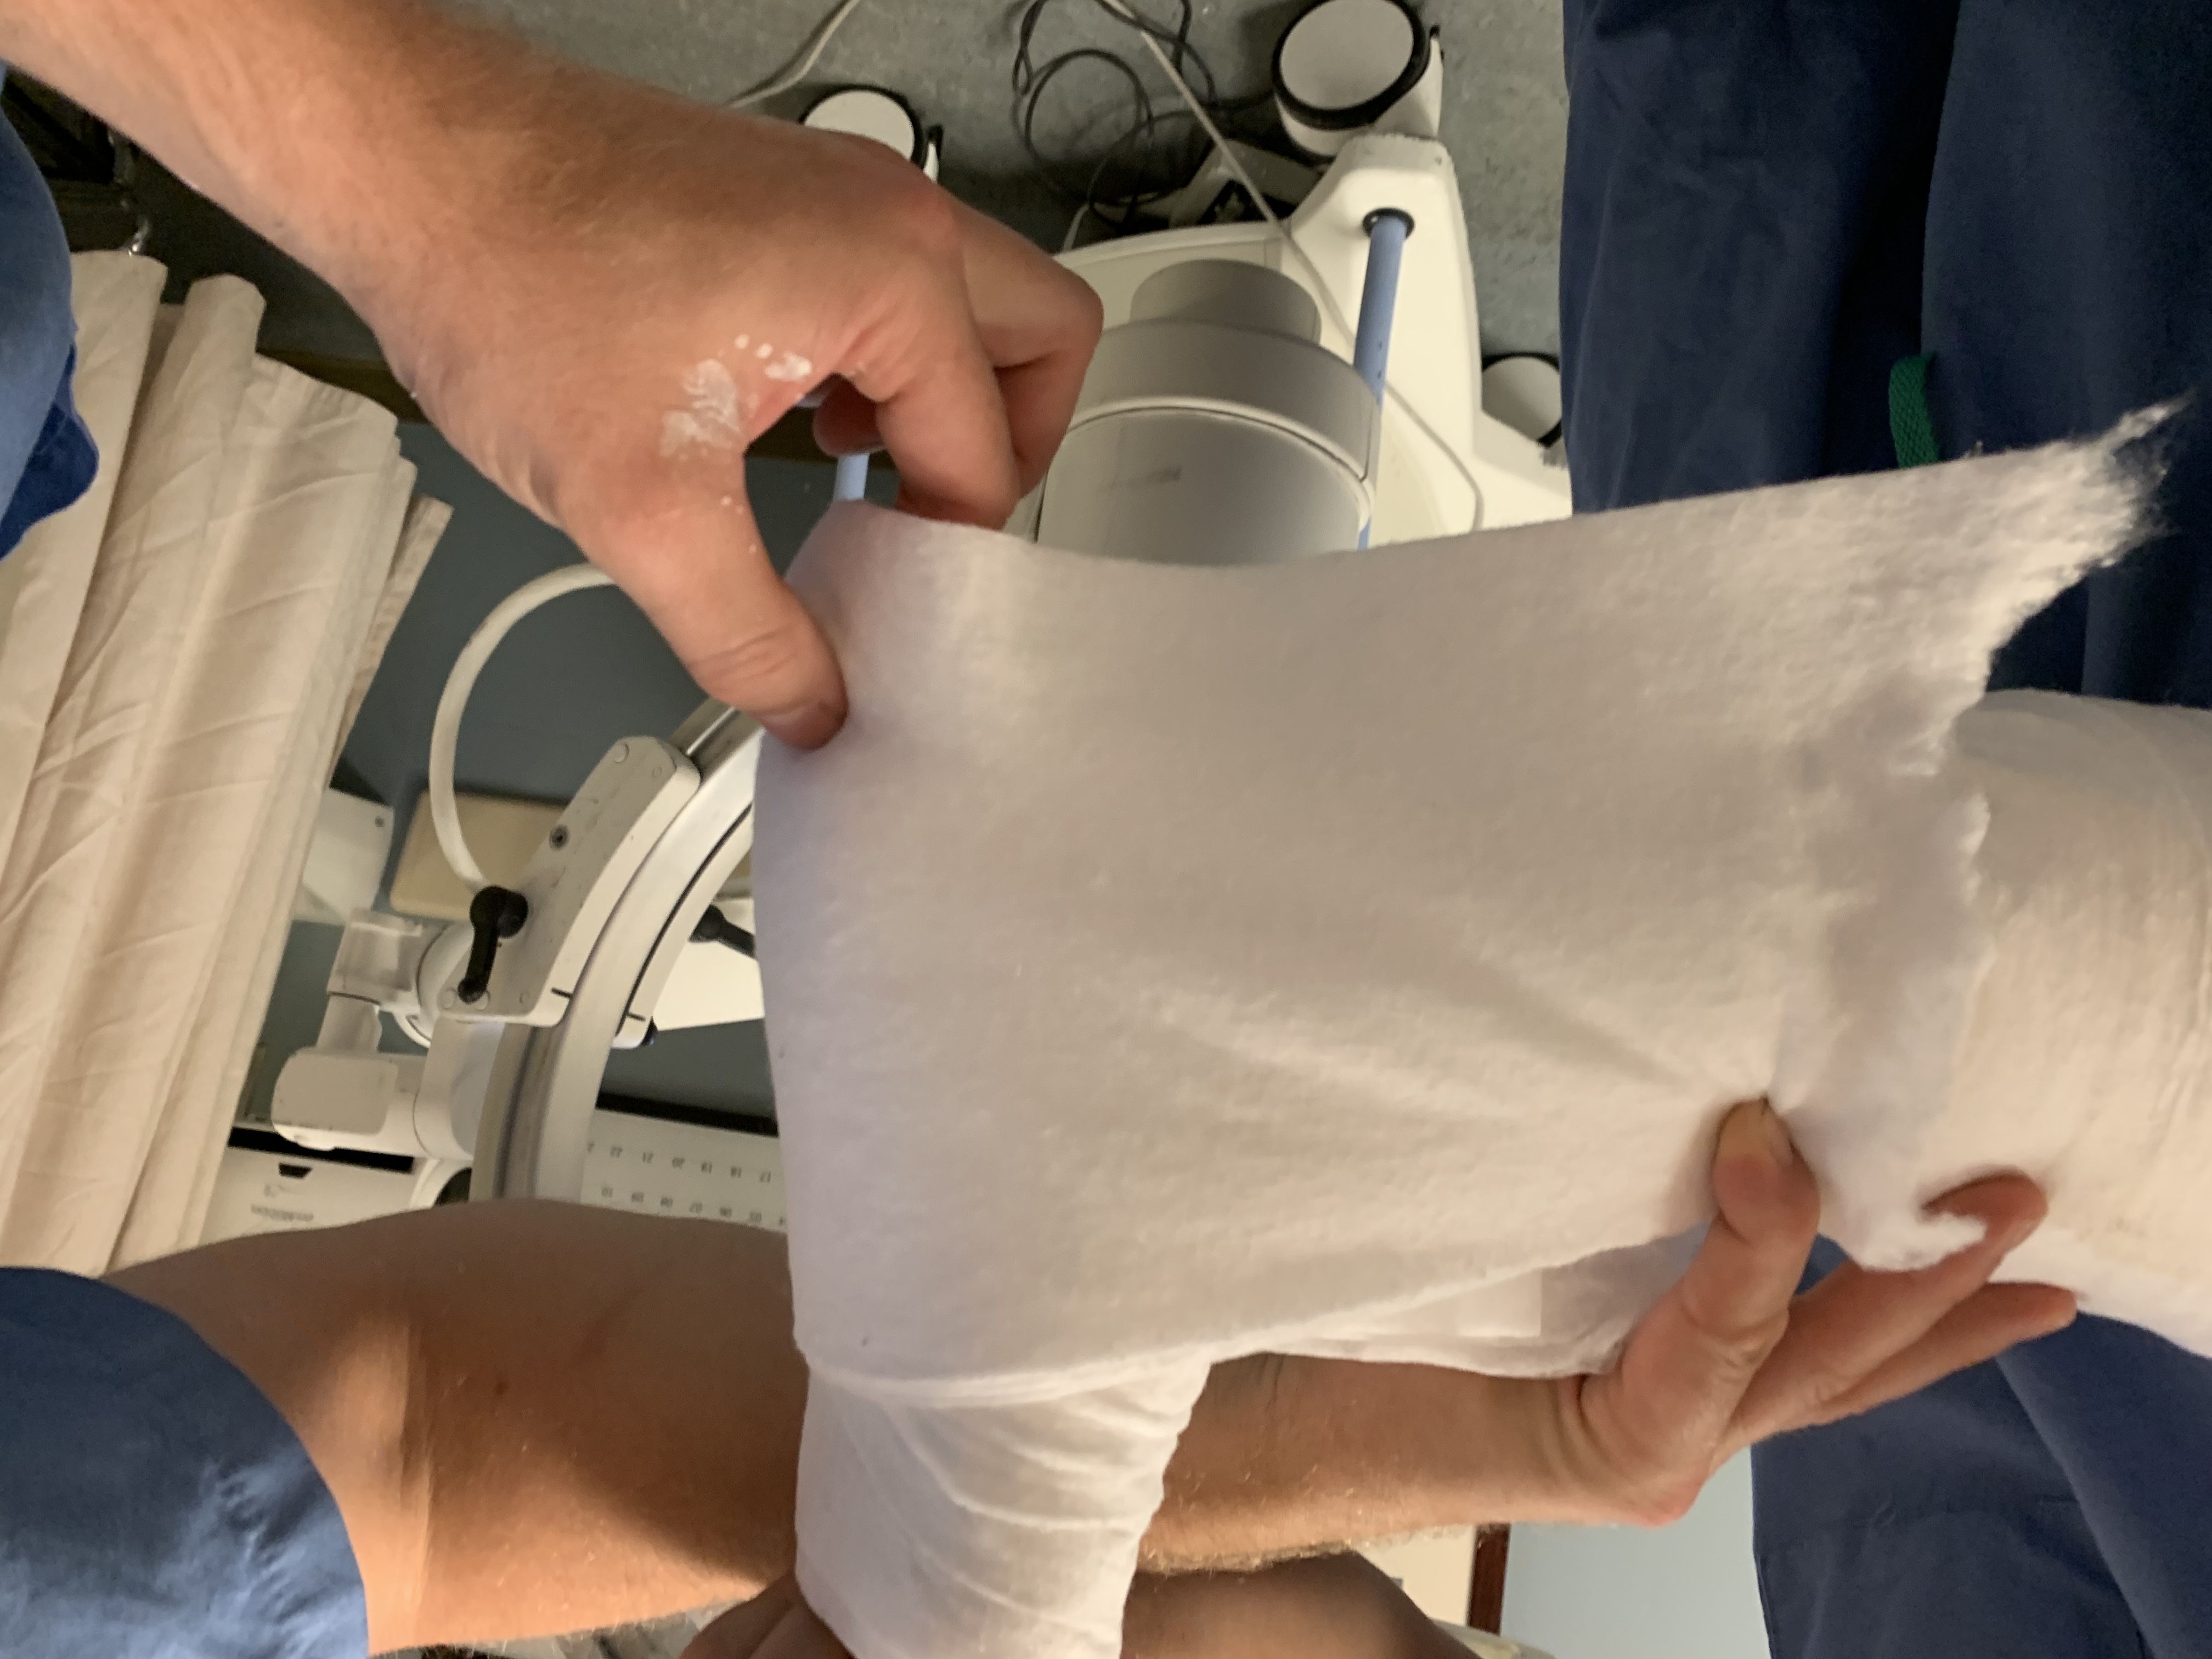
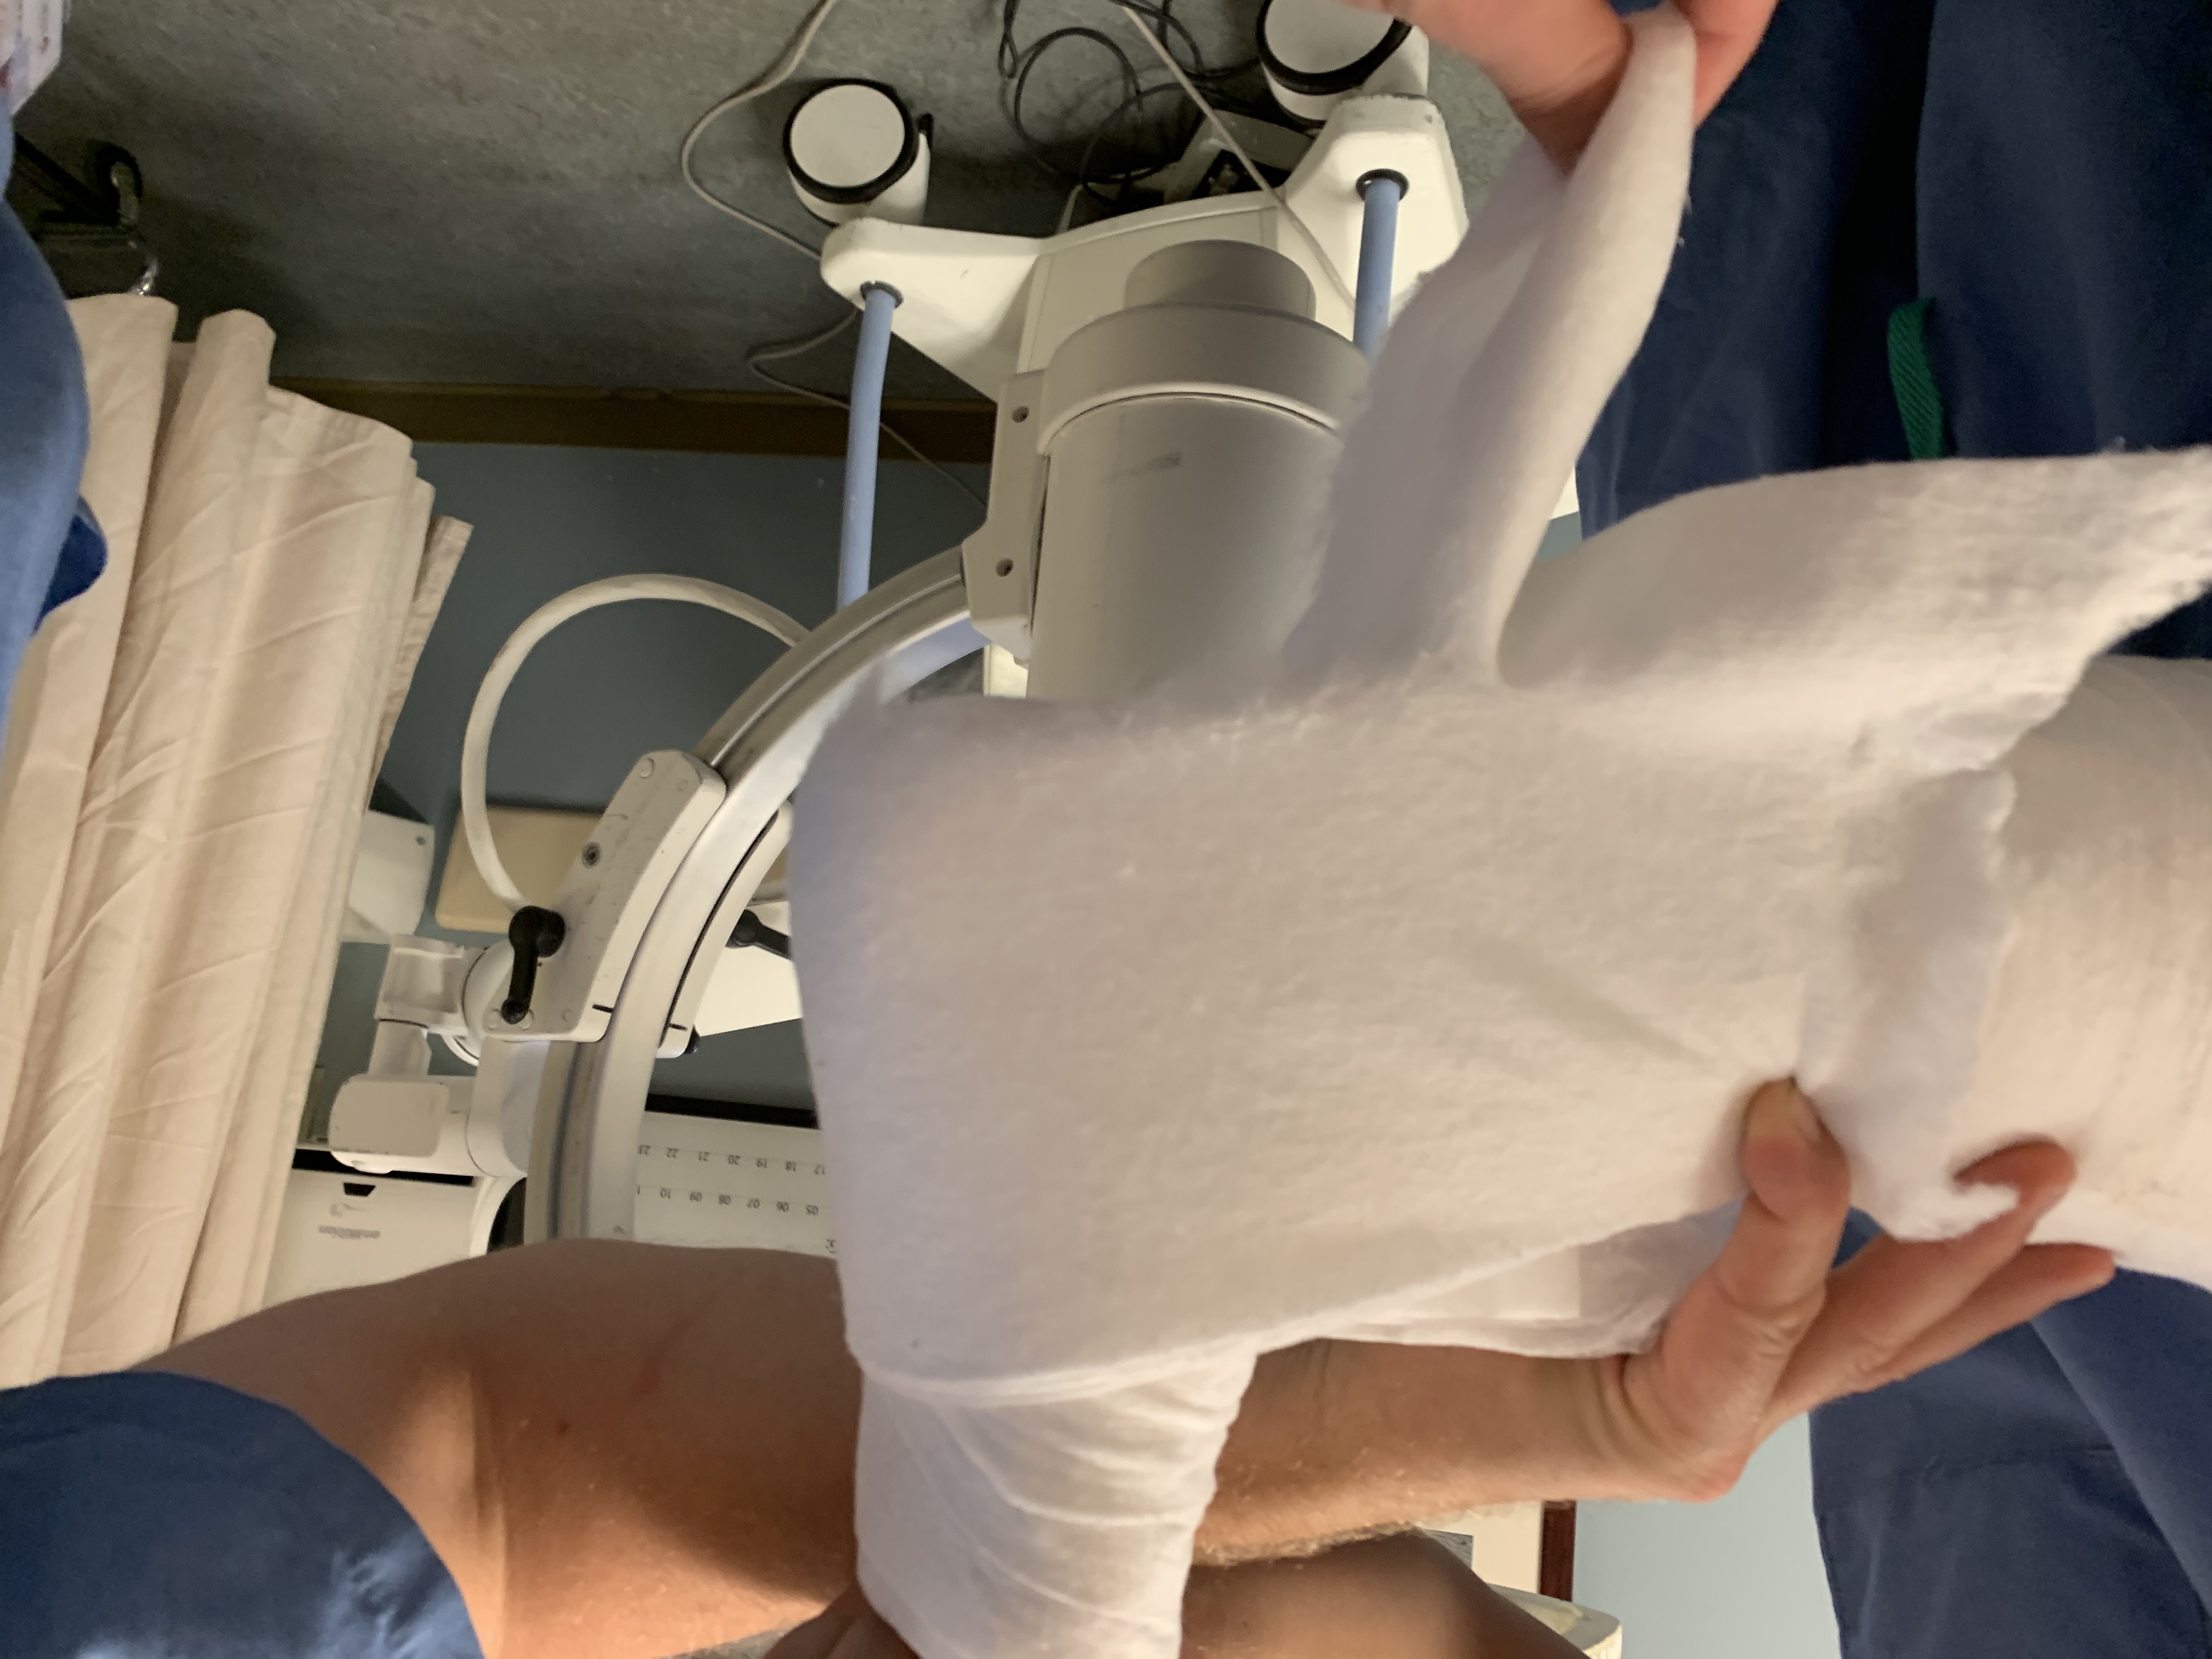
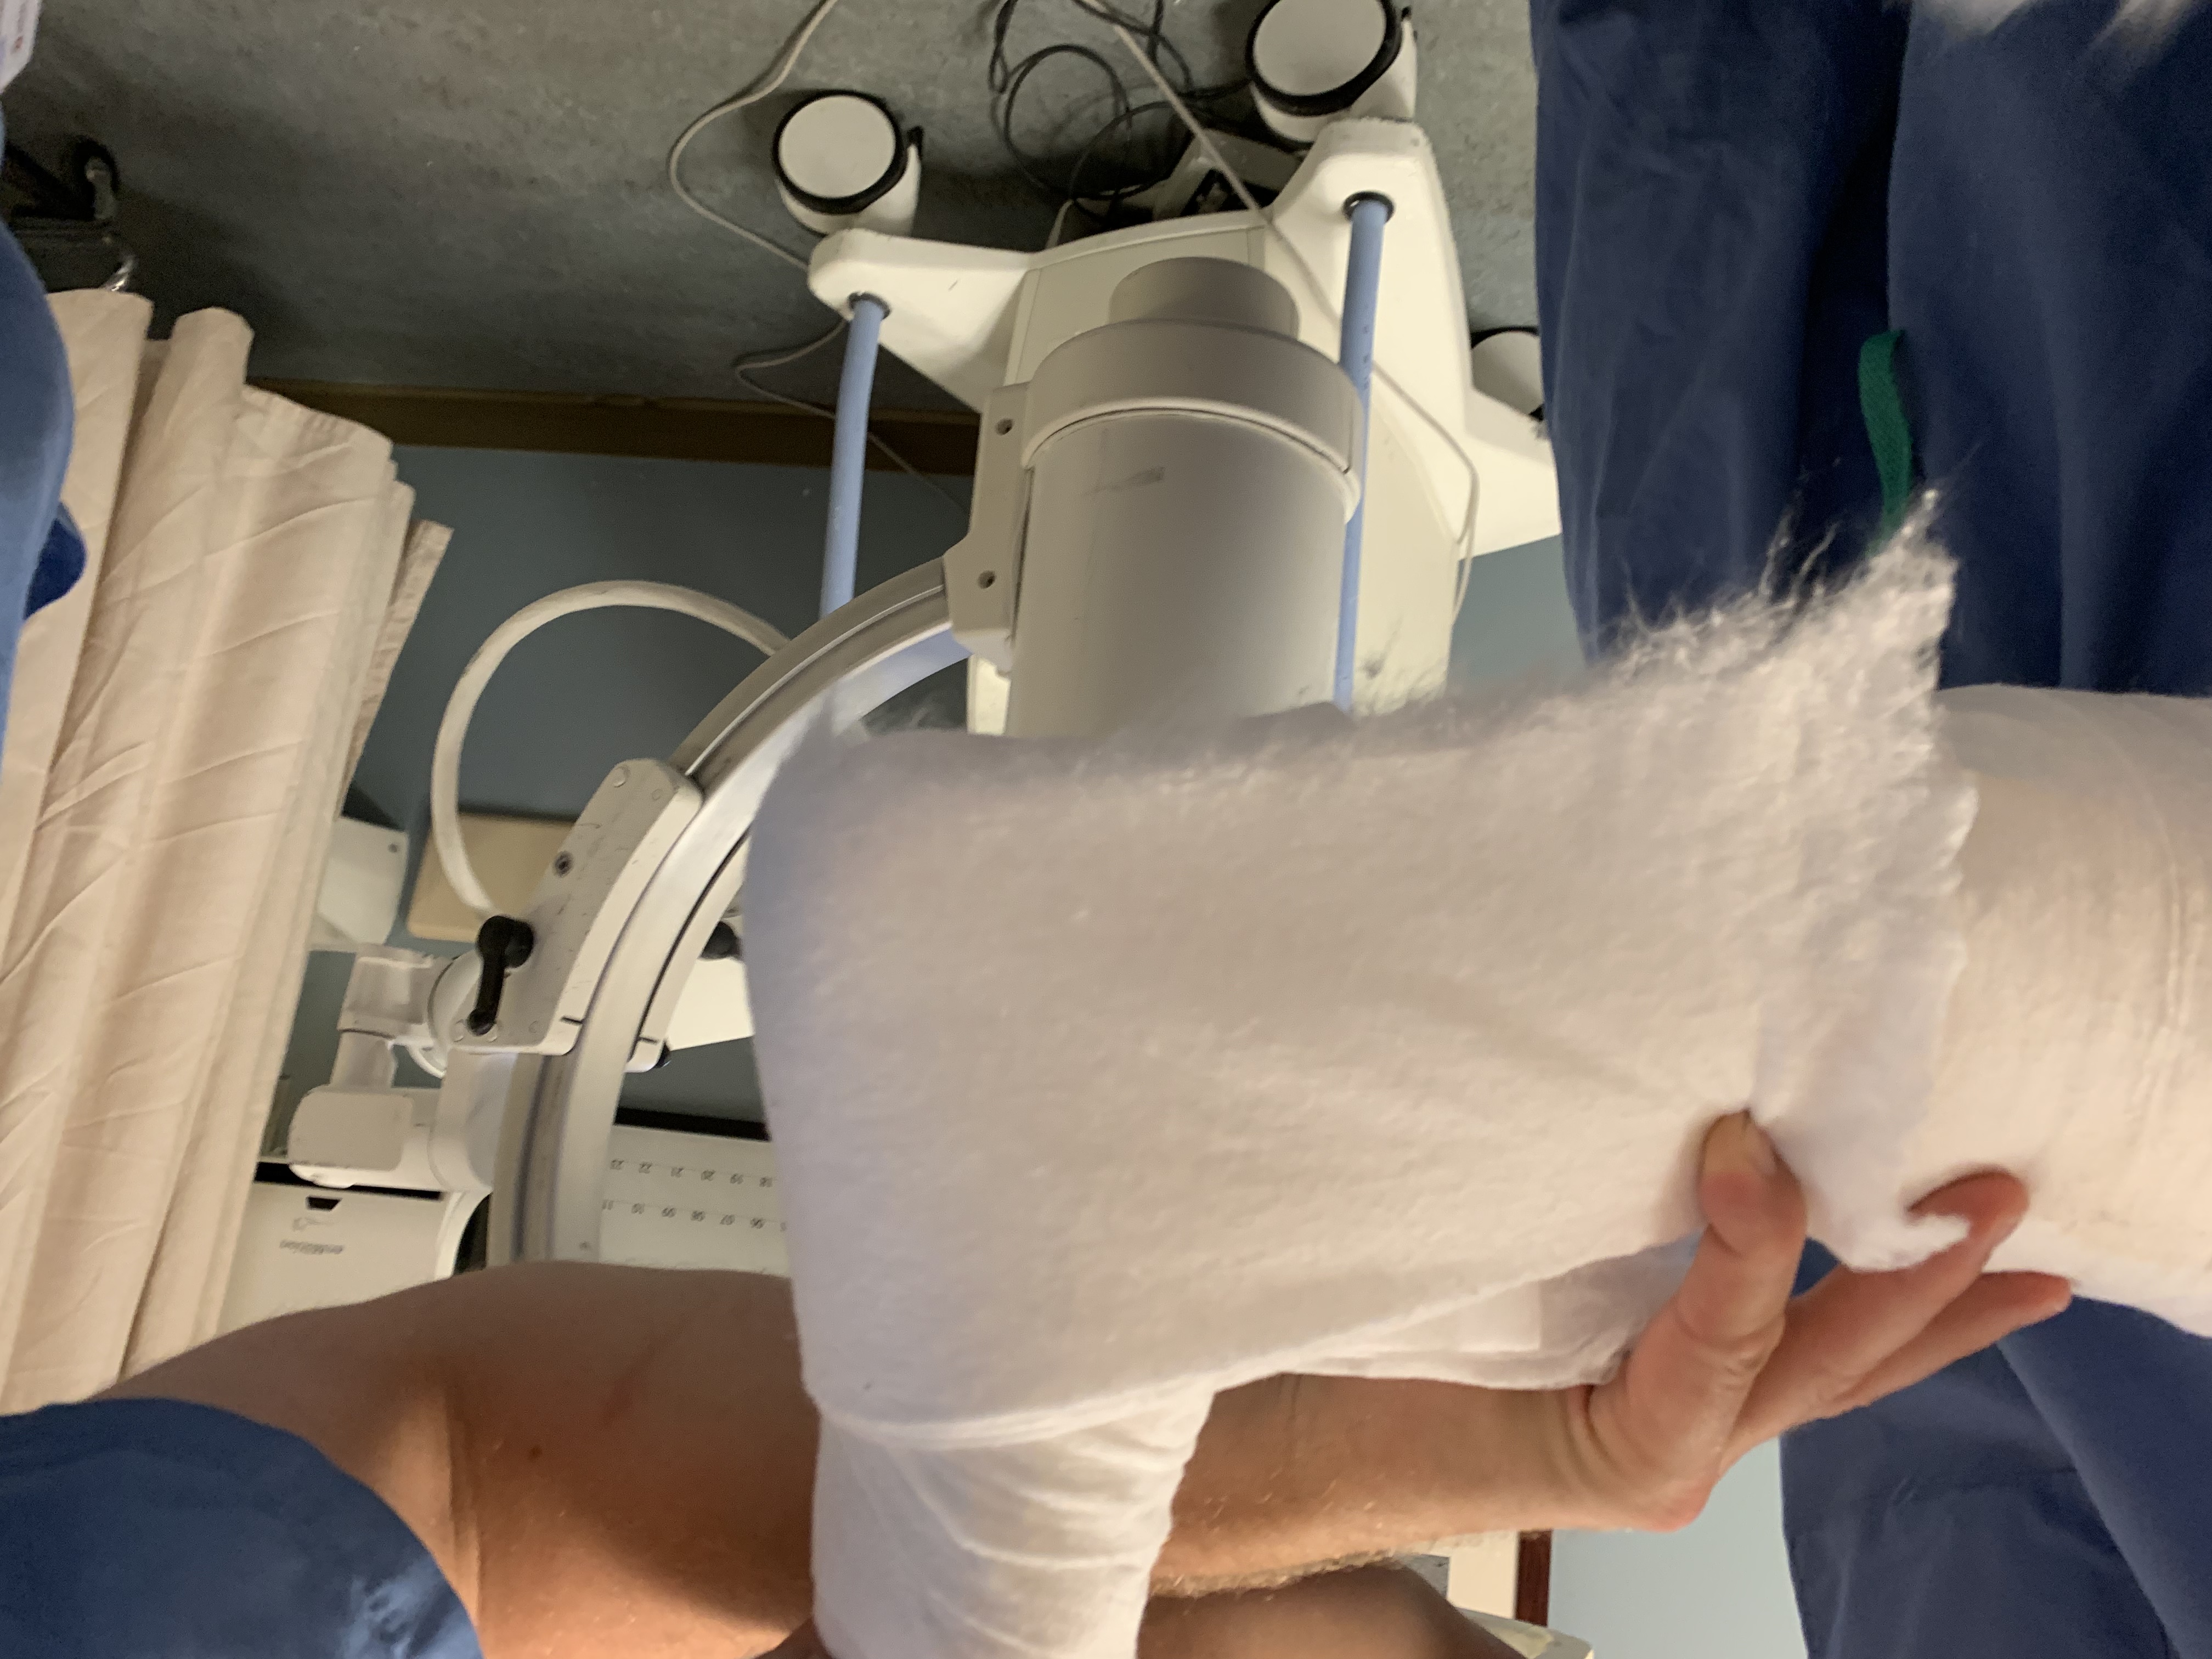
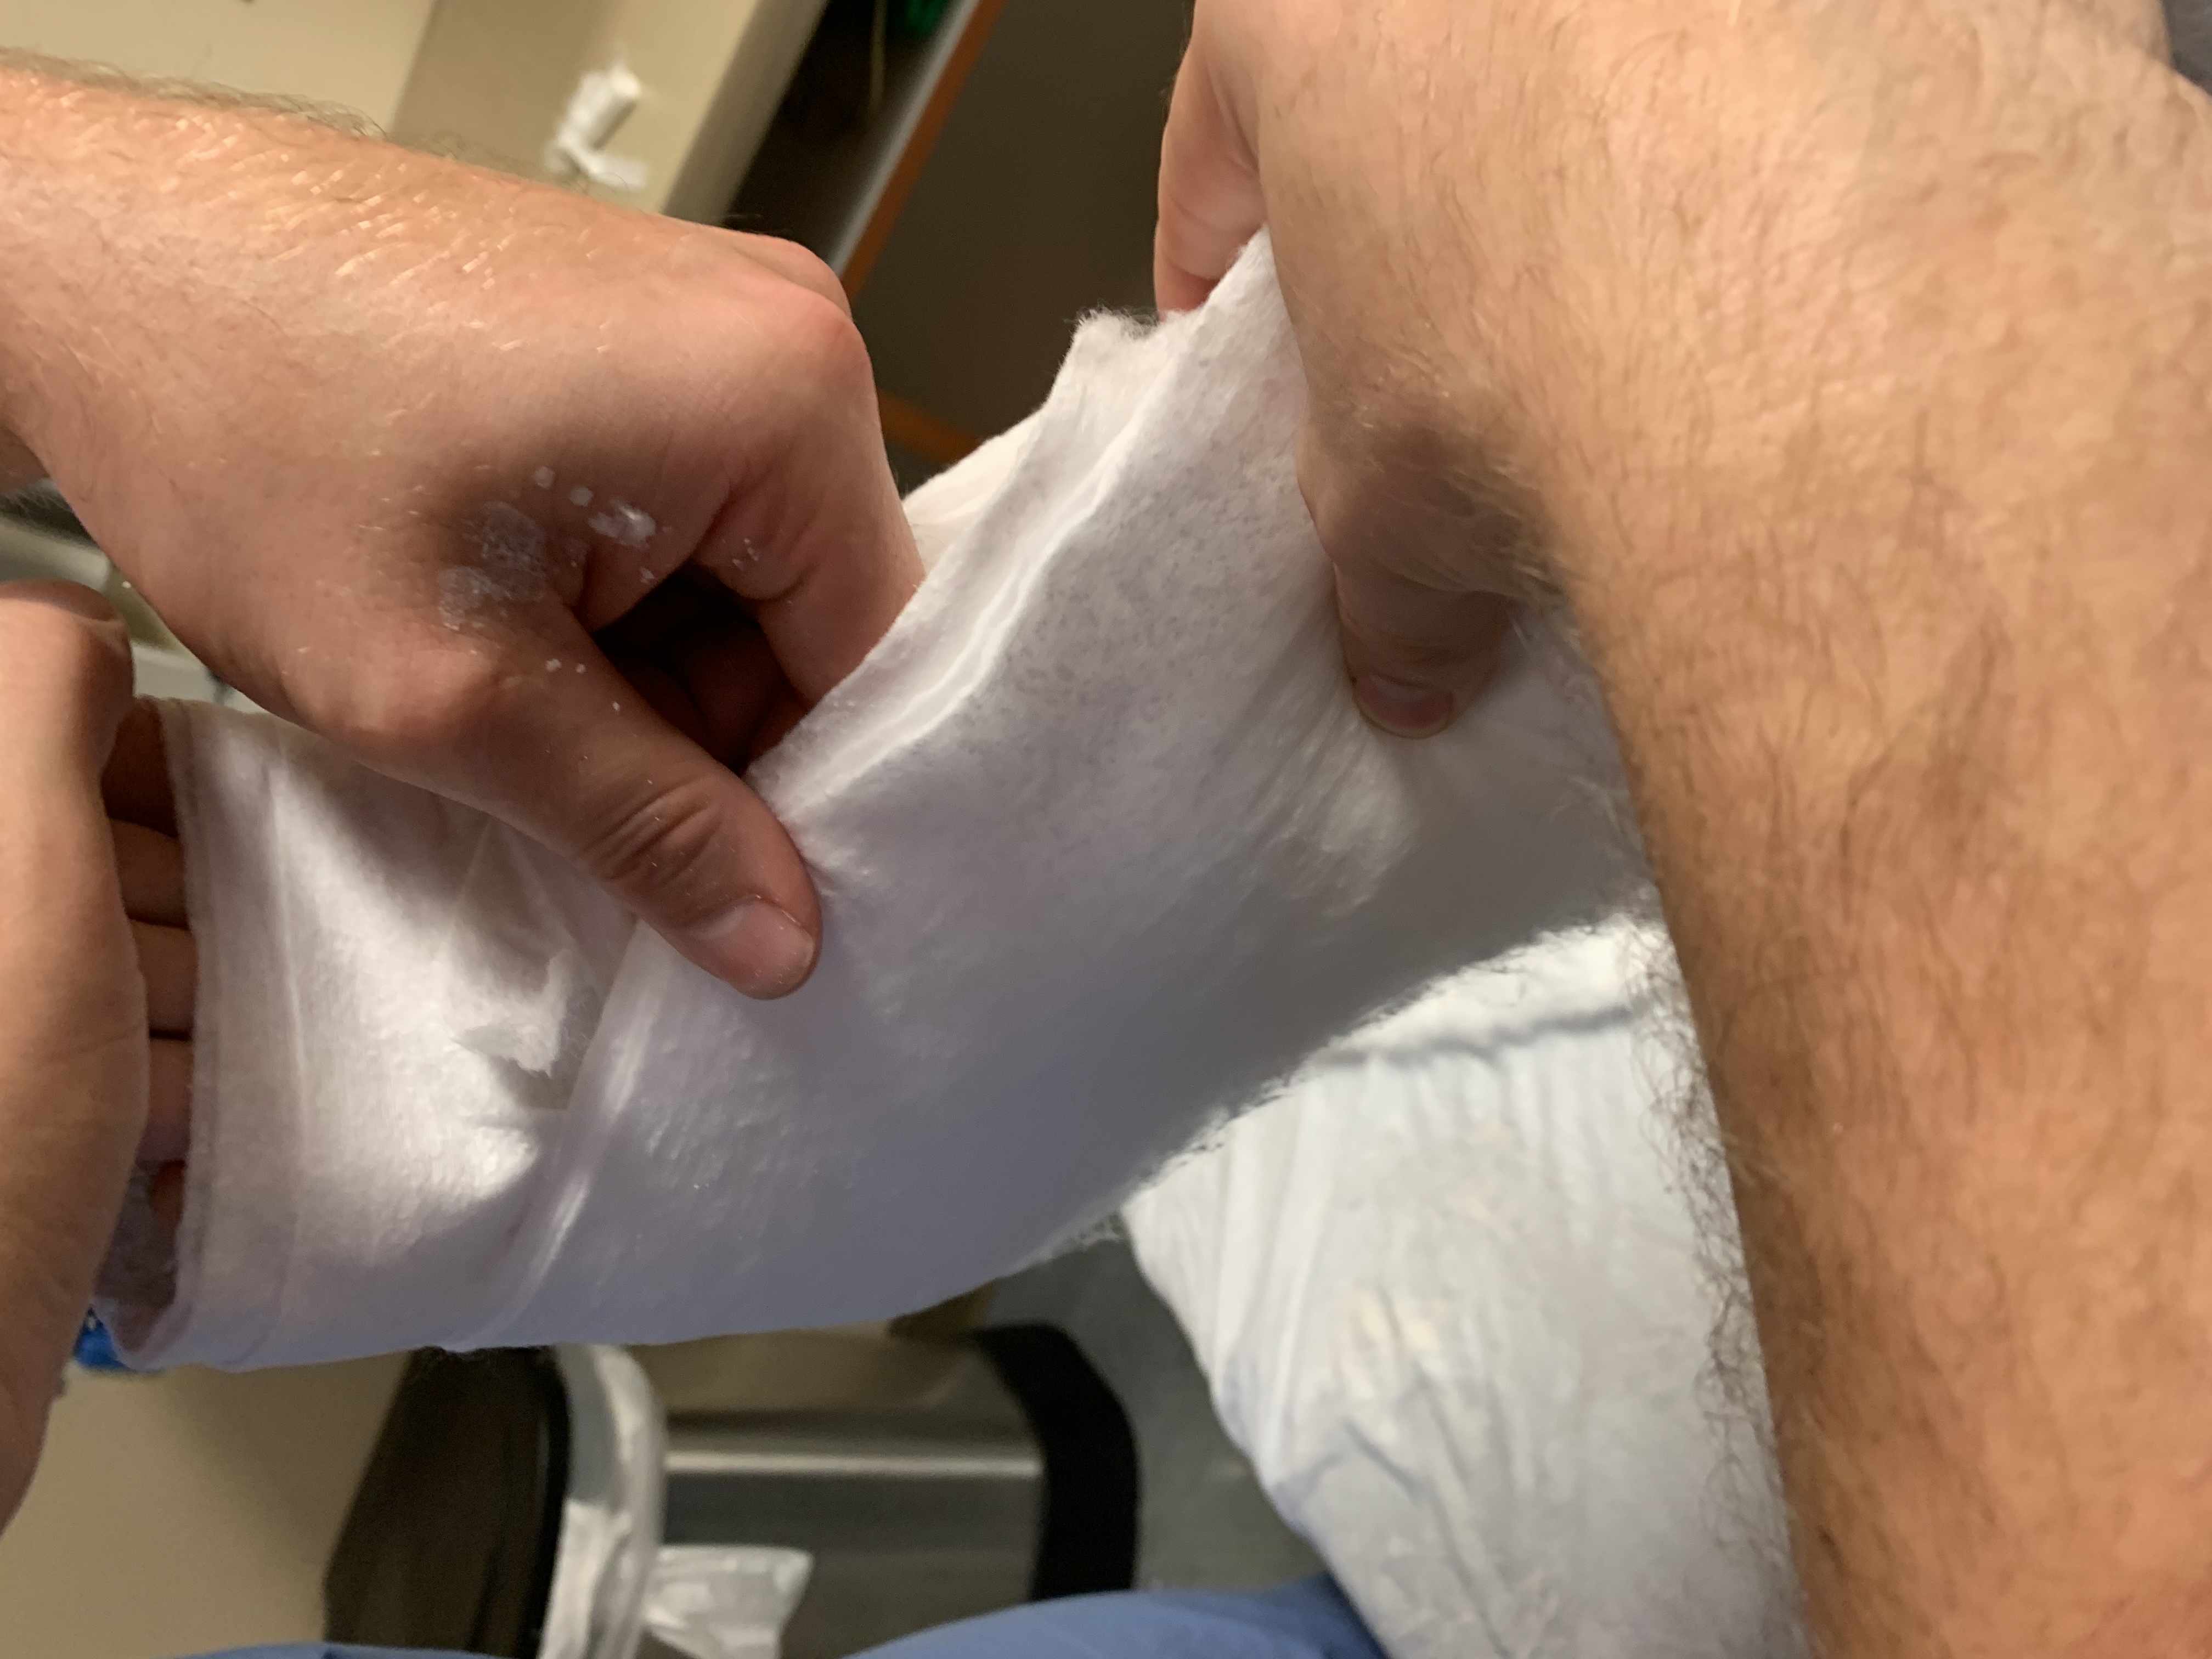
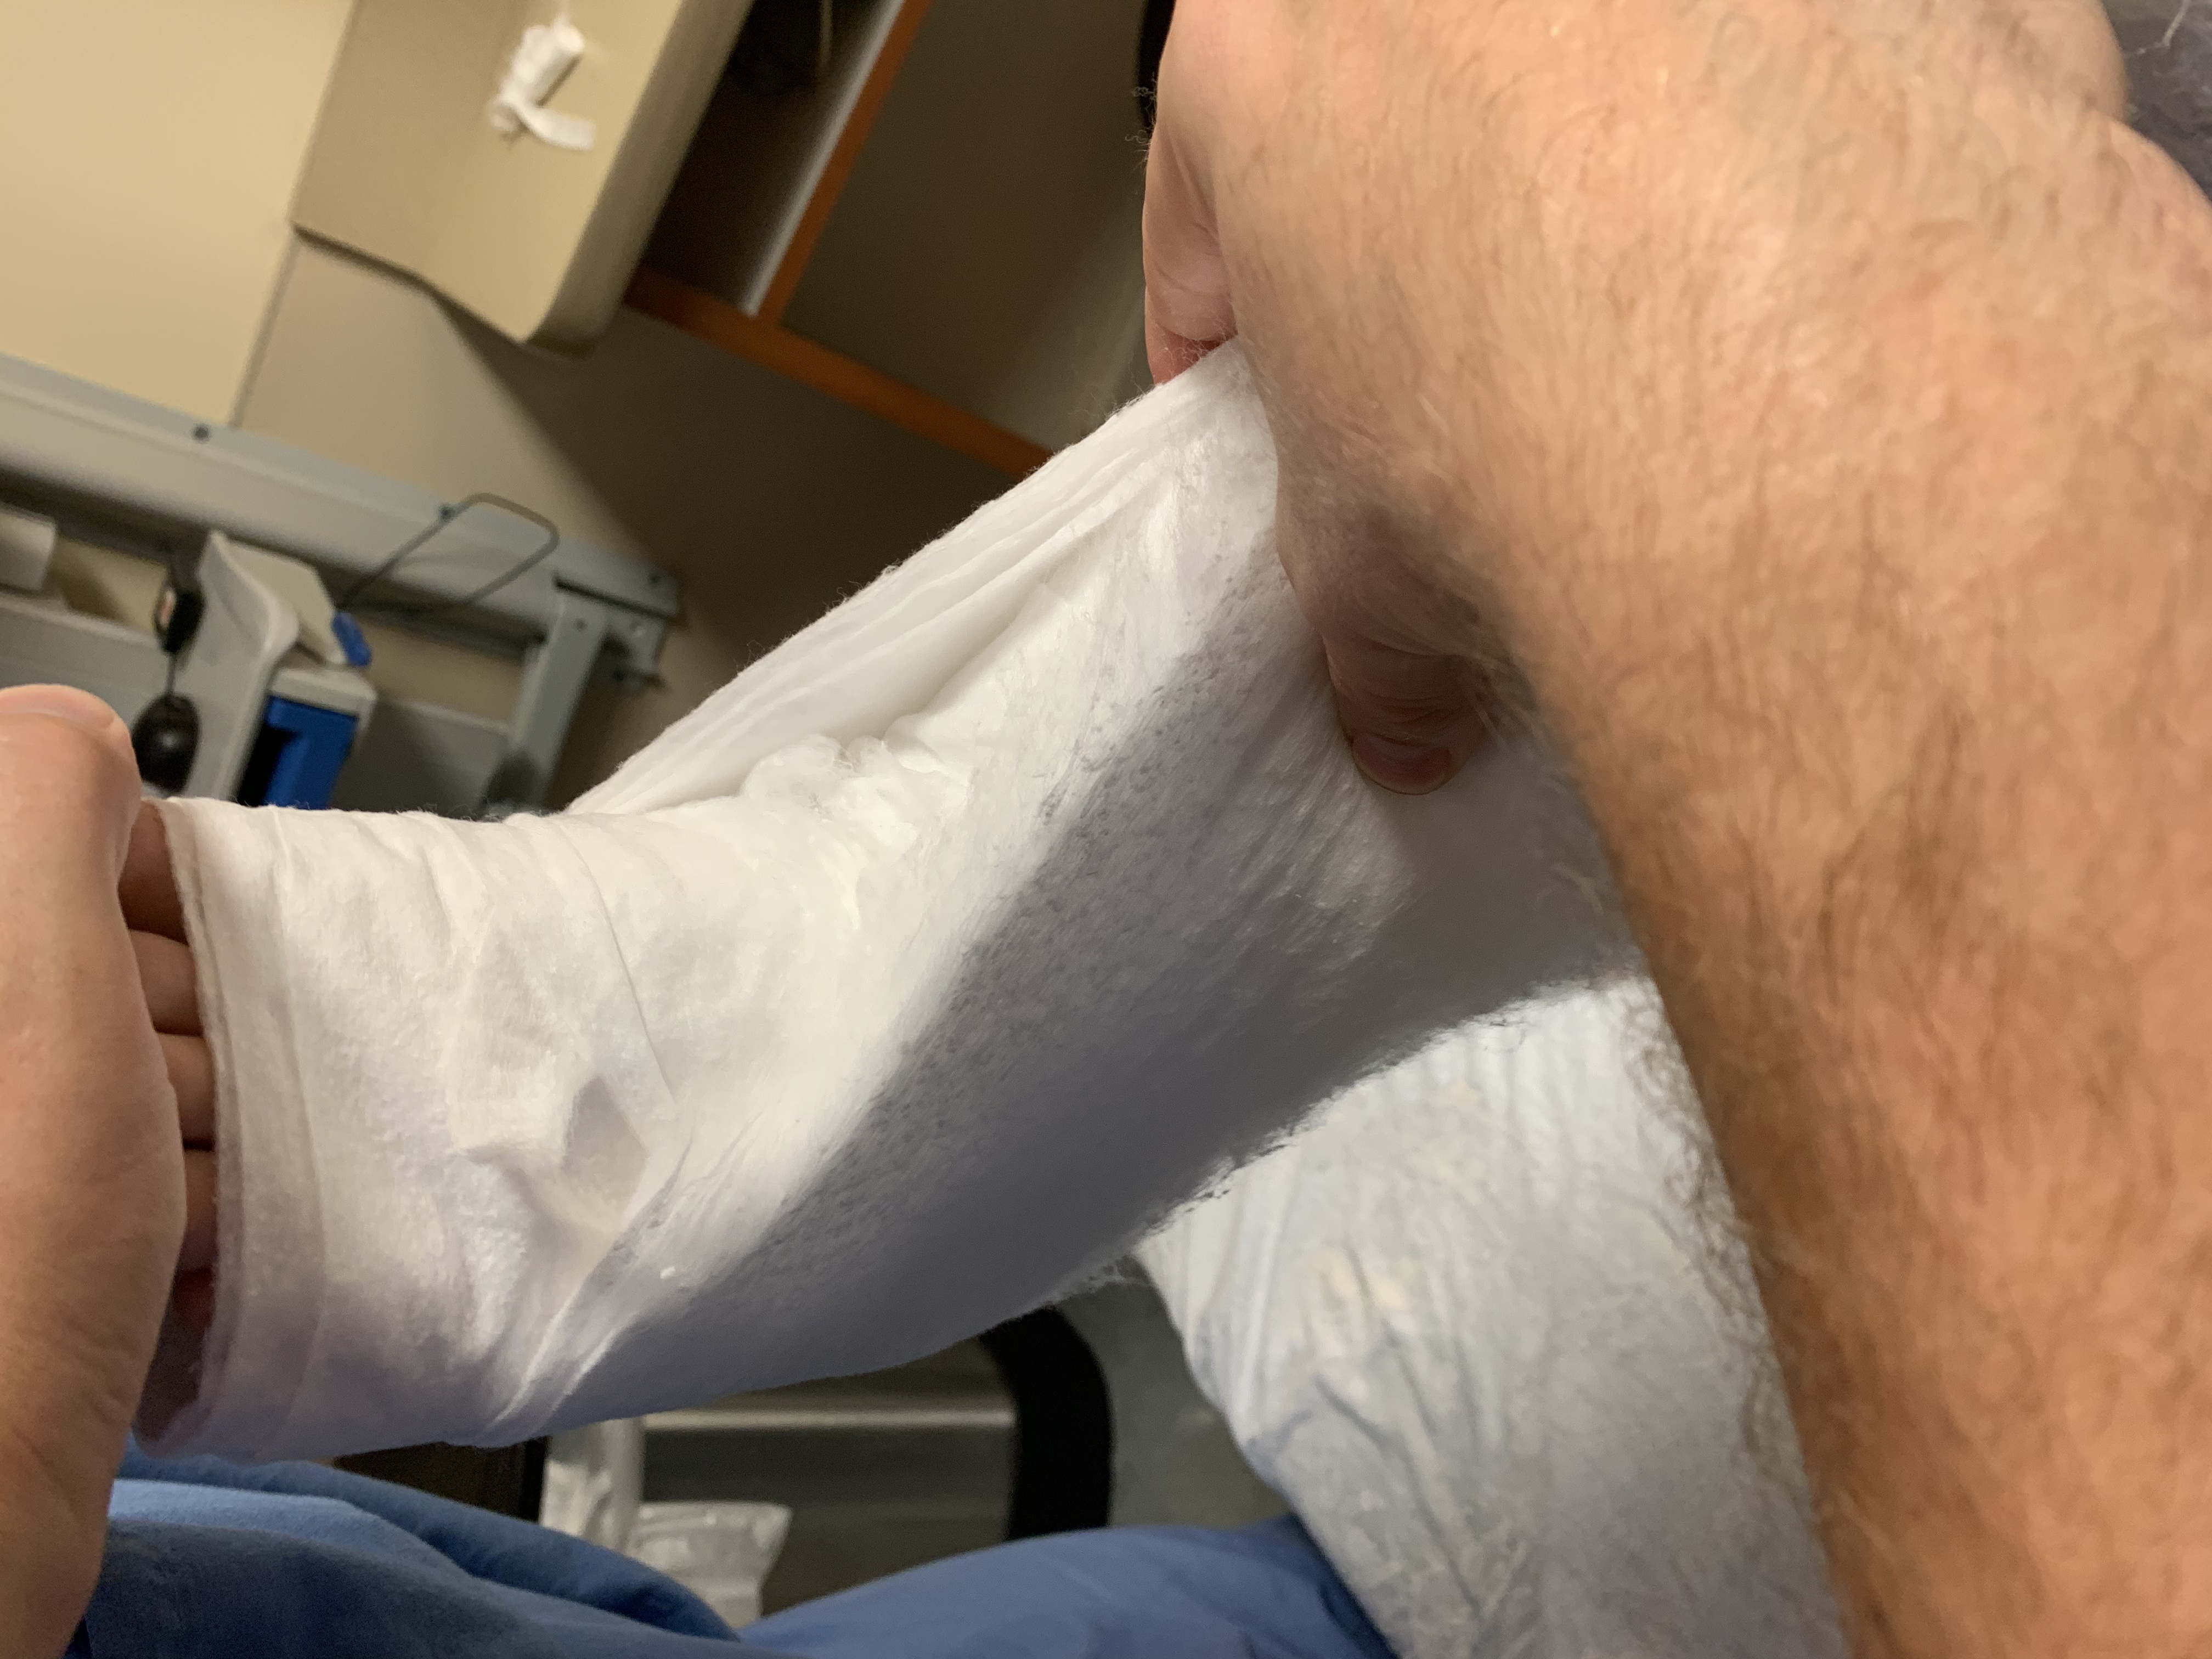
Fold the distal cotton back to provide extra padding at the toes. Fold the cotton in a way that matches the cascade of the toes for extra style points.
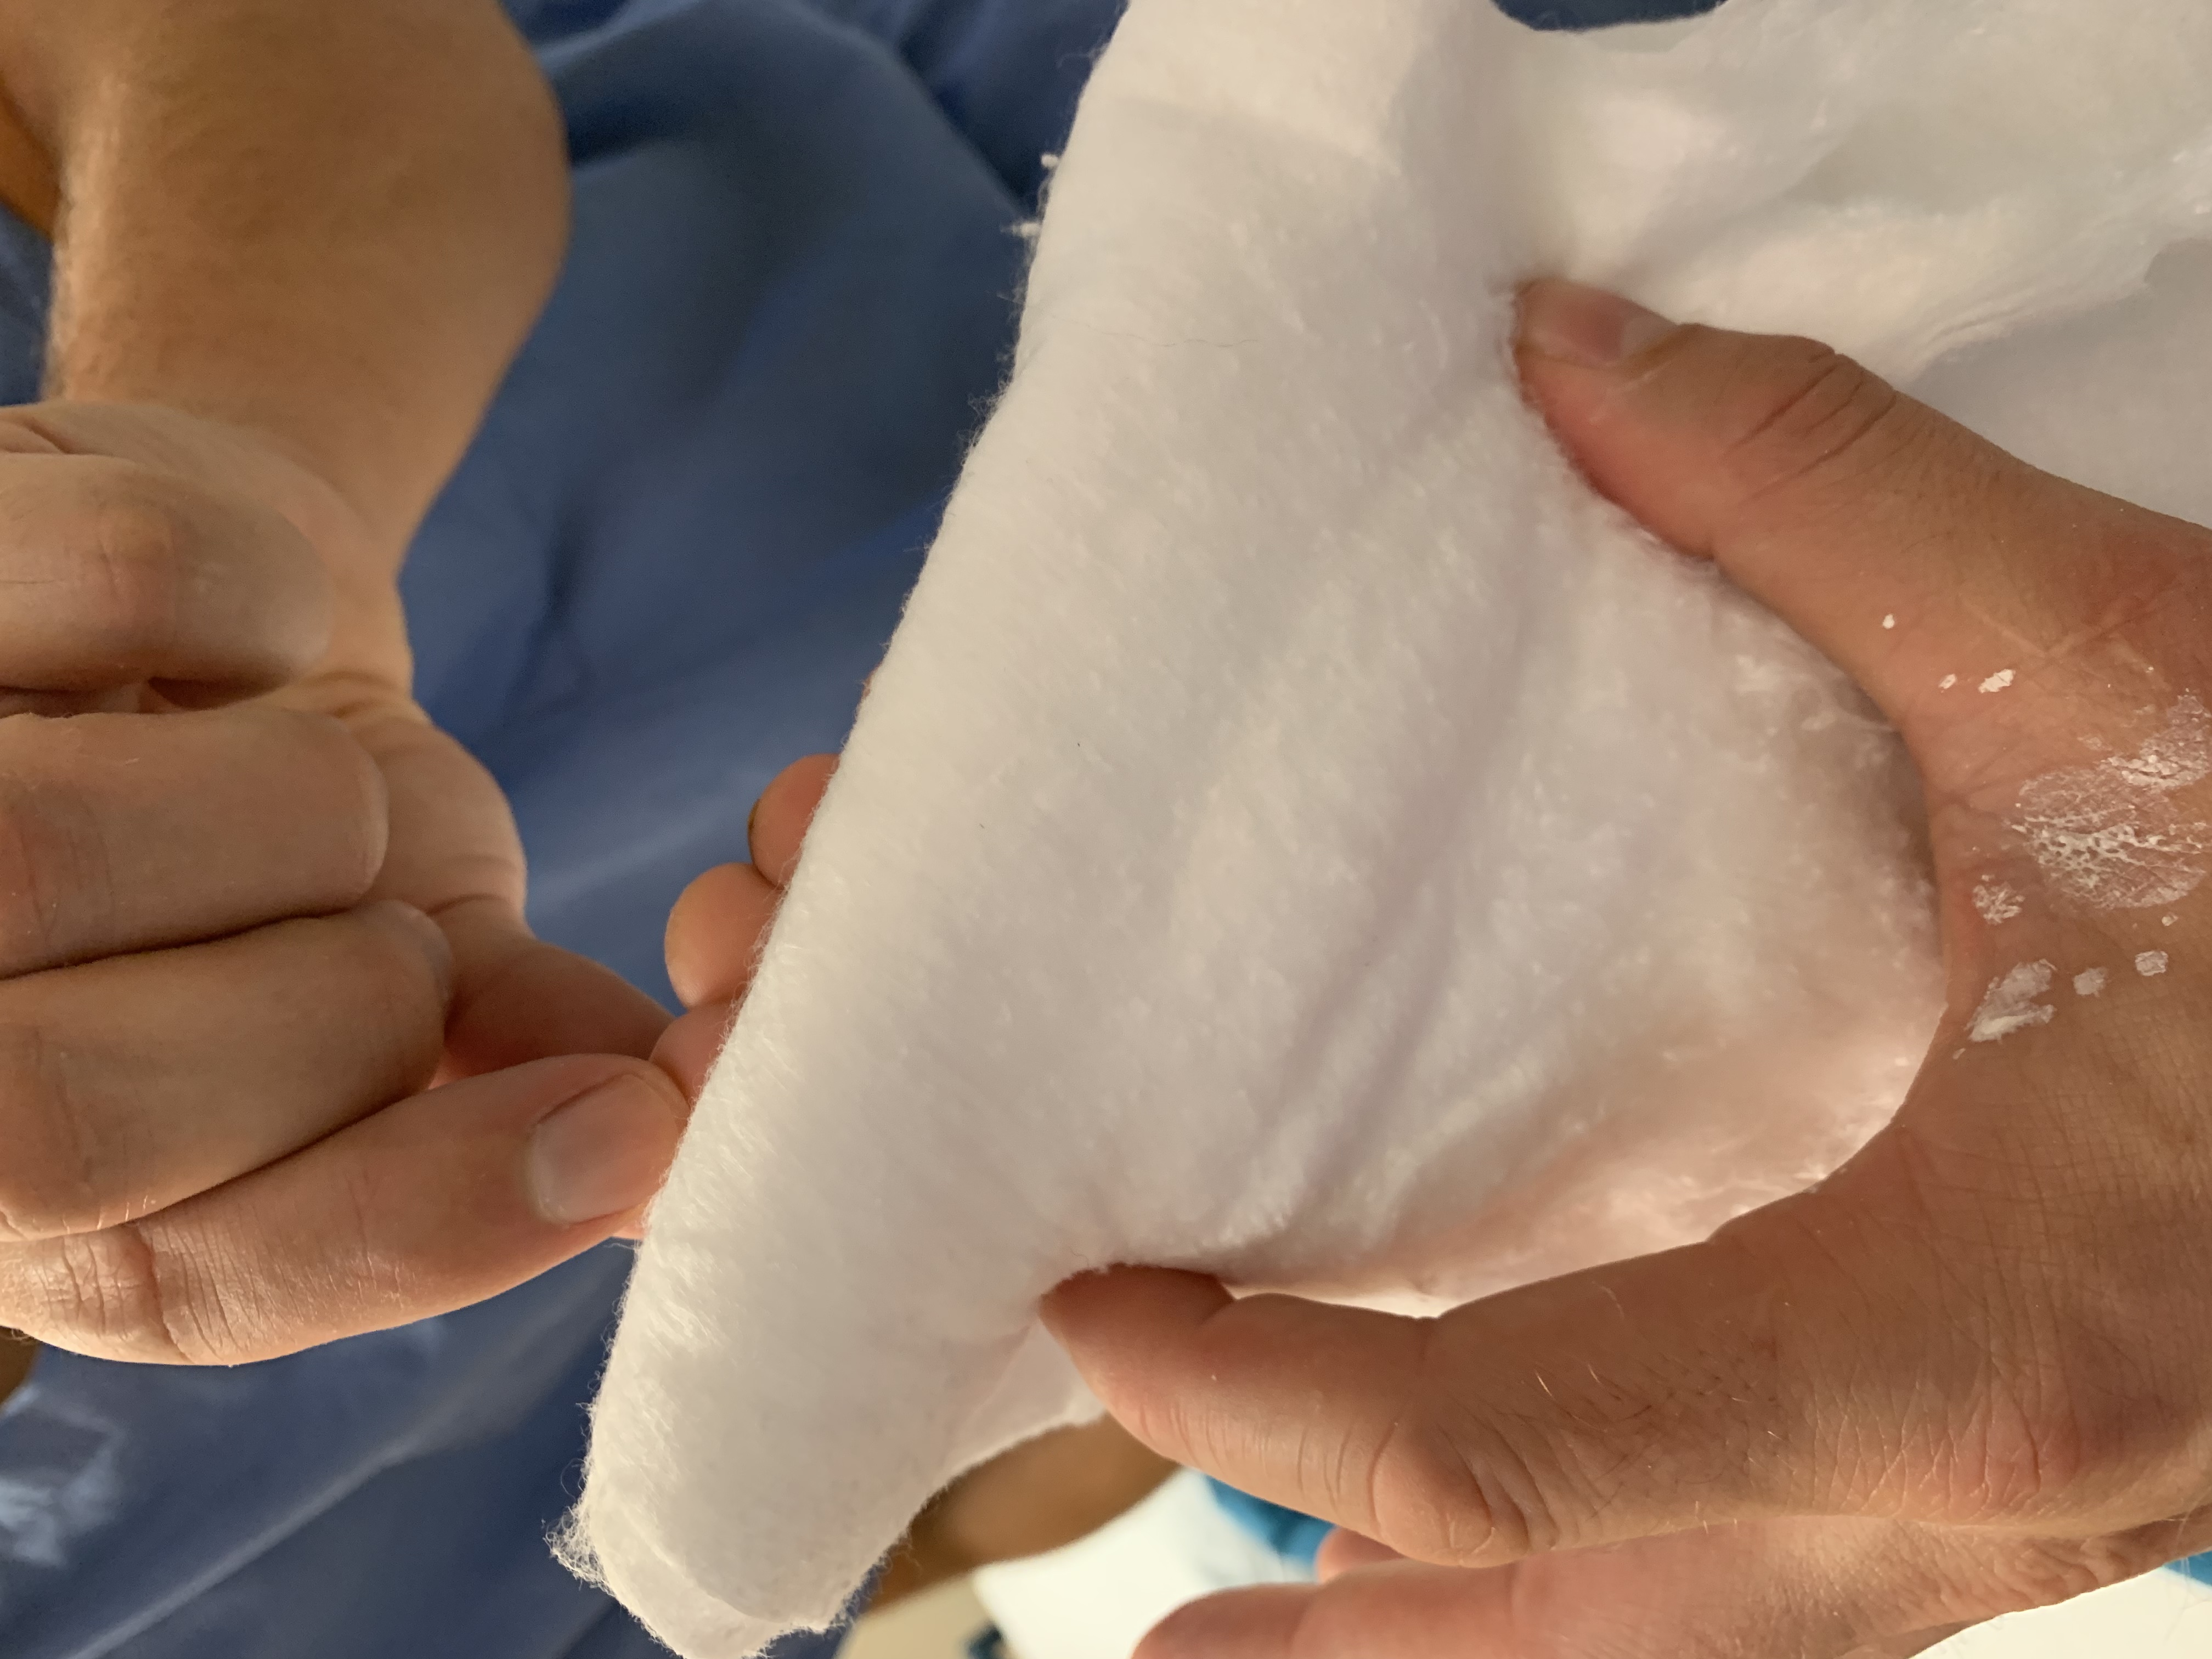
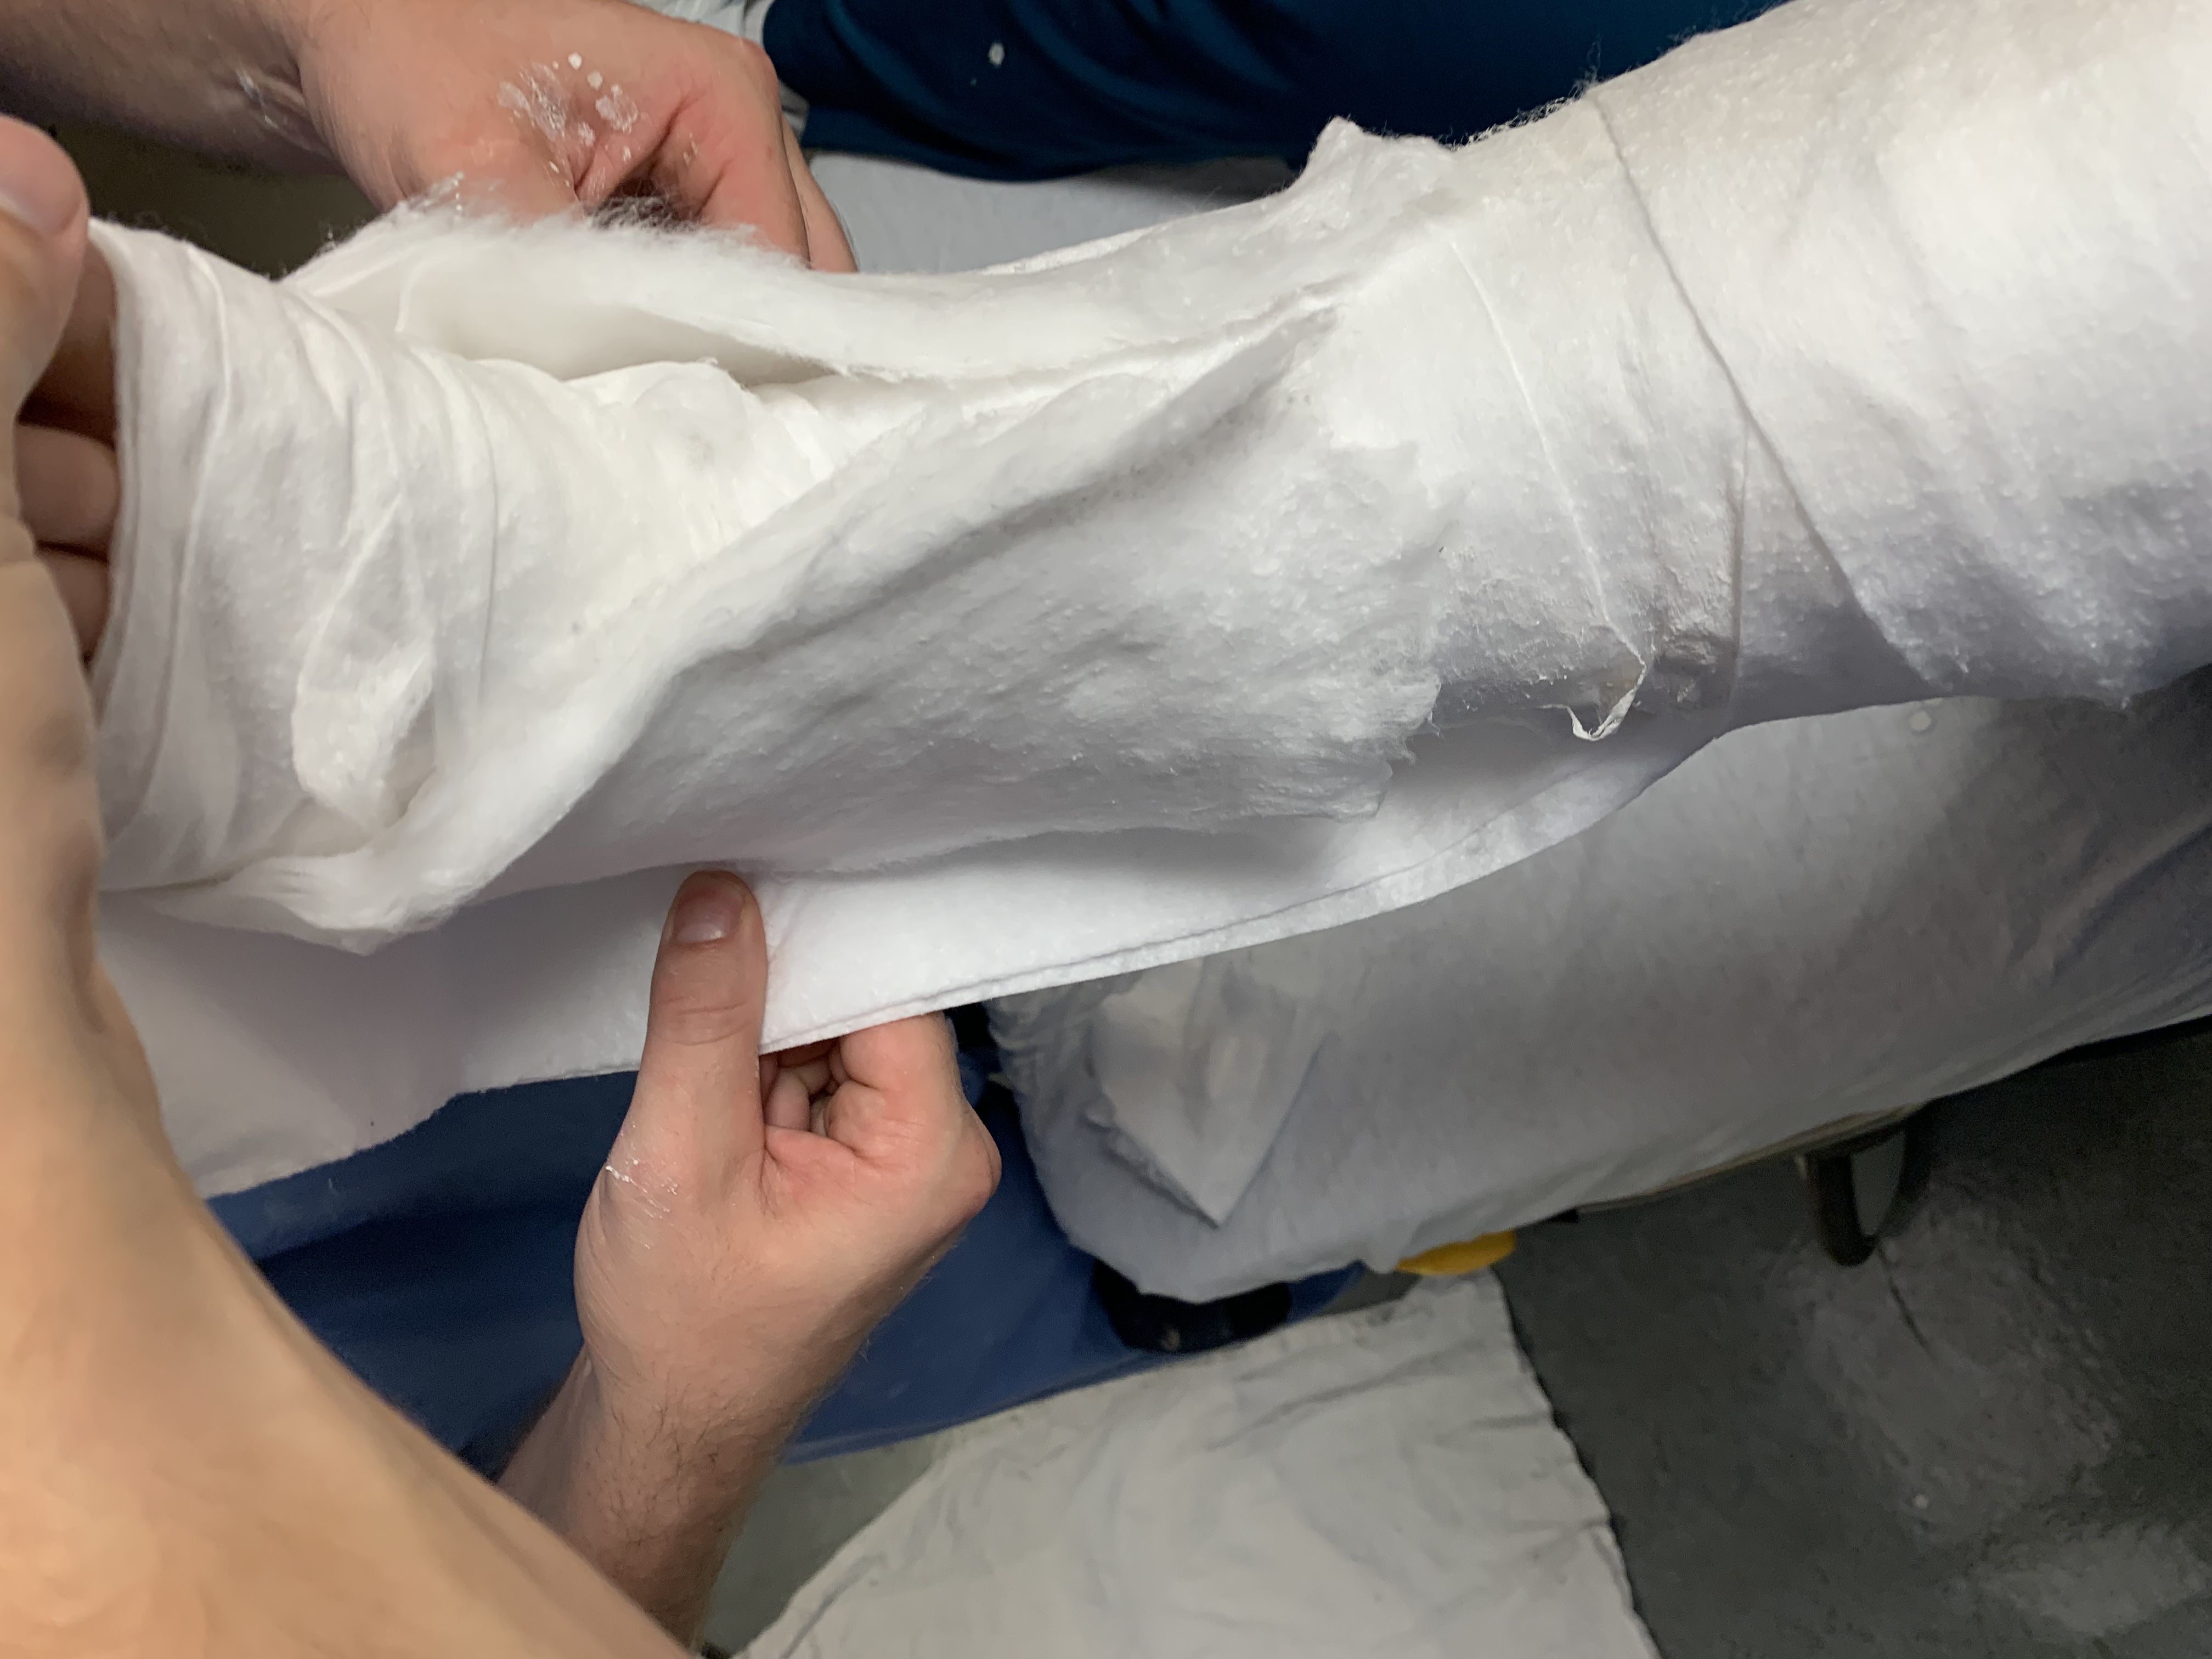
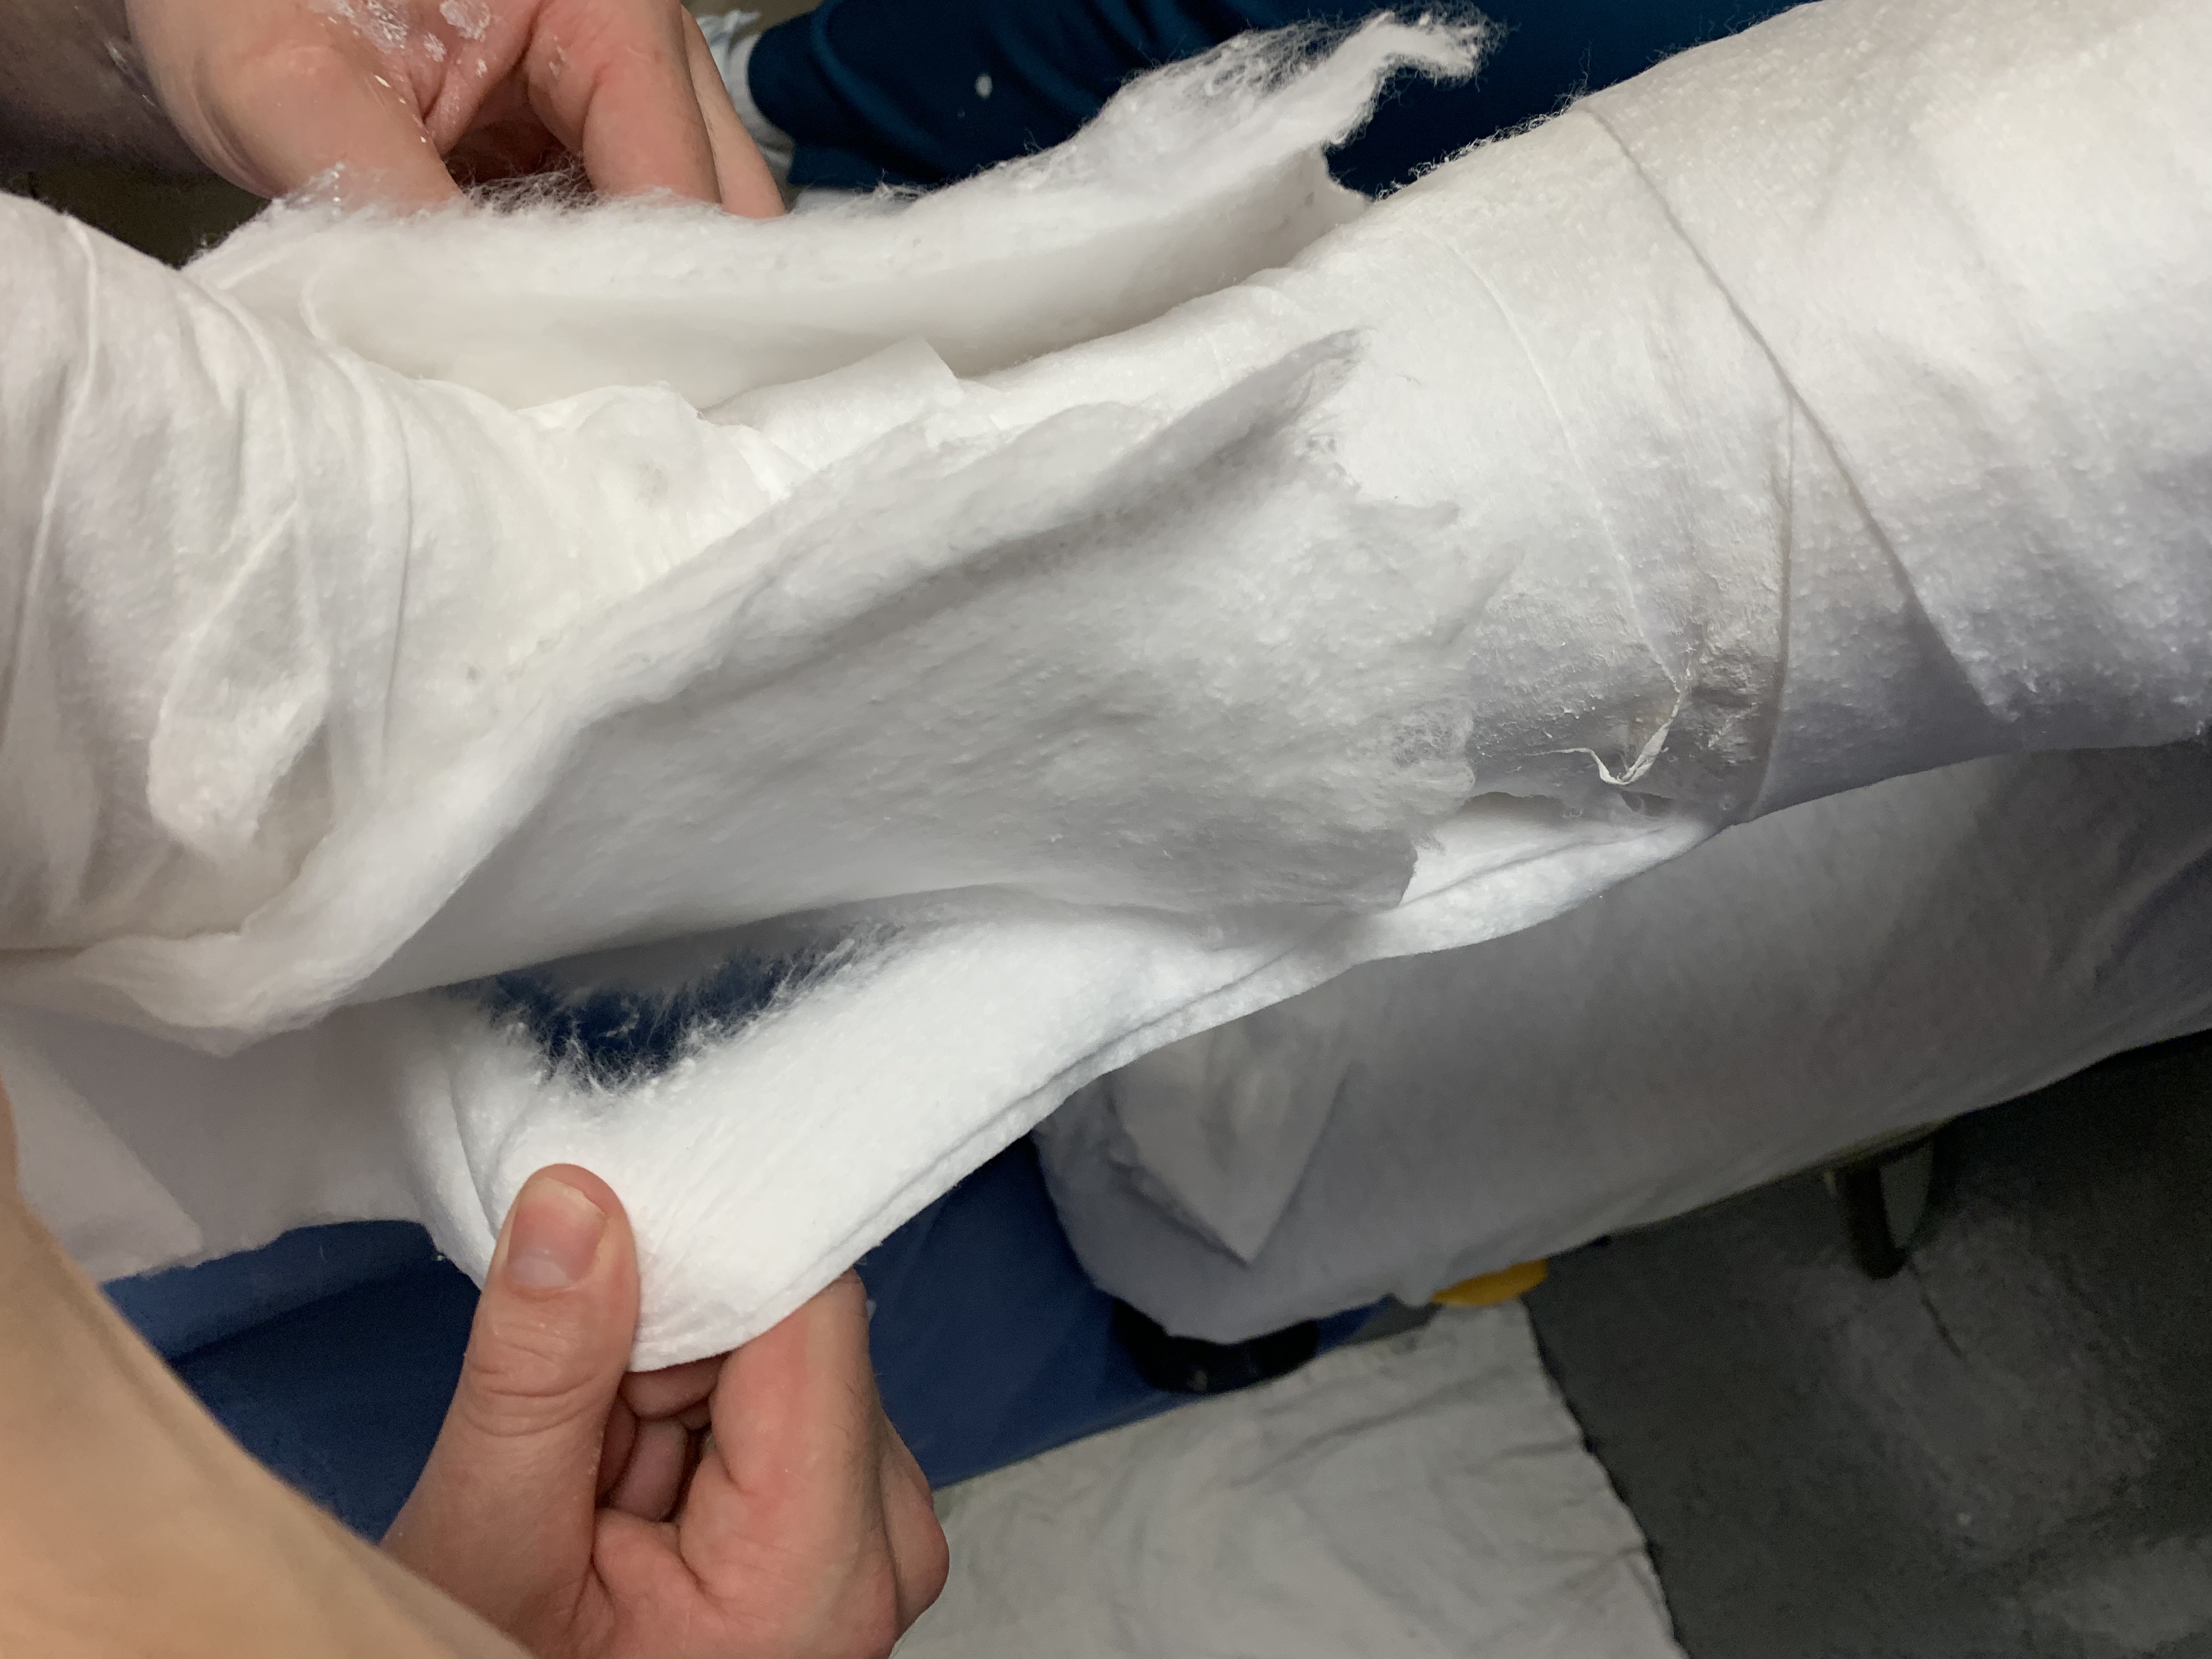
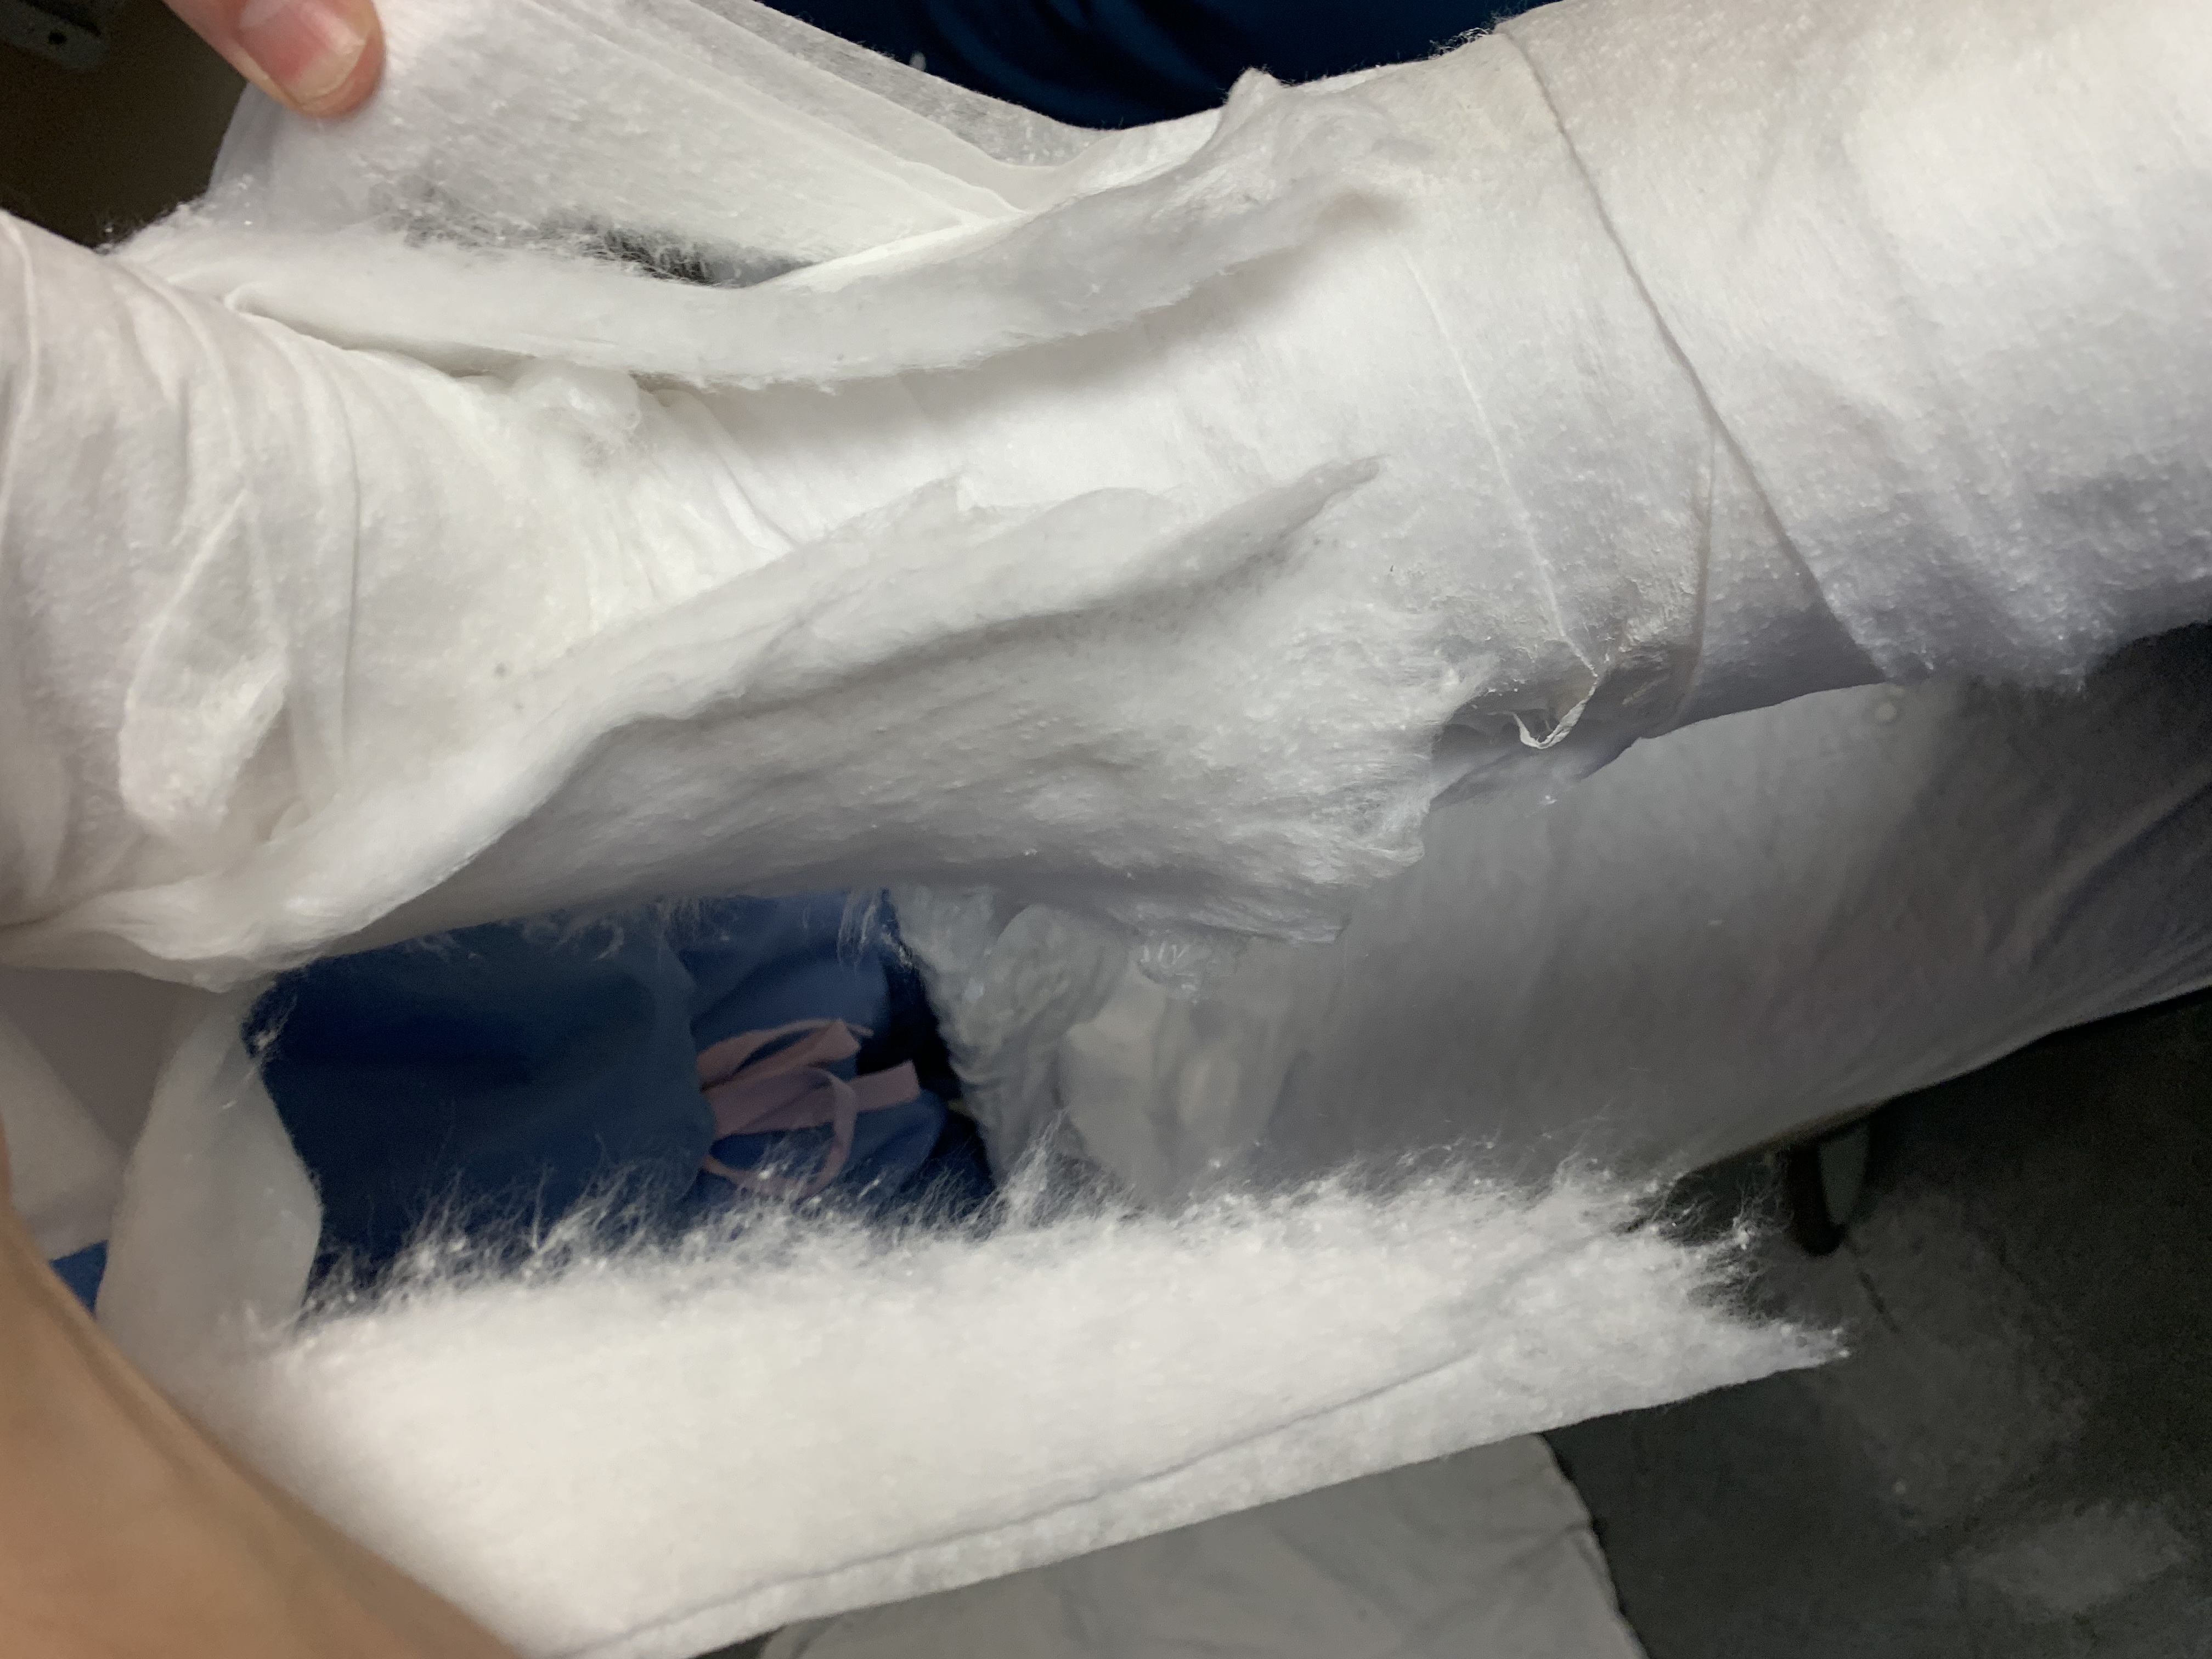
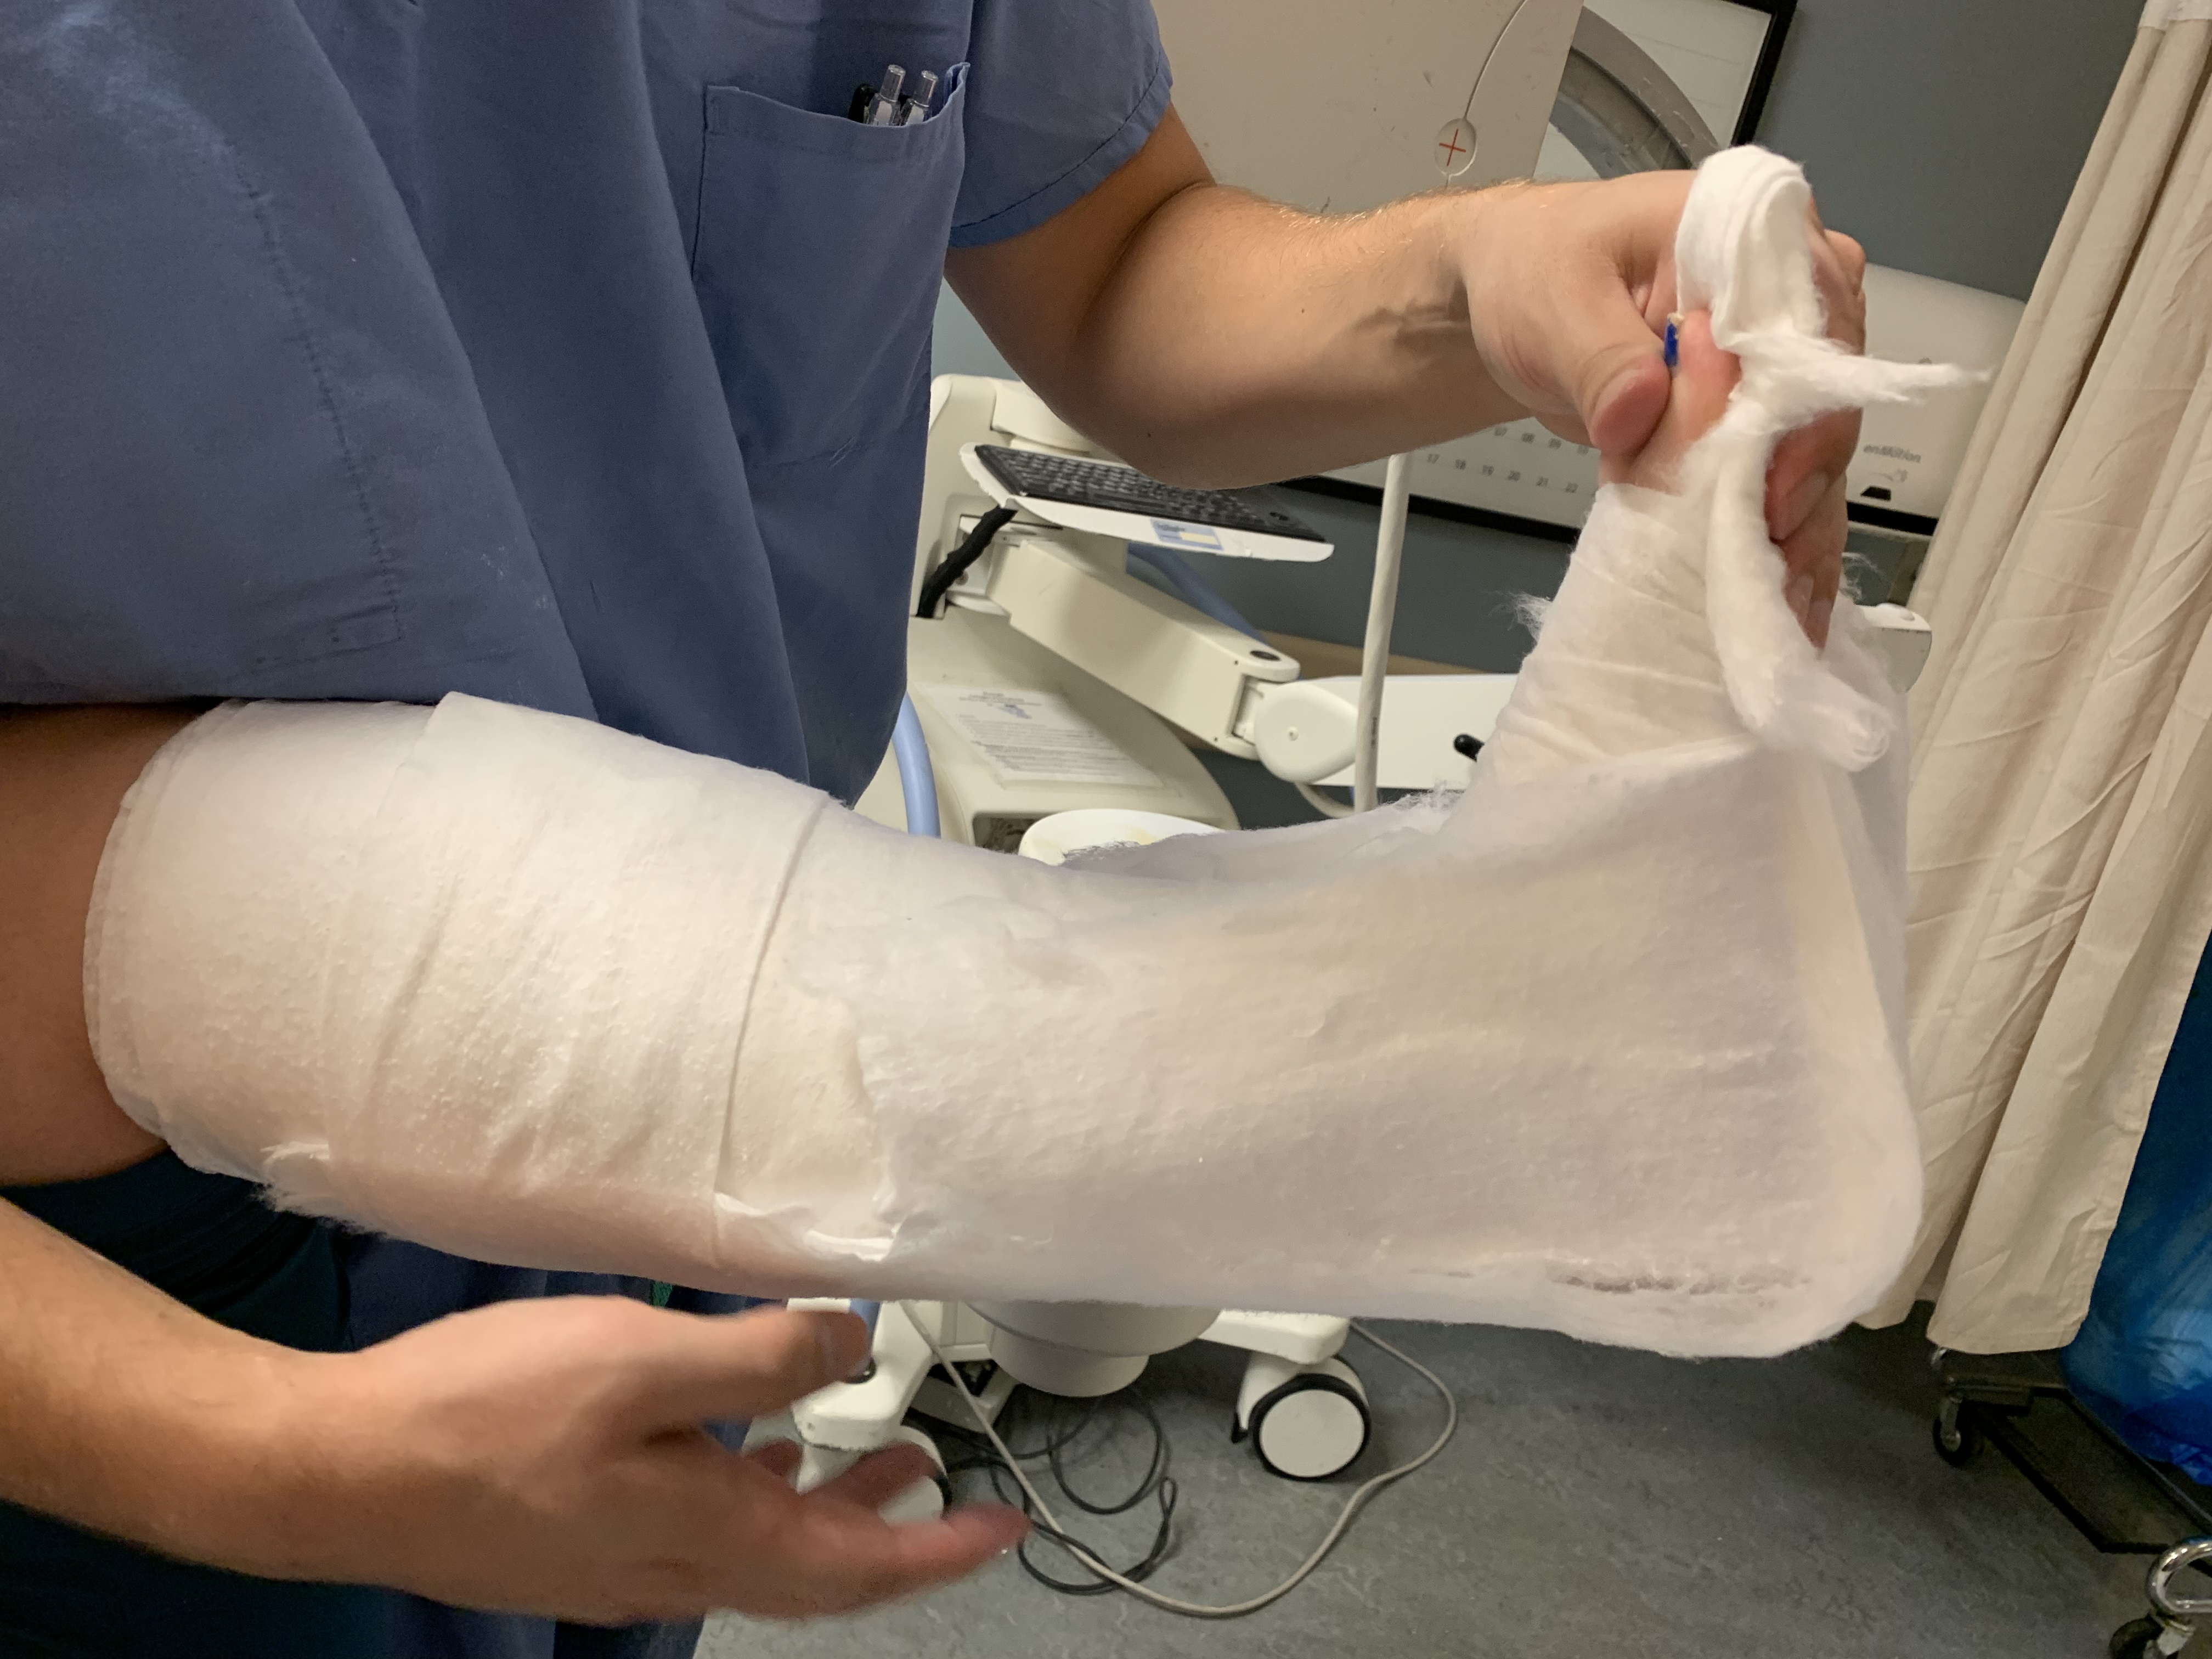
Quickly anchor the webril stirrups so they do not move.
Dip and place the plaster
This is the “double dip” technique (saves time to dip both plaster sheets at the same time, if this is a struggle you can do one at a time).
Grab both 10 layer slabs of 5x30in plaster sheets keeping a finger between them. (Don’t let go from this holding position throughout the dipping process).
Grab the other end of the sheets with your other hand and dip them in the warm water. (If you make the water too hot, it will burn the skin because the exothermic reaction from the plaster adds to the heat as well).
Remember: The more layers of plaster the more heat it will give off, this is why it is generally a bad idea to stack more than 10-12 layers and avoid significant overlaps and folds when possible. One 10 layer overlapped or folded with another 10 layers of plaster = 20 total layers. This will give off a significant amount of heat while drying. This is why it is also important to provide sufficient cotton padding to insulate the skin from too much heat. Just remember, too much padding will cause you to lose your reduction as well, so there is a delicate balance.
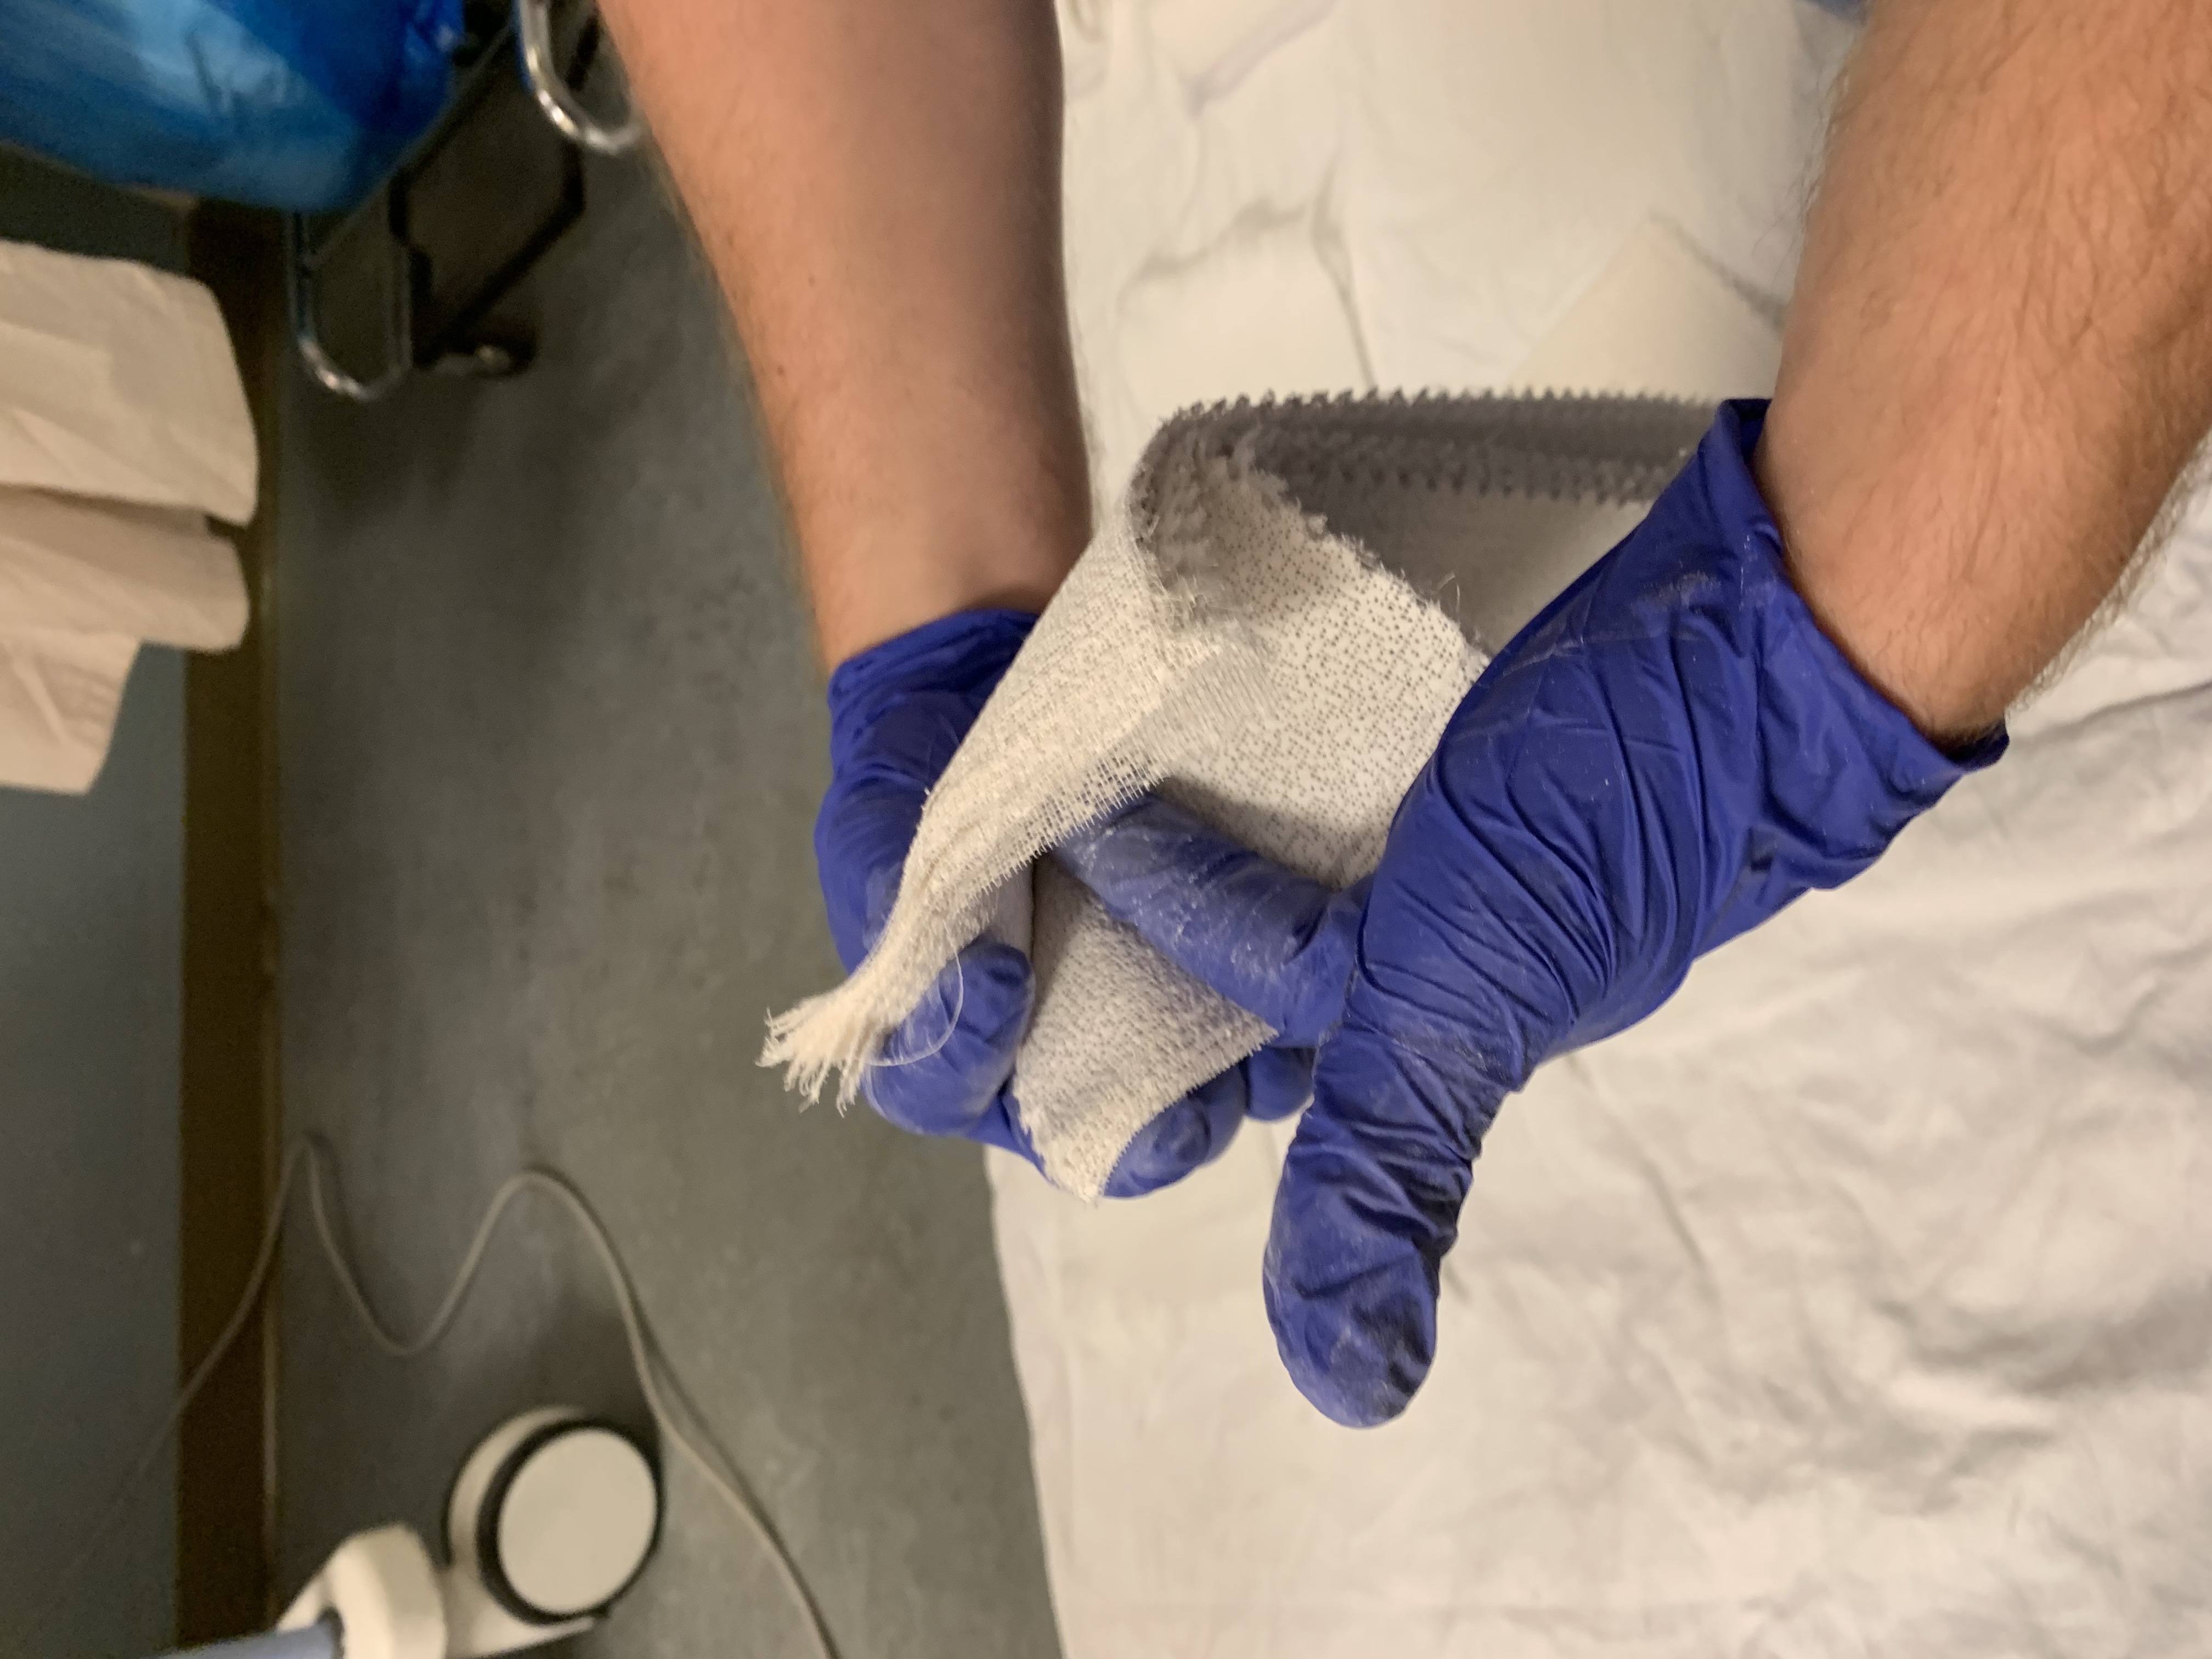
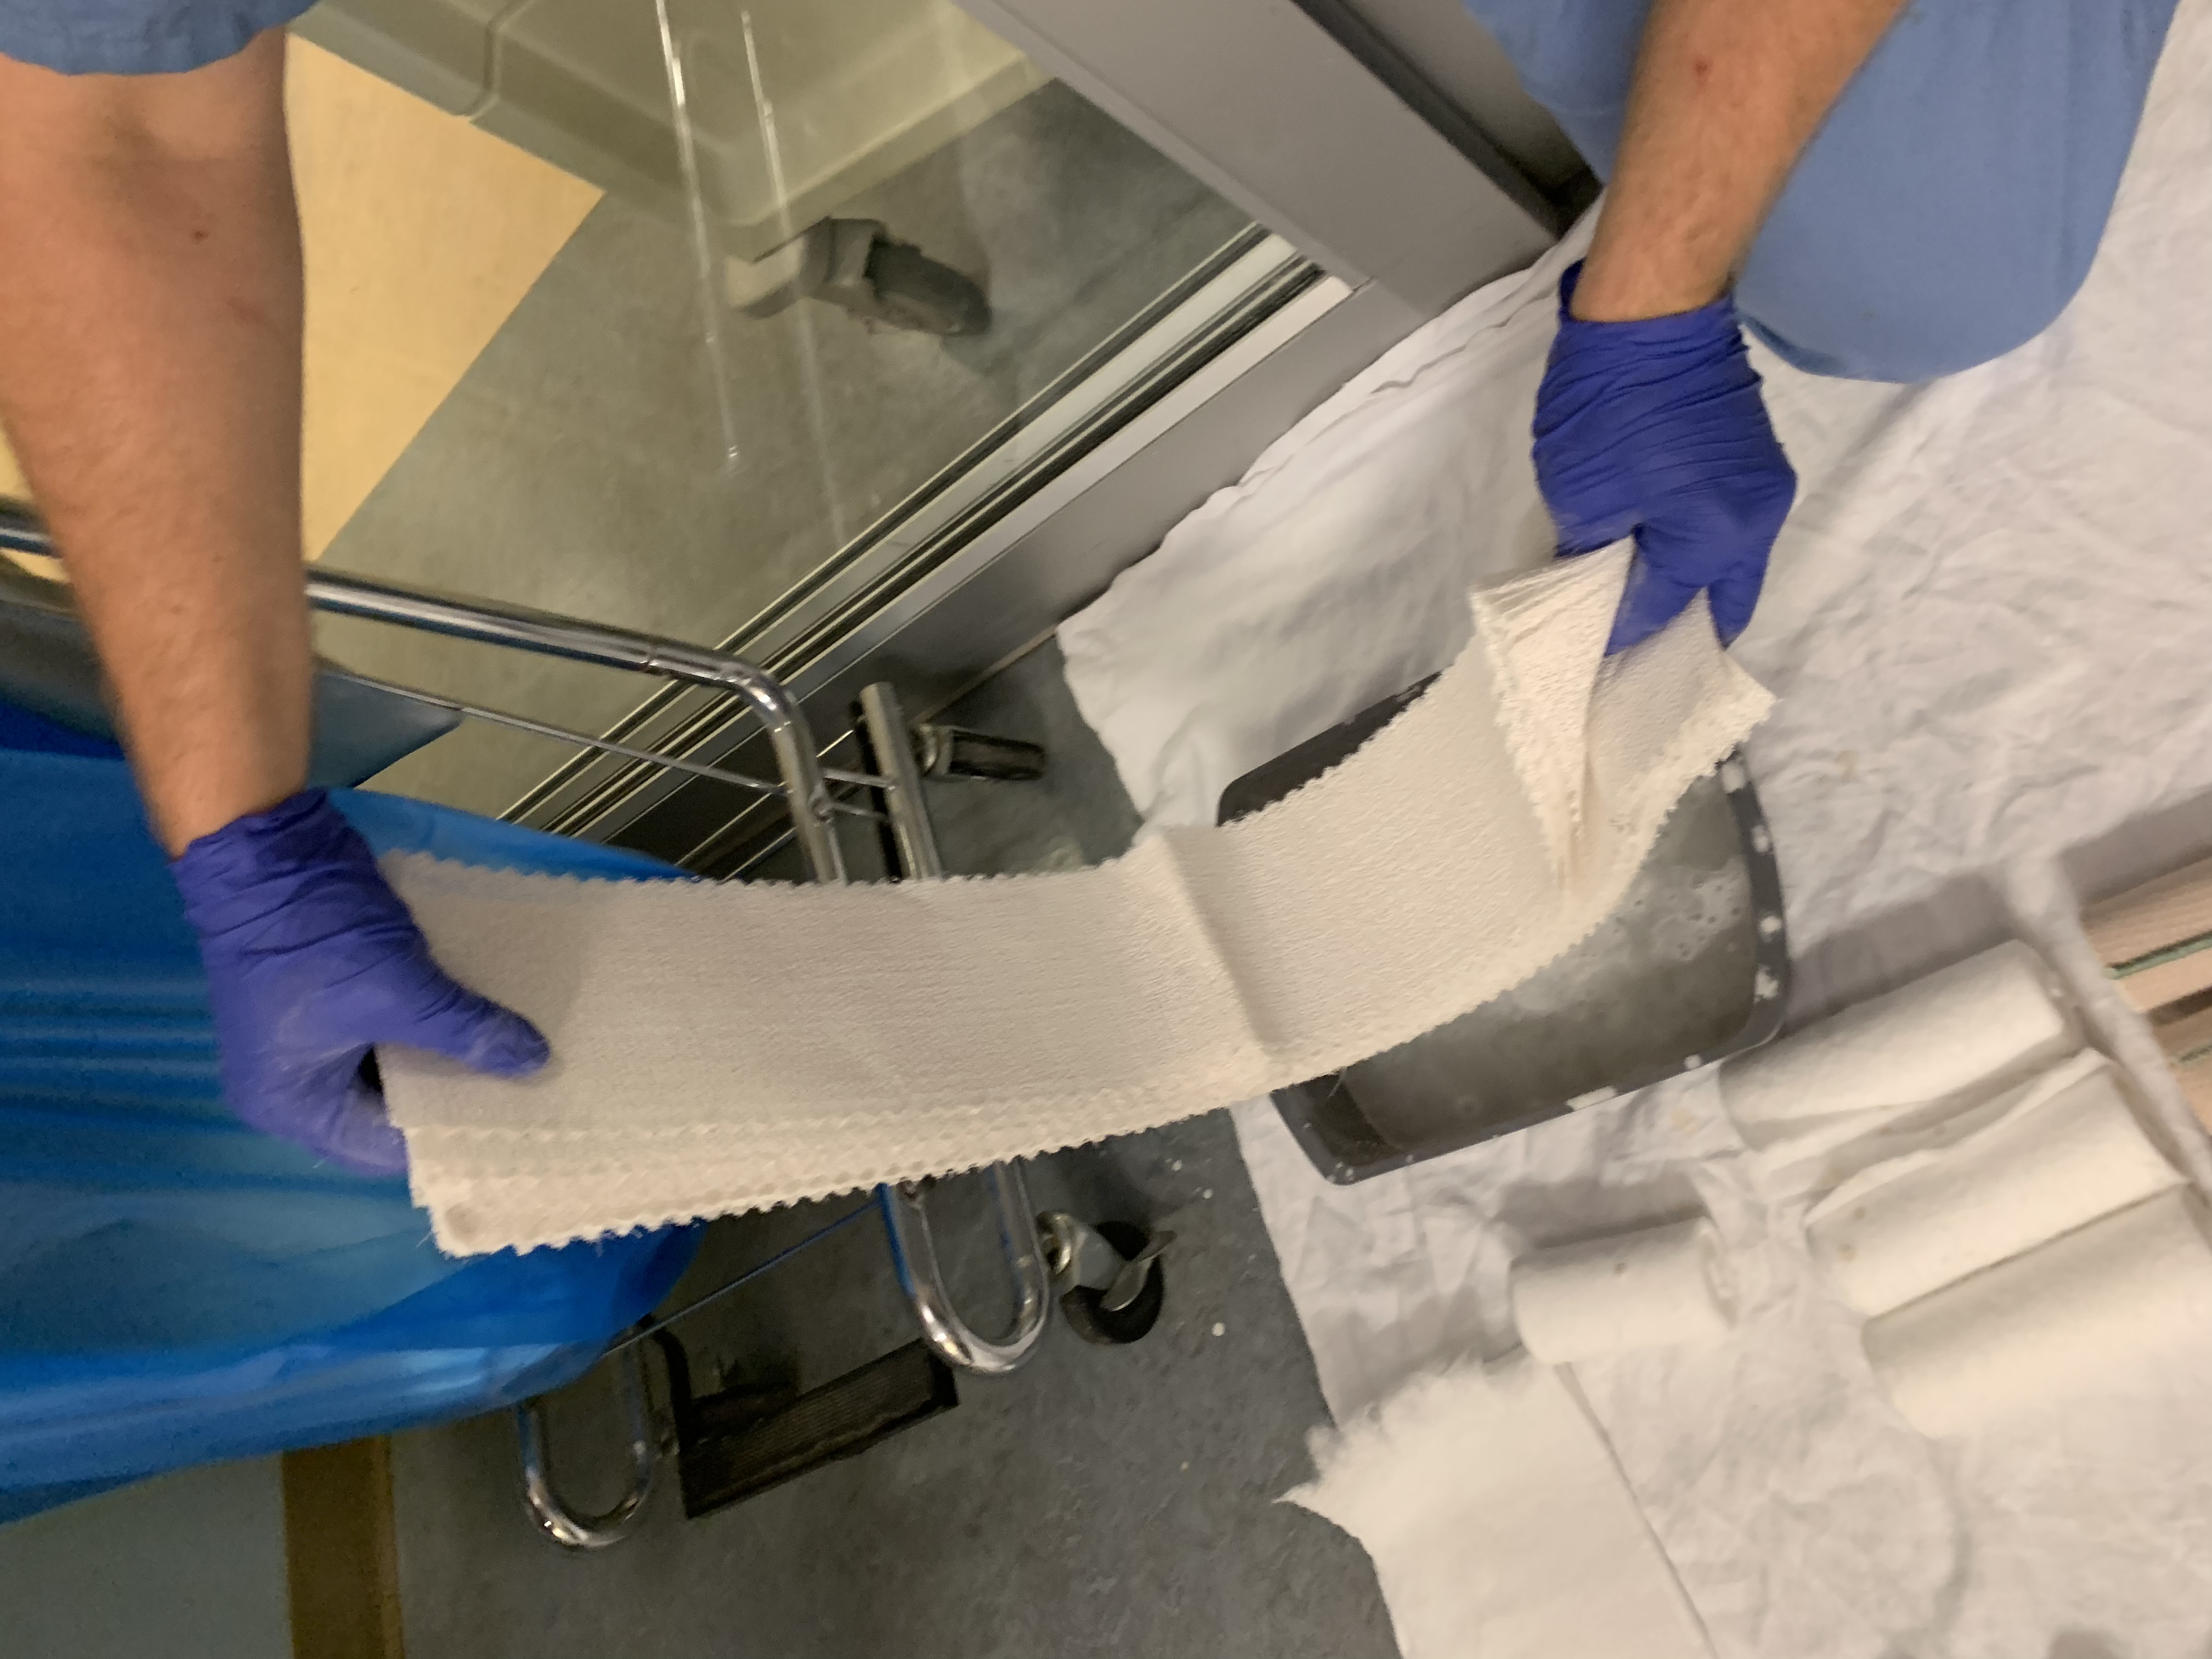
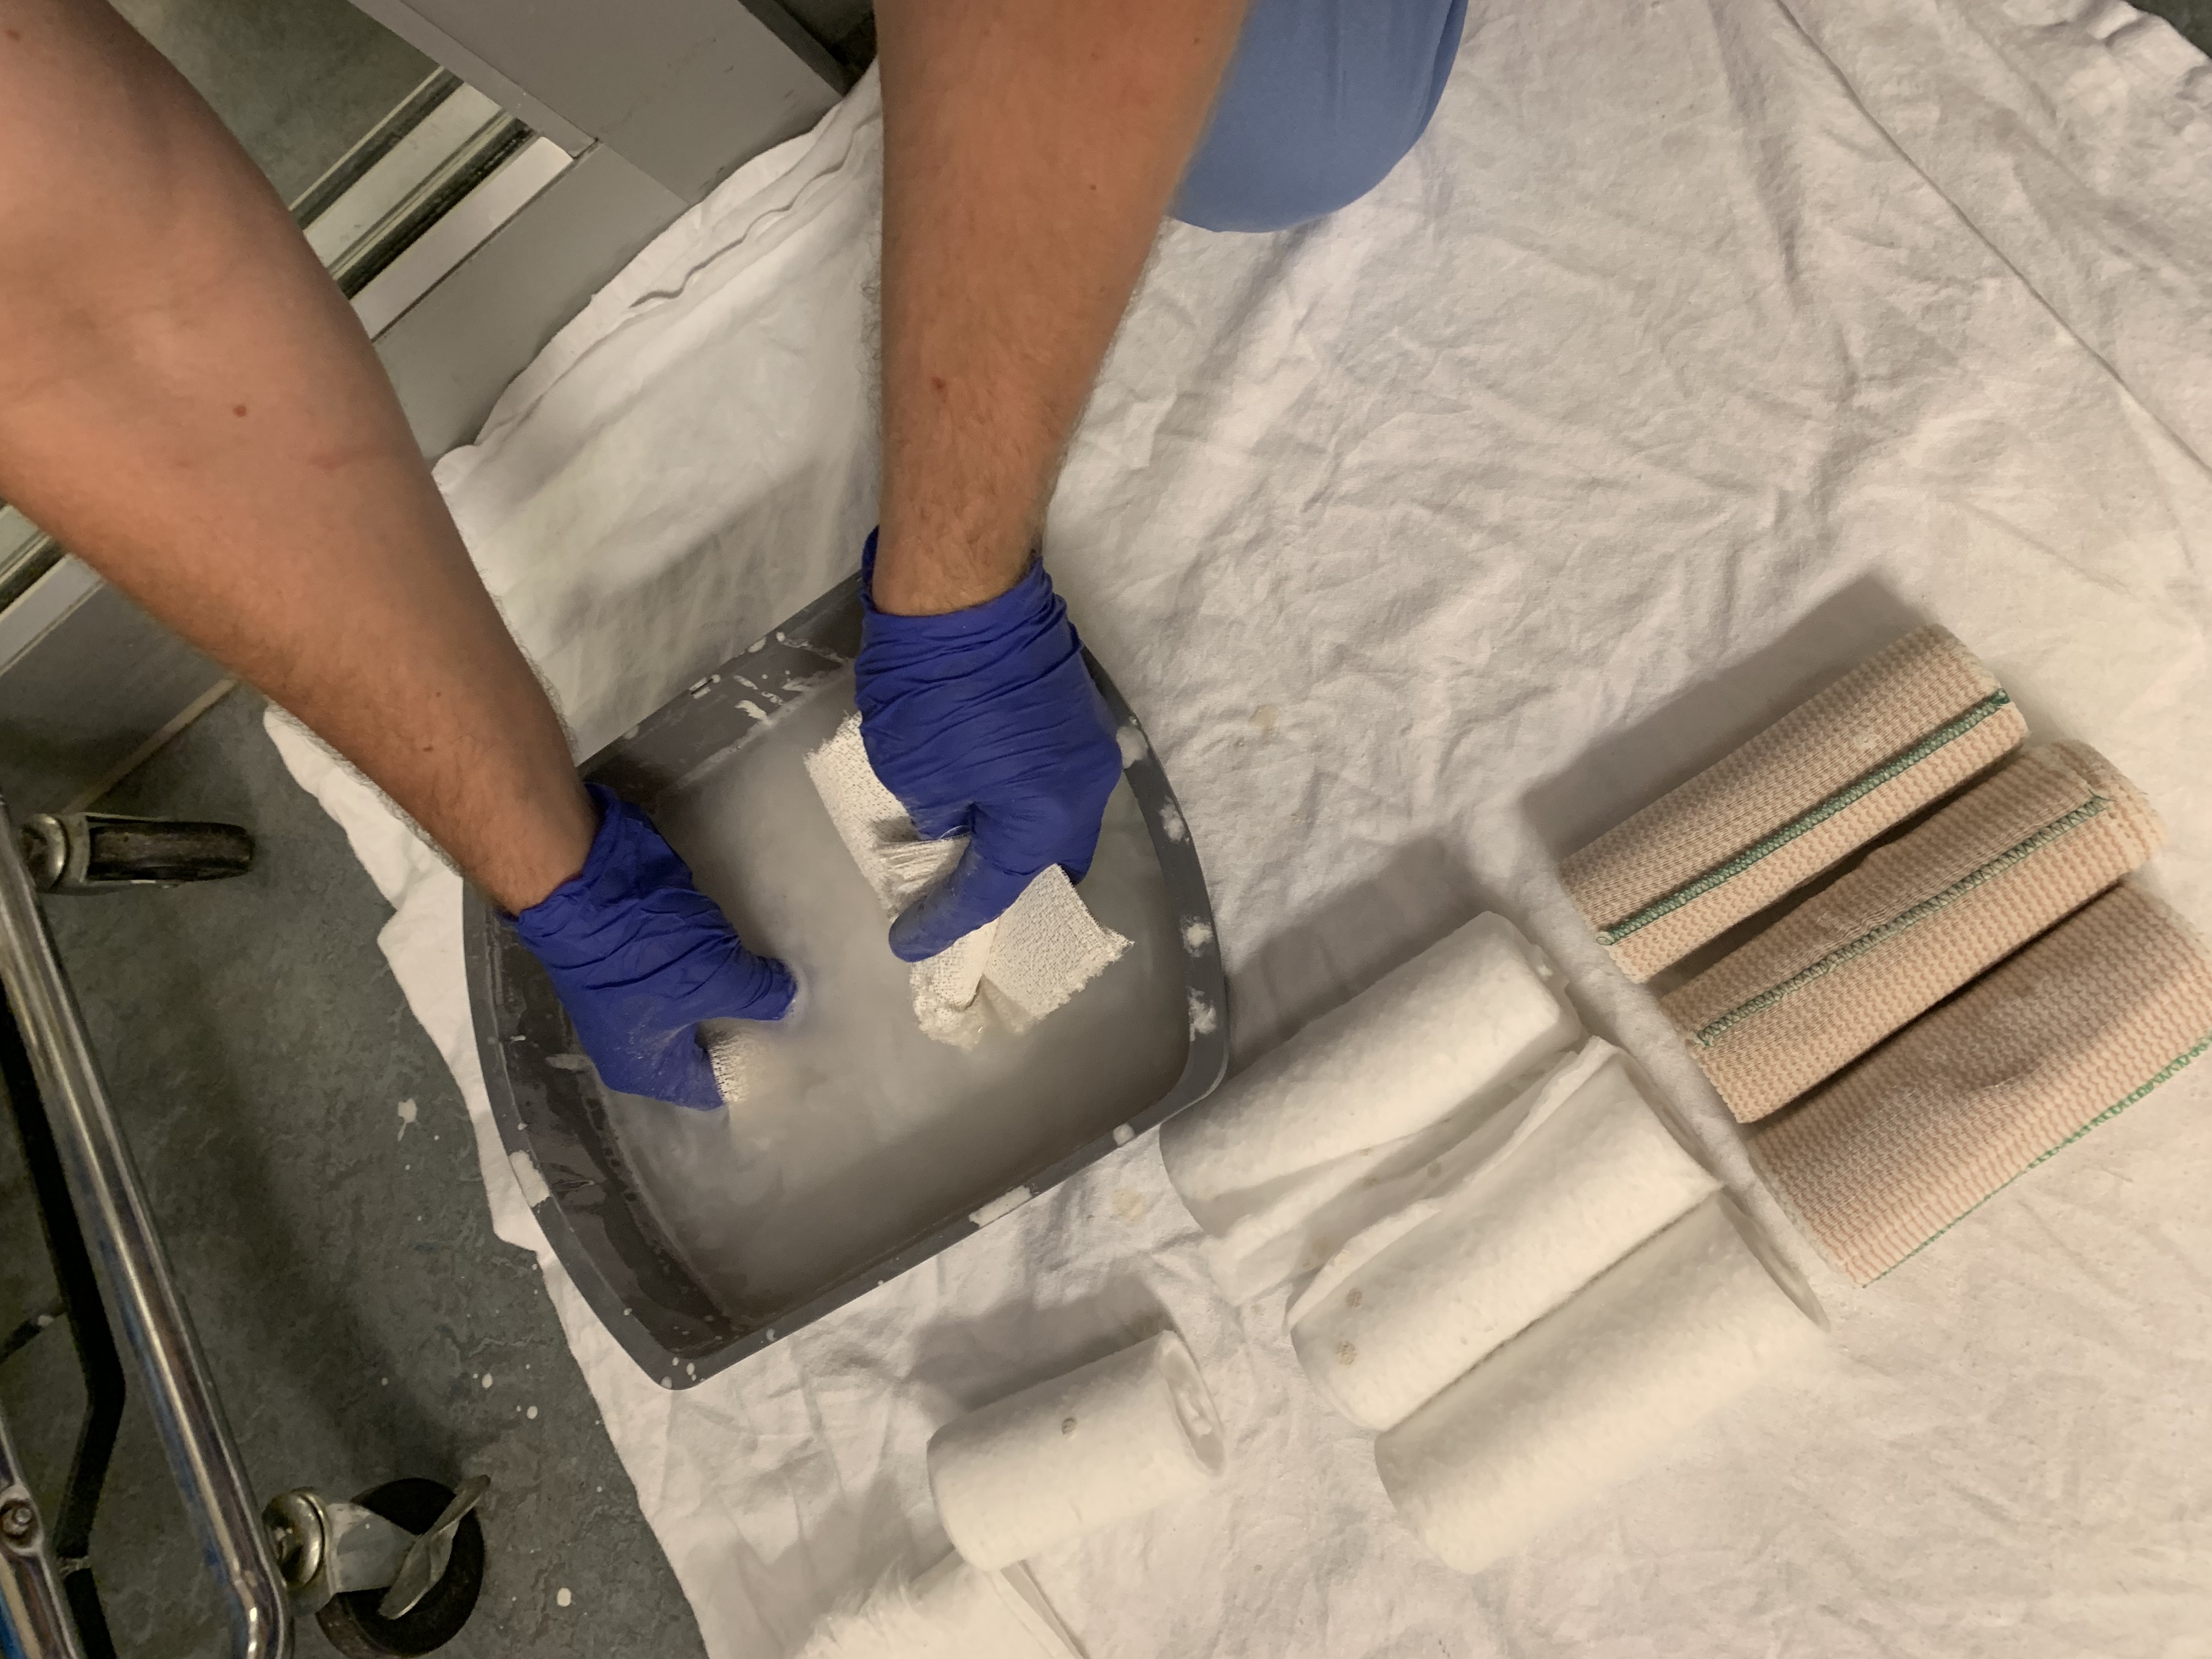
After you dip the plaster, squeeze the excess water out.
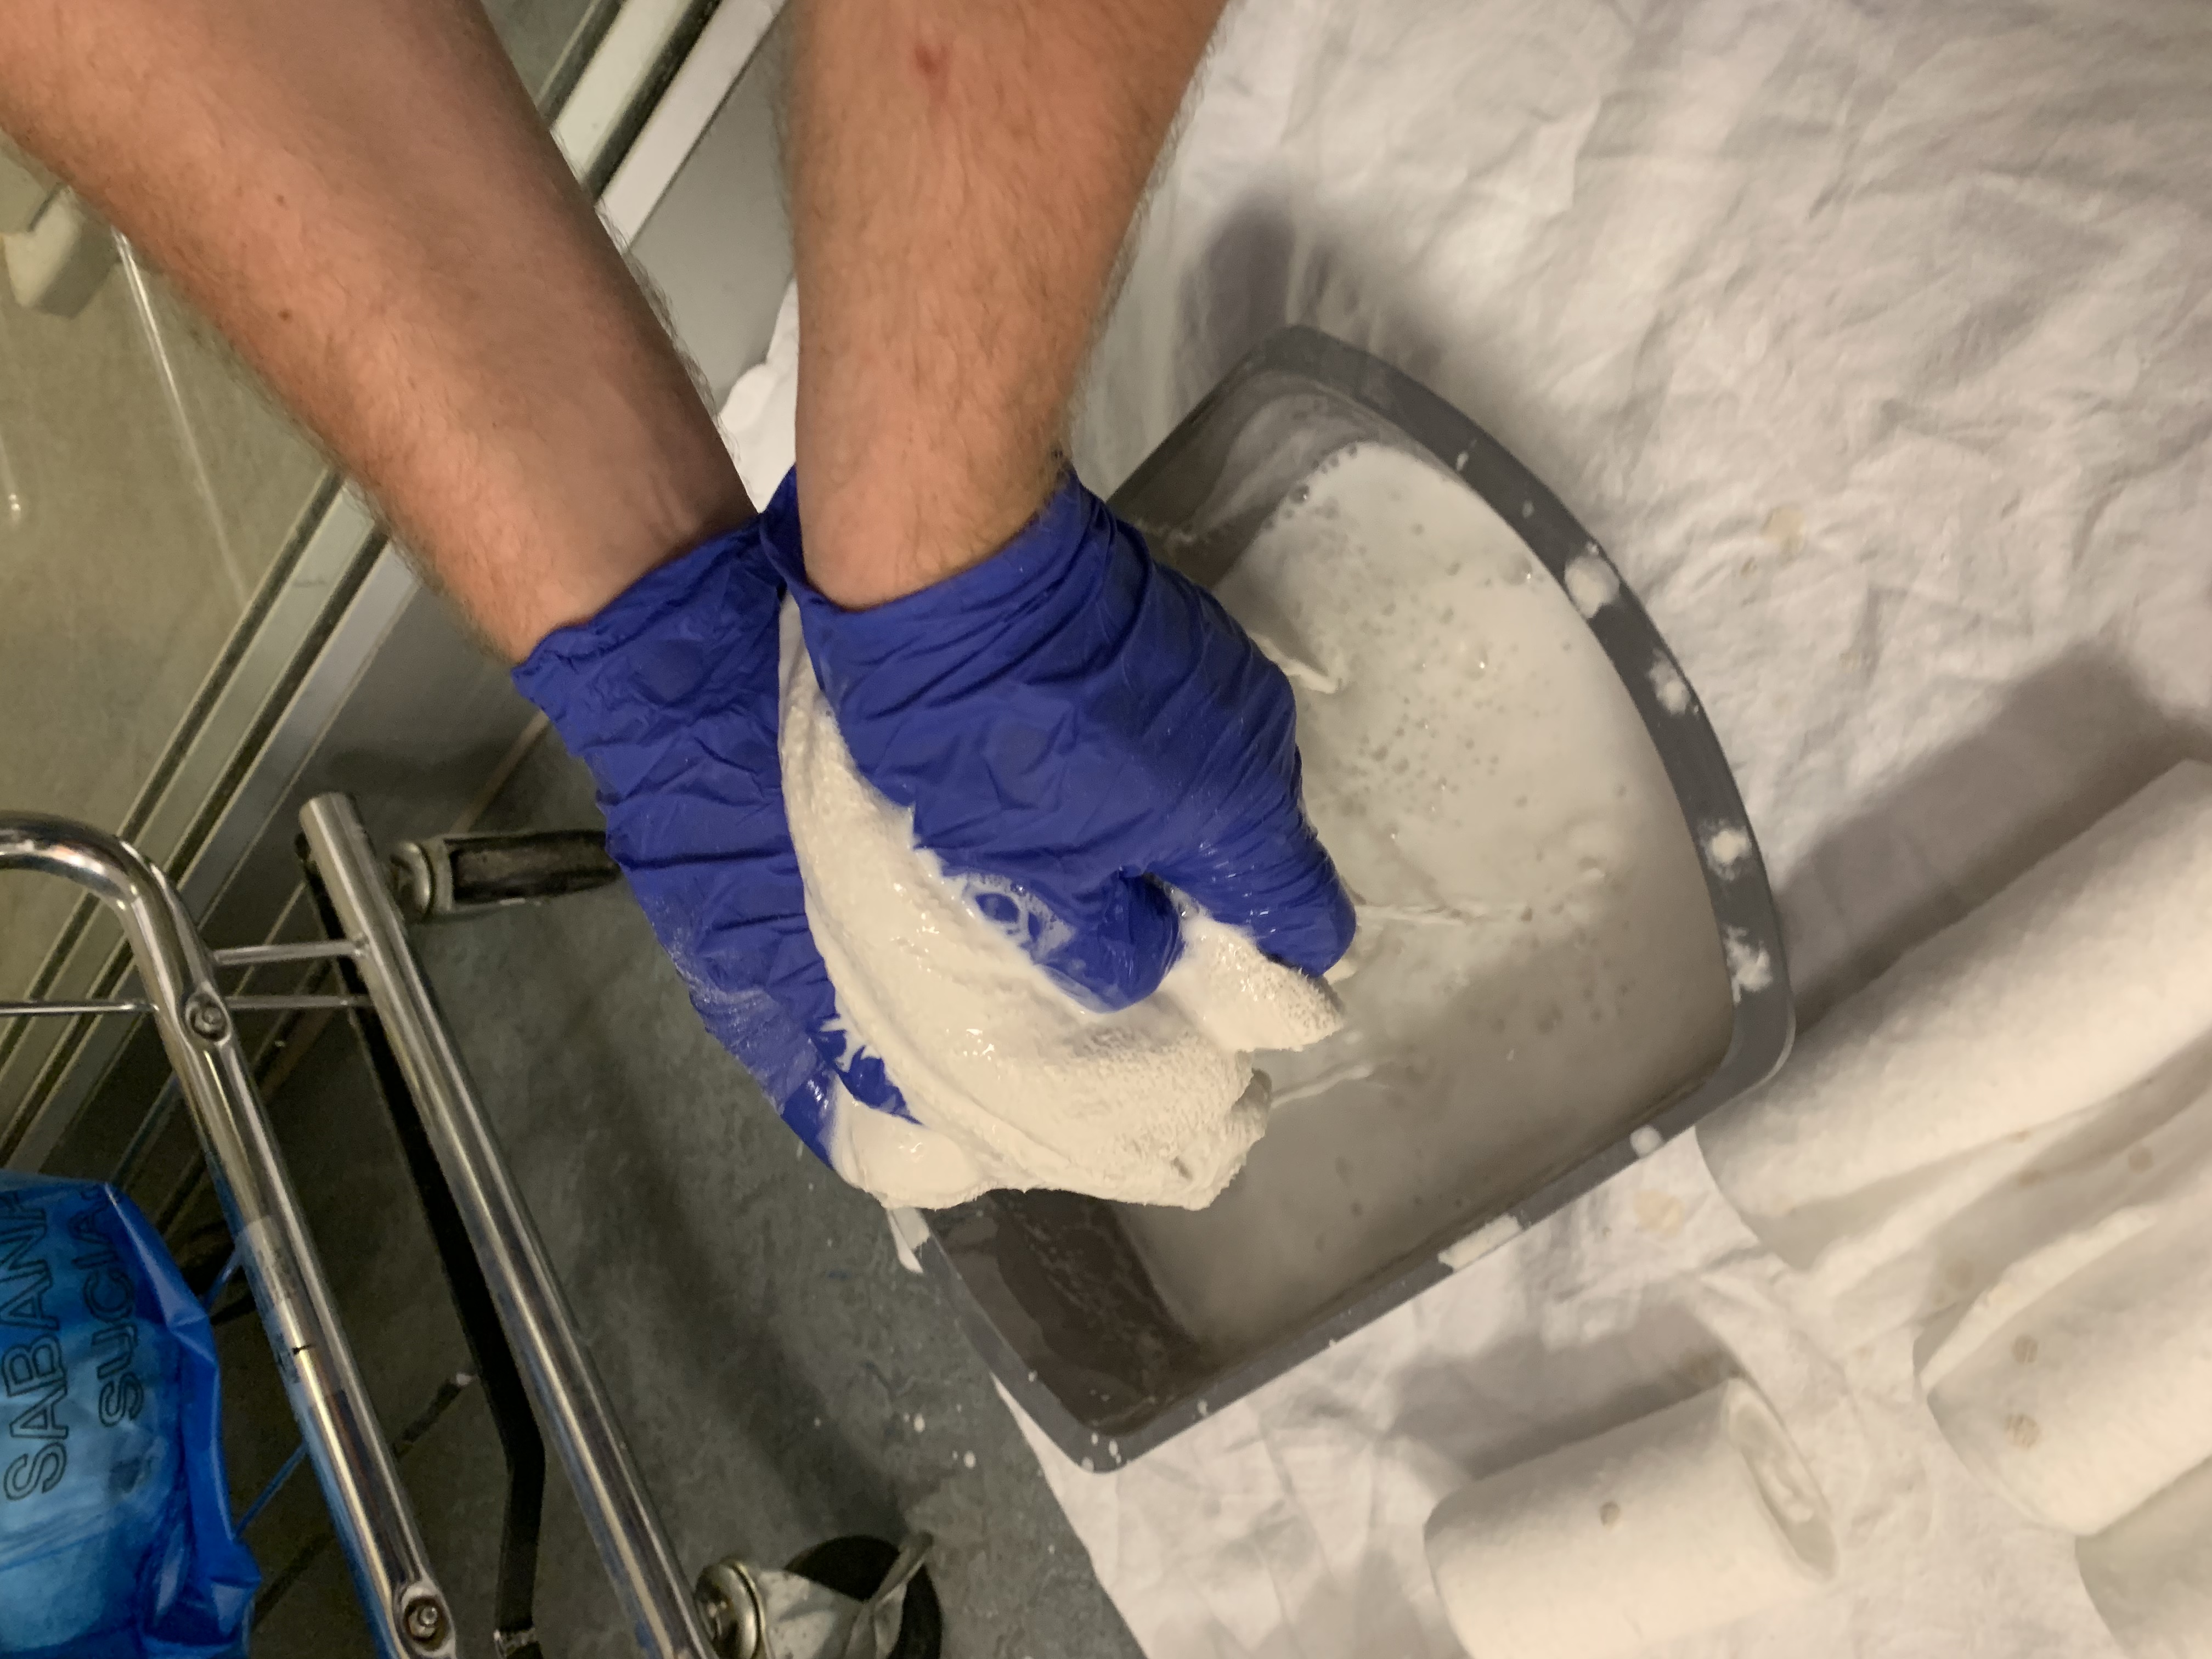
Then use your free hand to squeegy the extra water out. Keeping your 10 layers separate from the other 10.
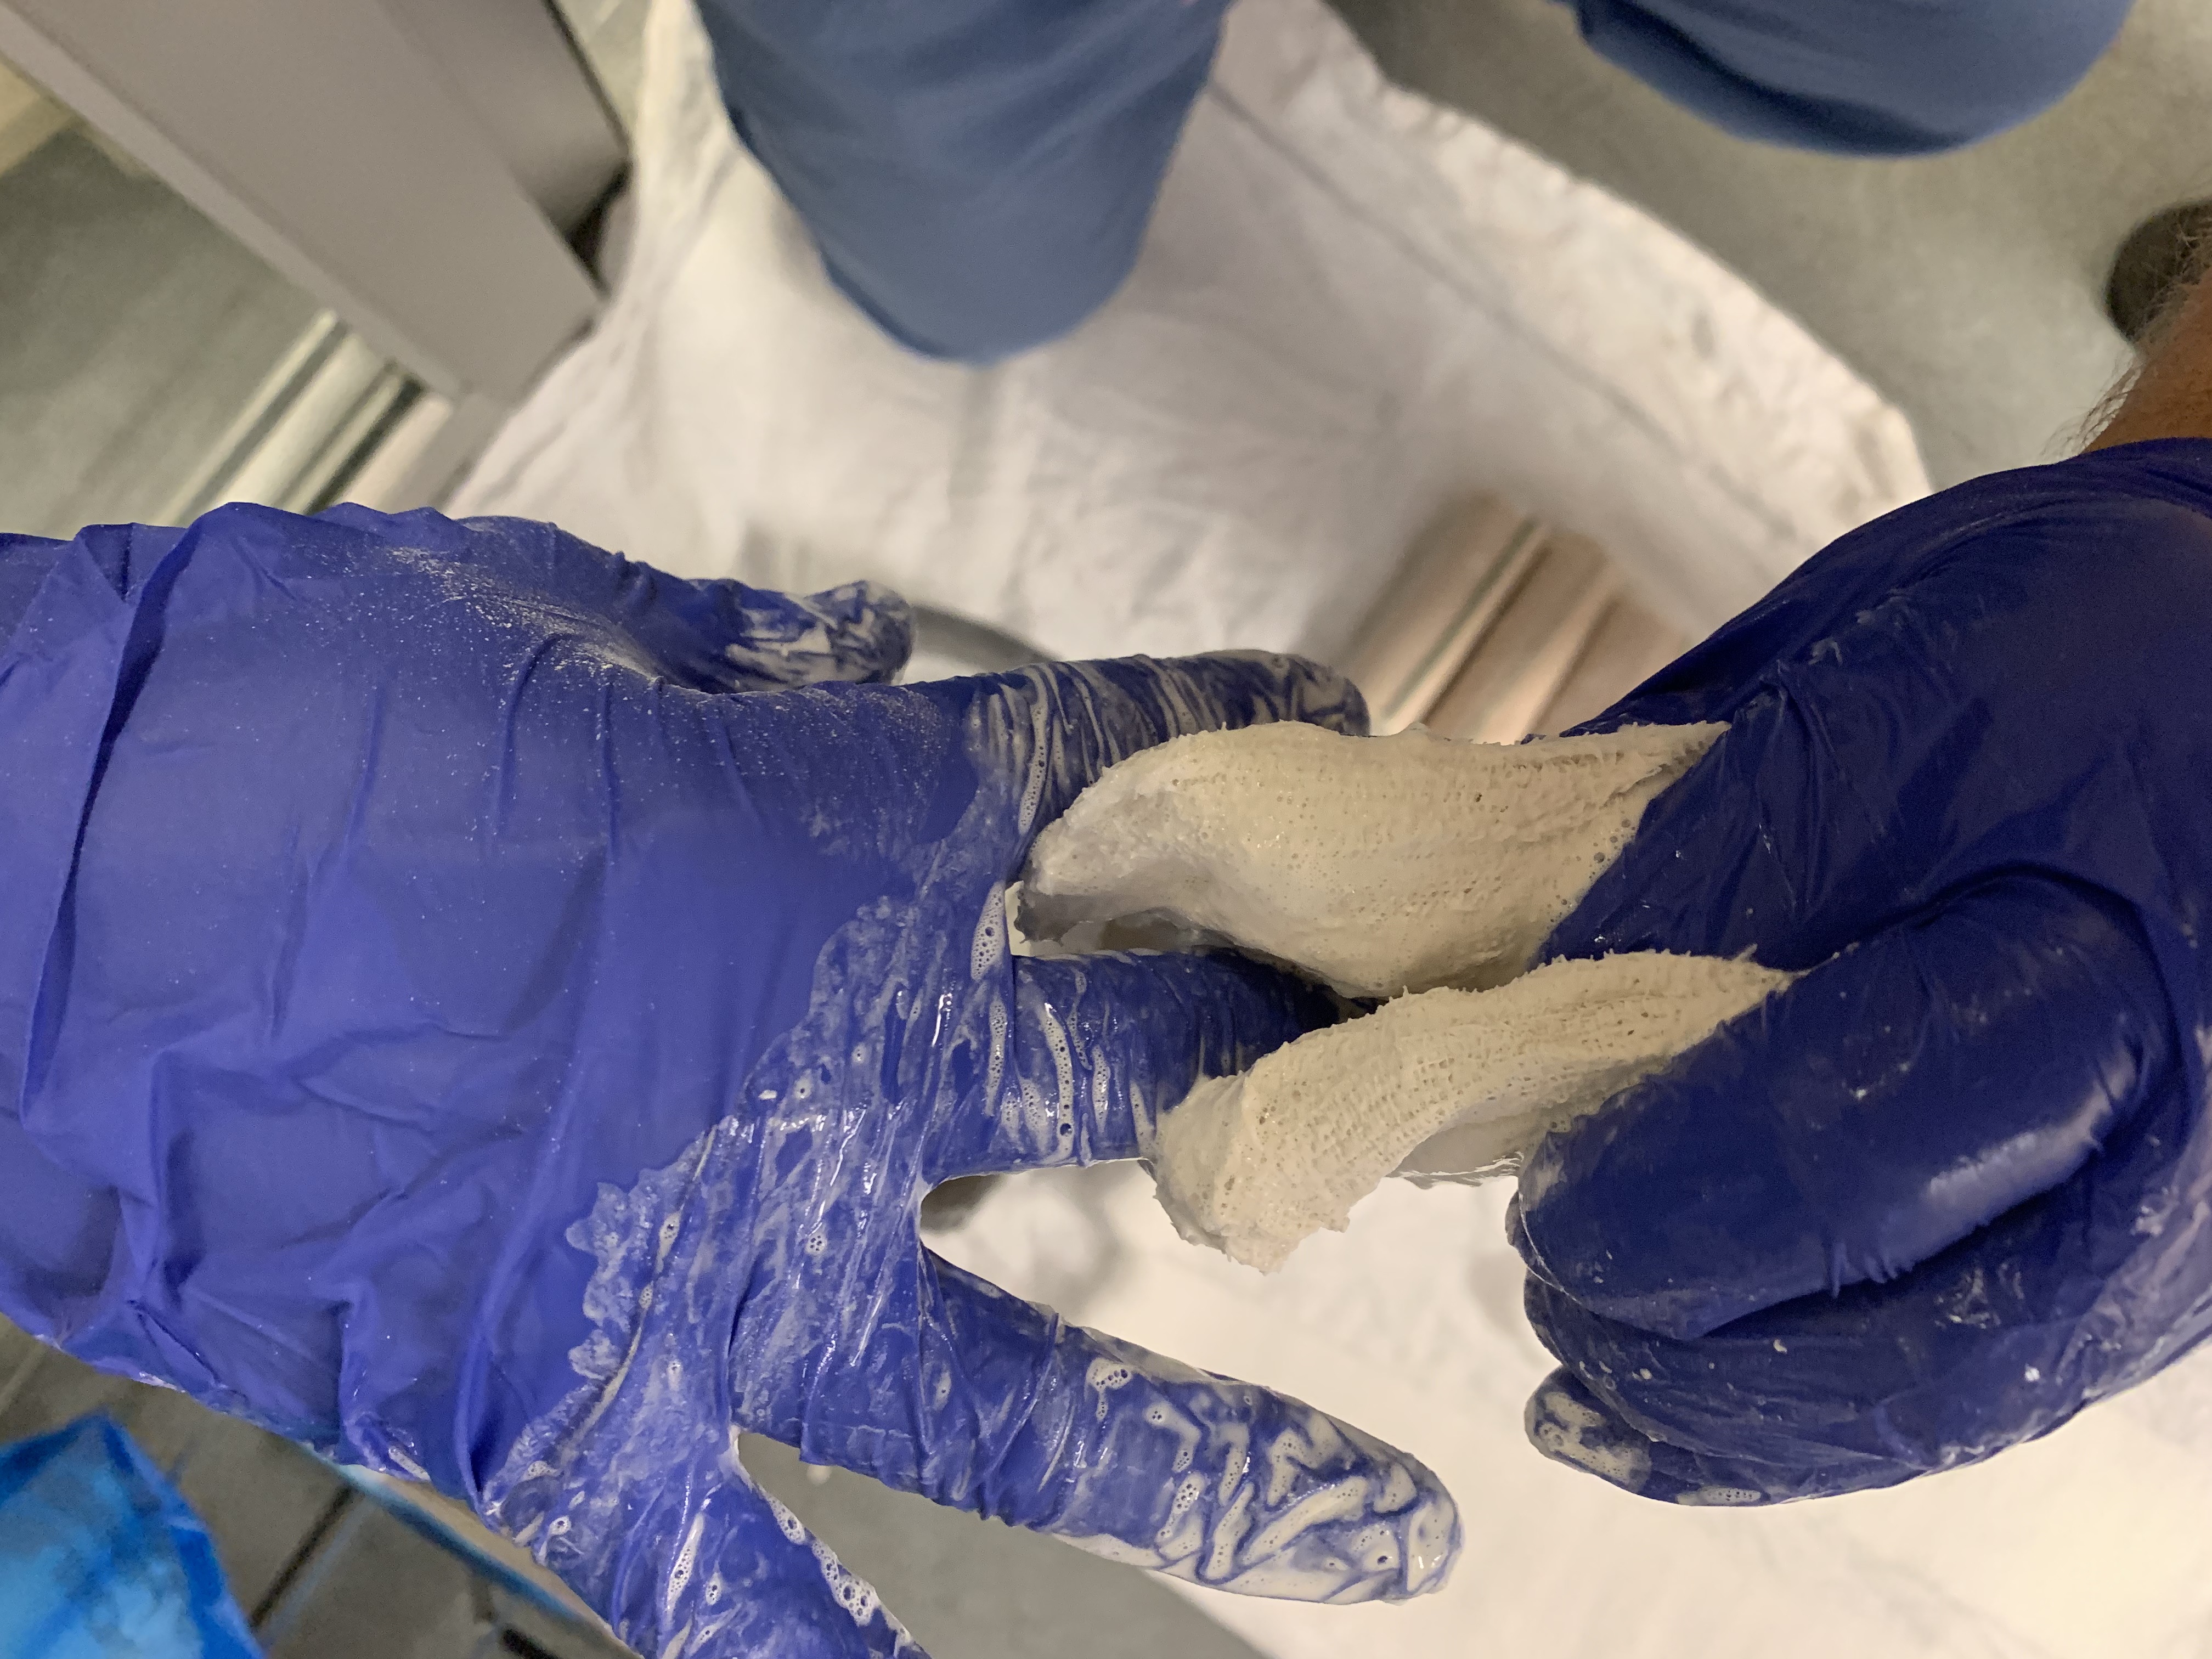
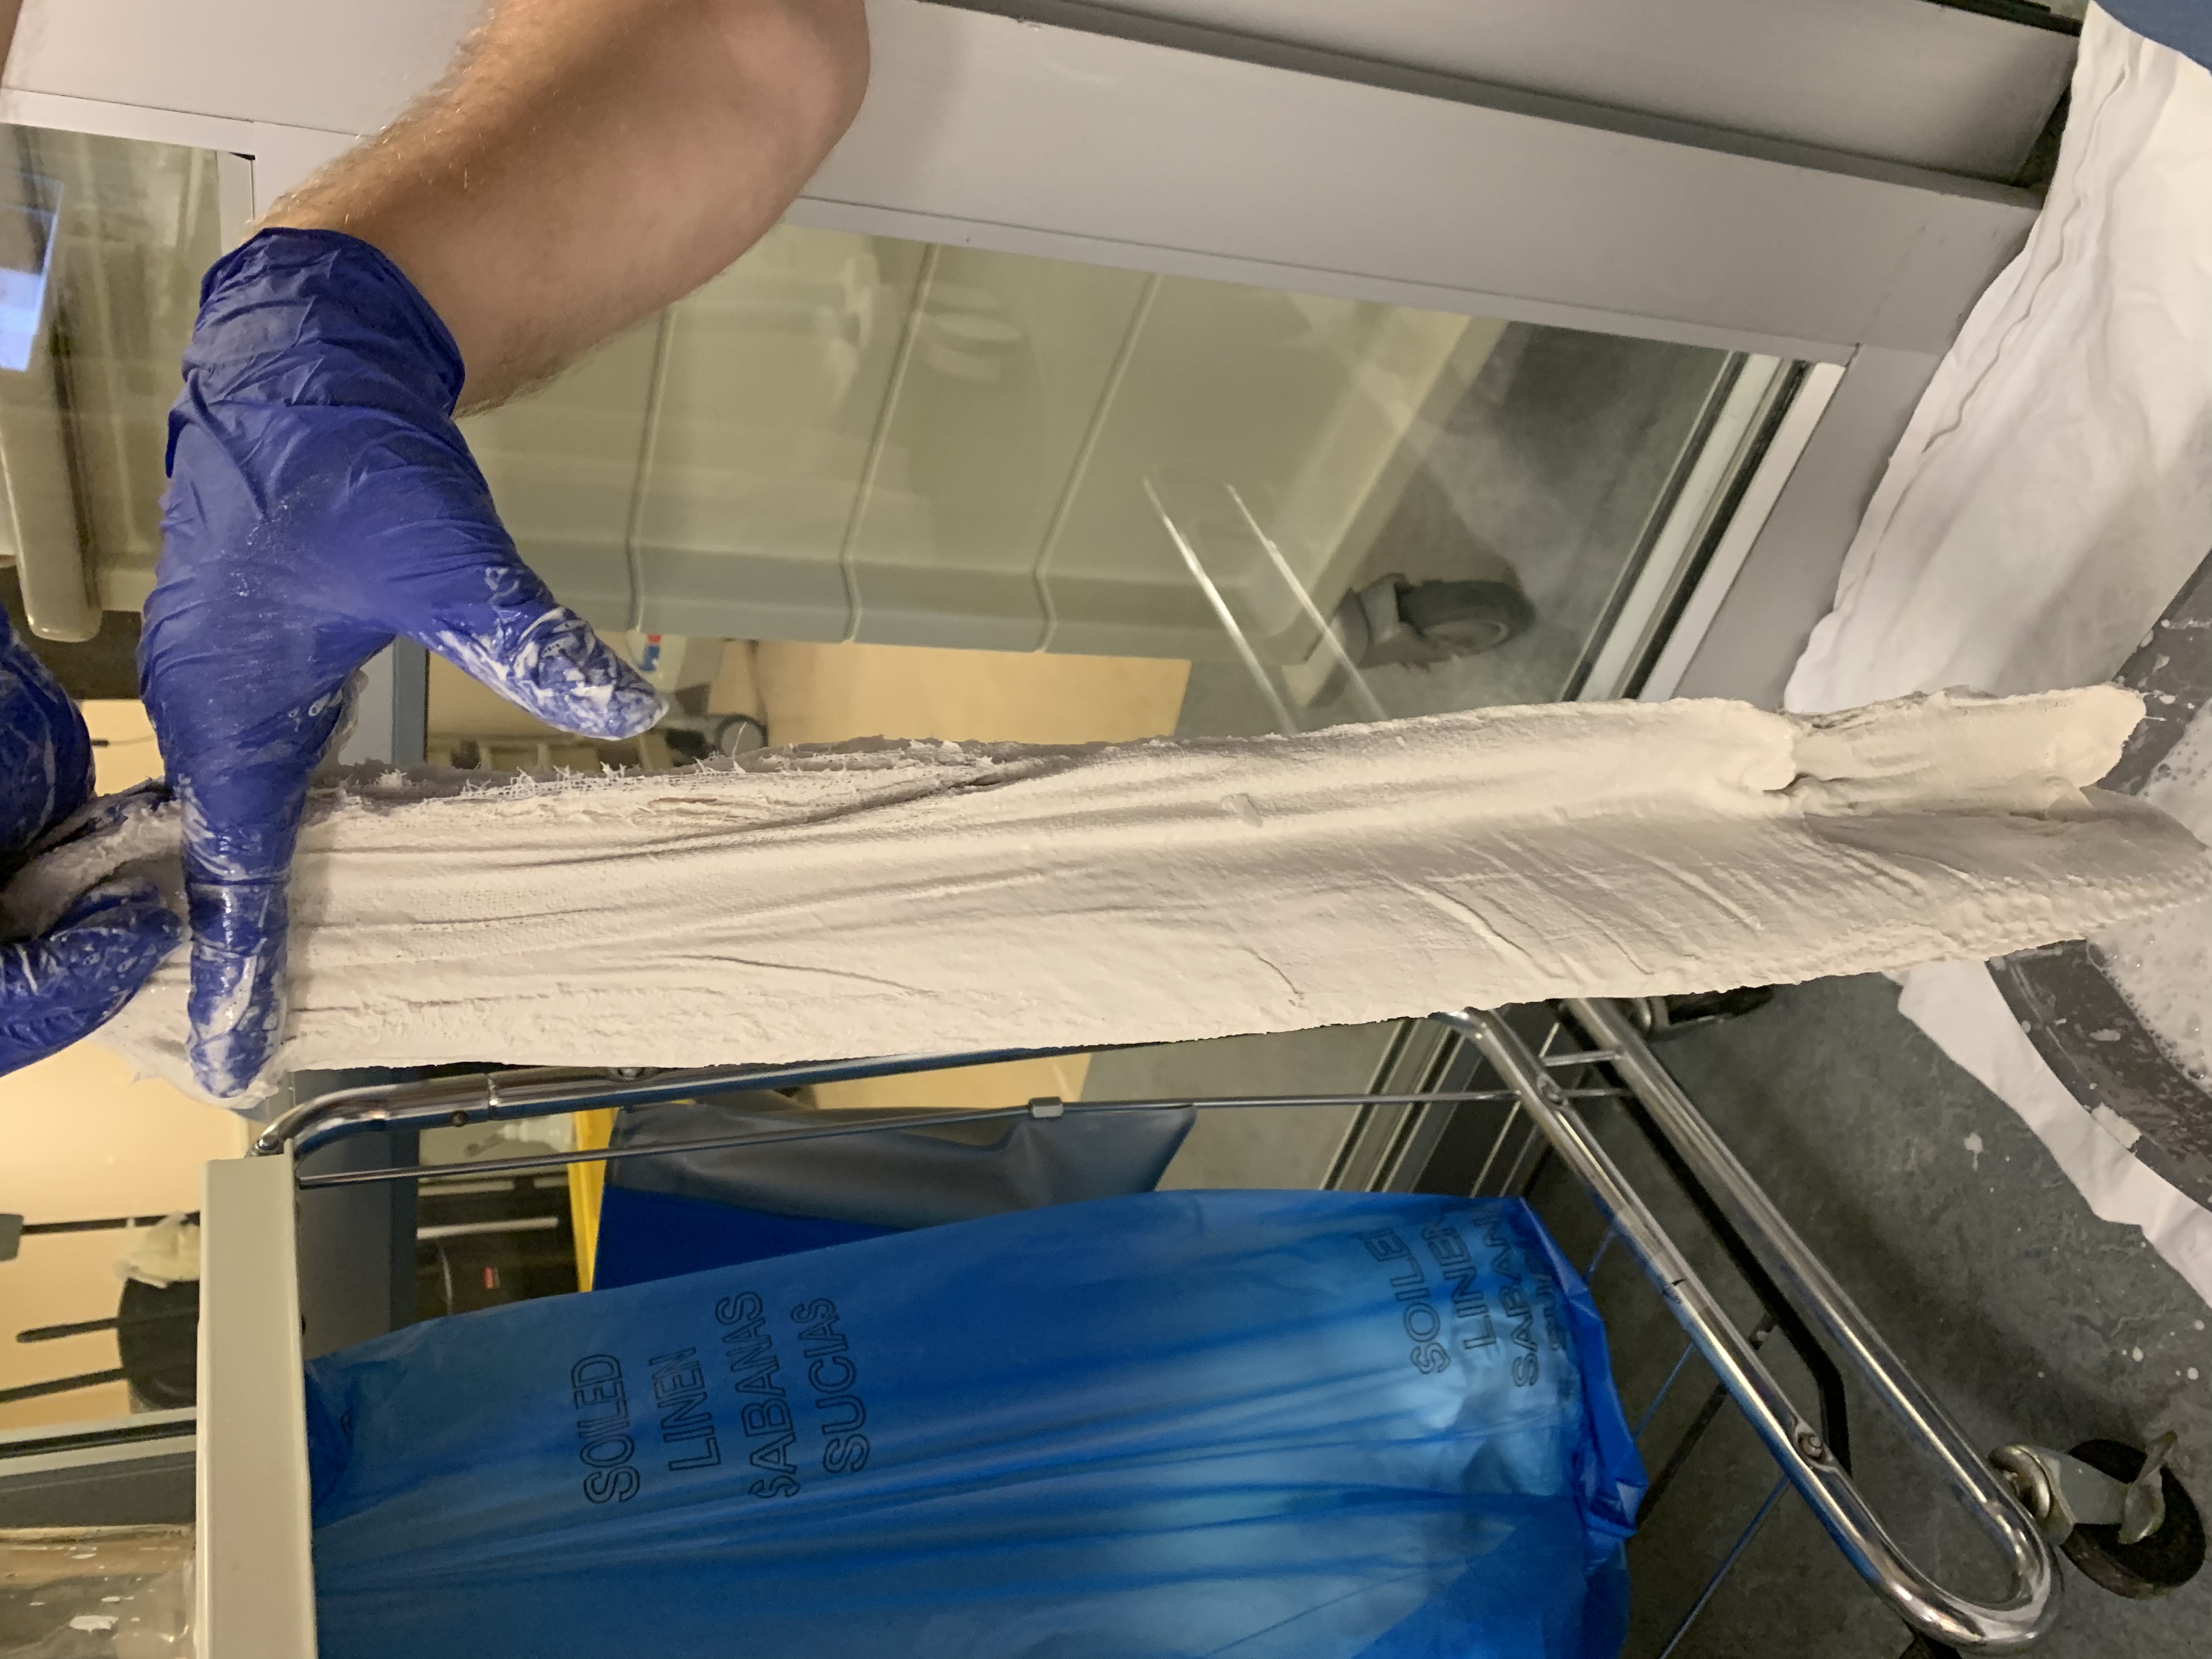
Just rotate the hand holding the two plaster slabs up to allow your free hand to squeegy the other side. Remember, to never let go with the hand keeping the two 10 layer slabs separate.
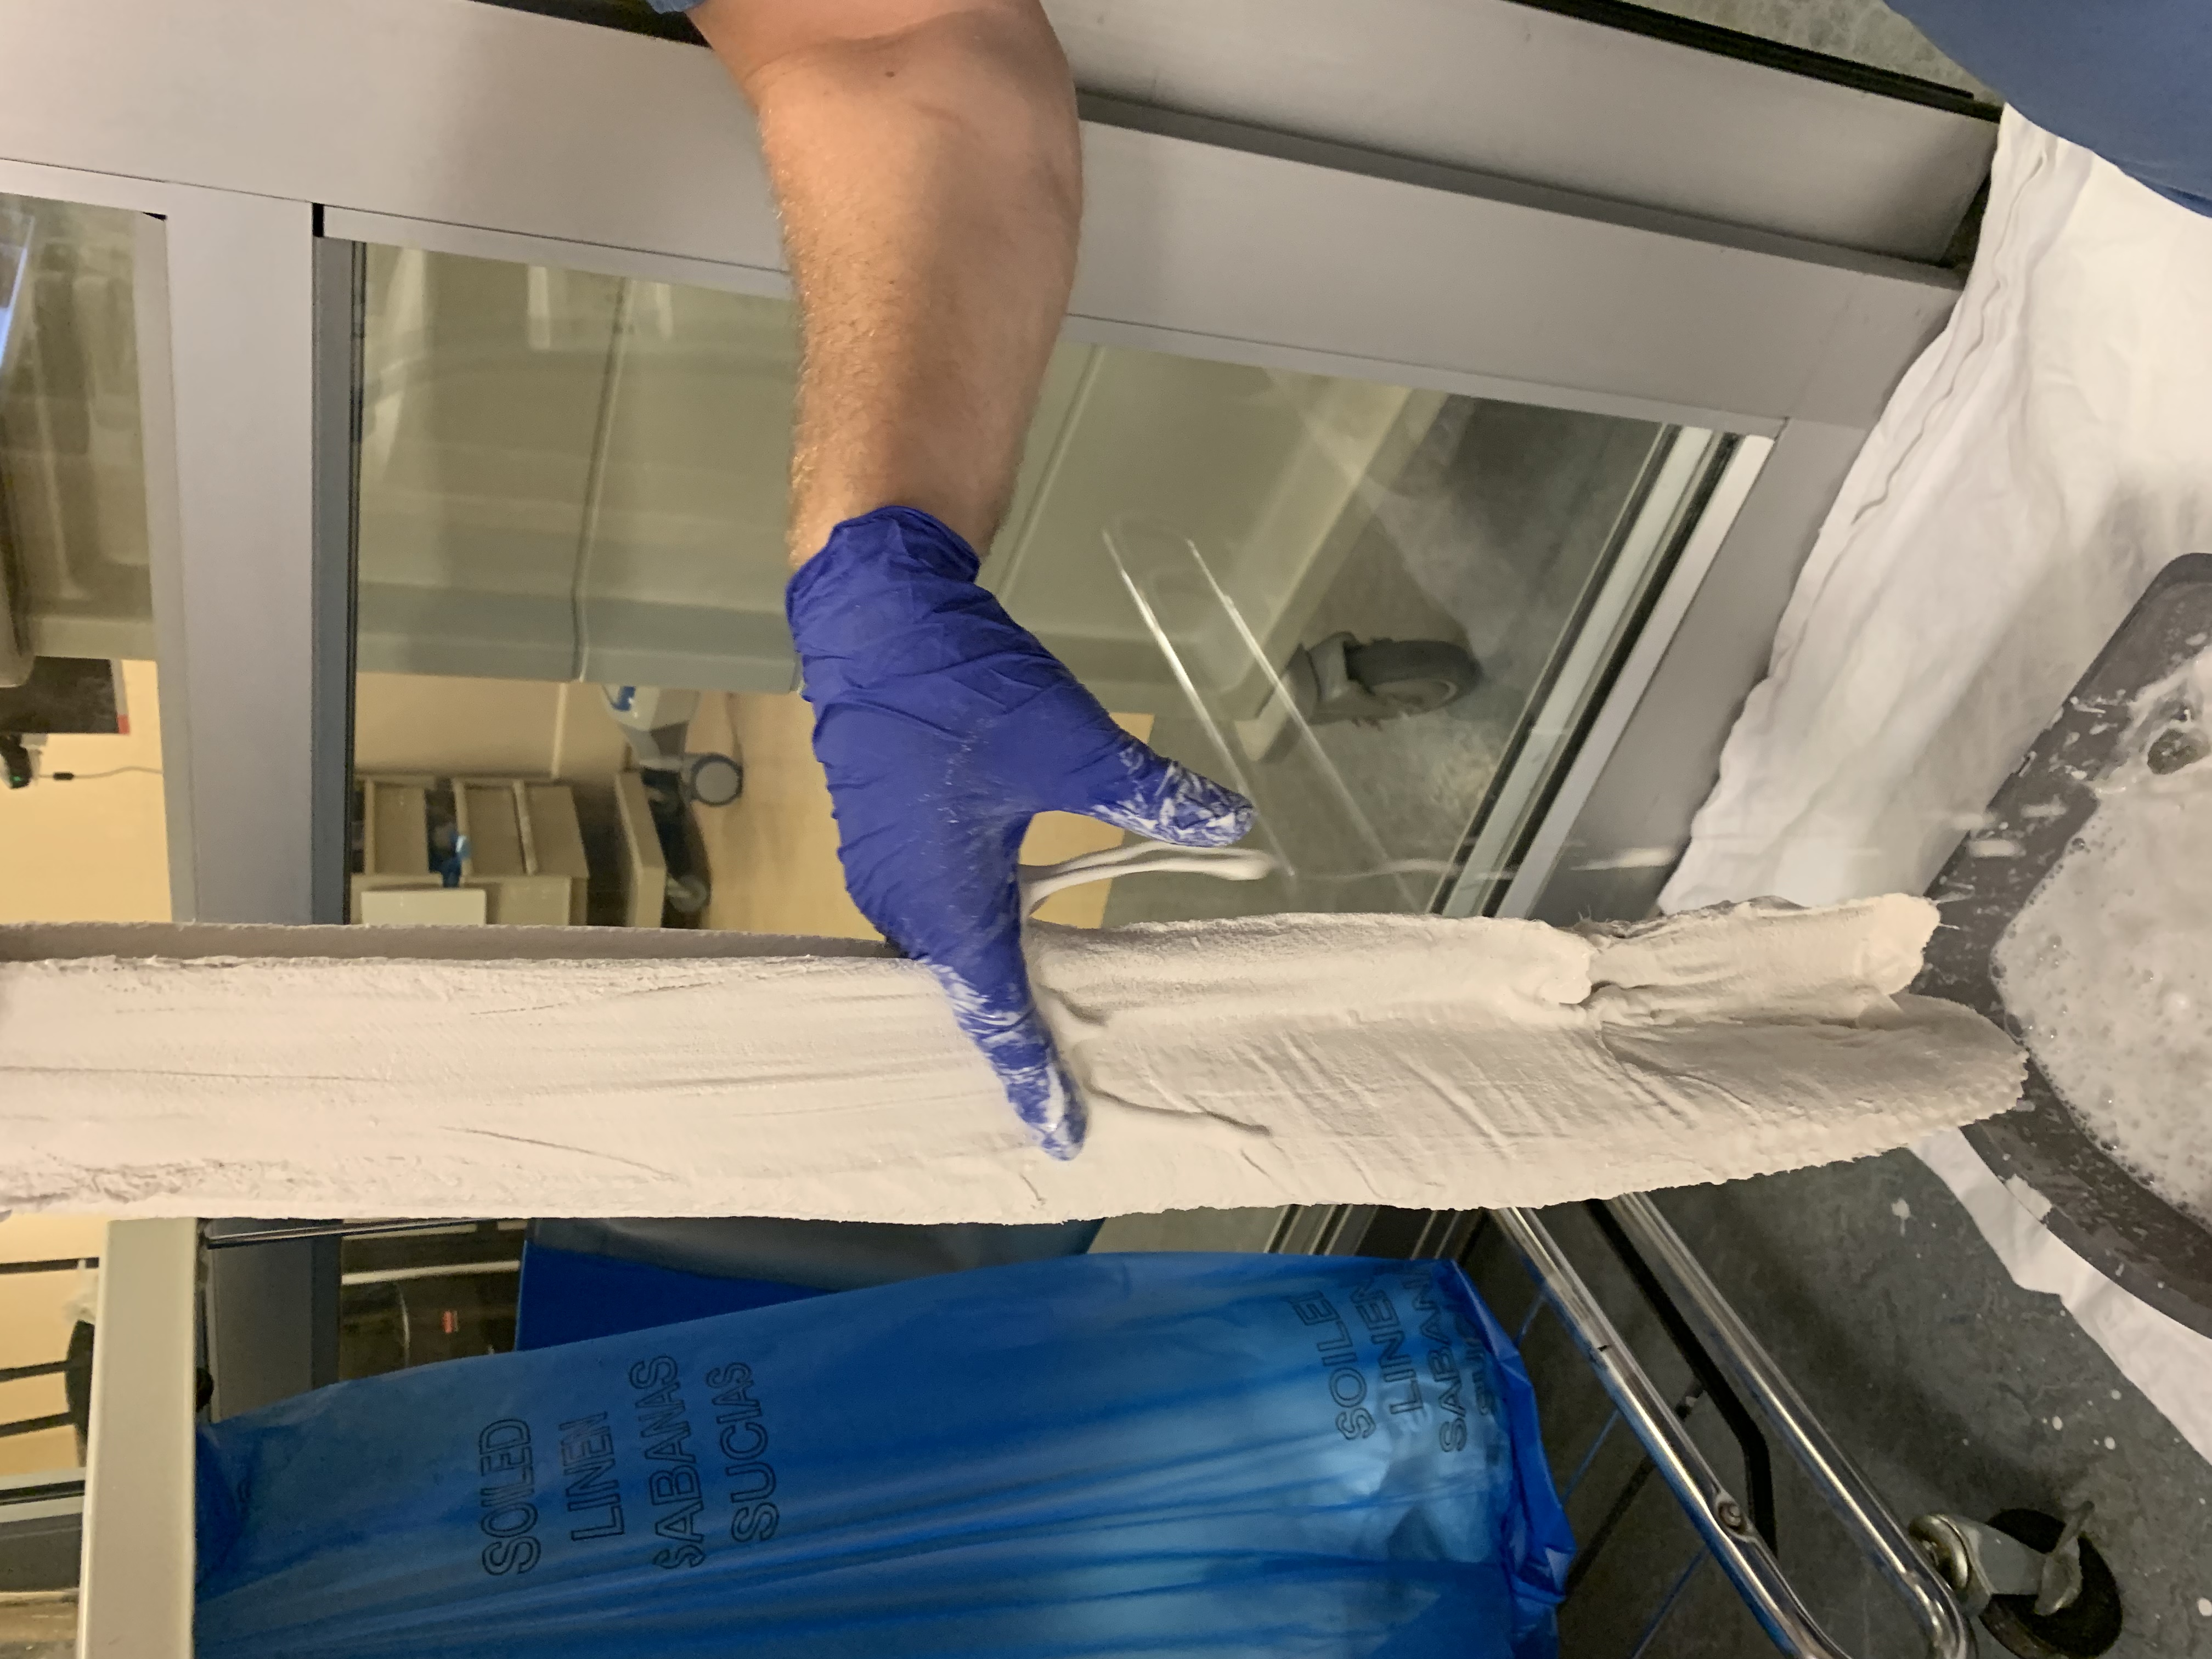
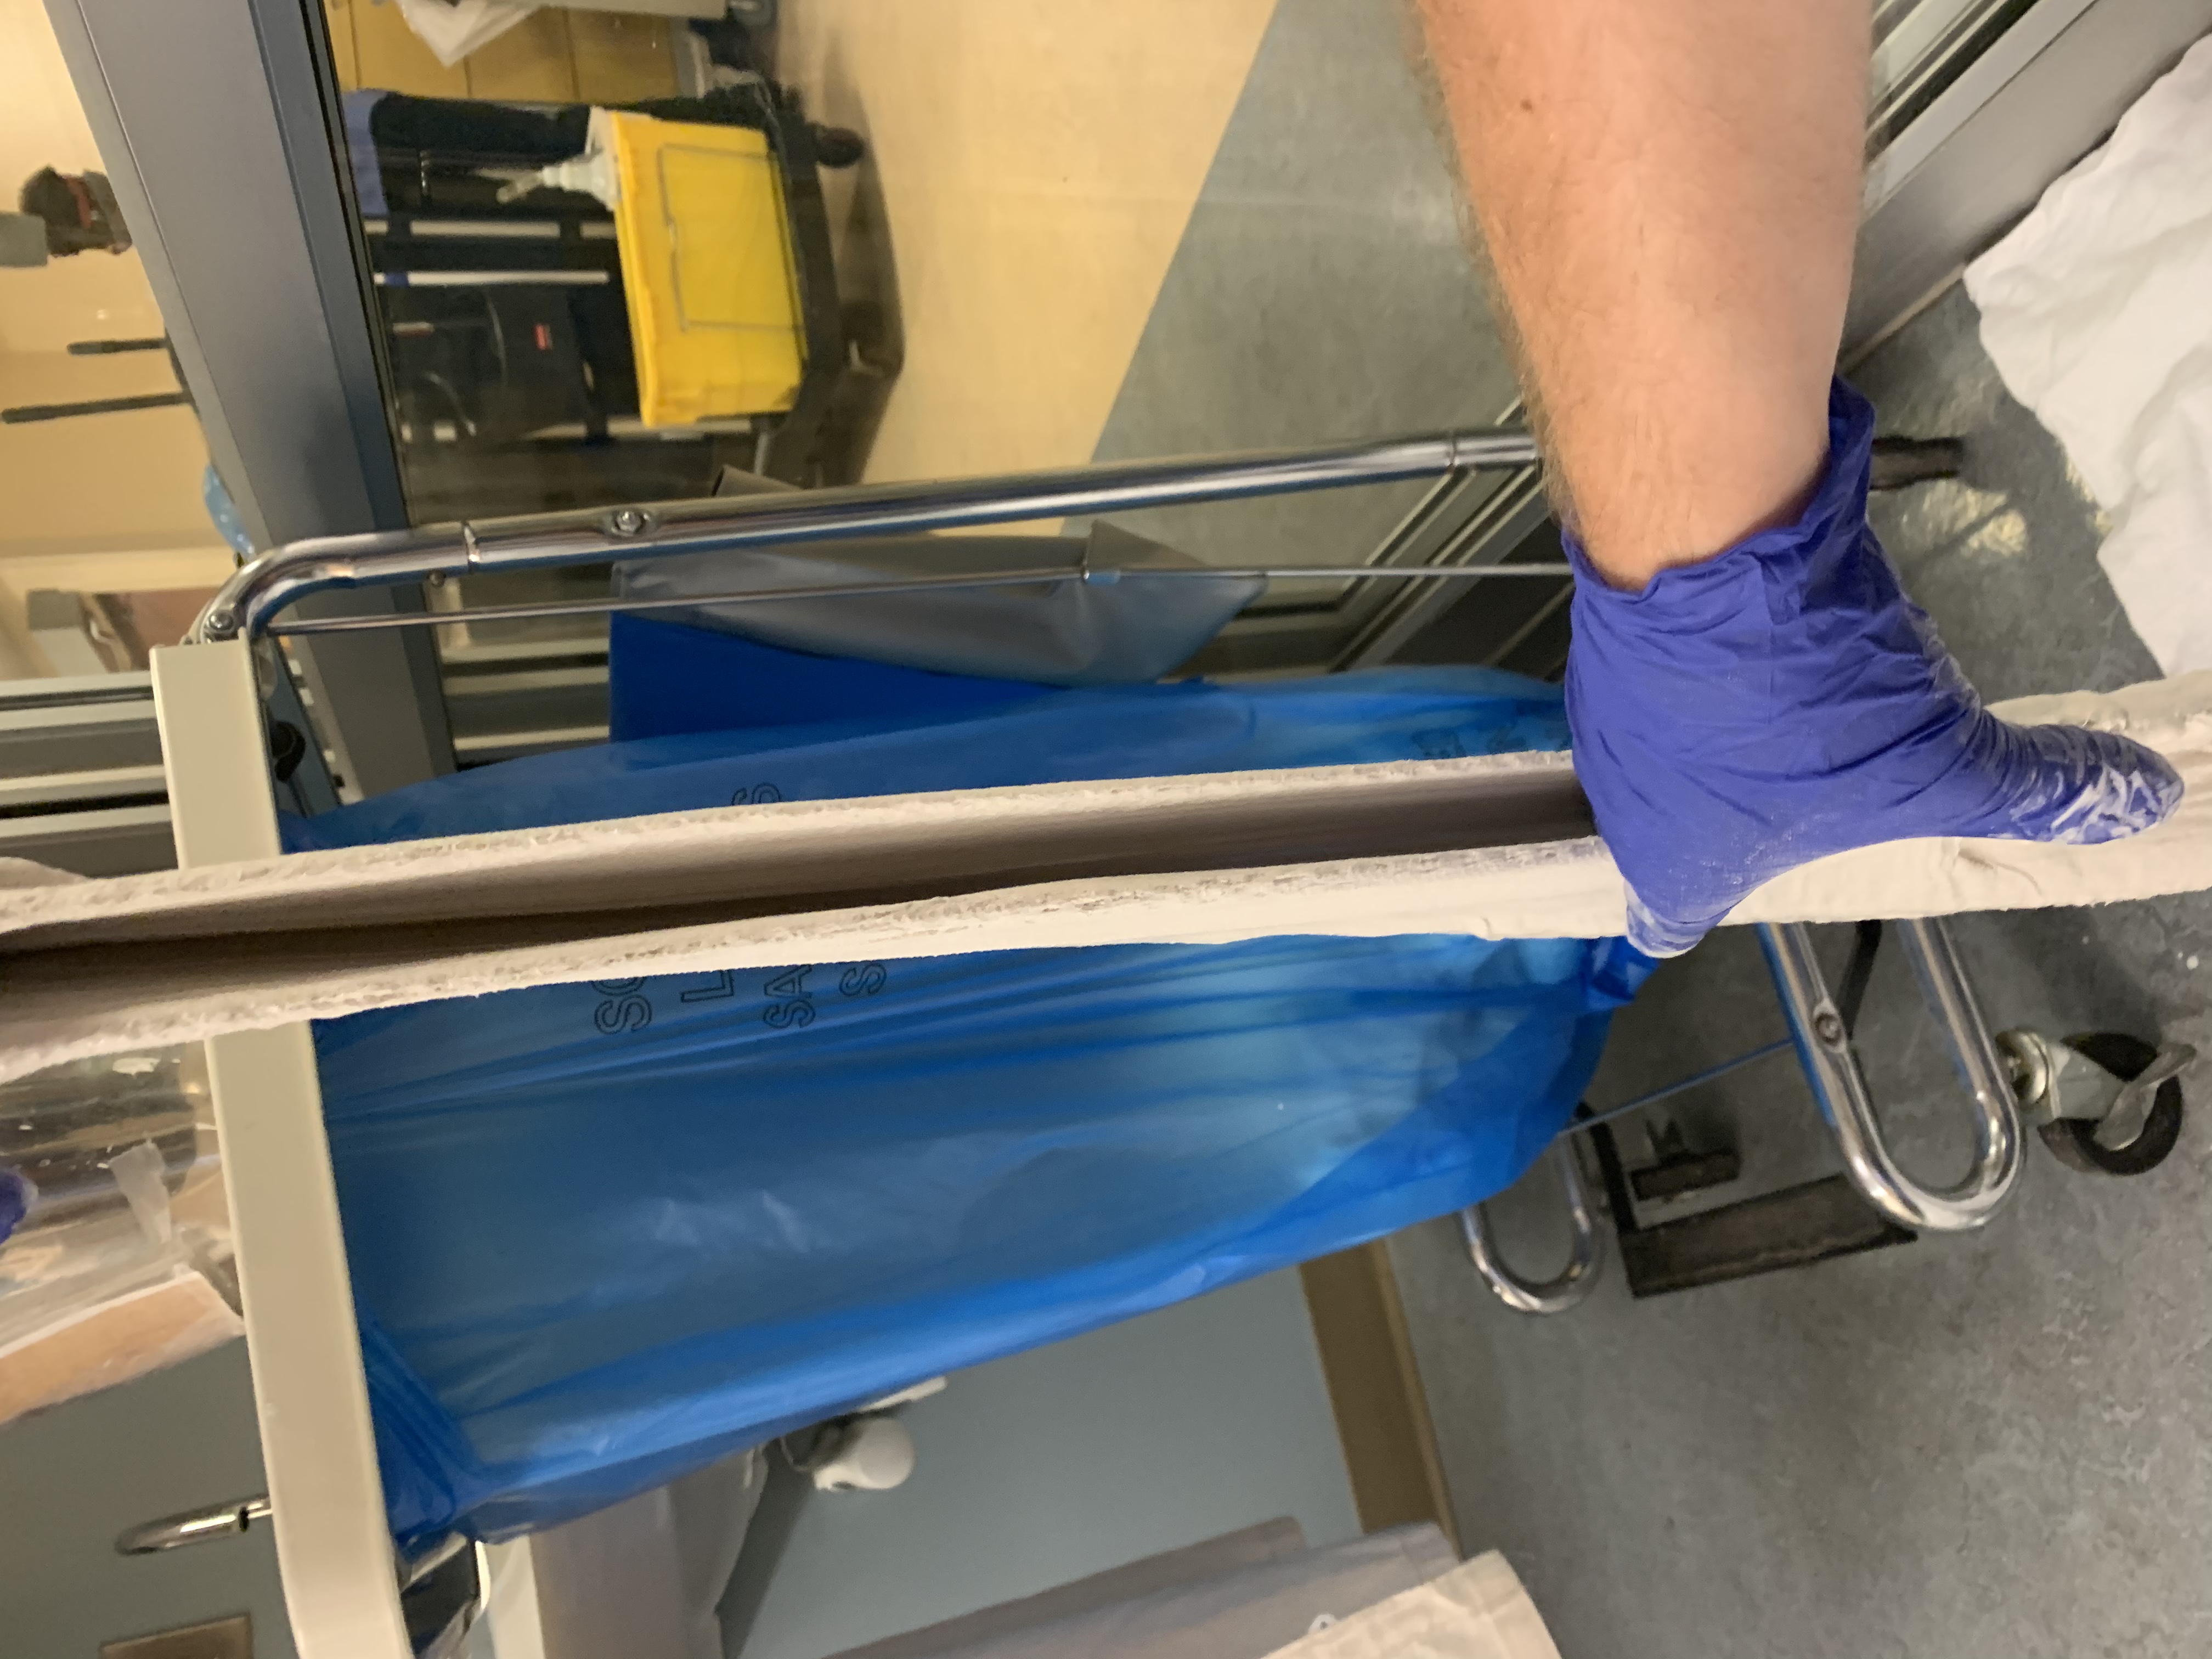
Carry the slabs up to the bed and set one down while you place one slab at a time.
I like to place the stirrups first, centering its length on the posterior middle third of the foot, and wrapping it up the sides of the leg.
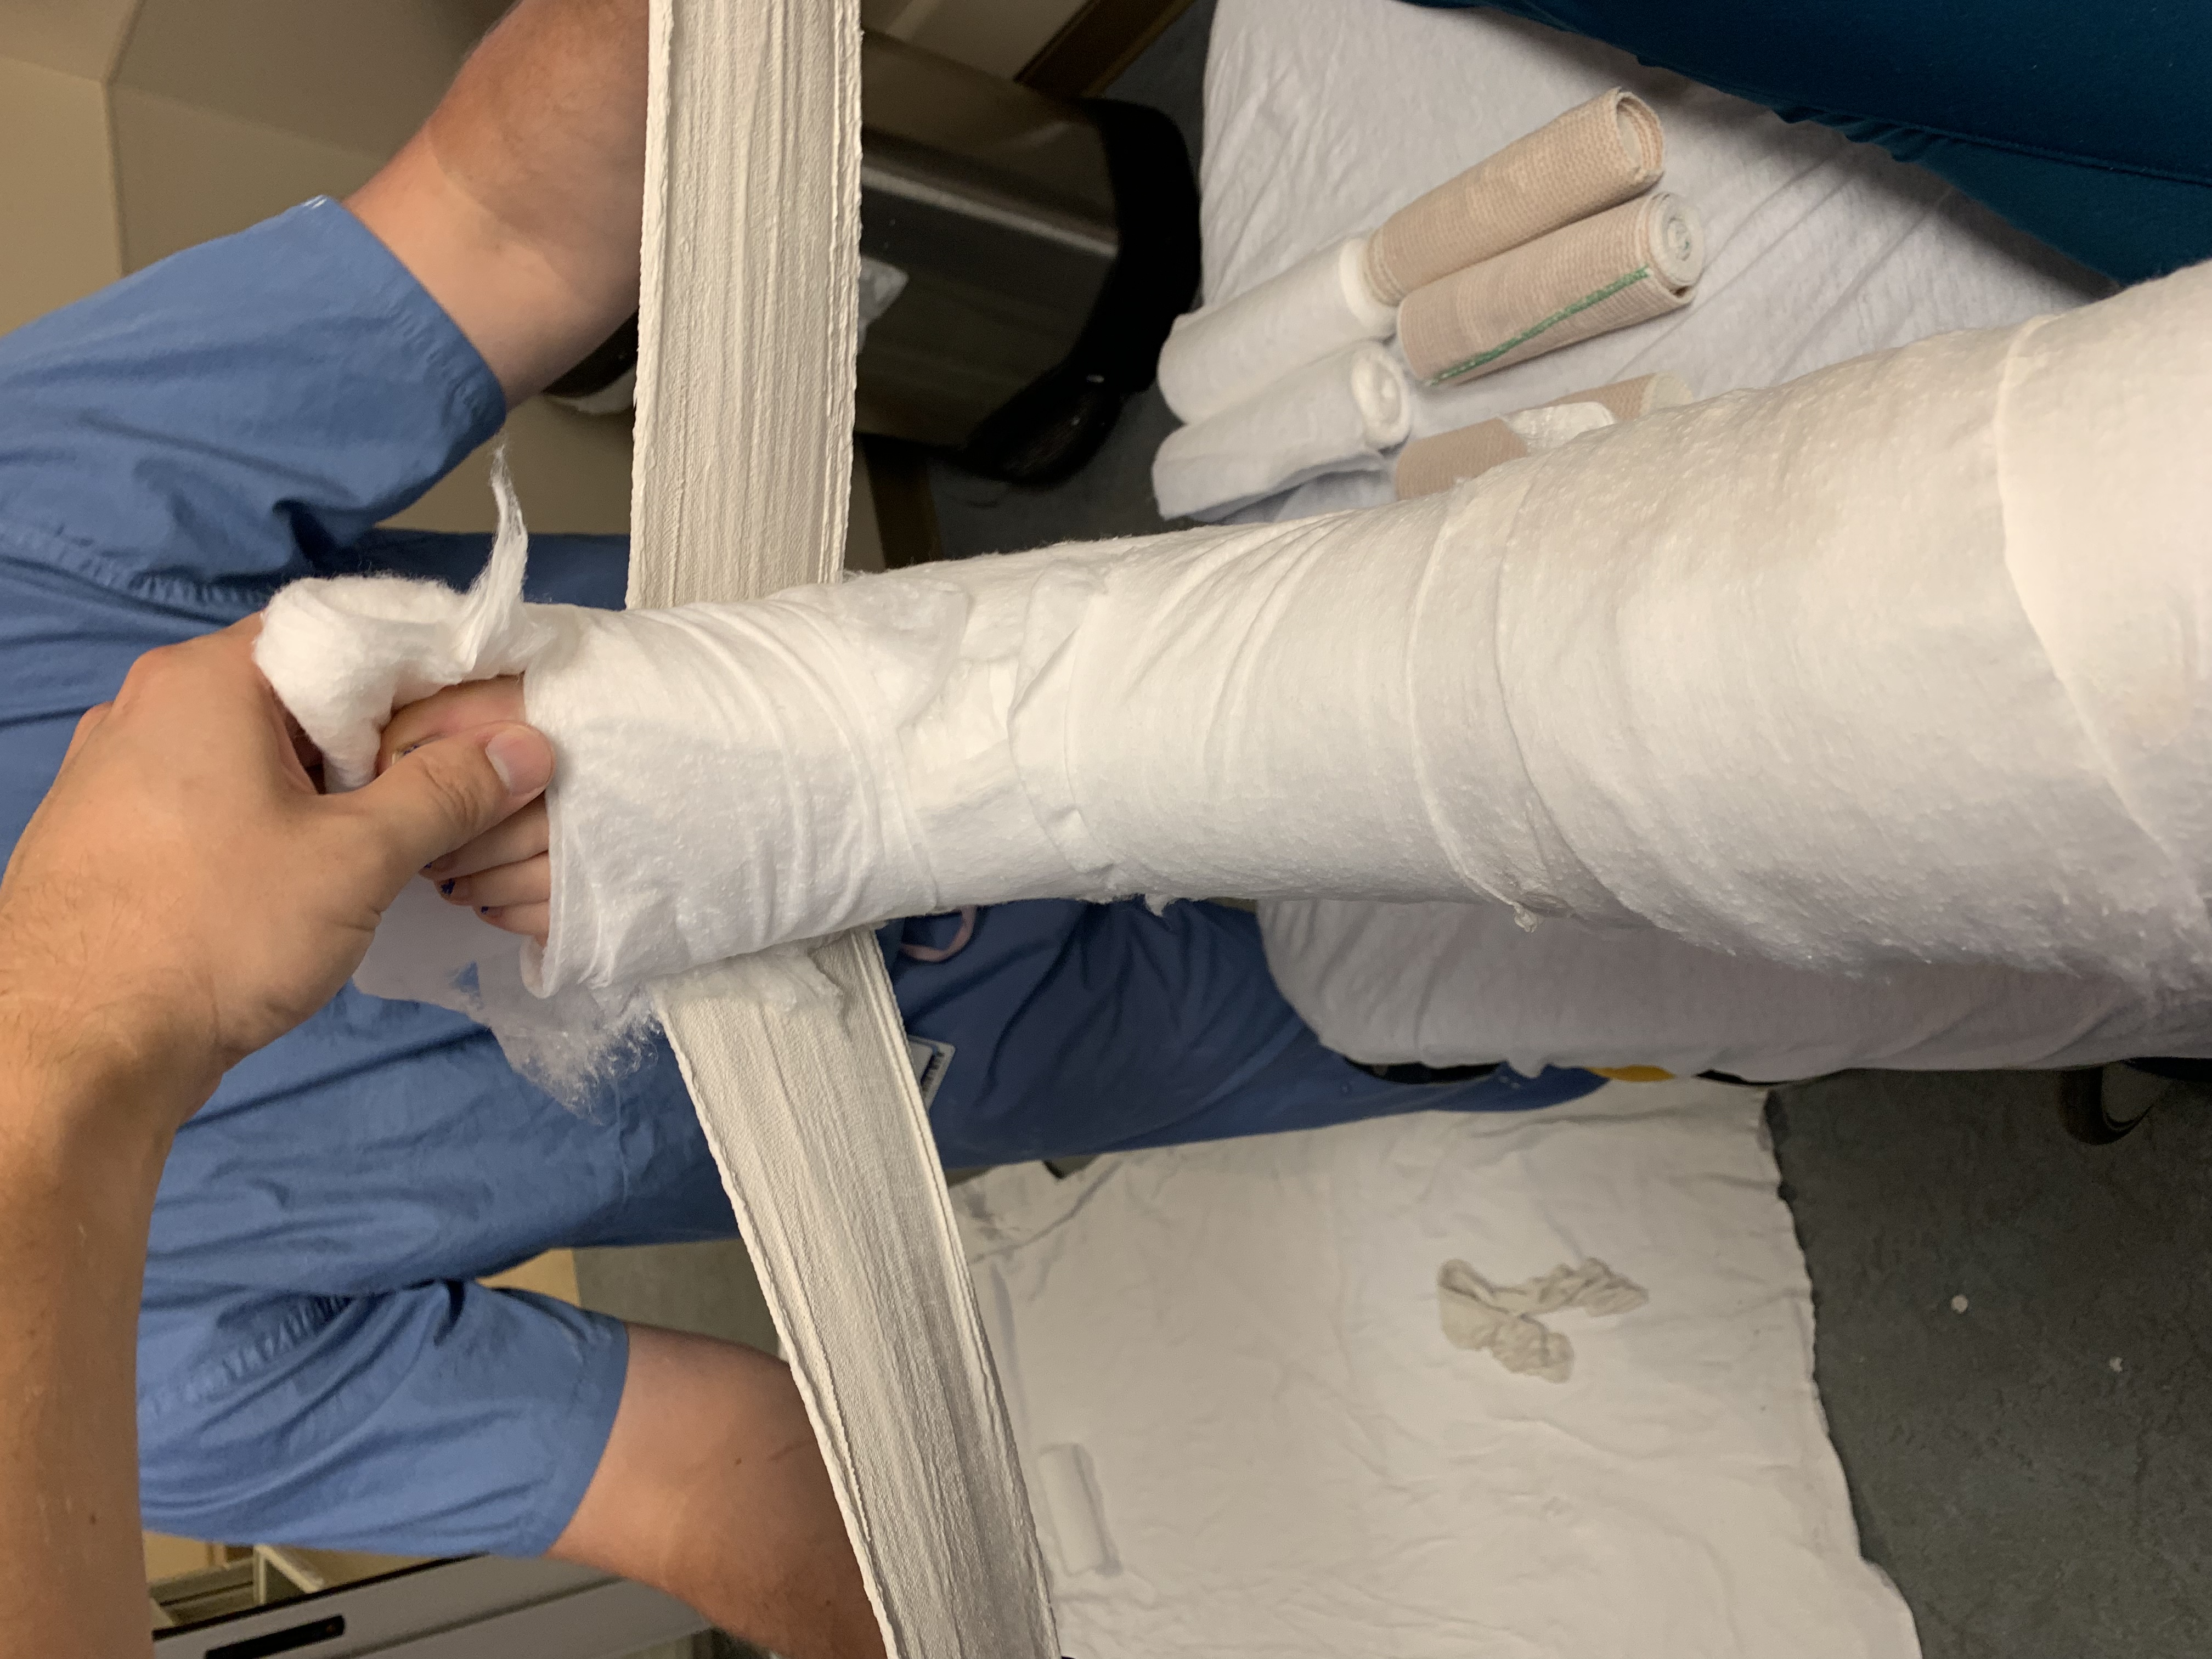
Ensure that the ends of the slab do not touch anteriorly, this can be very difficult to get off if it does and can create a circumferential wrap on the leg which can cause compartment syndrome if the injury and swelling is severe enough.
Note: In long legs, you may have to roll out 6inch plaster to the desired length should the precut 5x30inch slabs be too short. Ideally the plaster ends near the tibial tubercle at the proximal tibia.
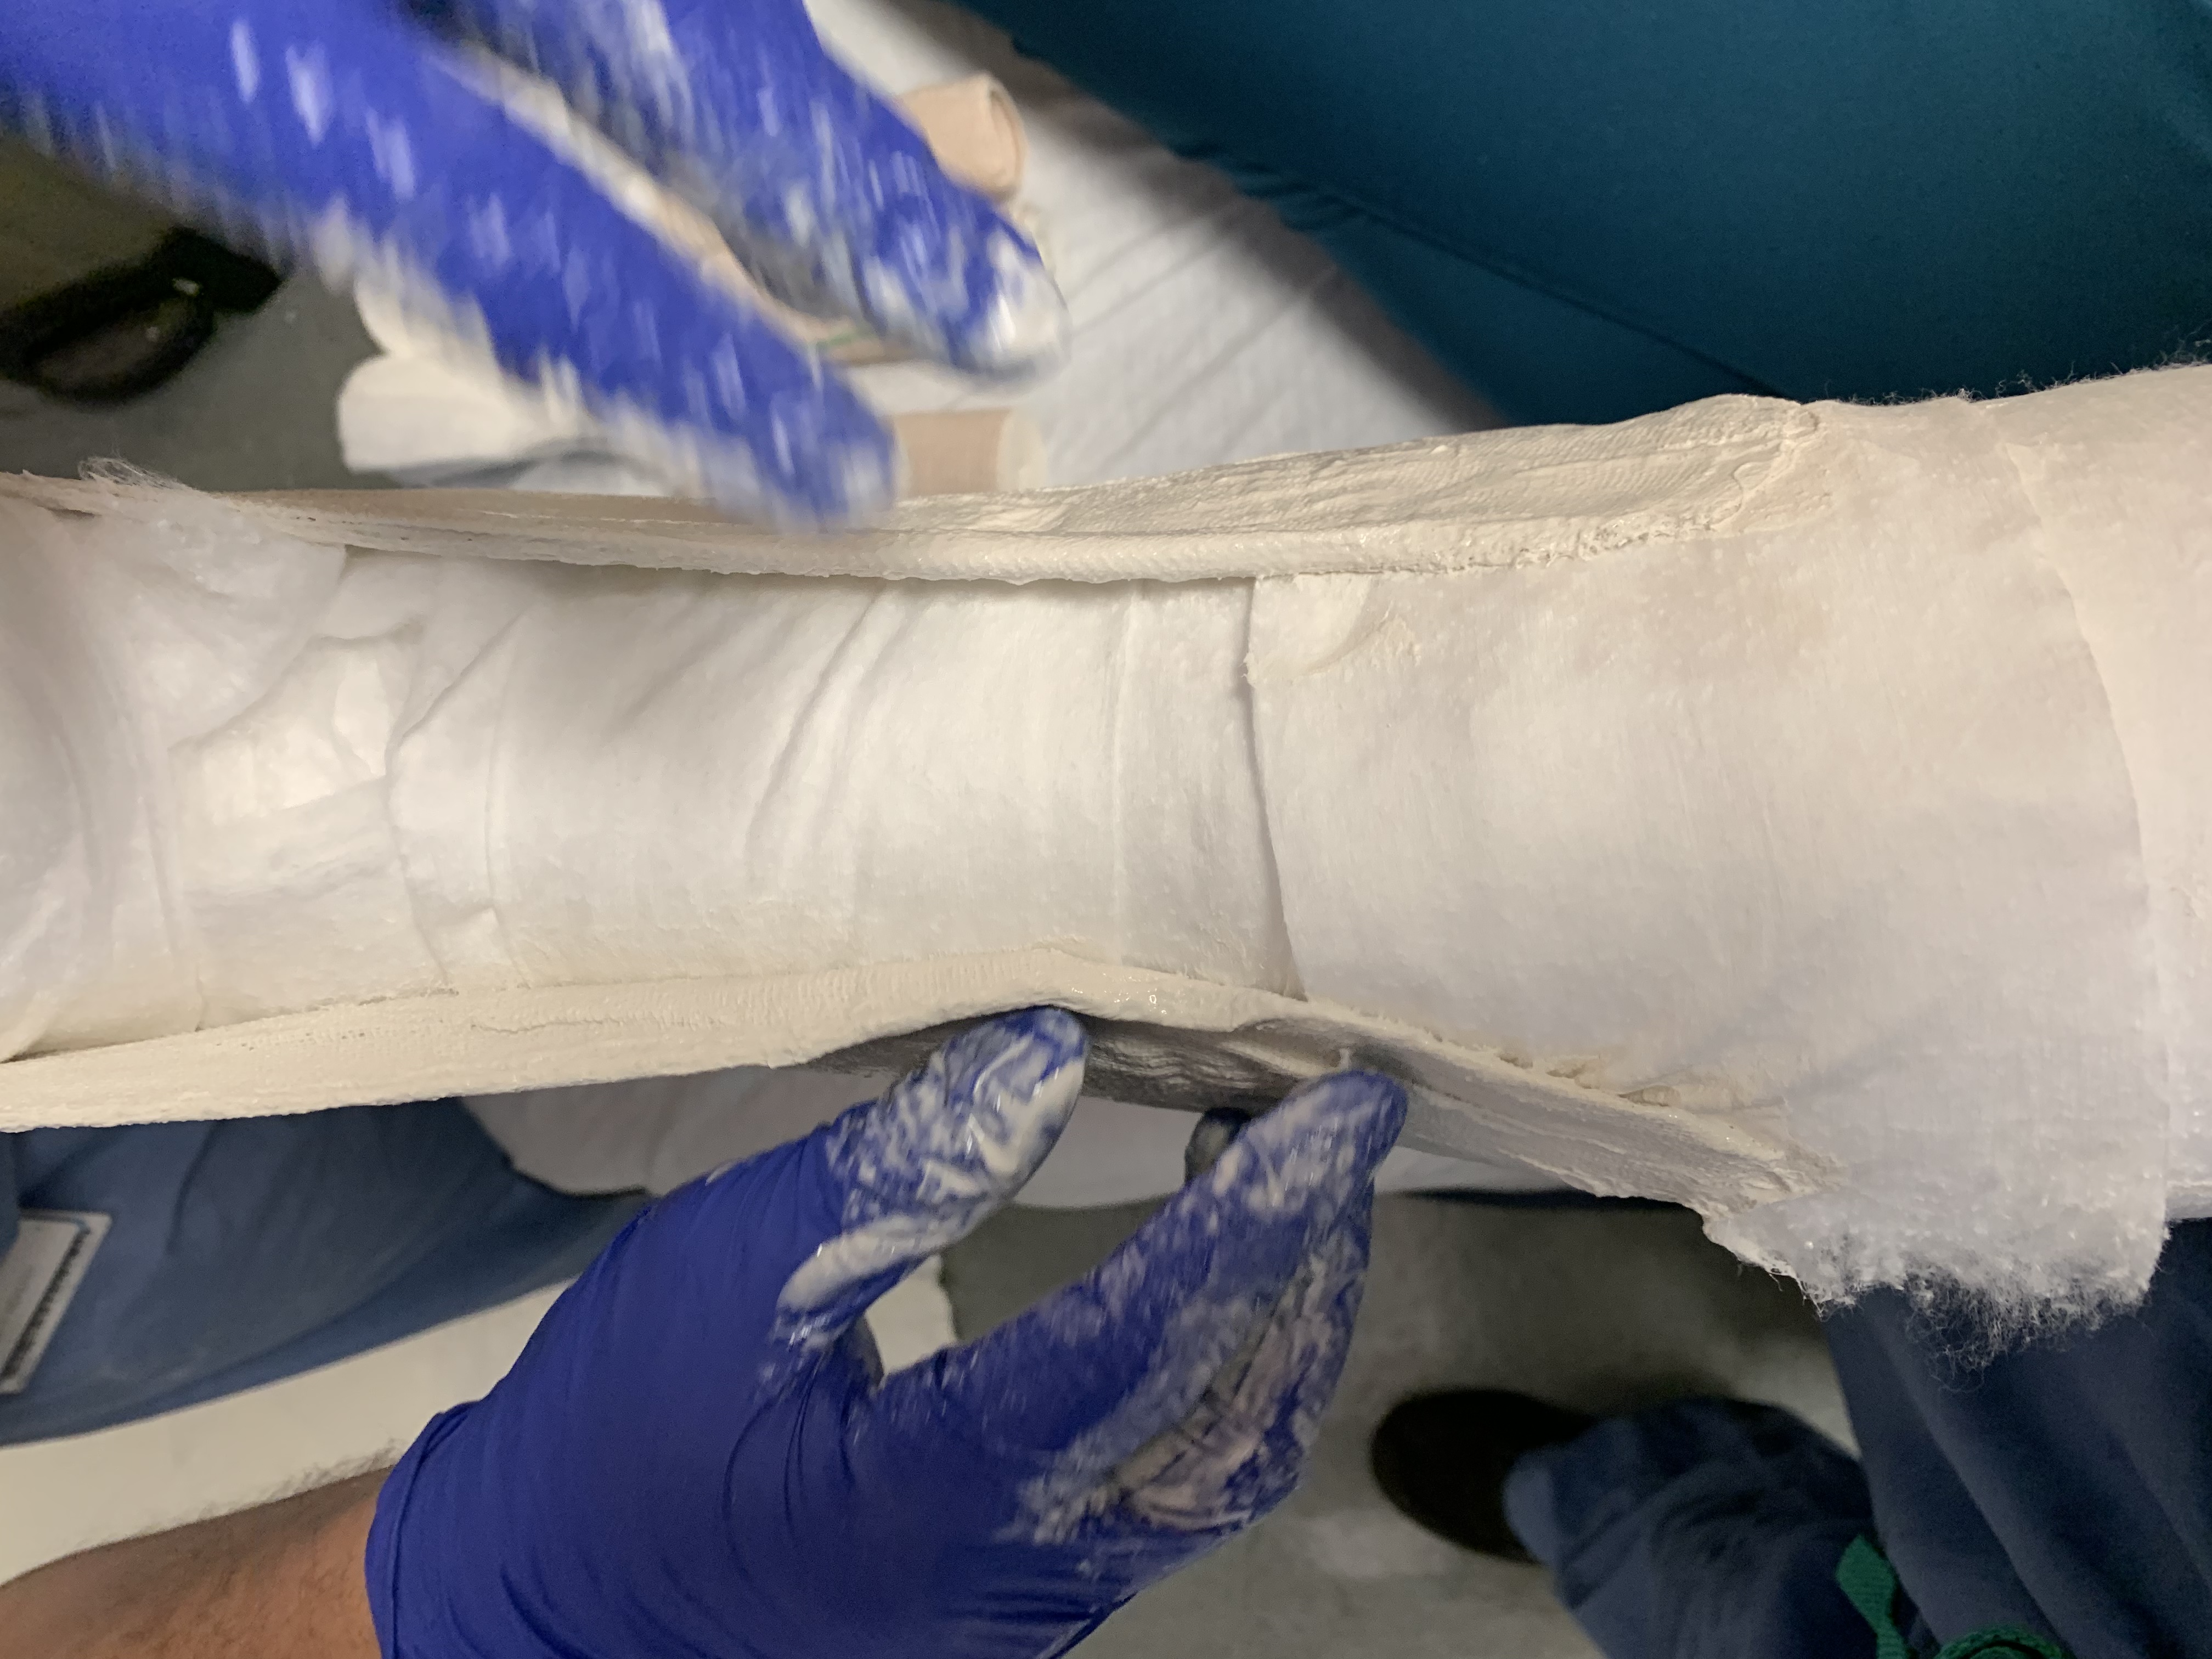
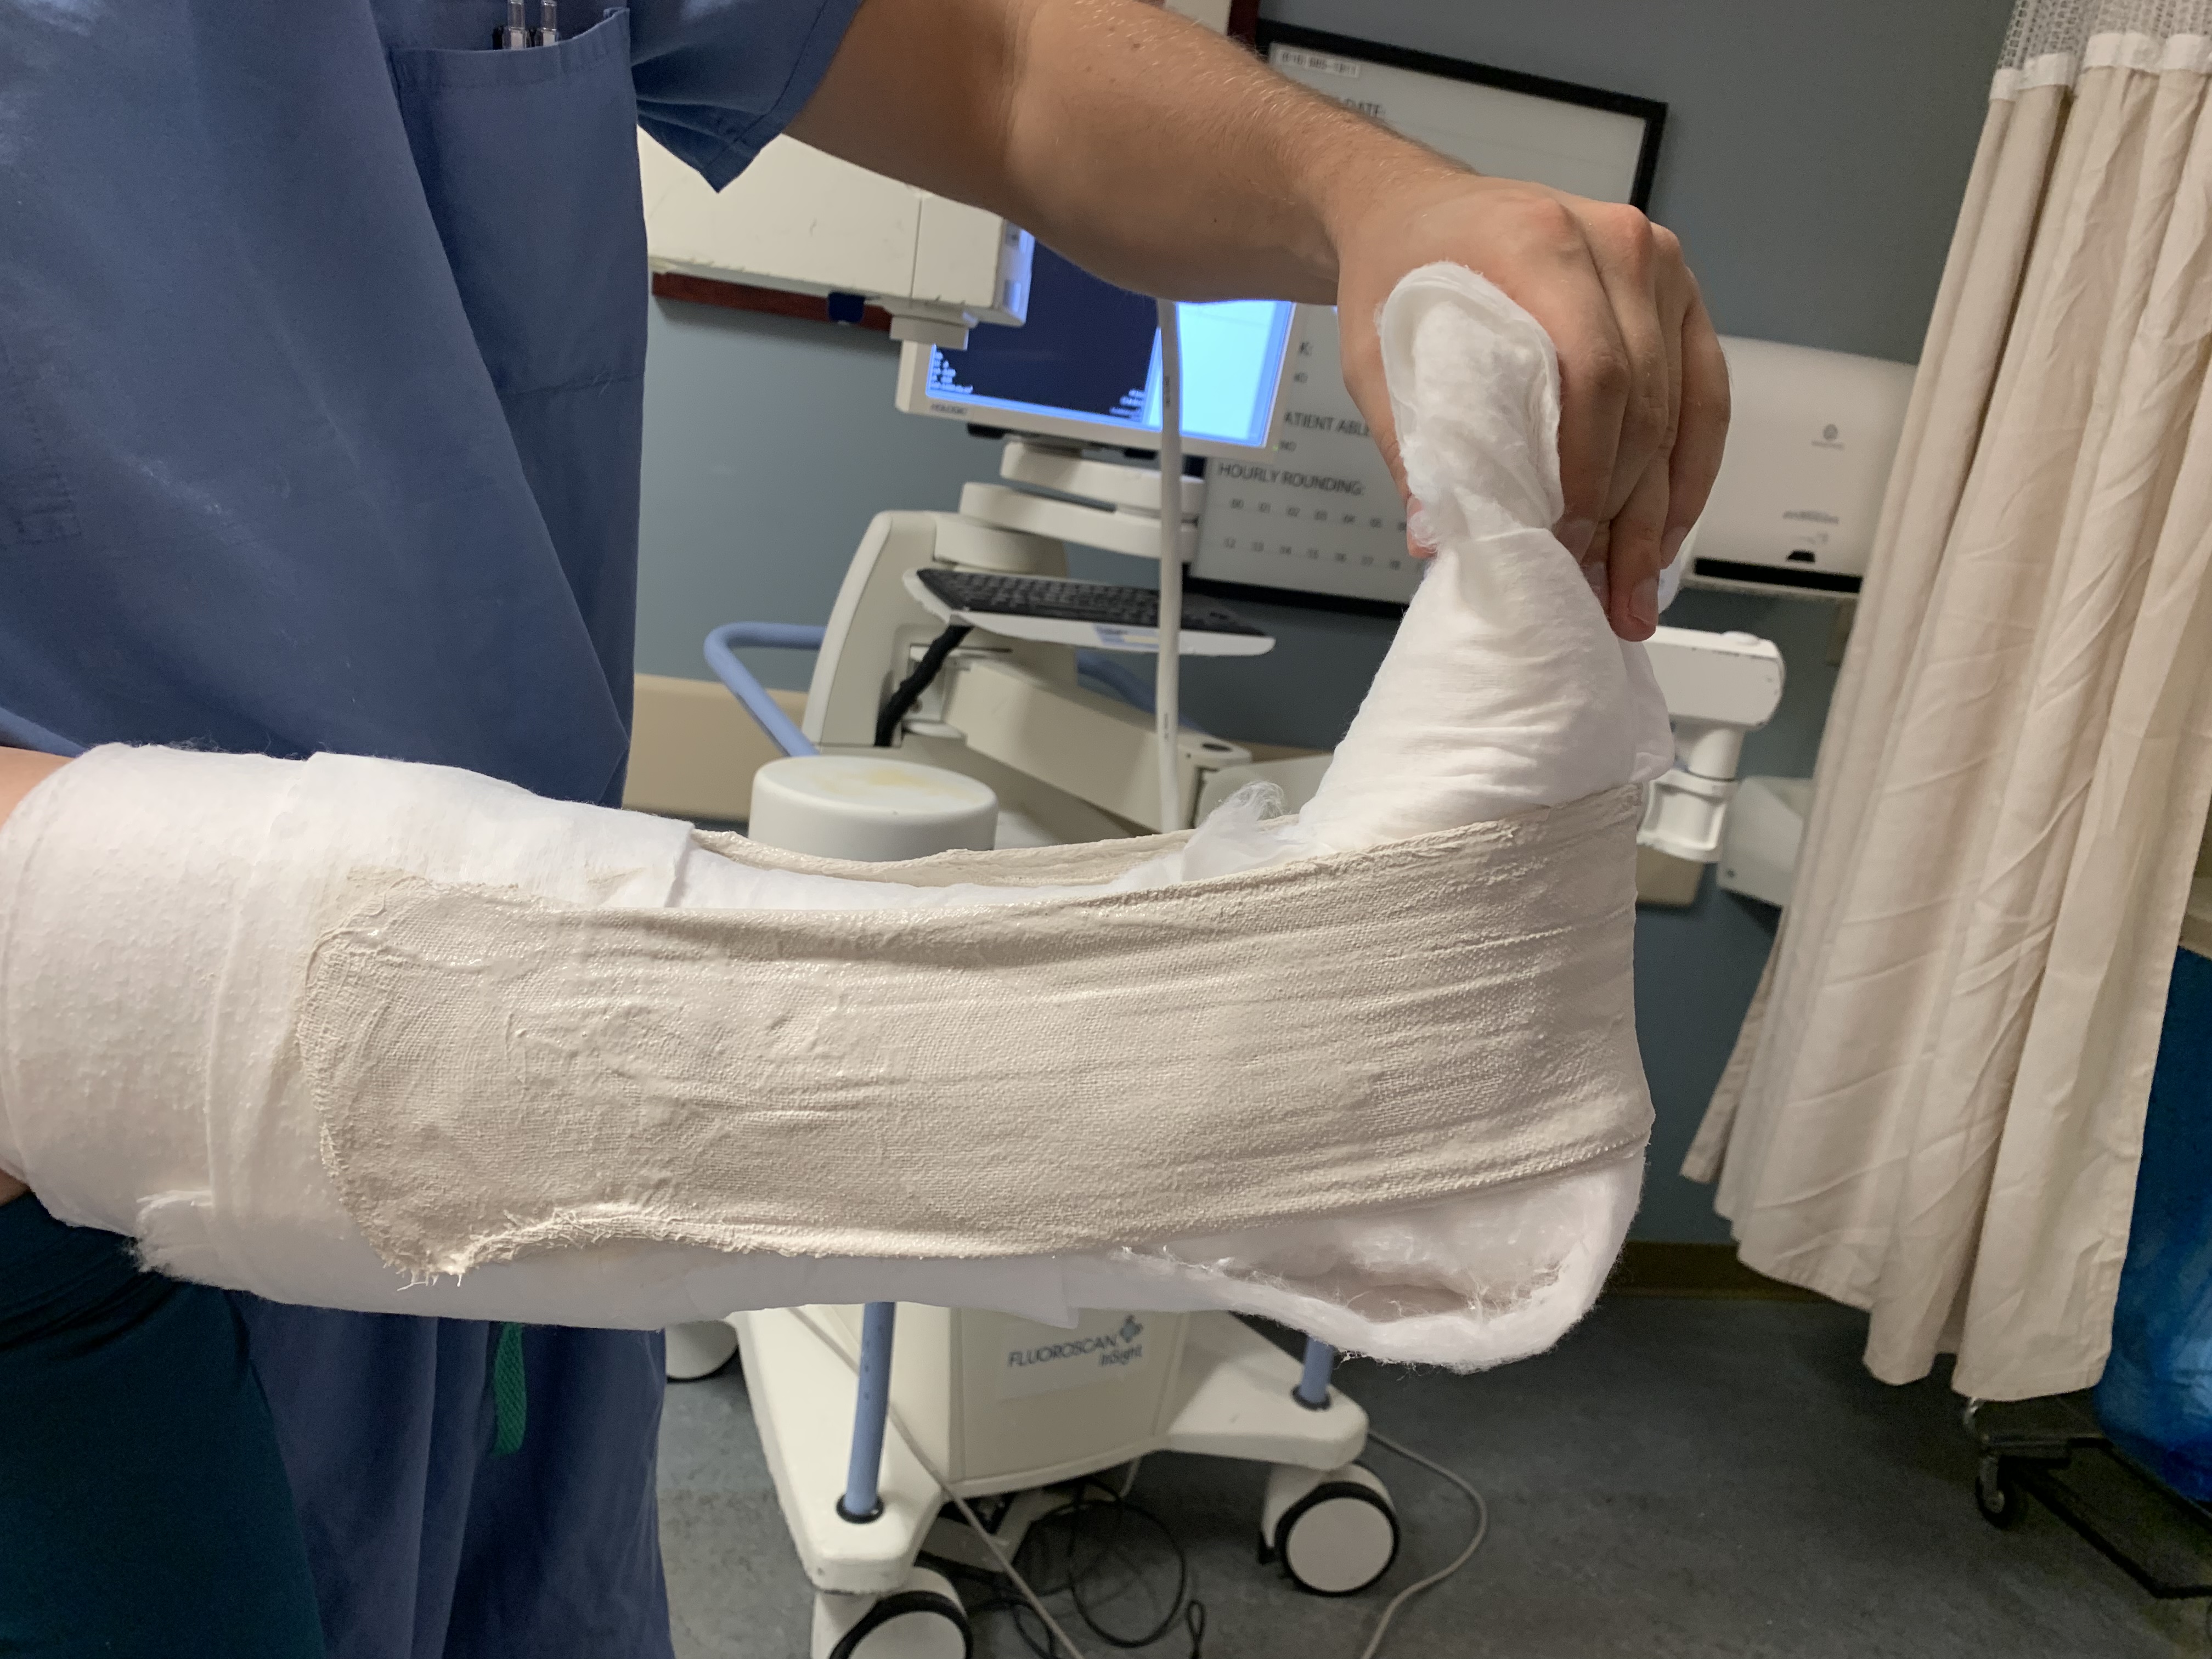
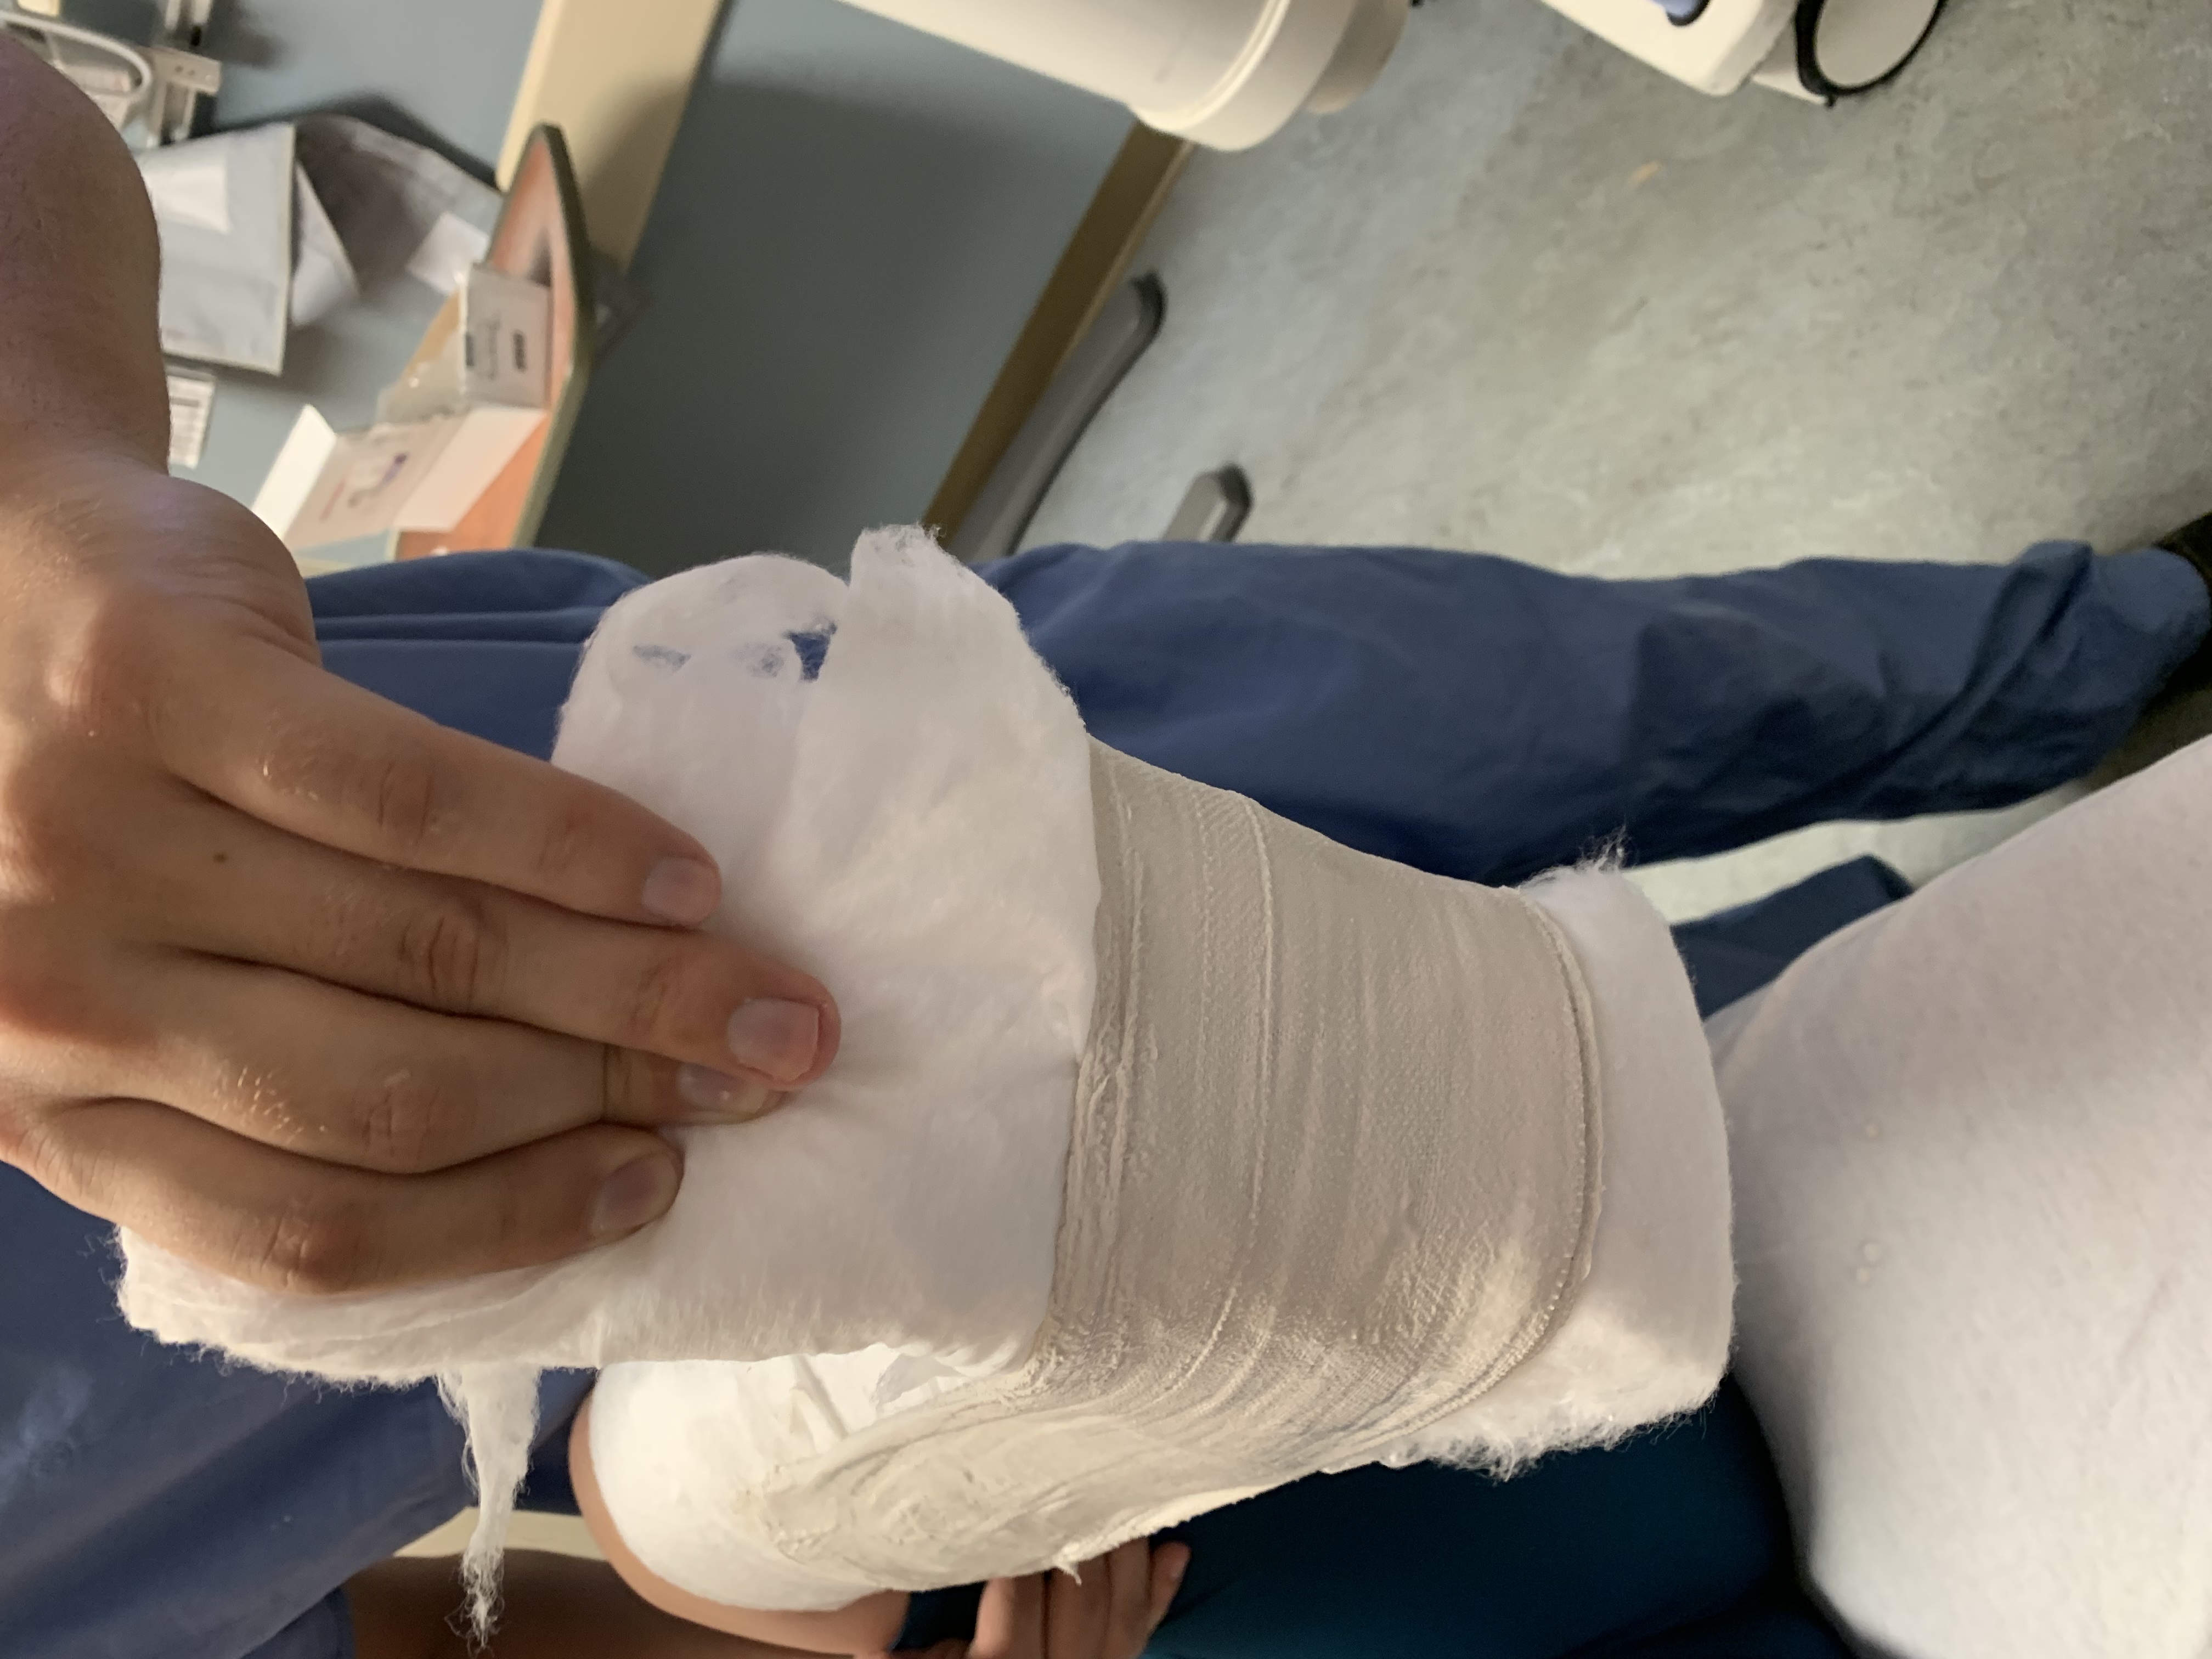
Make sure the splint material stays on your webril. You do not want plaster touching the patient’s skin.
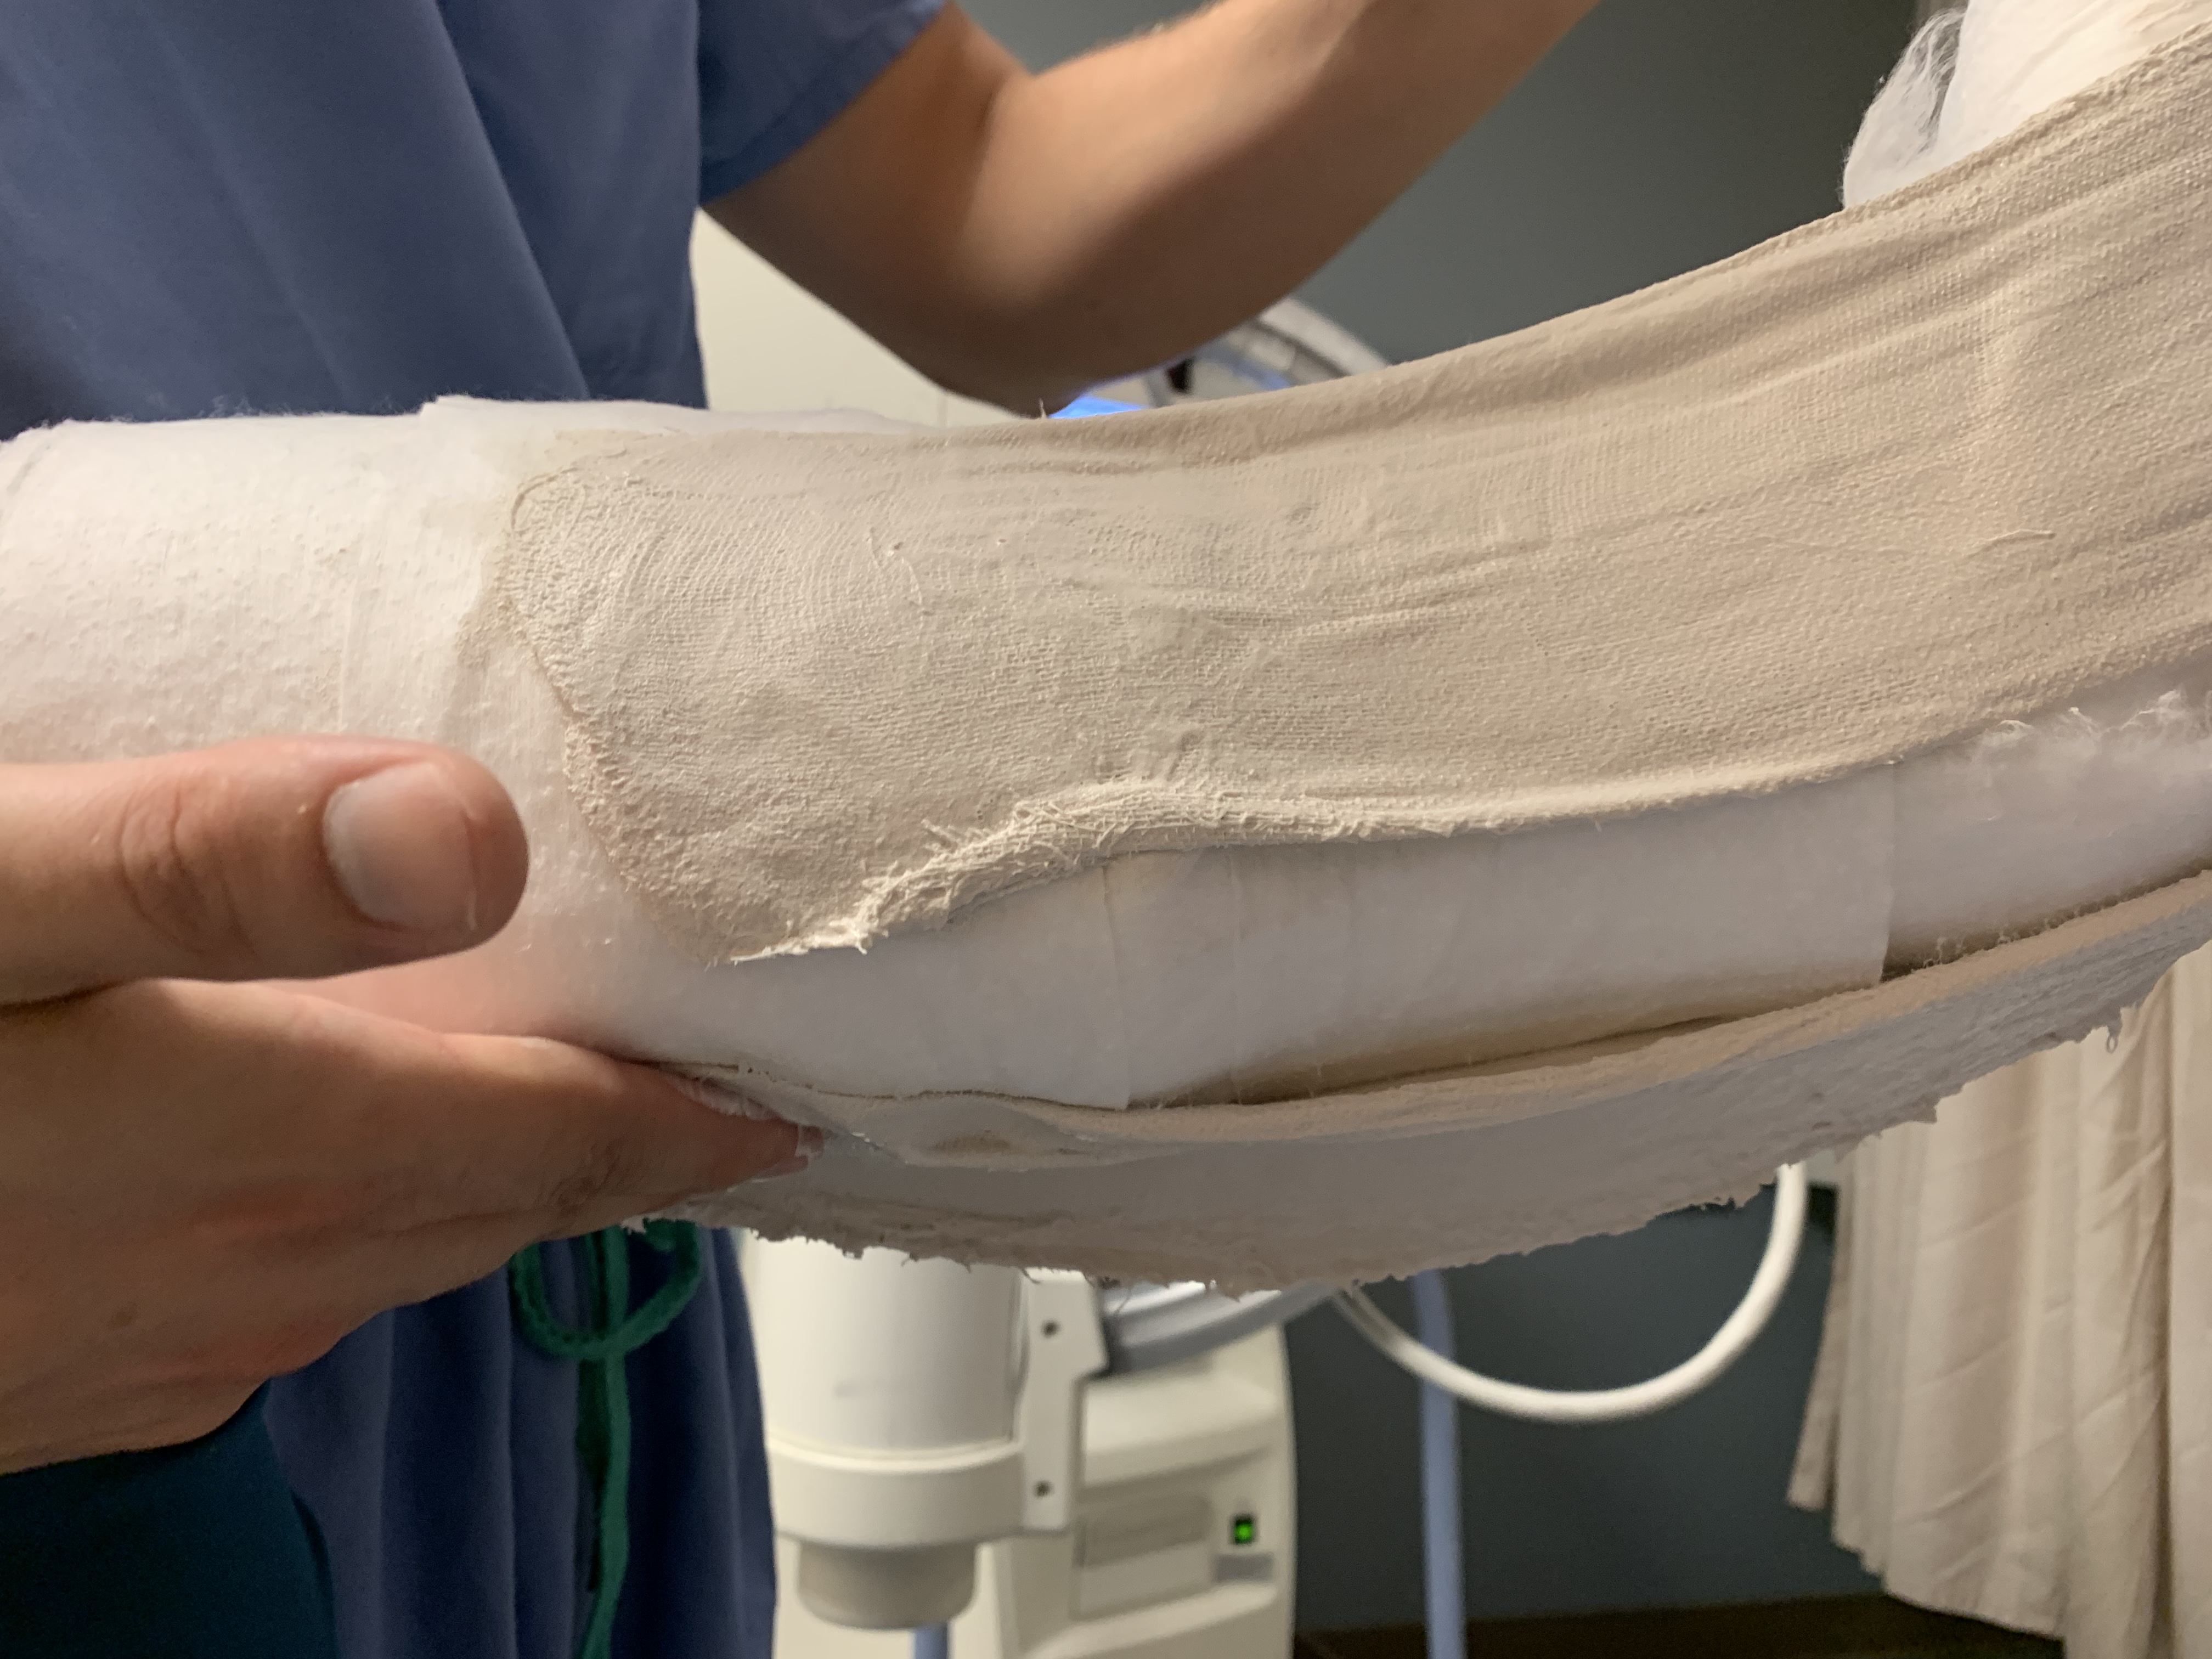
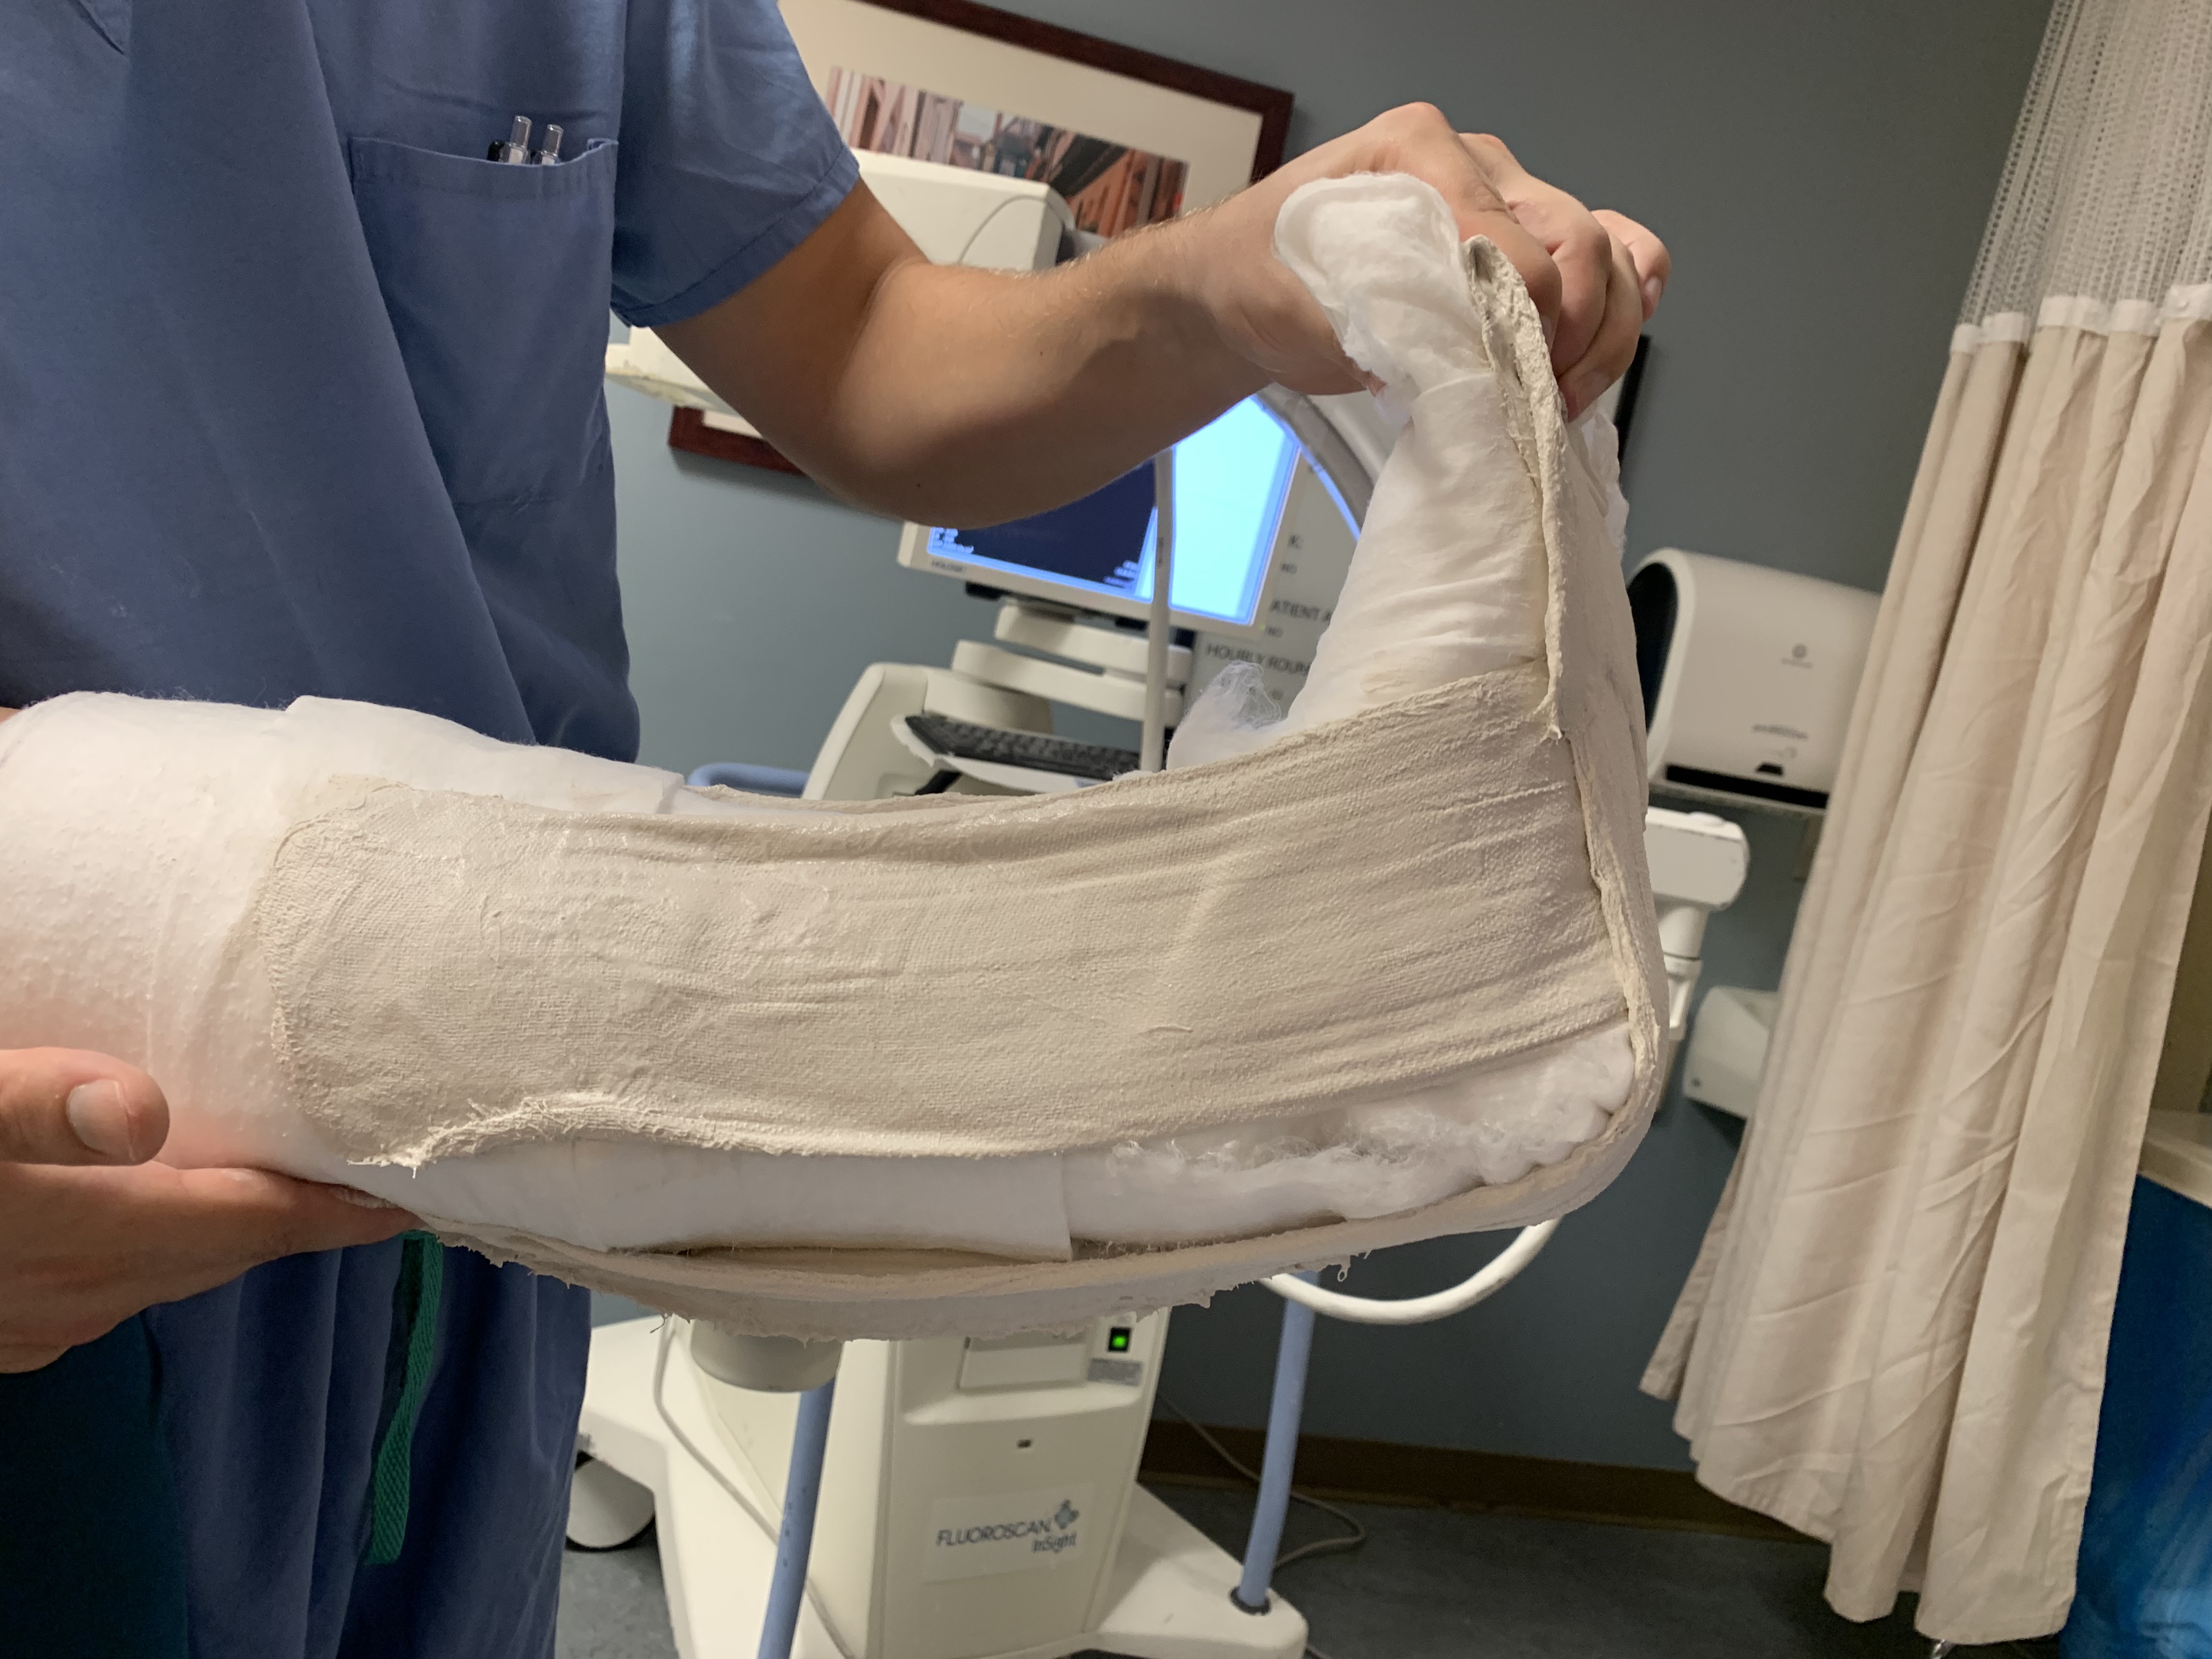
Here we folded back the plaster to the tips of the toes. (remember folding plaster doubles how many plaster layers are stacked which increases the heat, so be careful of this and ensure you have enough padding as this also helps protect the skin from excess heat).
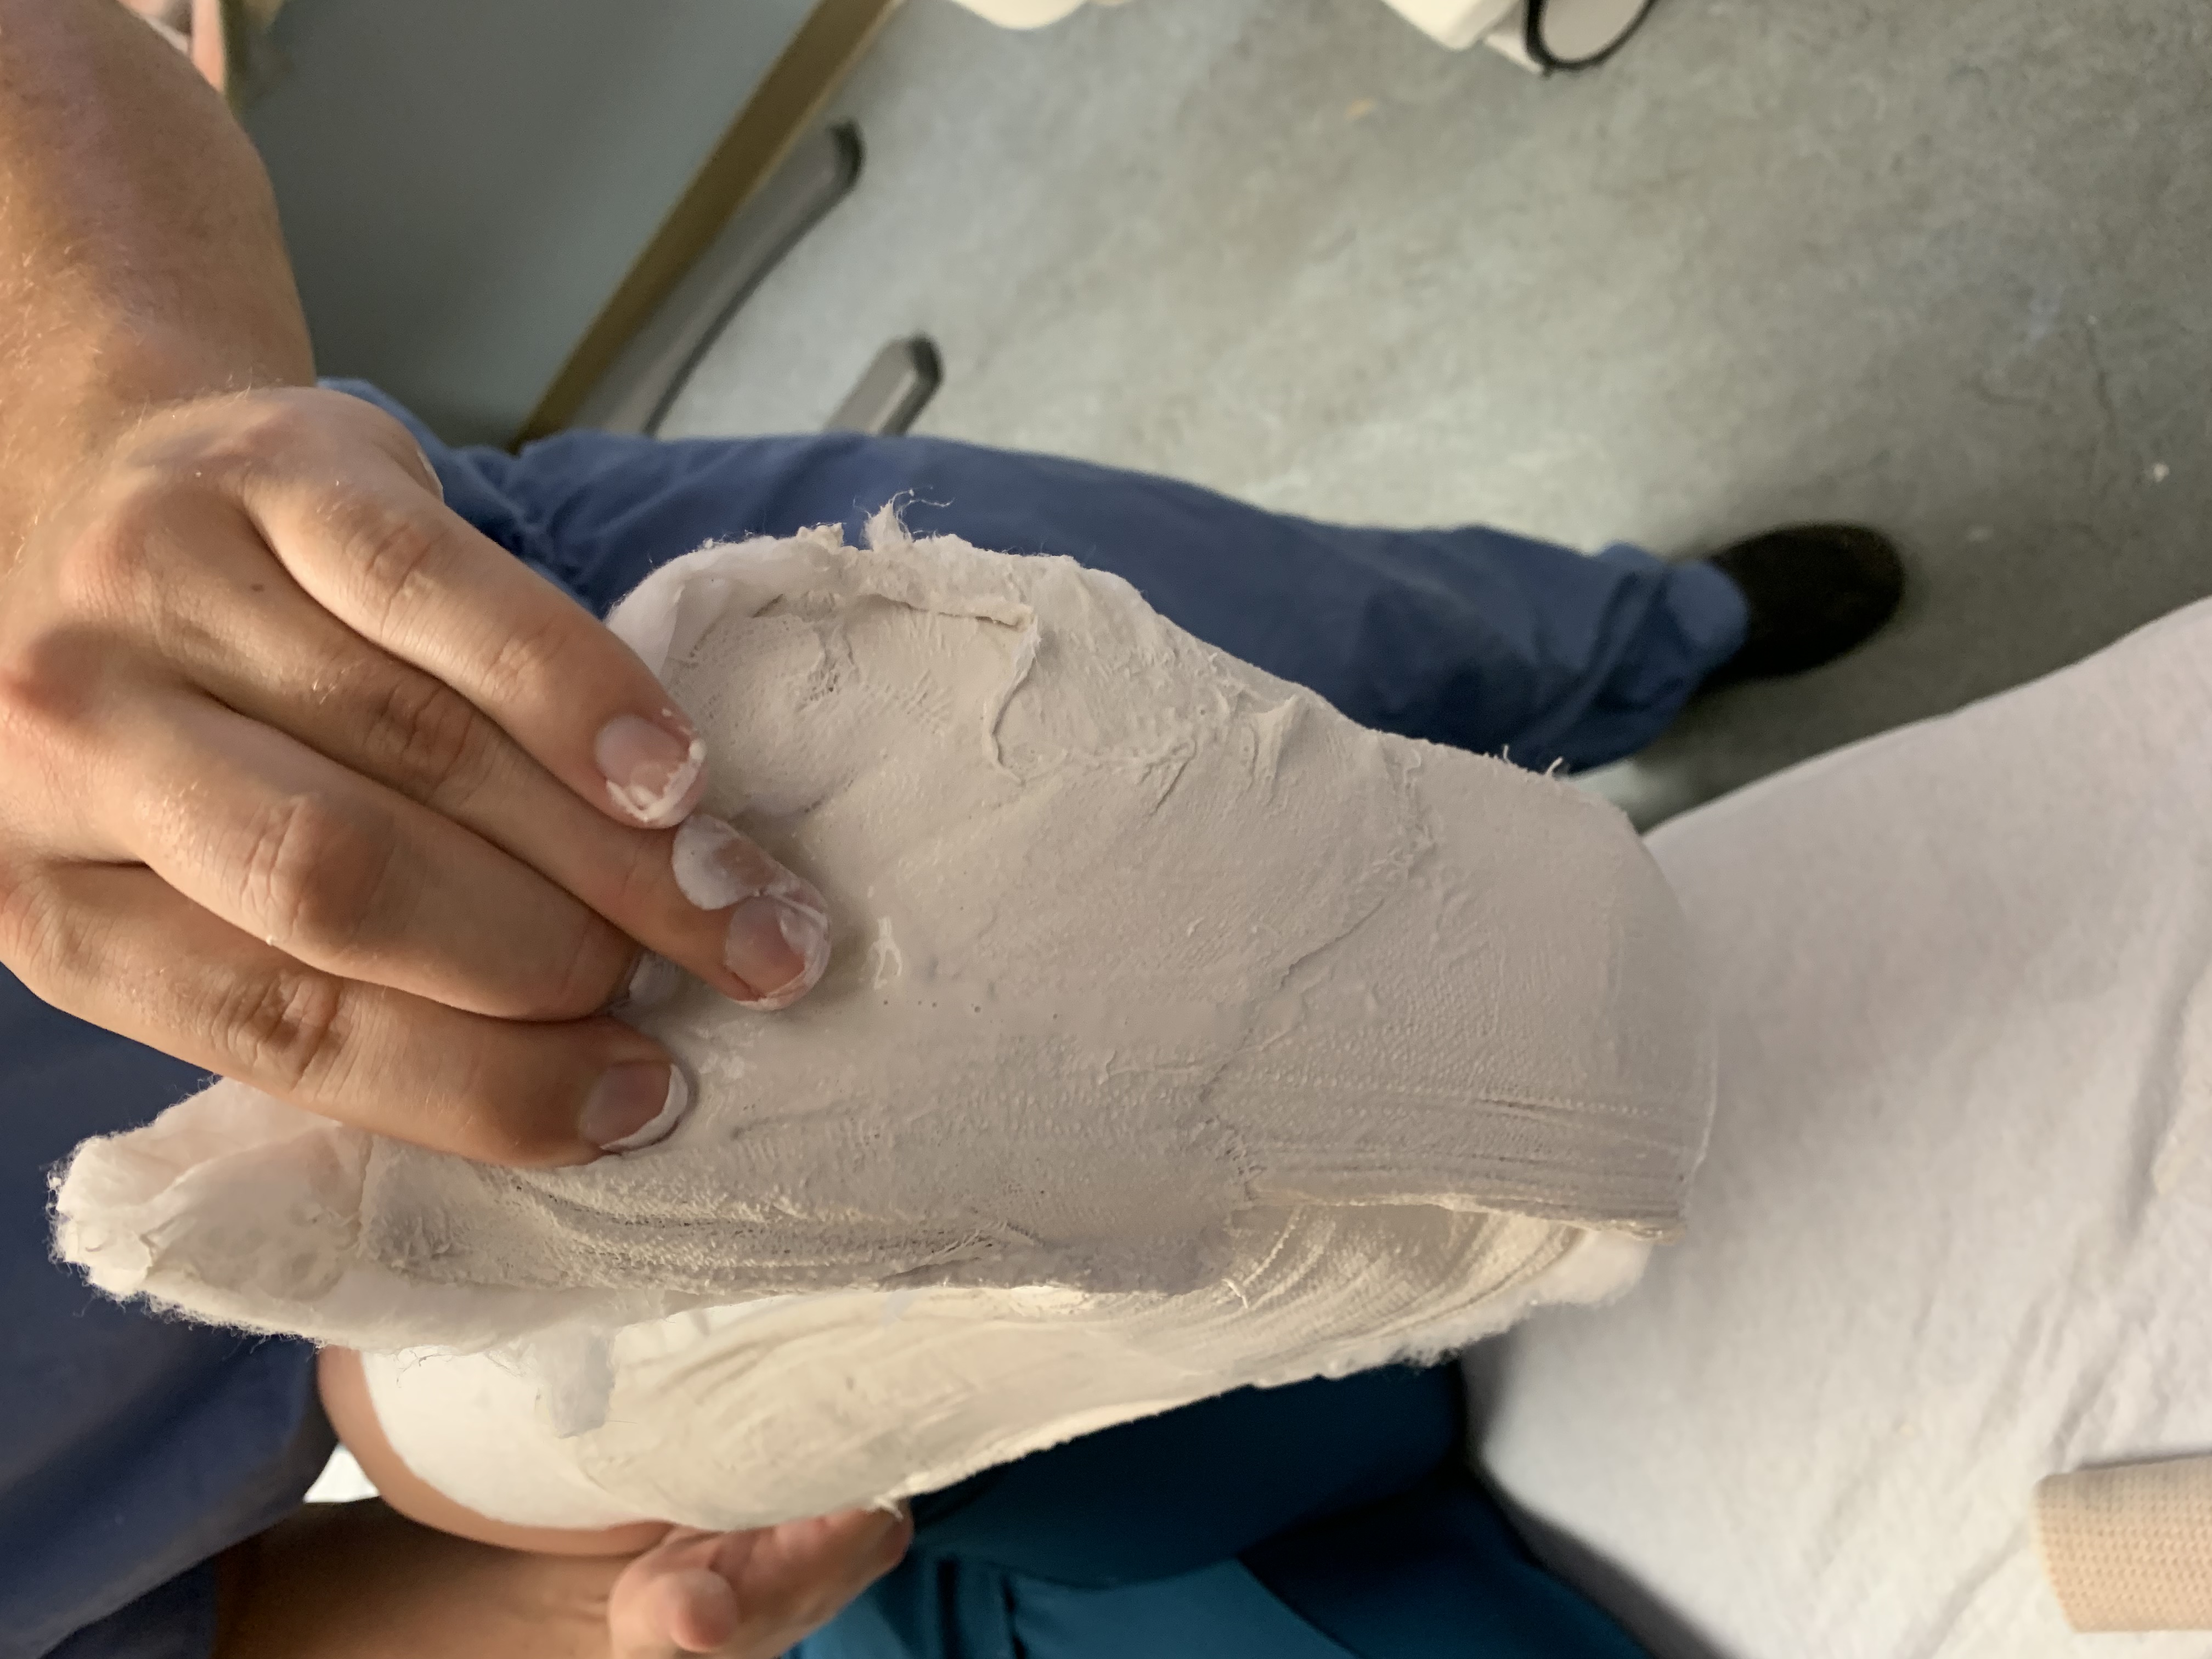
Secure the plaster in place with webril. Cover the plaster with one layer of webril makes it easier to unwrap the splint in clinic if needed to inspect someone’s skin.
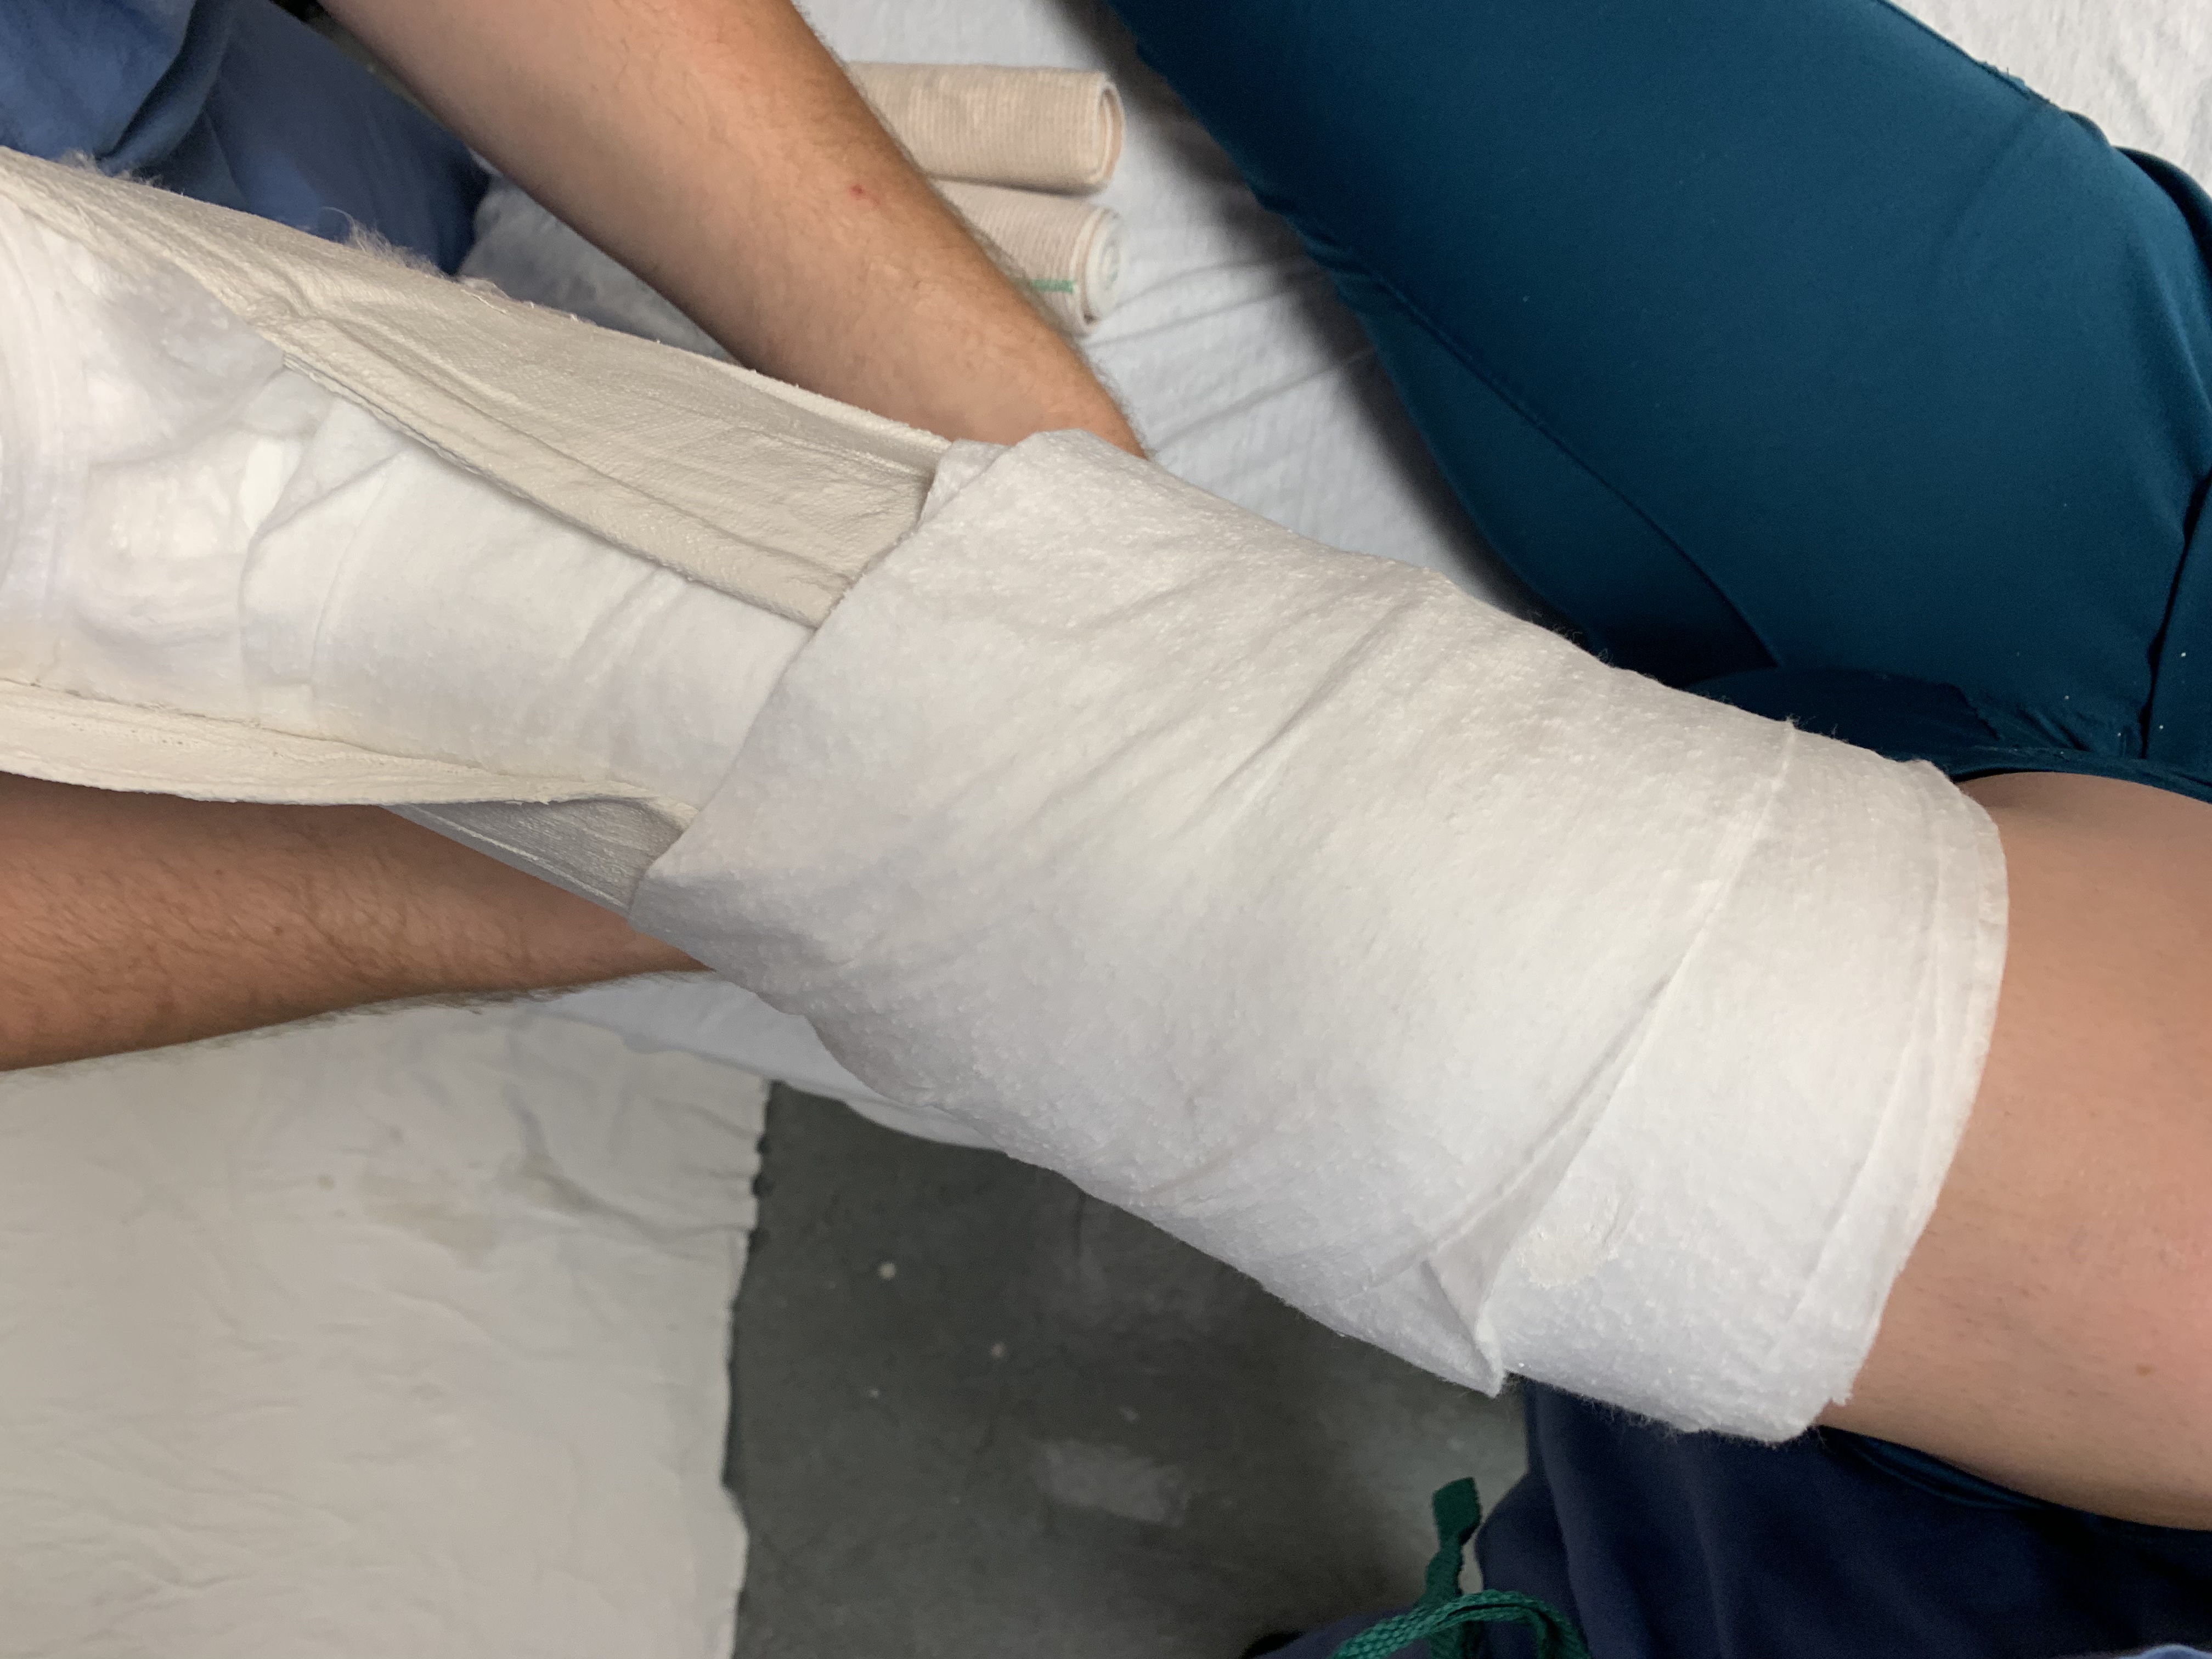
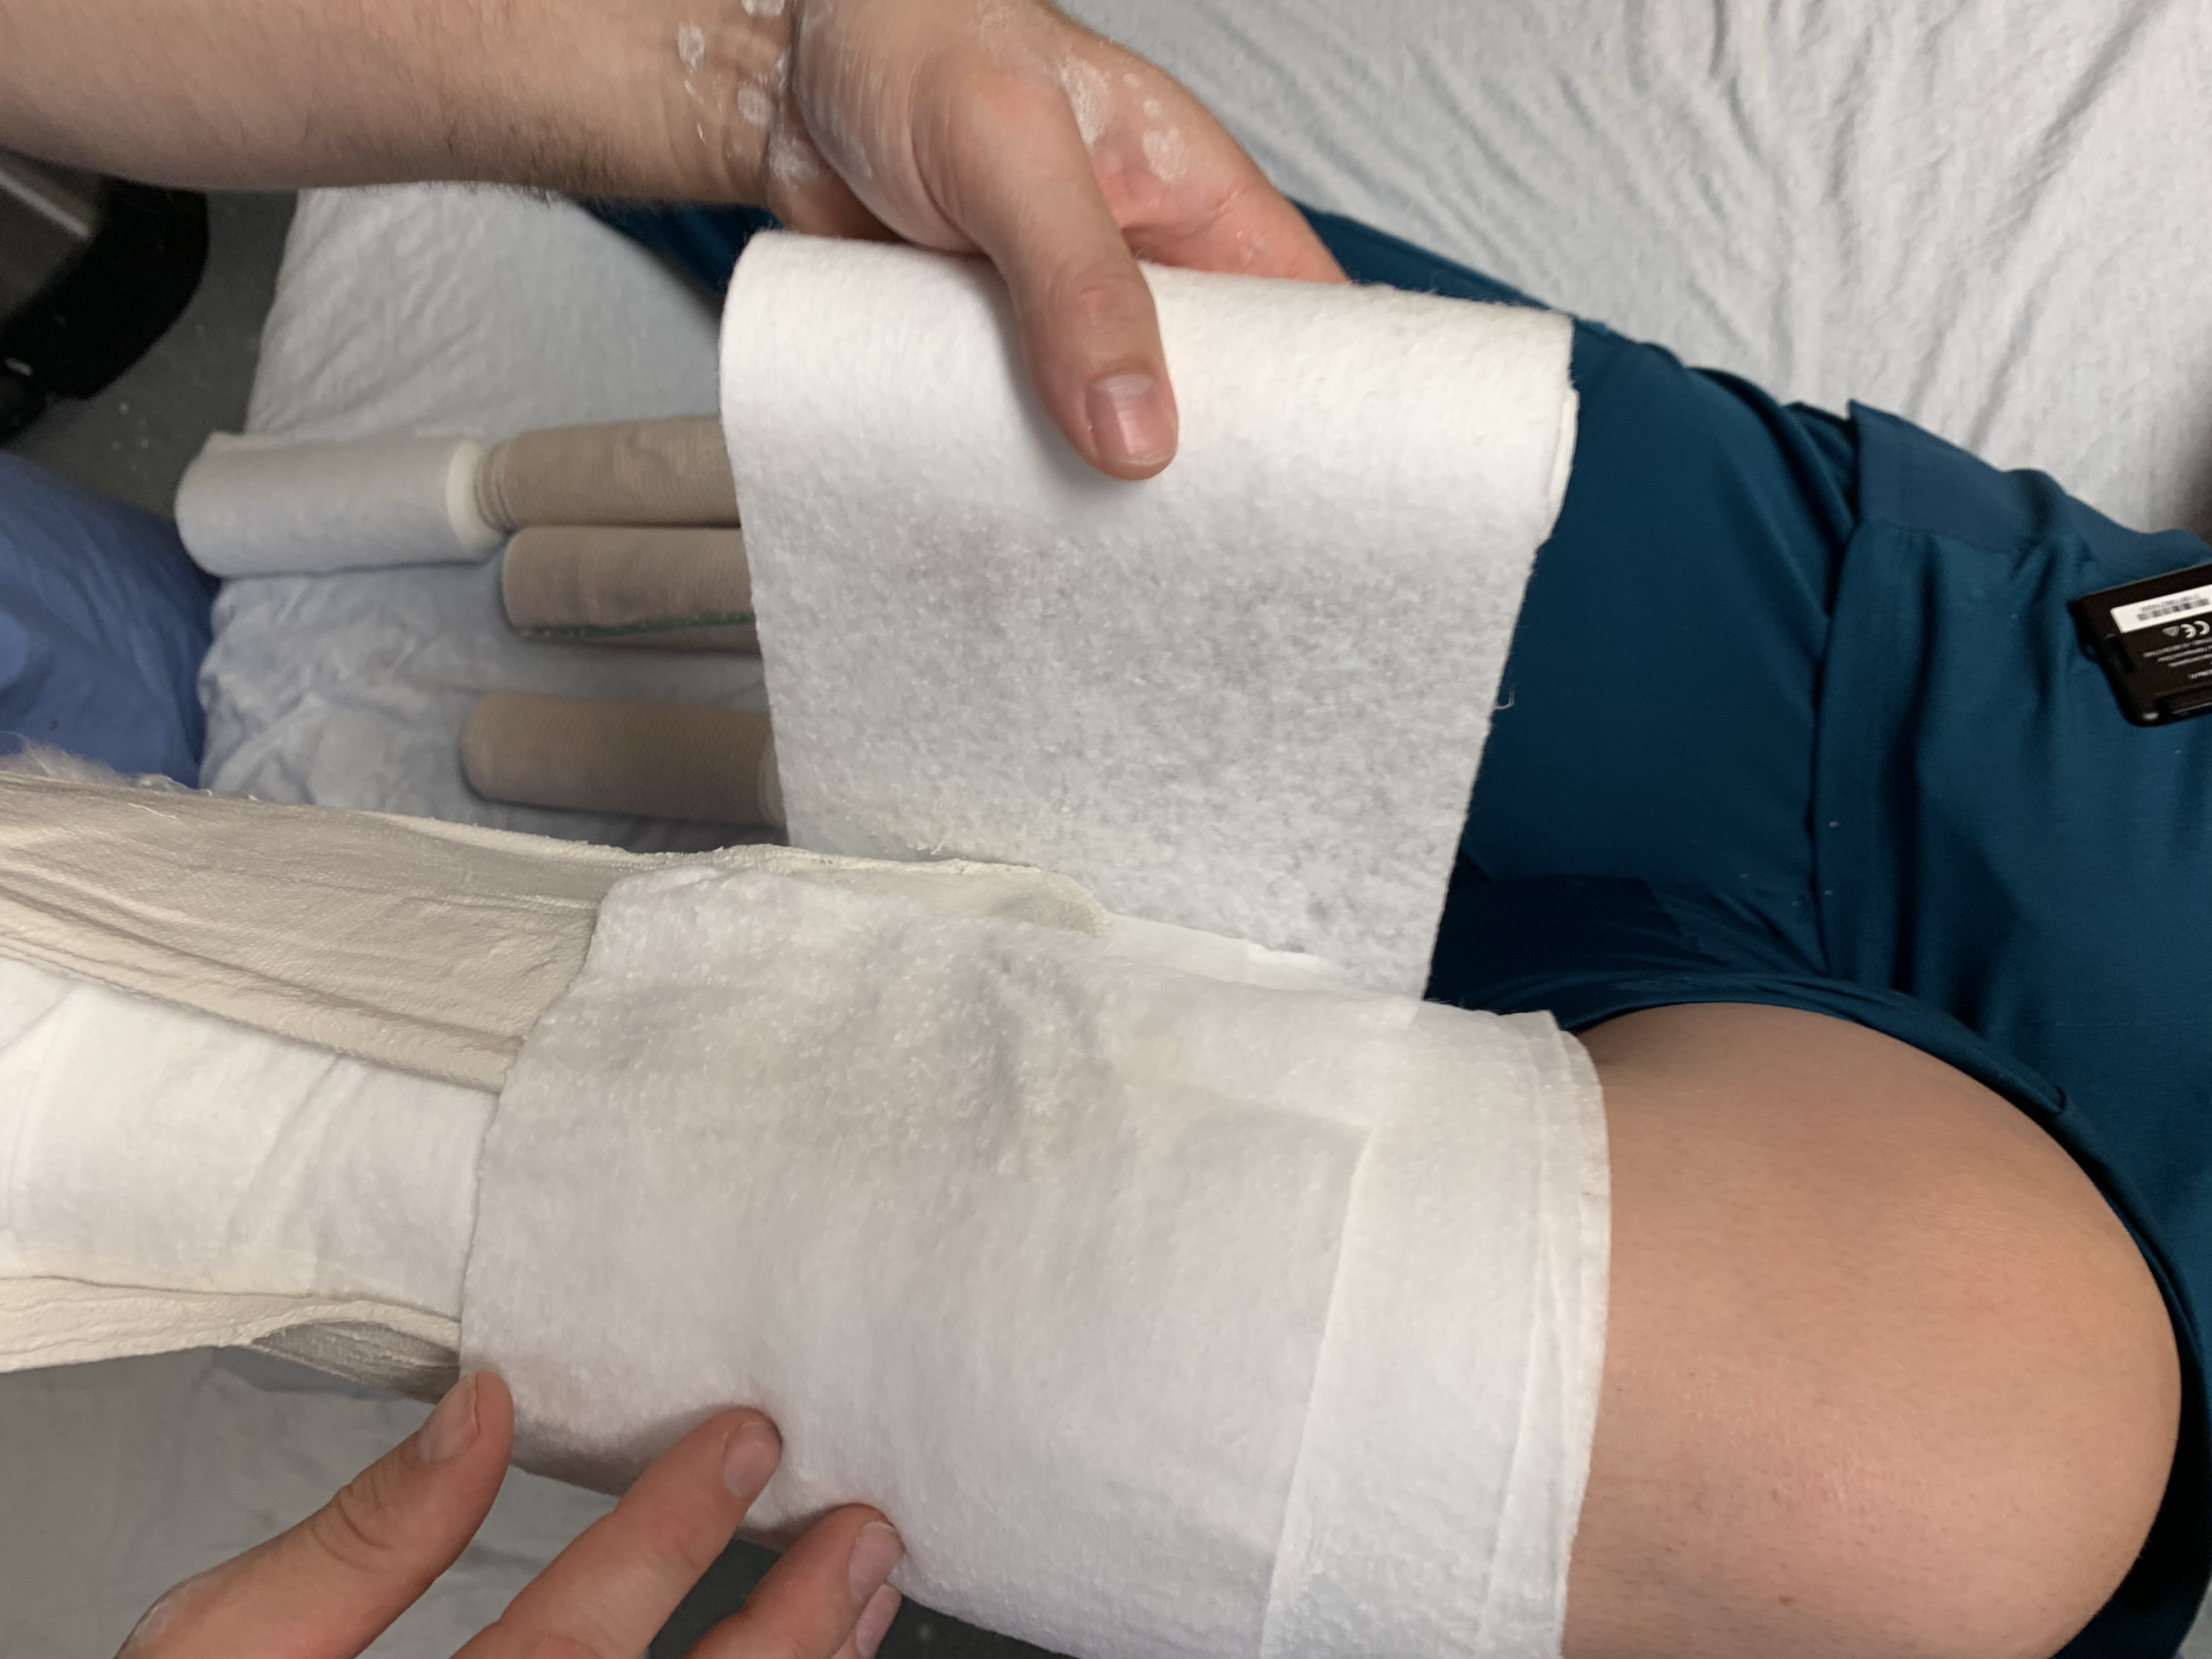
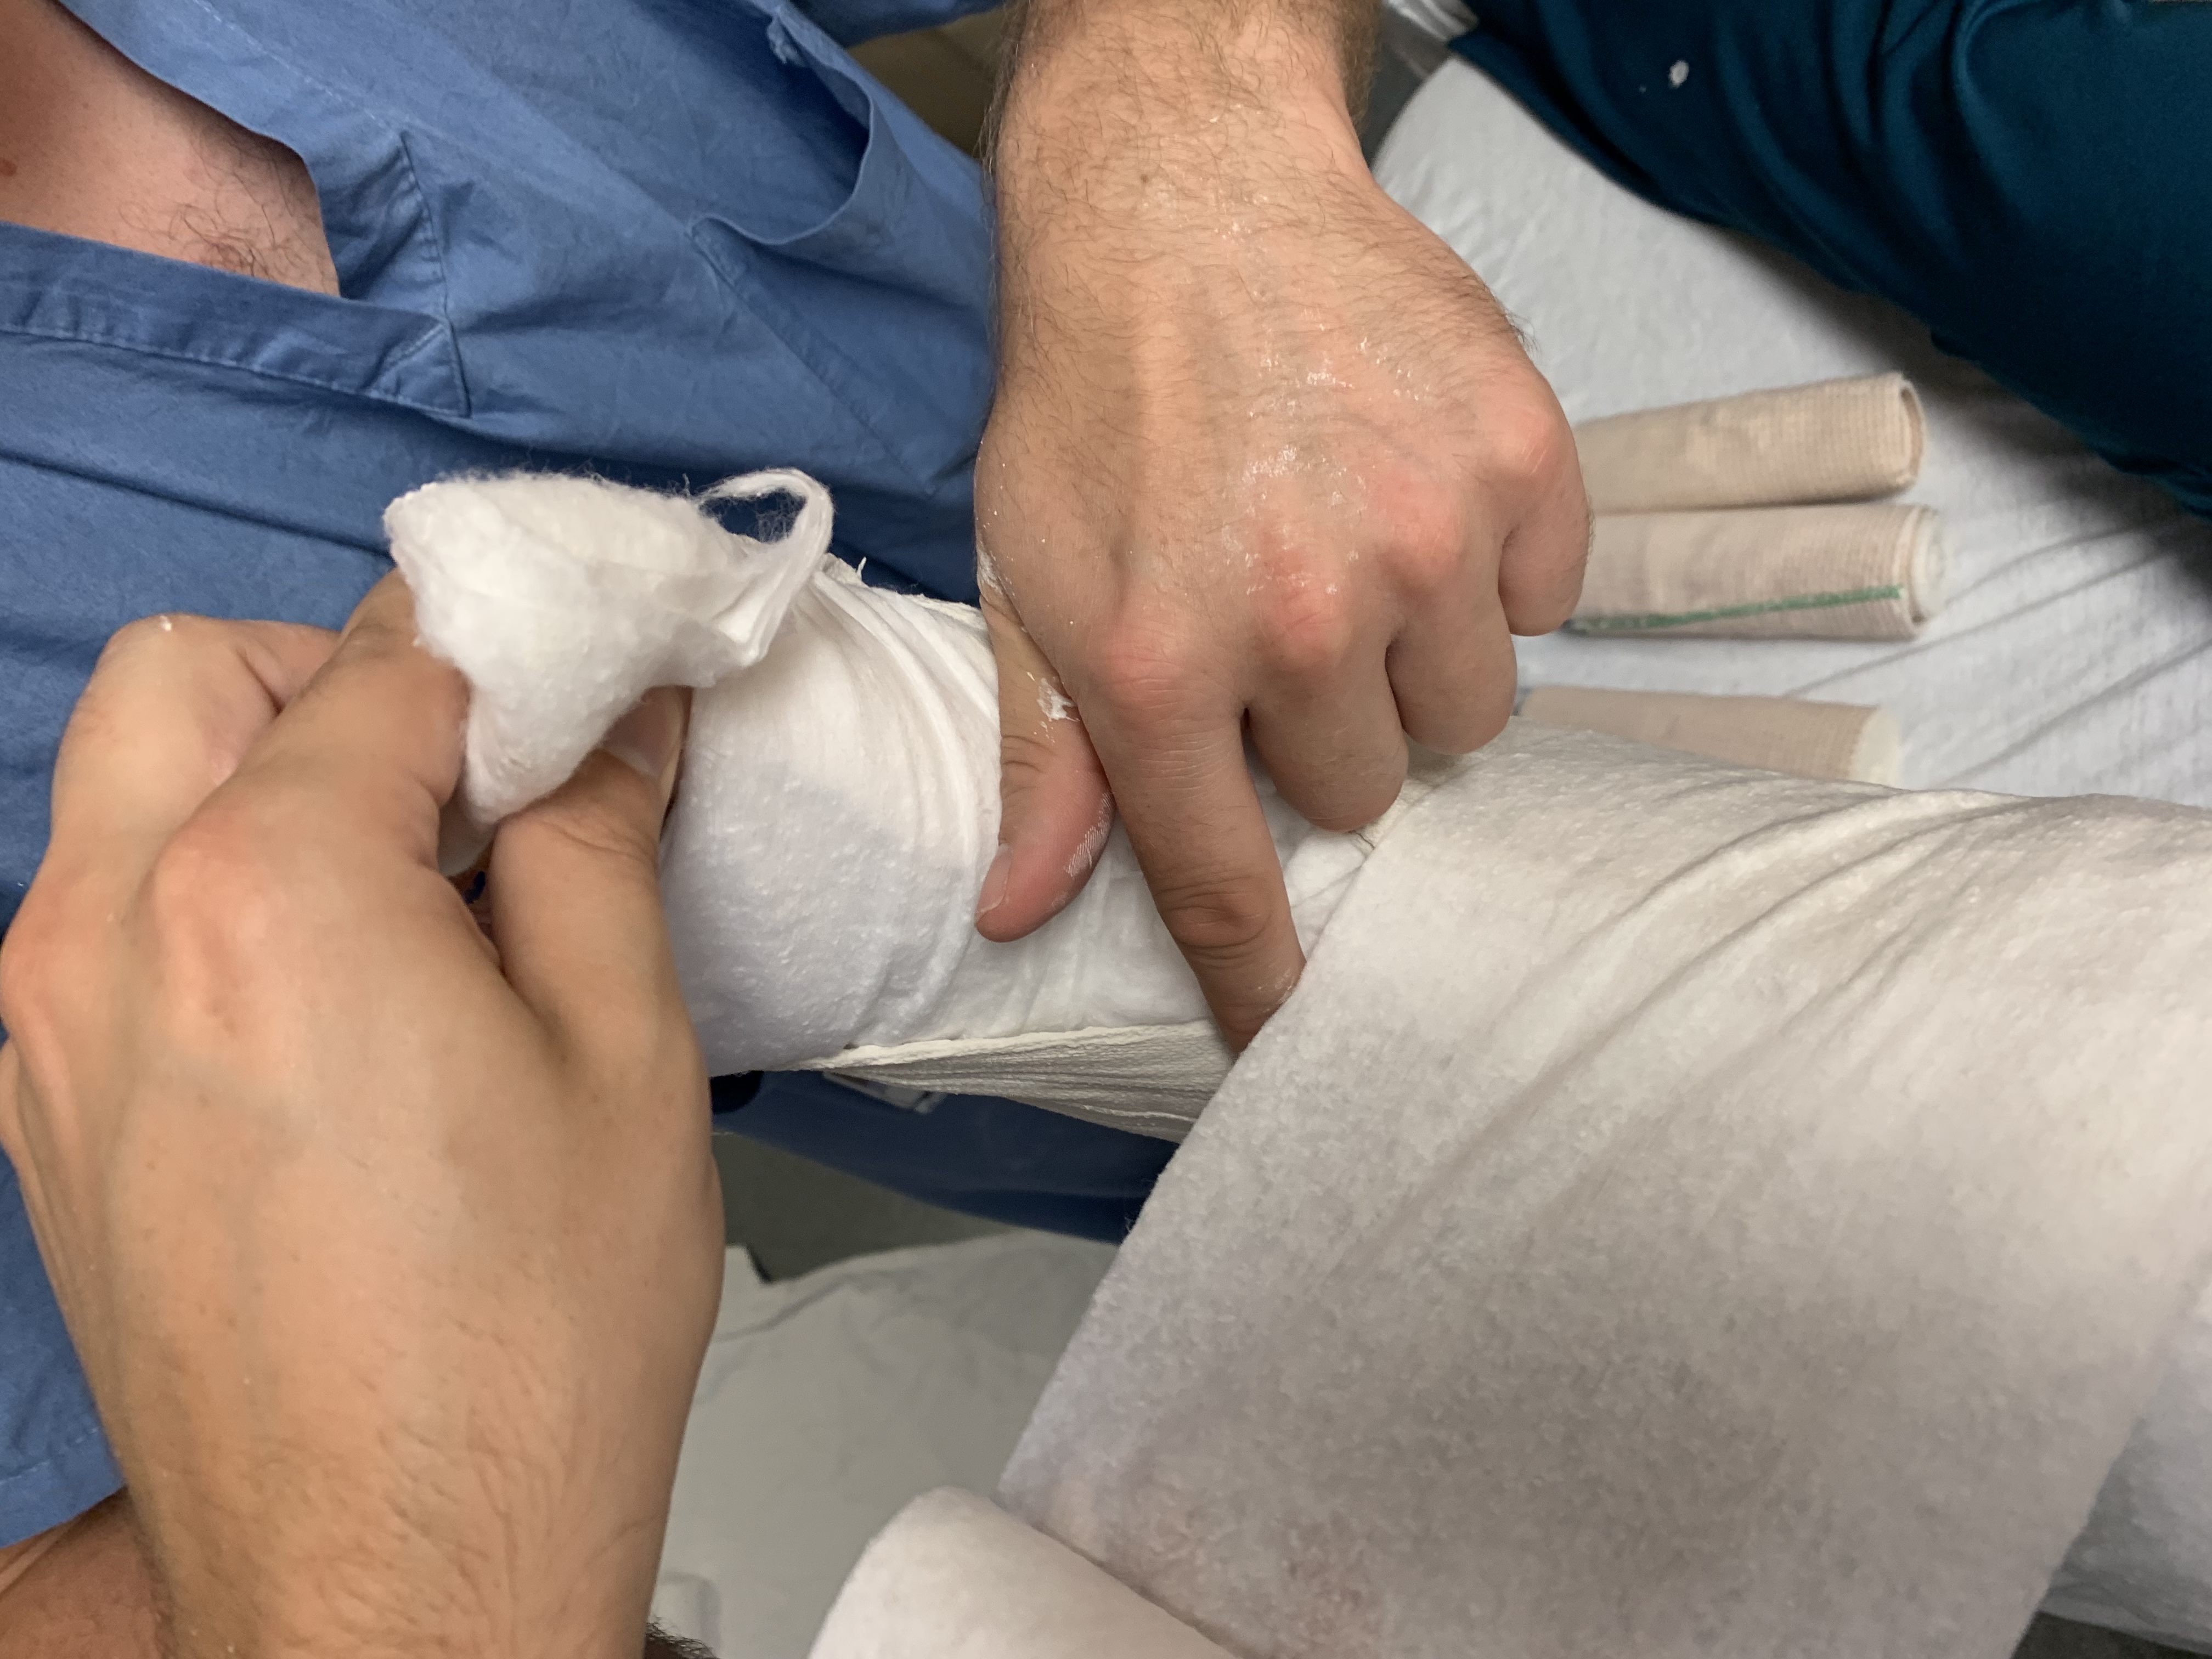
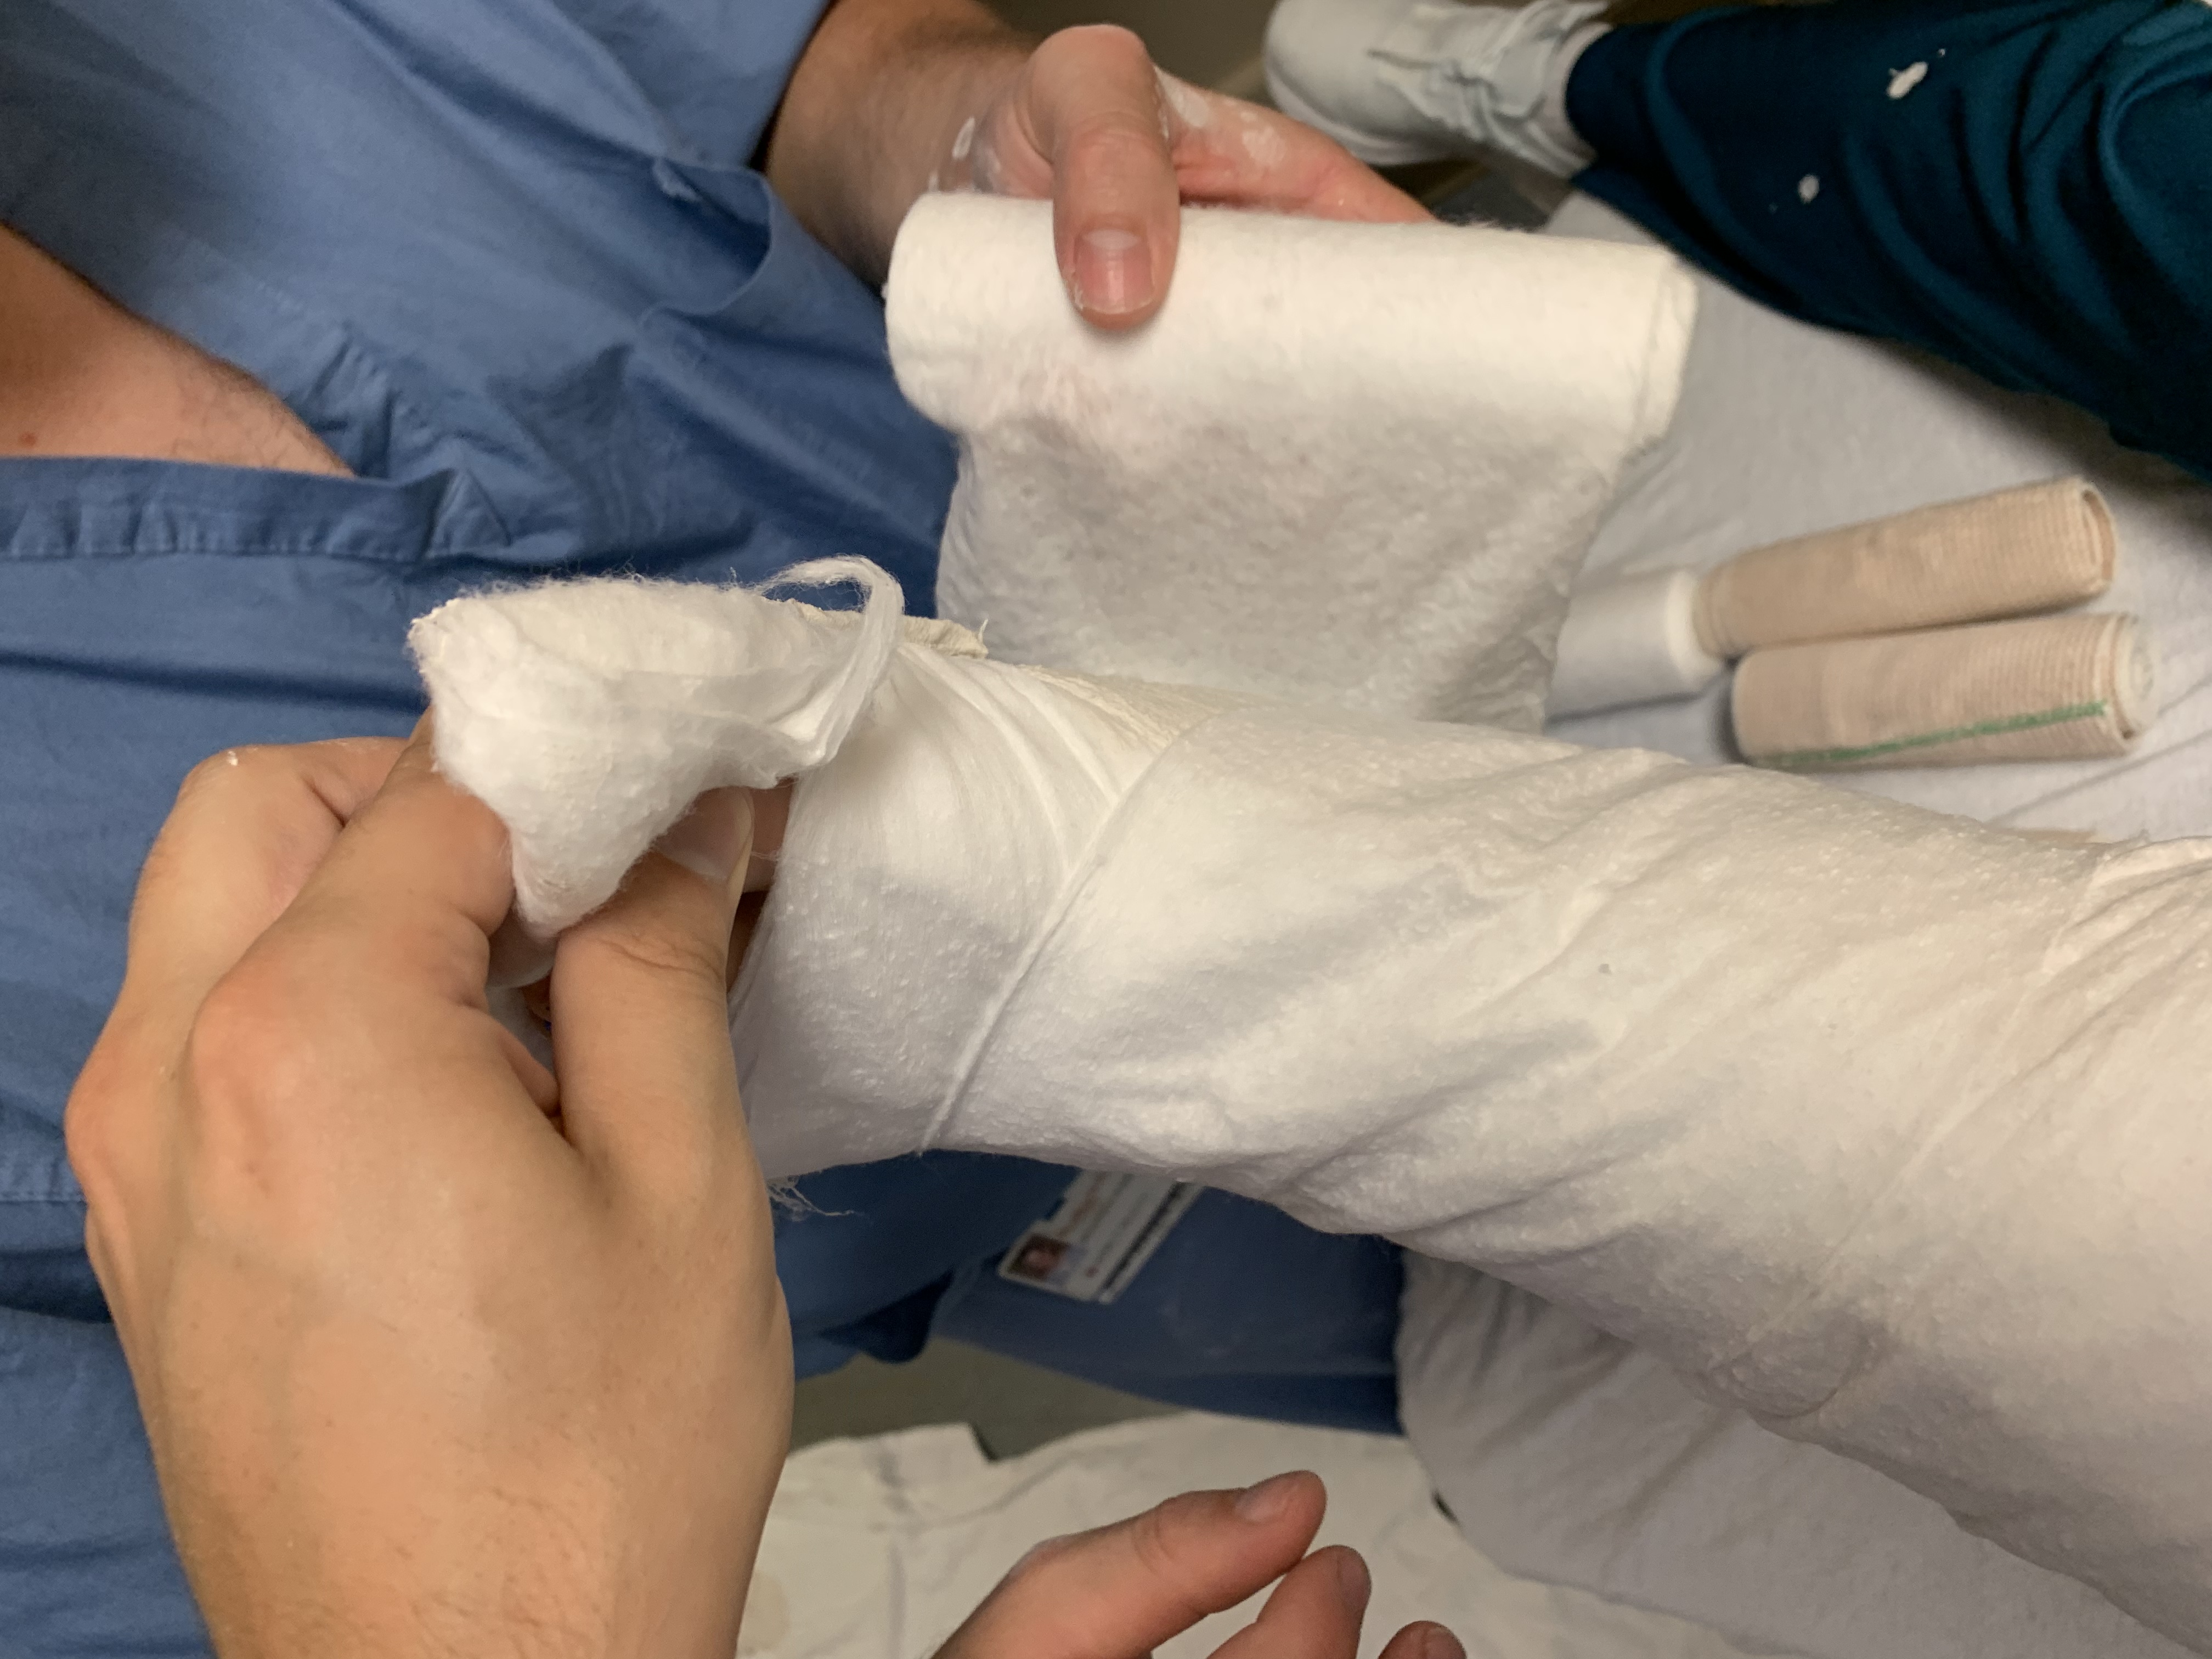
Now wrap the splint with ace wrap. Depicted here is wrapping the toe box. (A toe box is just a little extra splint material that protects the toes from getting jammed while wearing the splint).
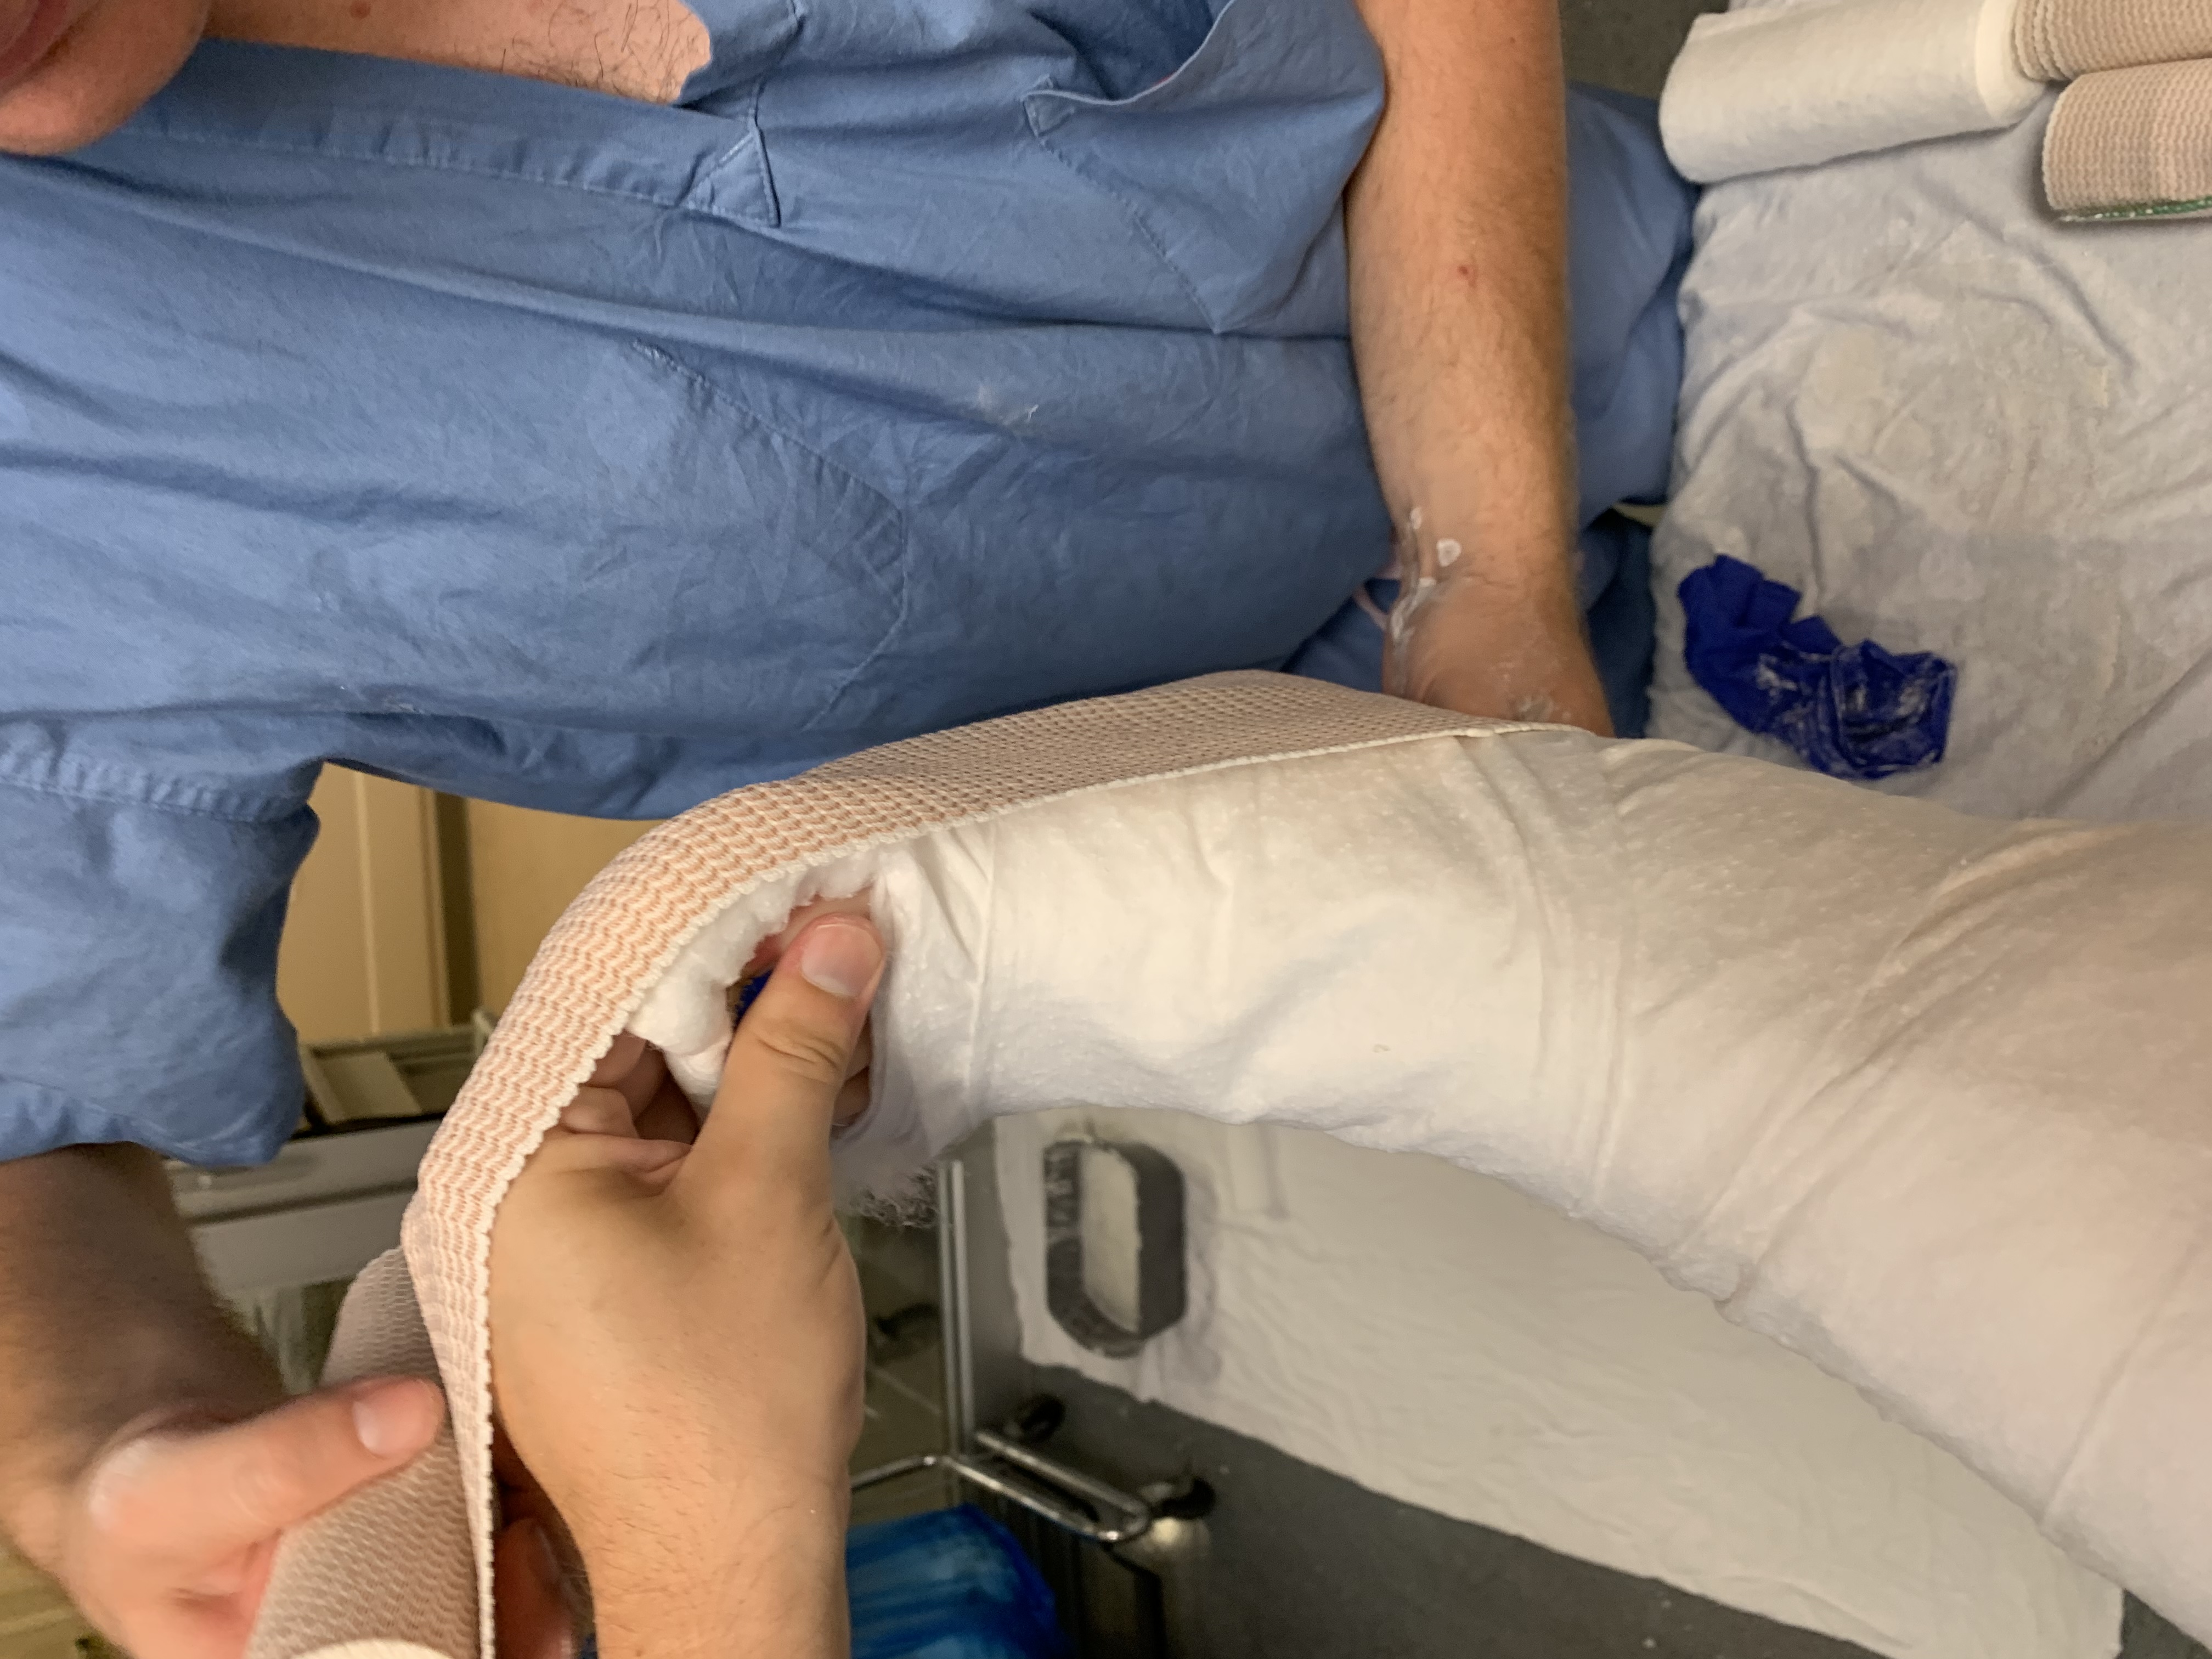
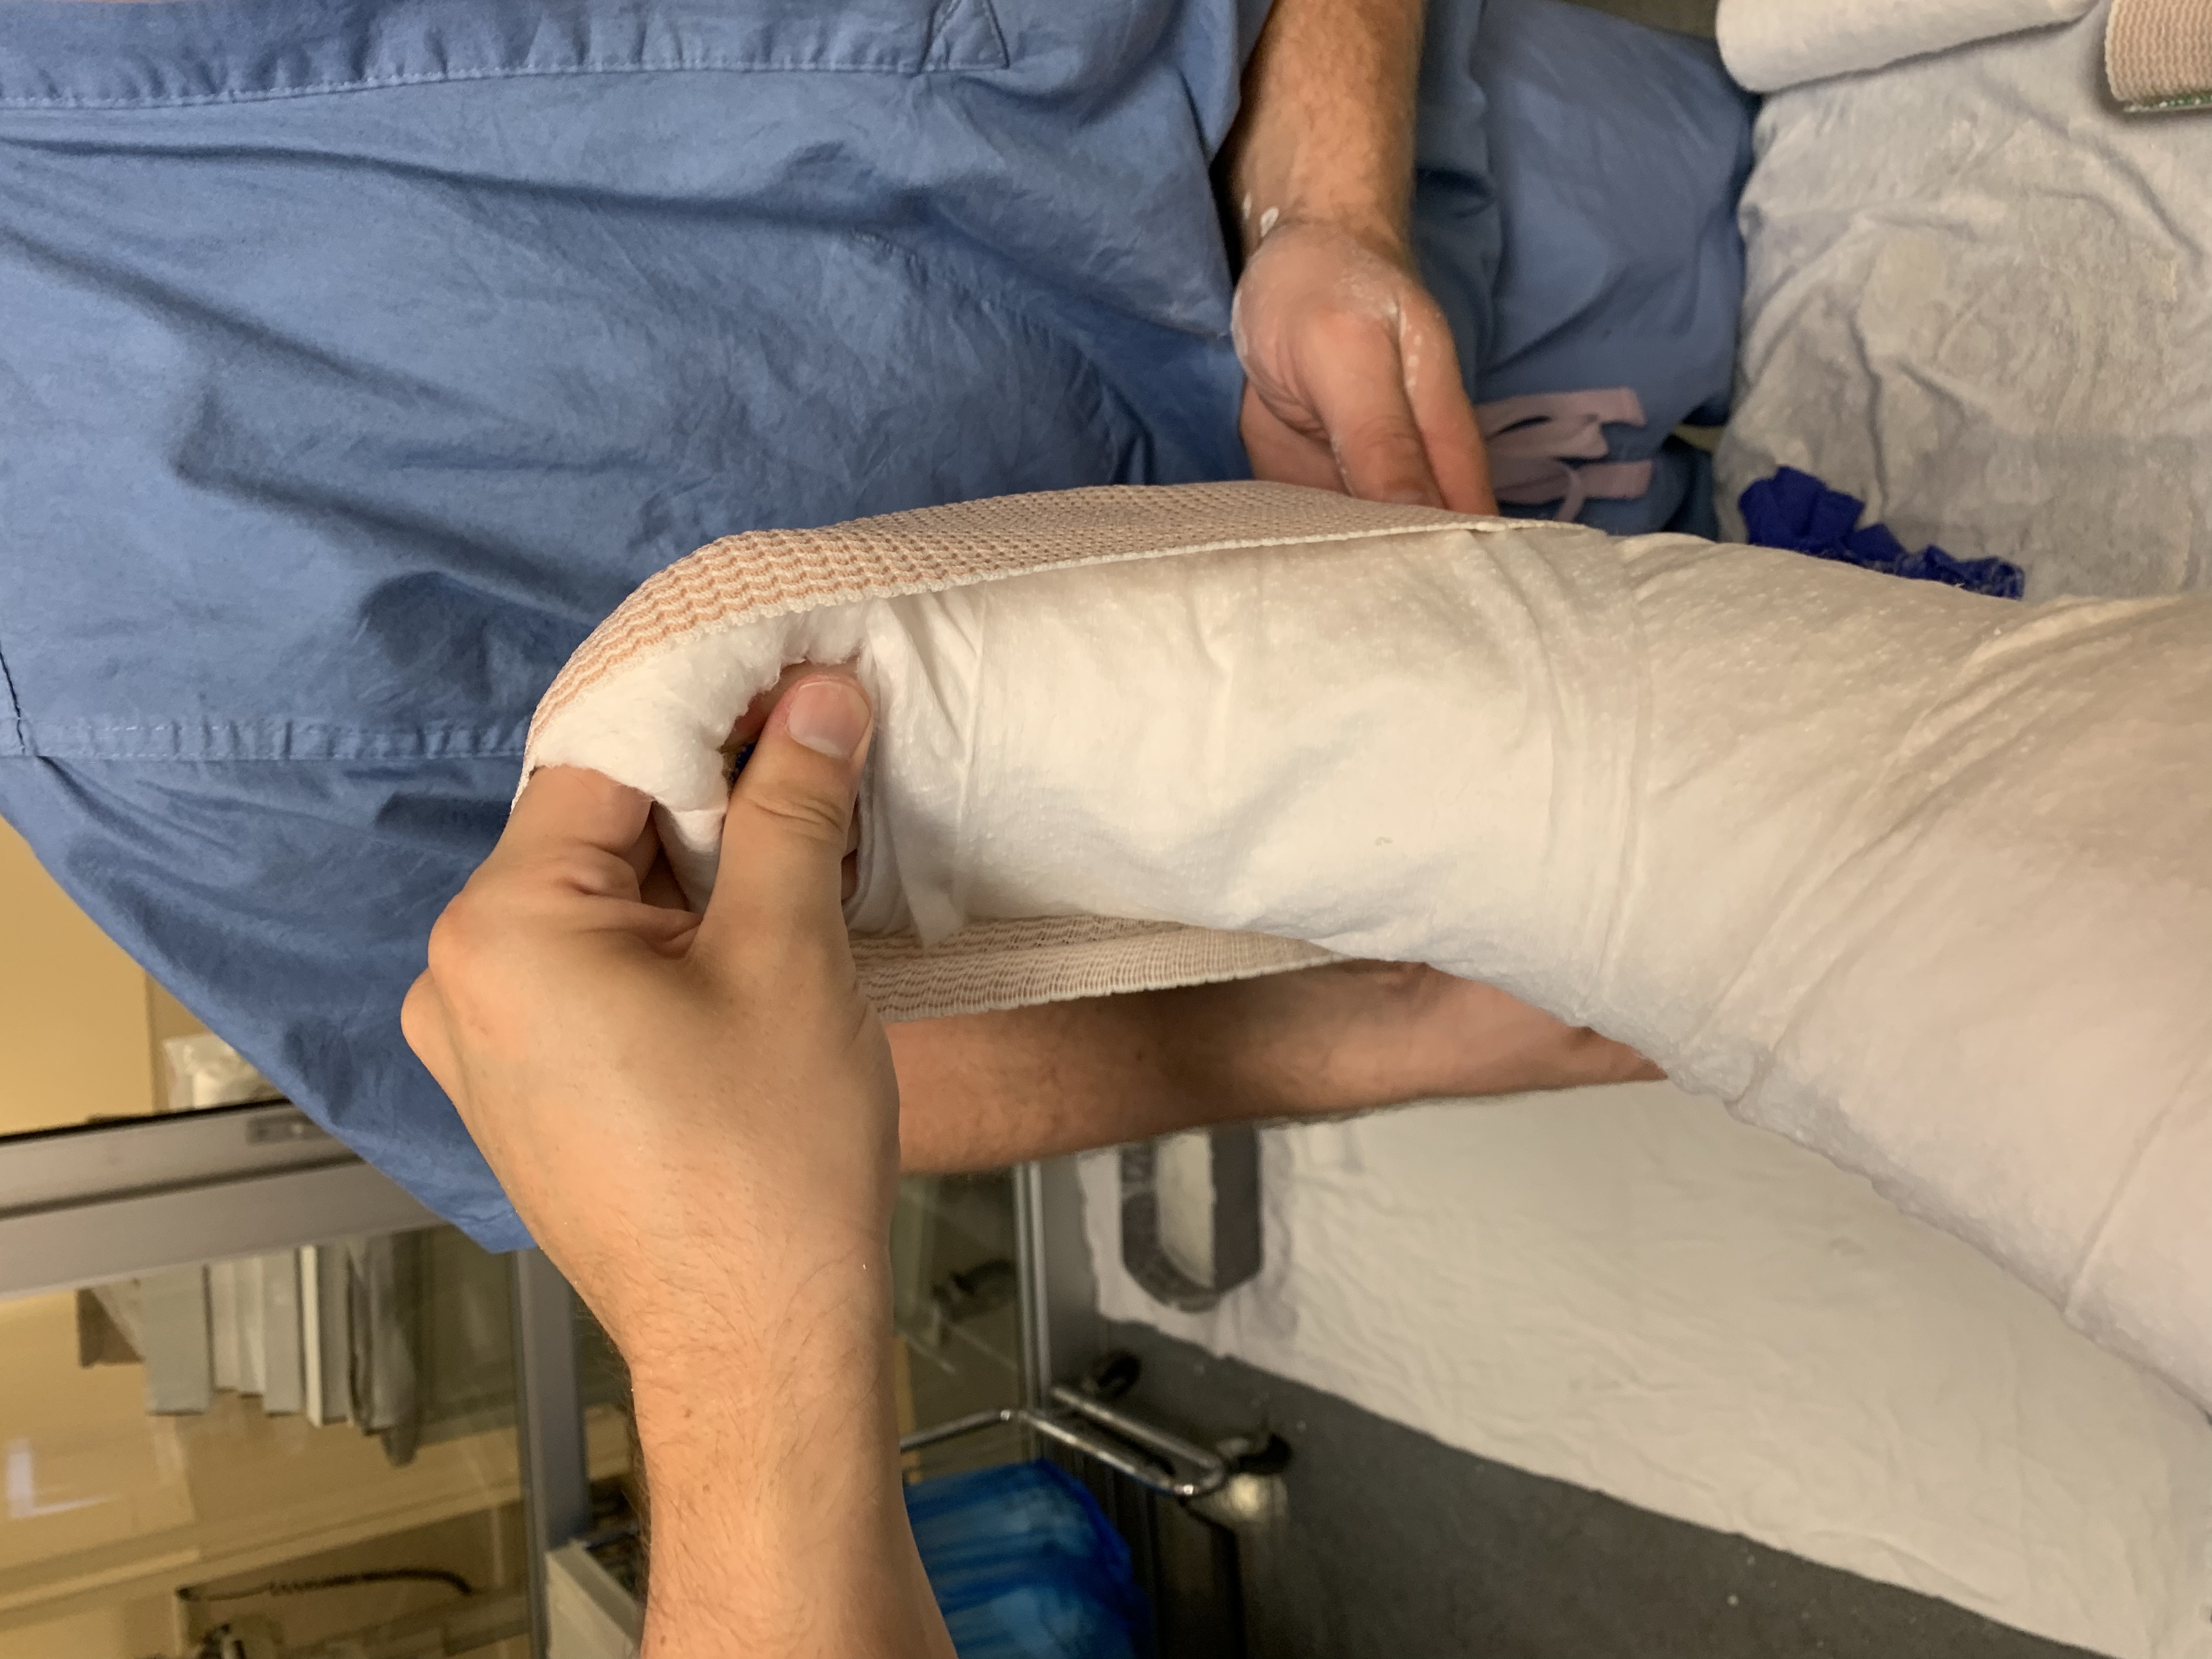
Starting at the heel, wrap over the toes, and capture the other end at the heel.
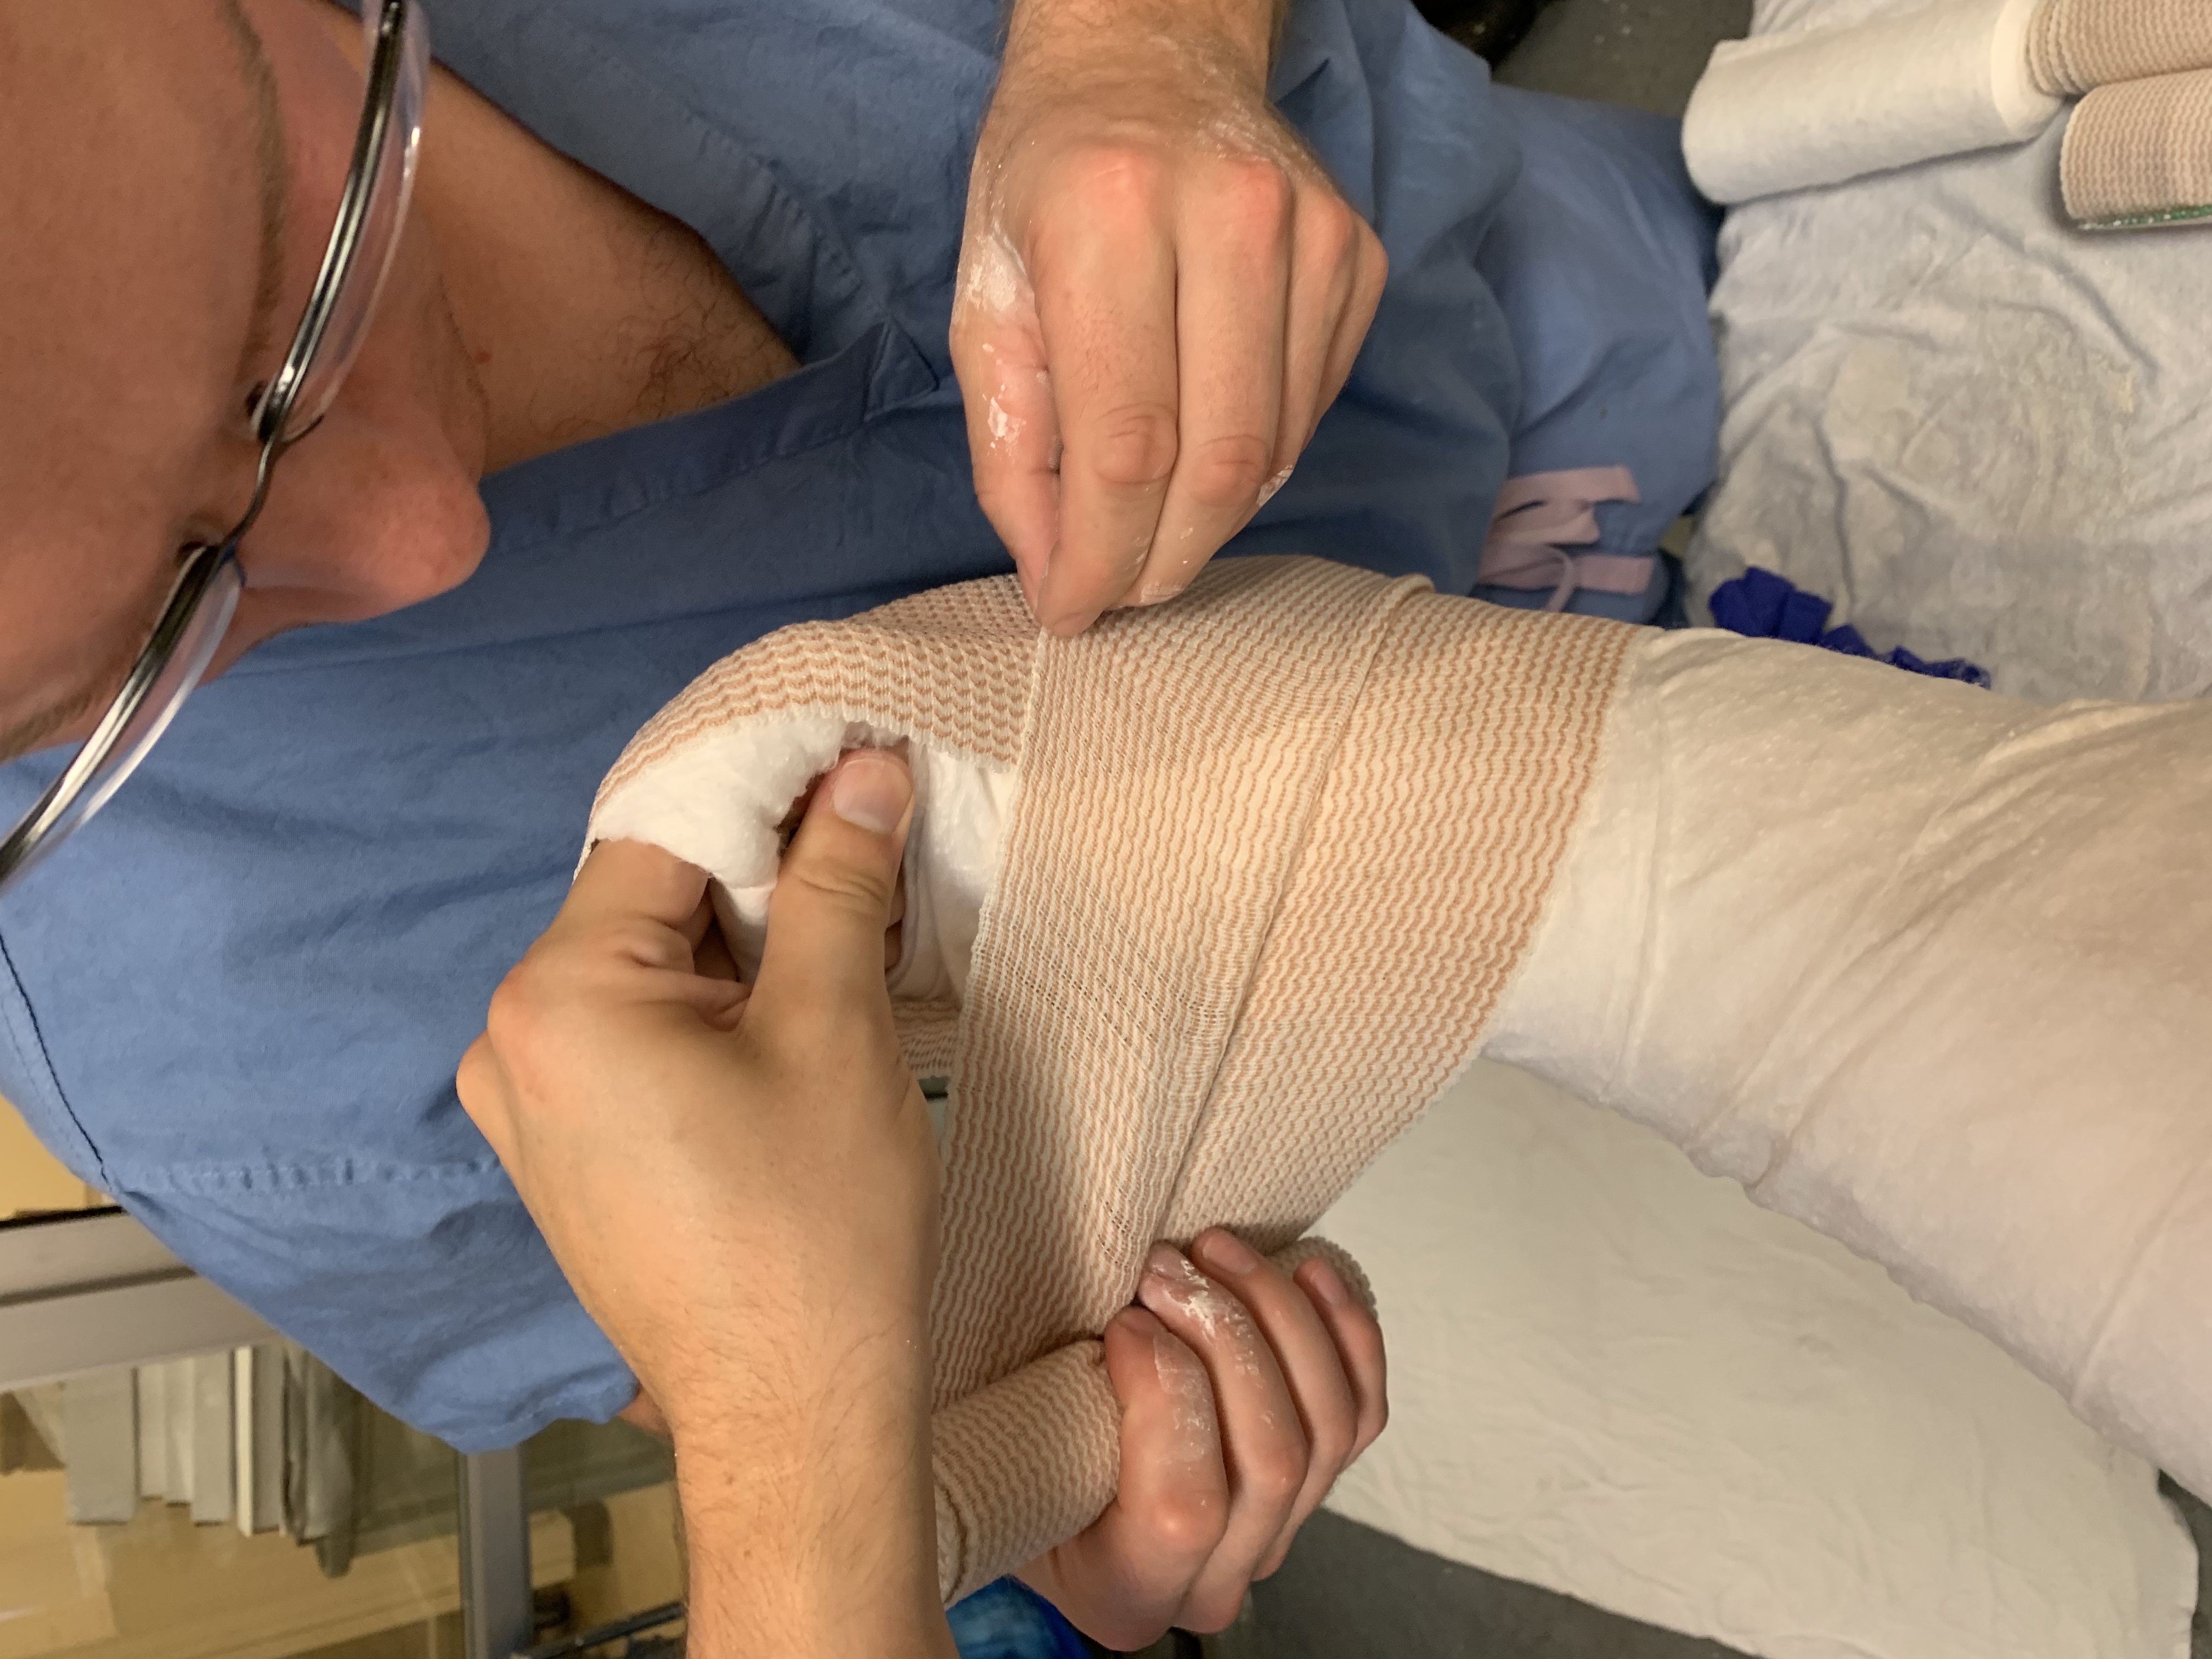
Then make sure to wrap at the base of the toes around the plantar forefoot capturing the most distal ace wrap on the plantar aspect of the foot before continuing up the splint.
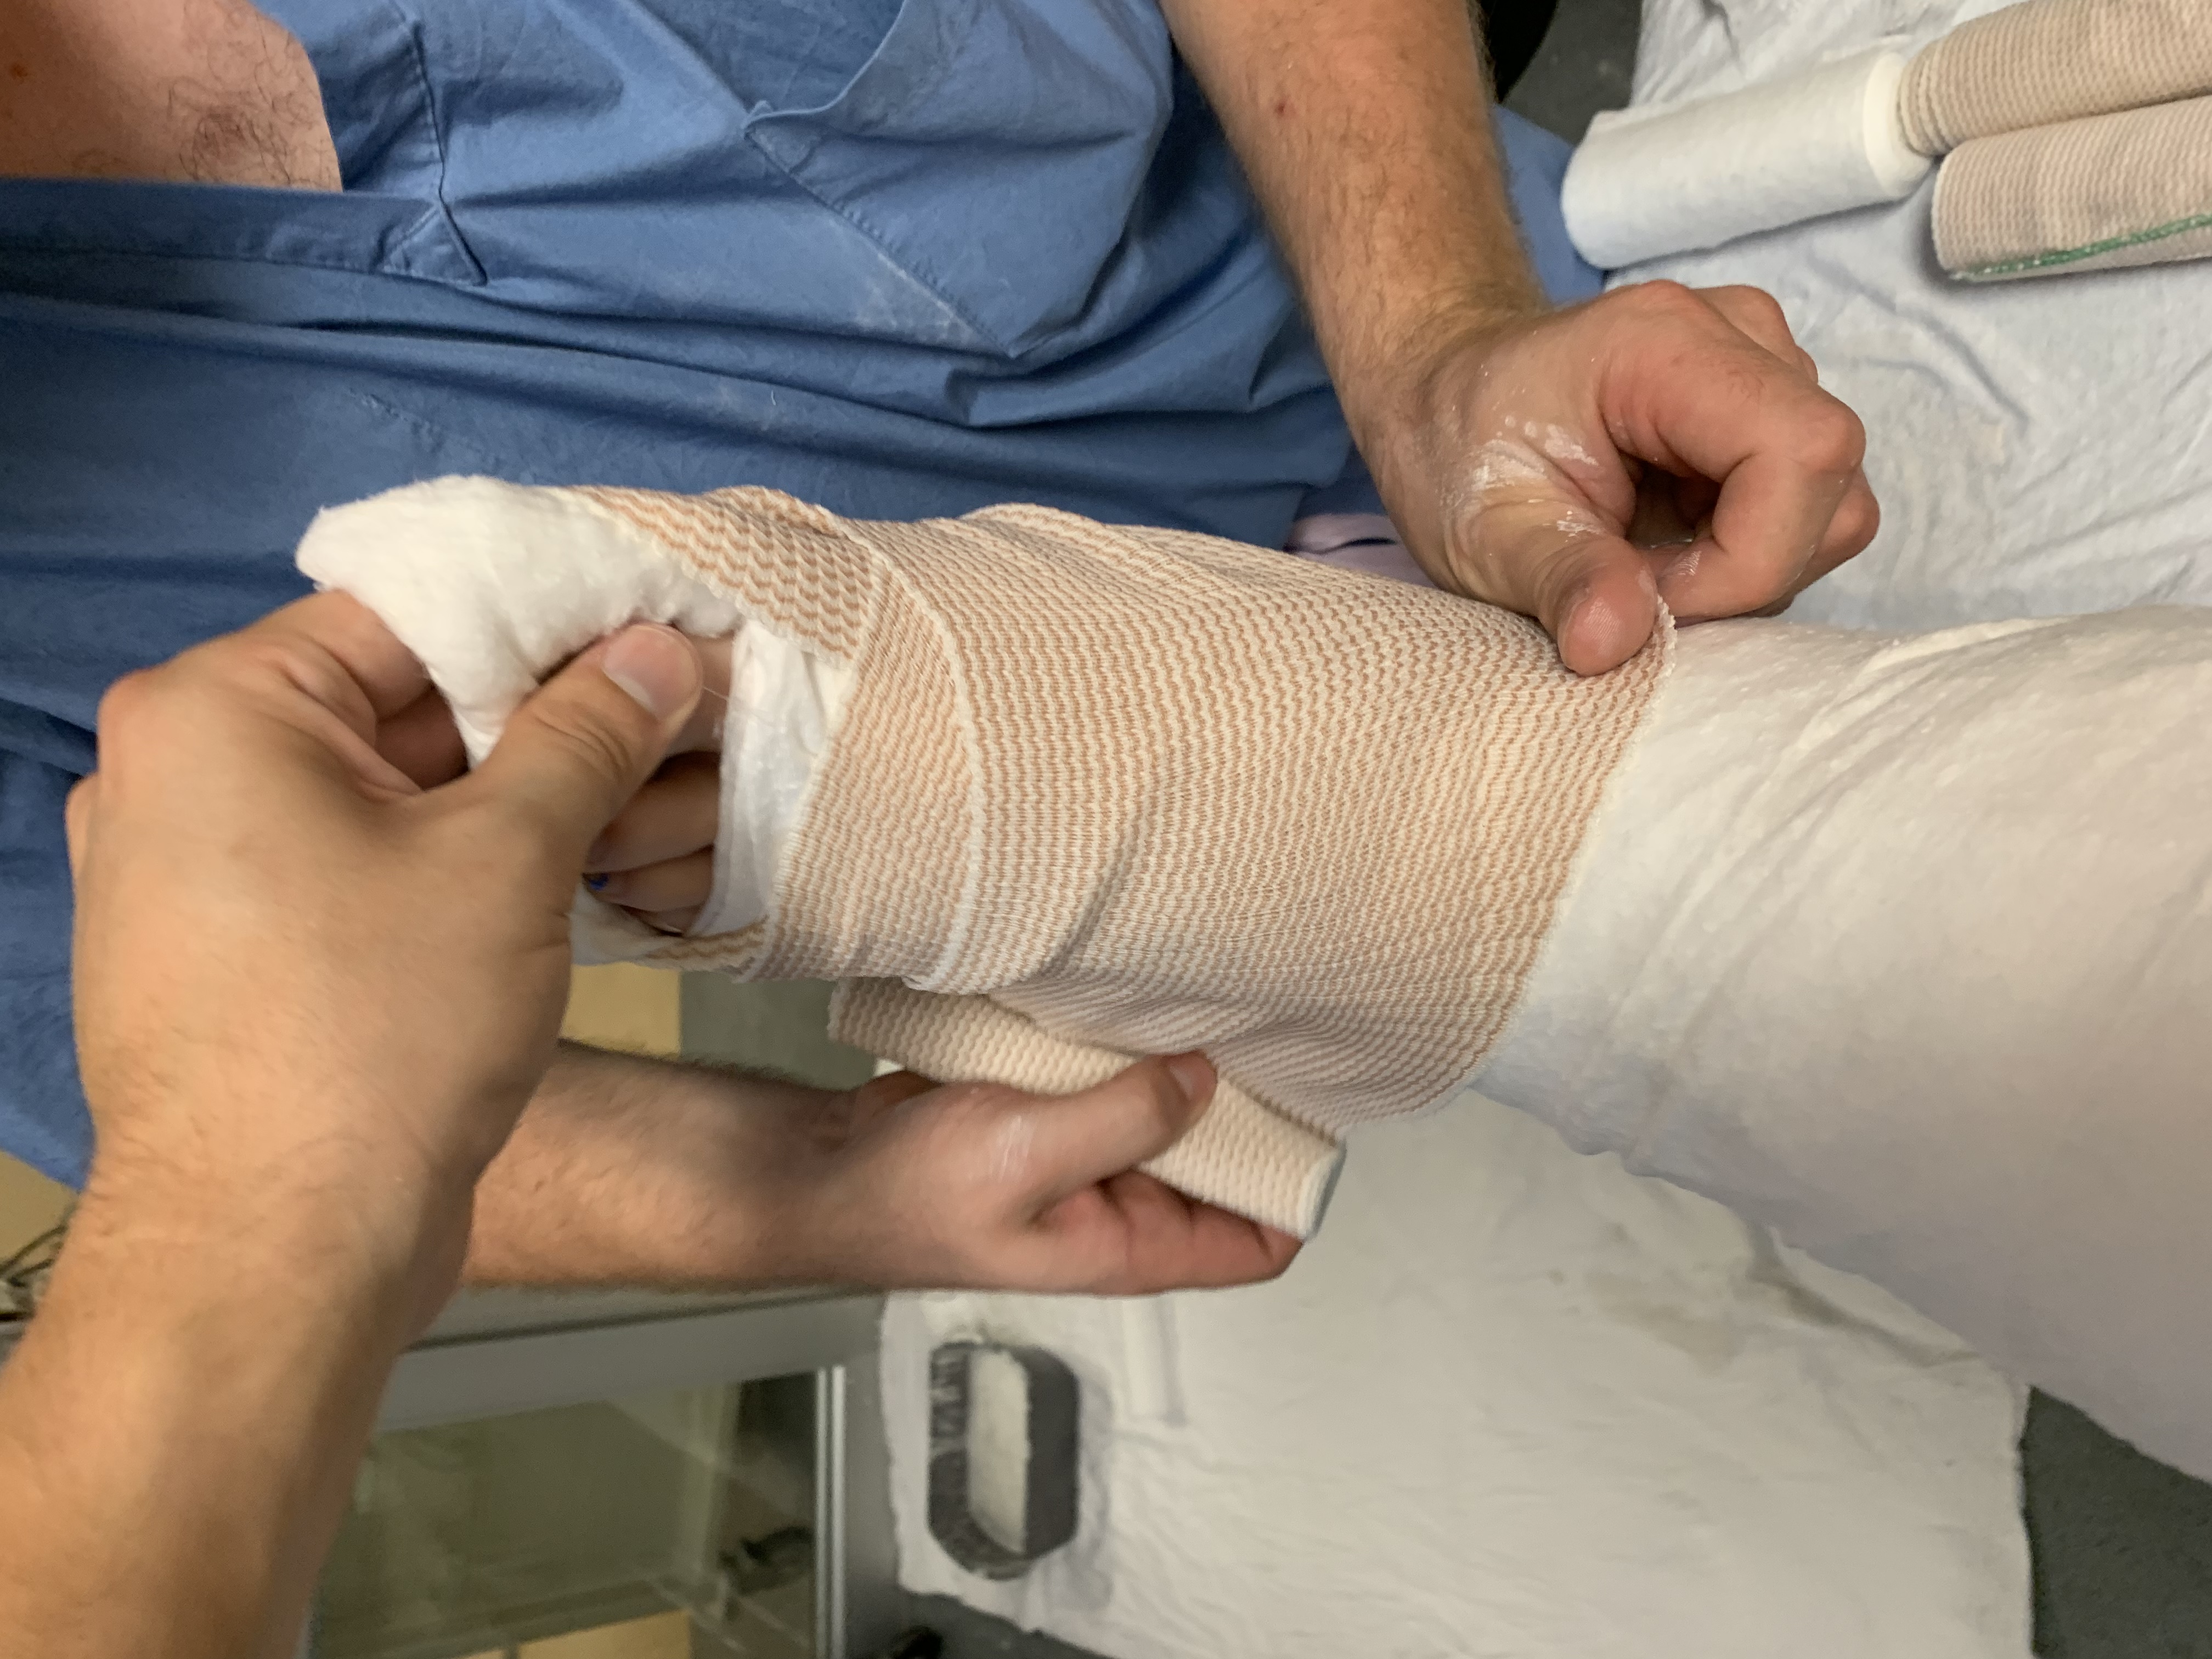
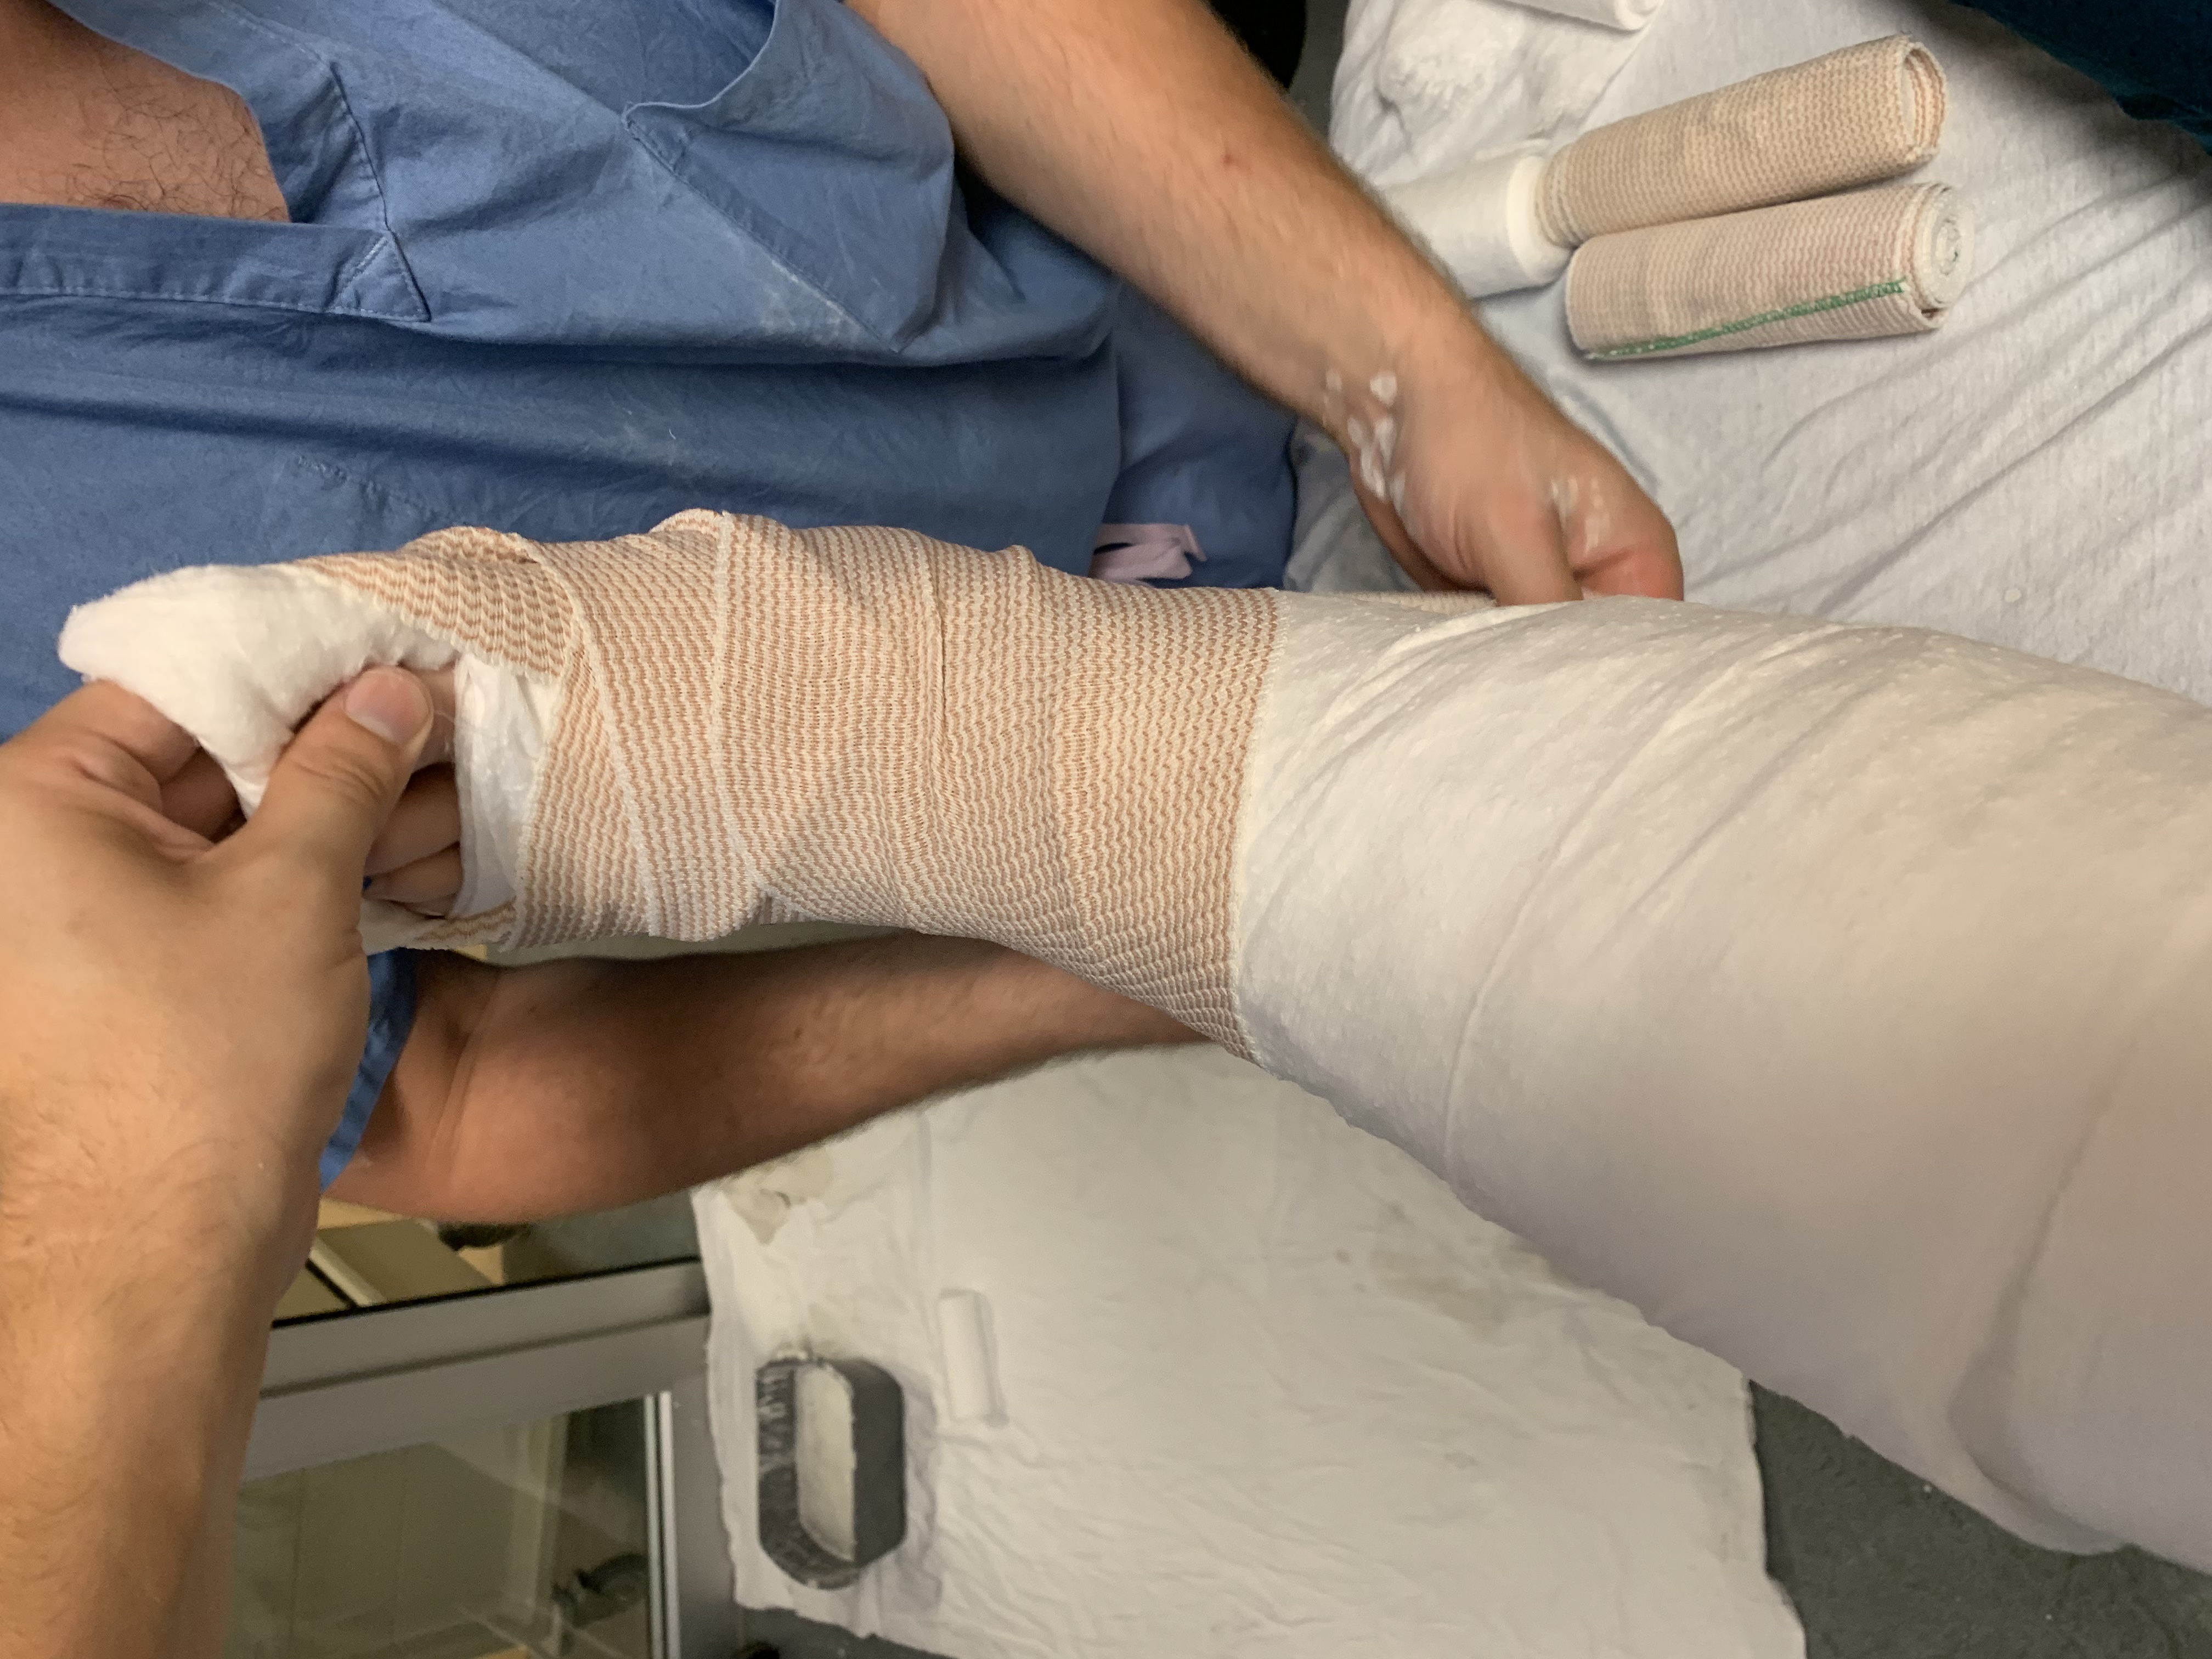
Remember to go quickly because you still have to mold prior to the plaster hardening.
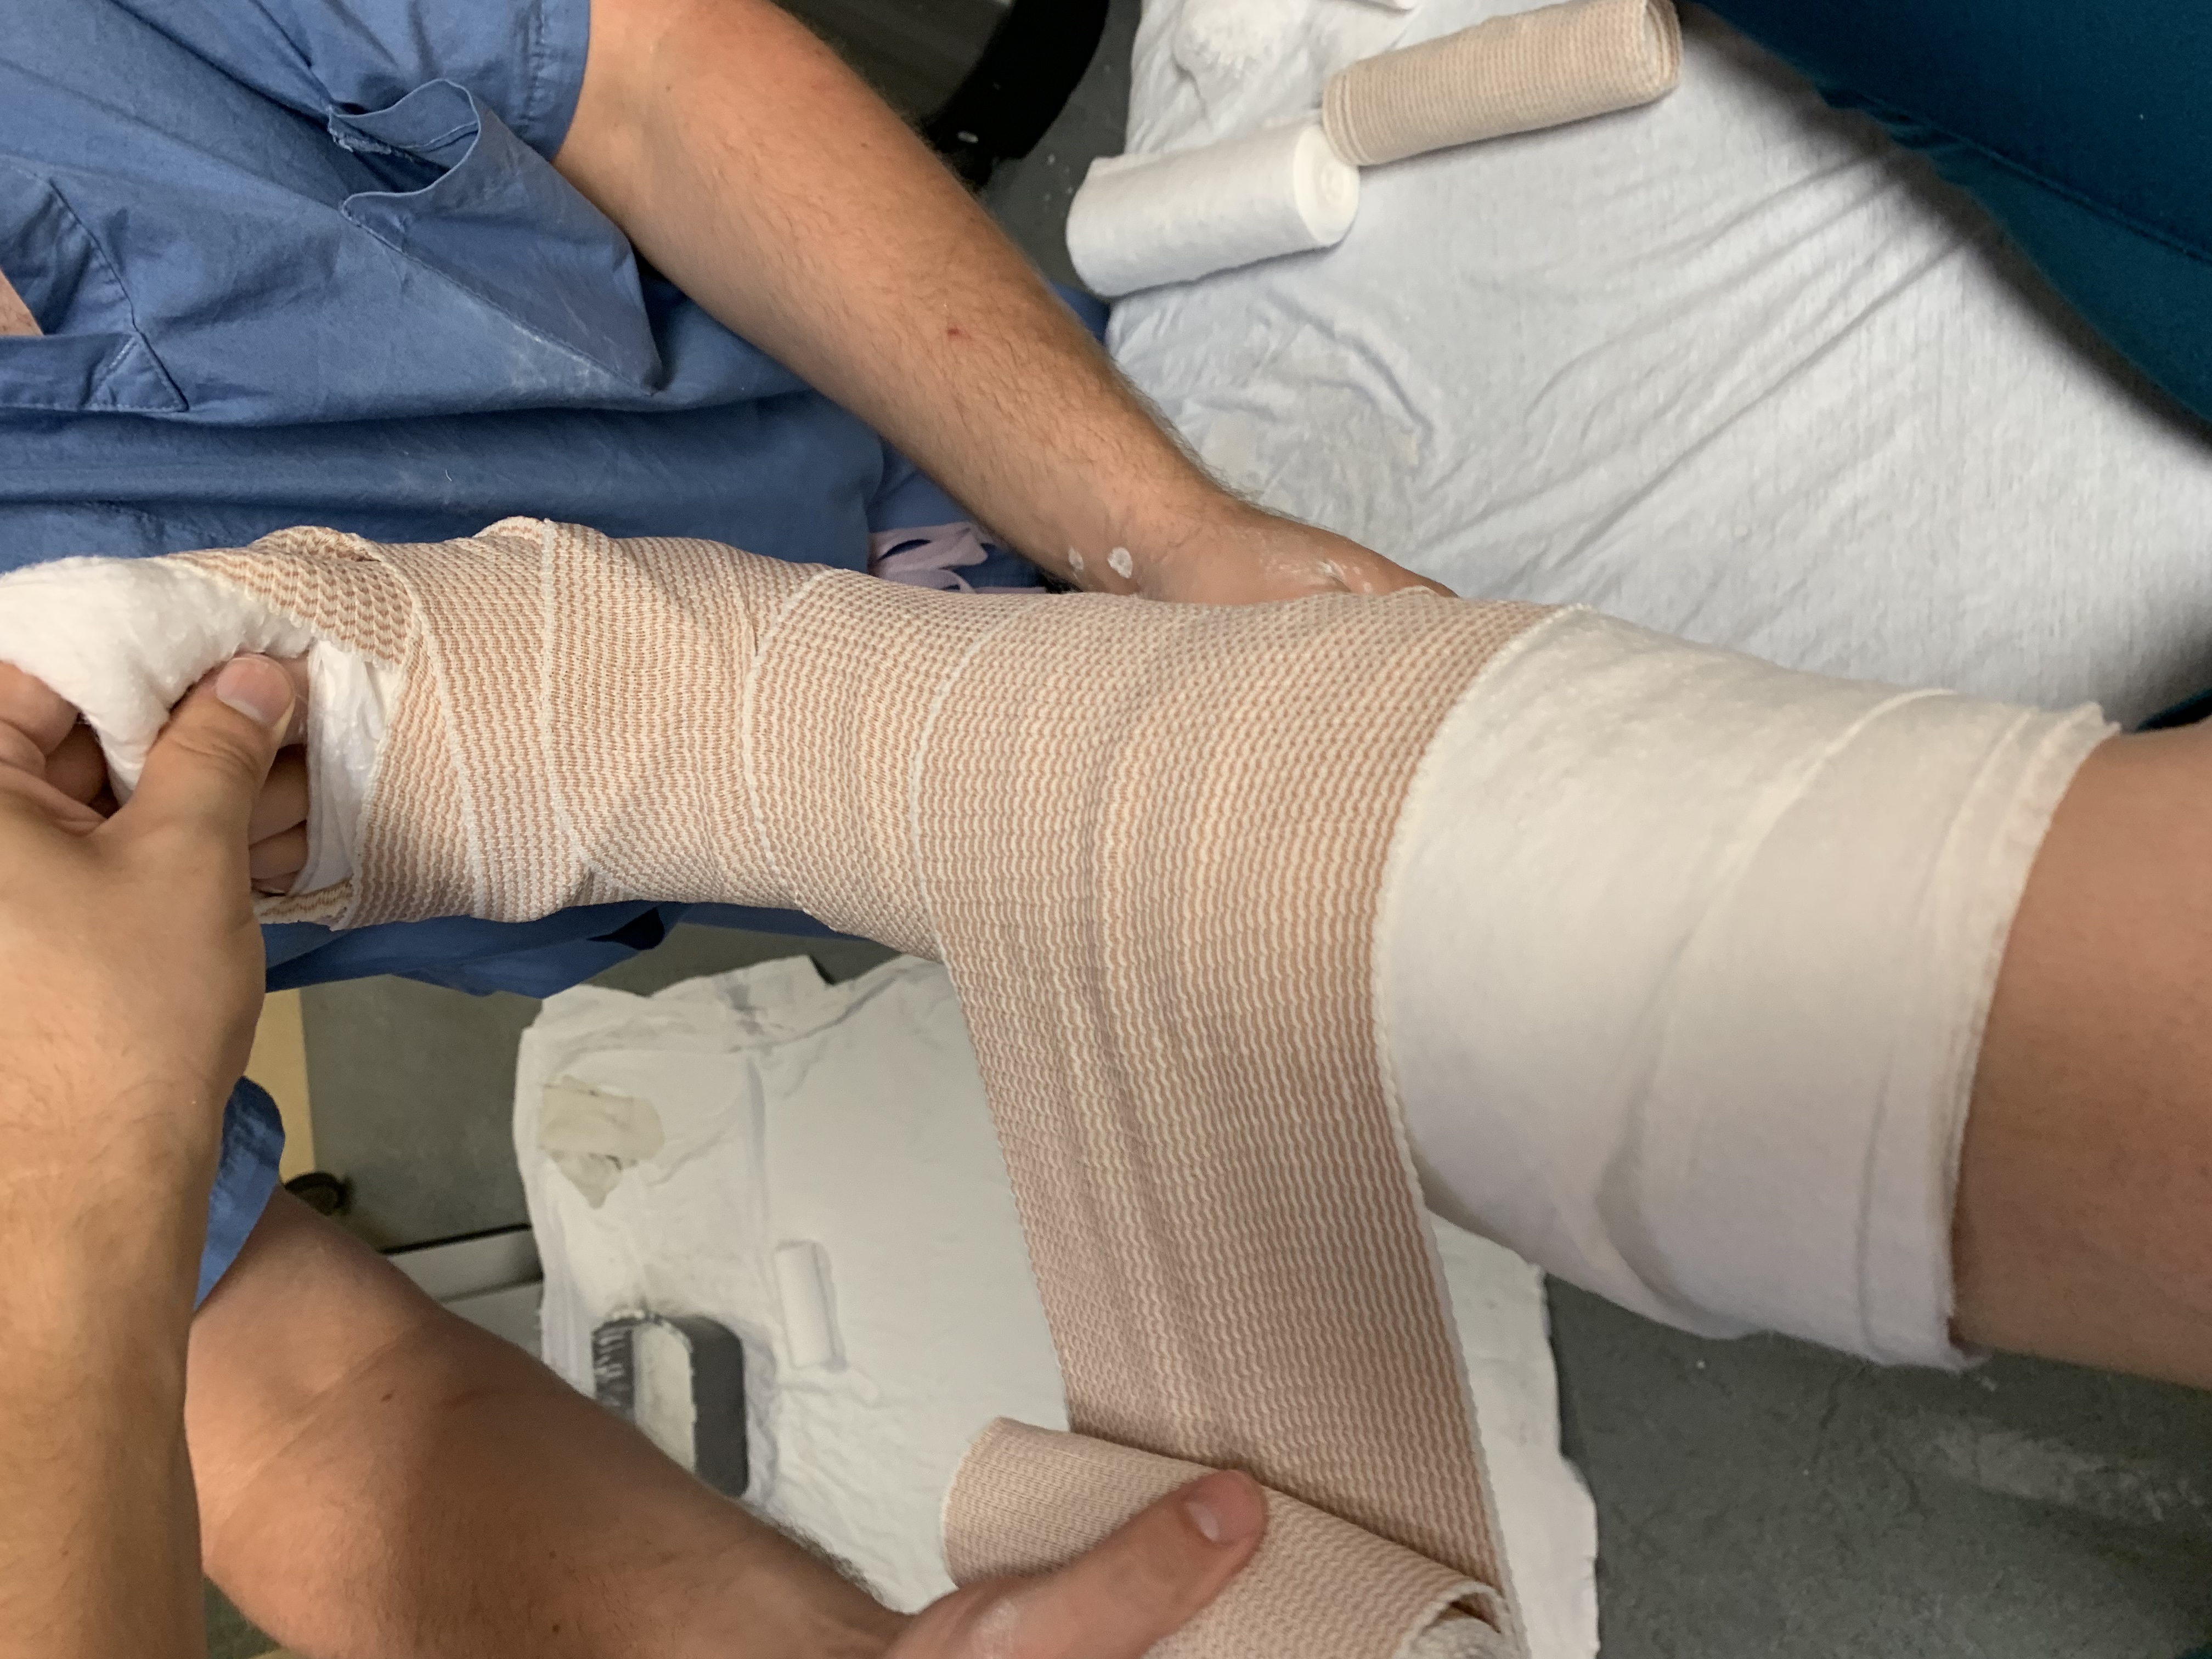
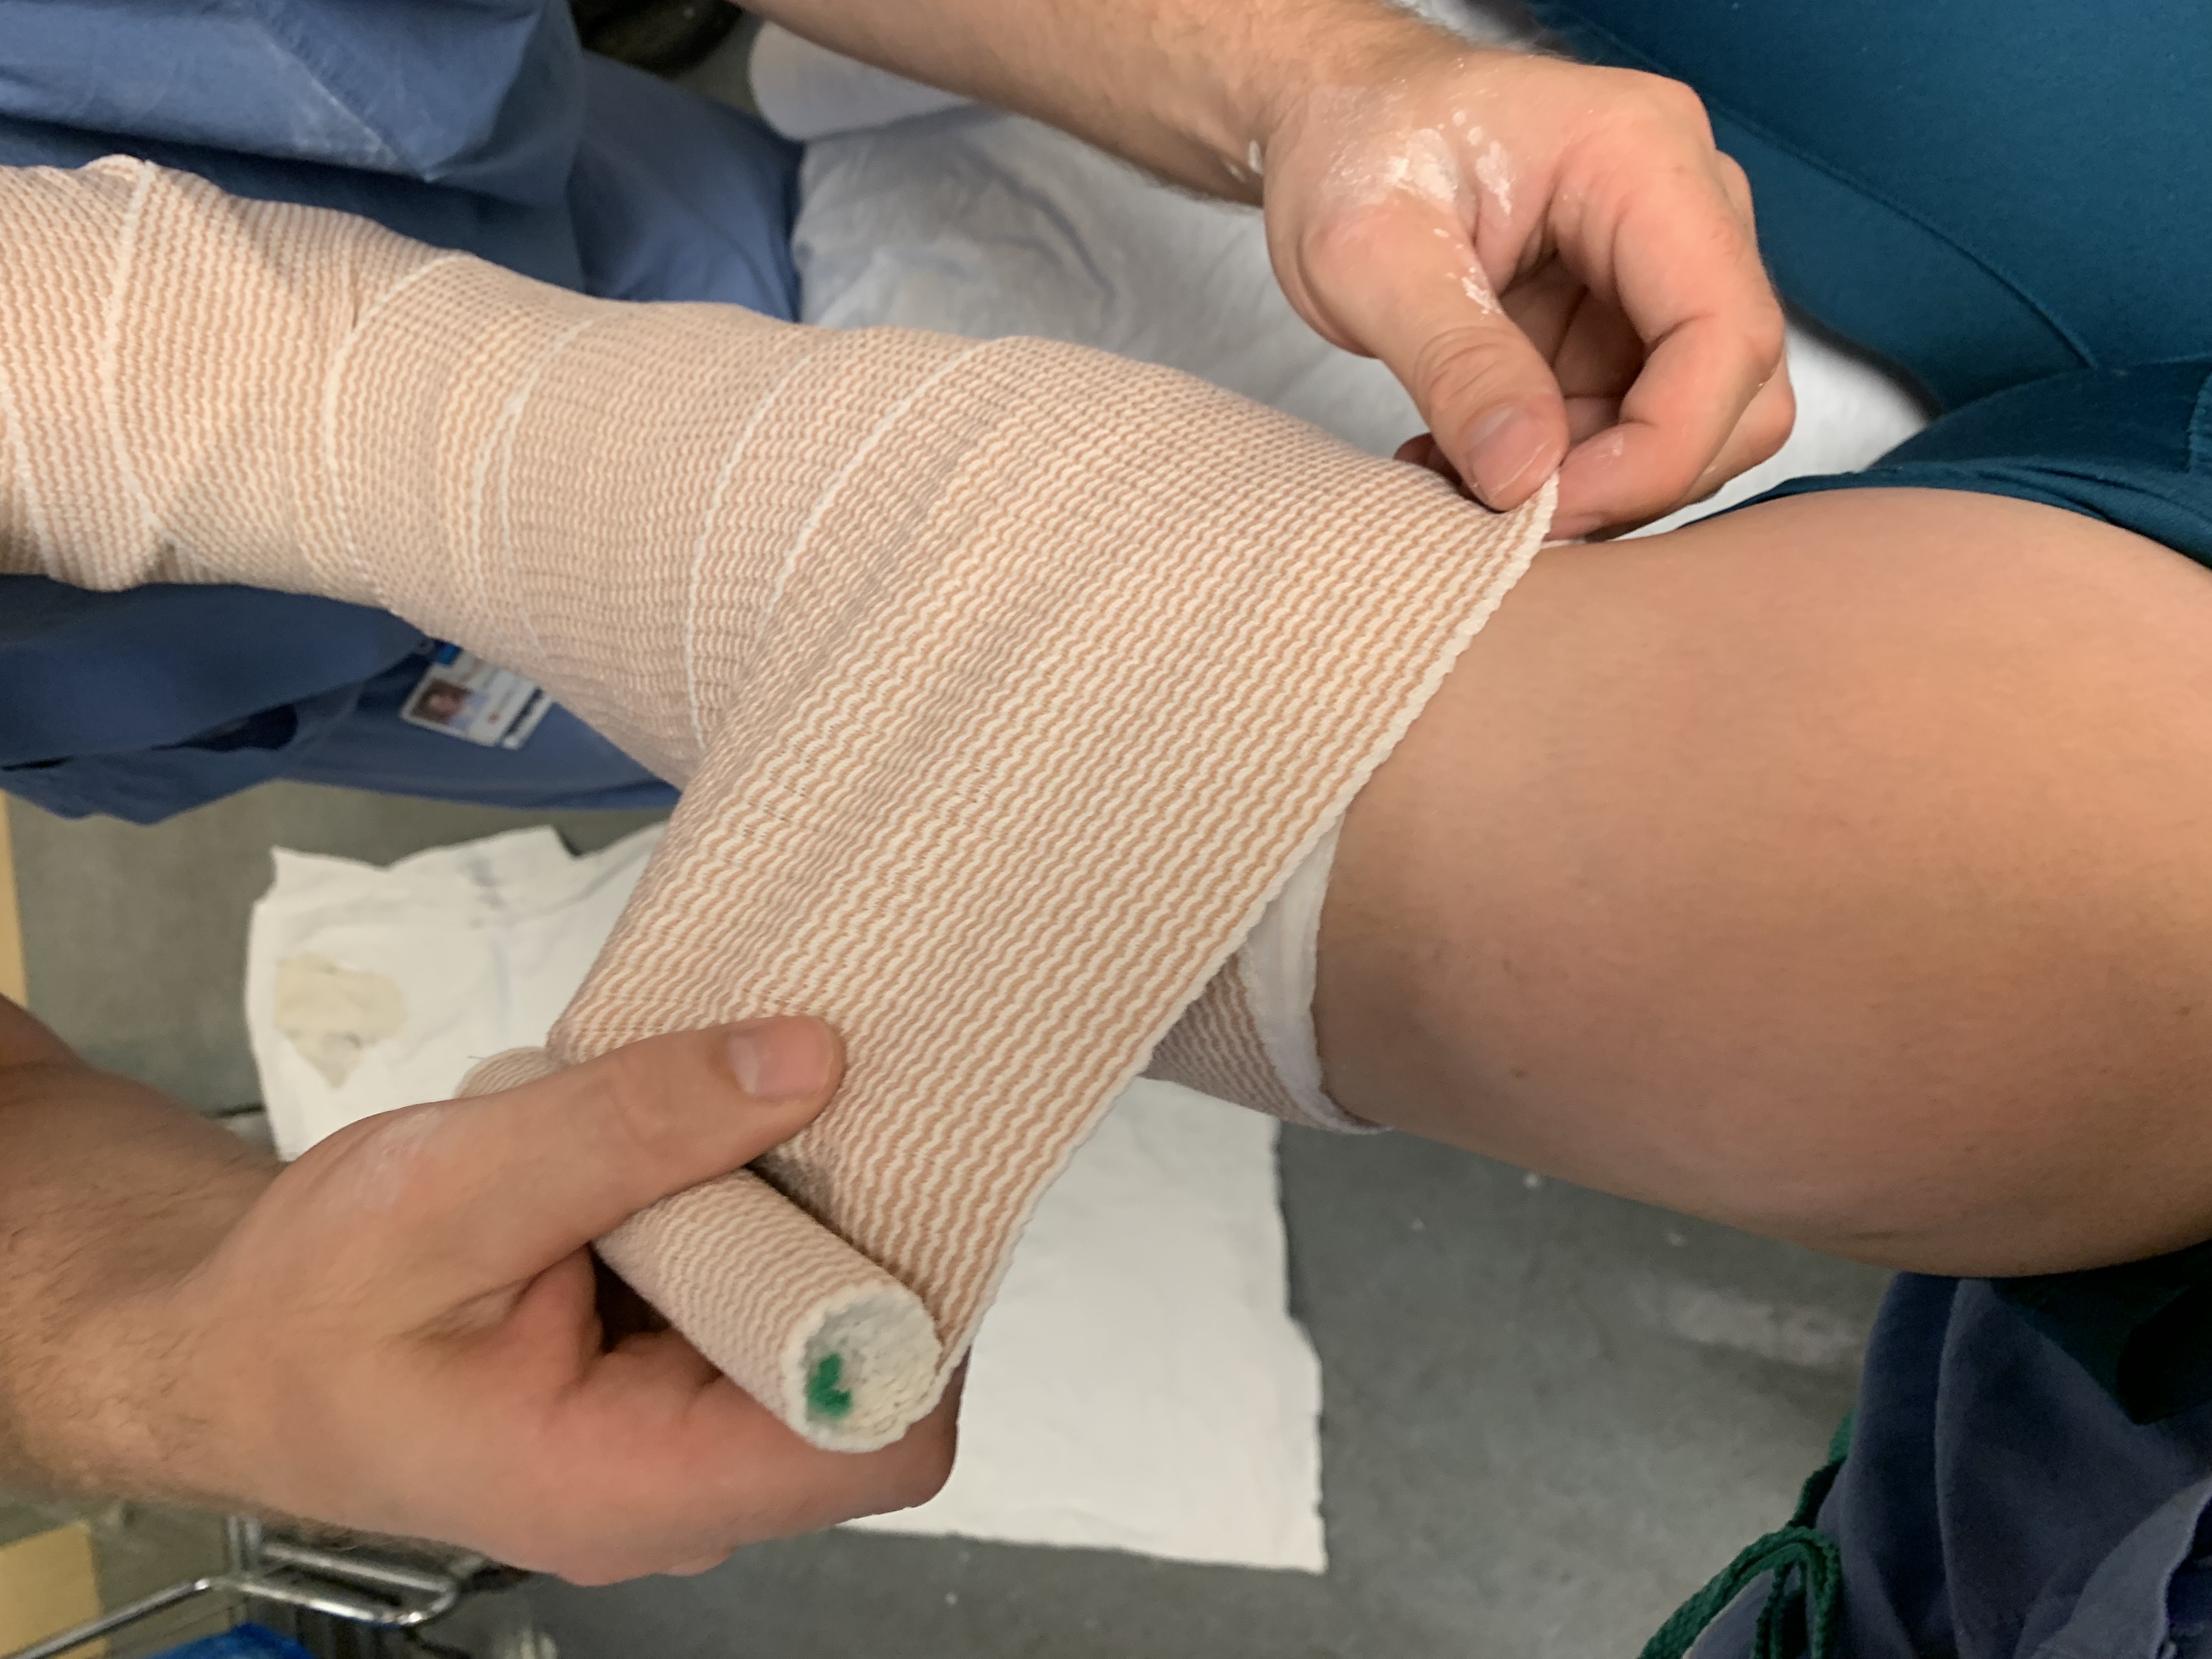
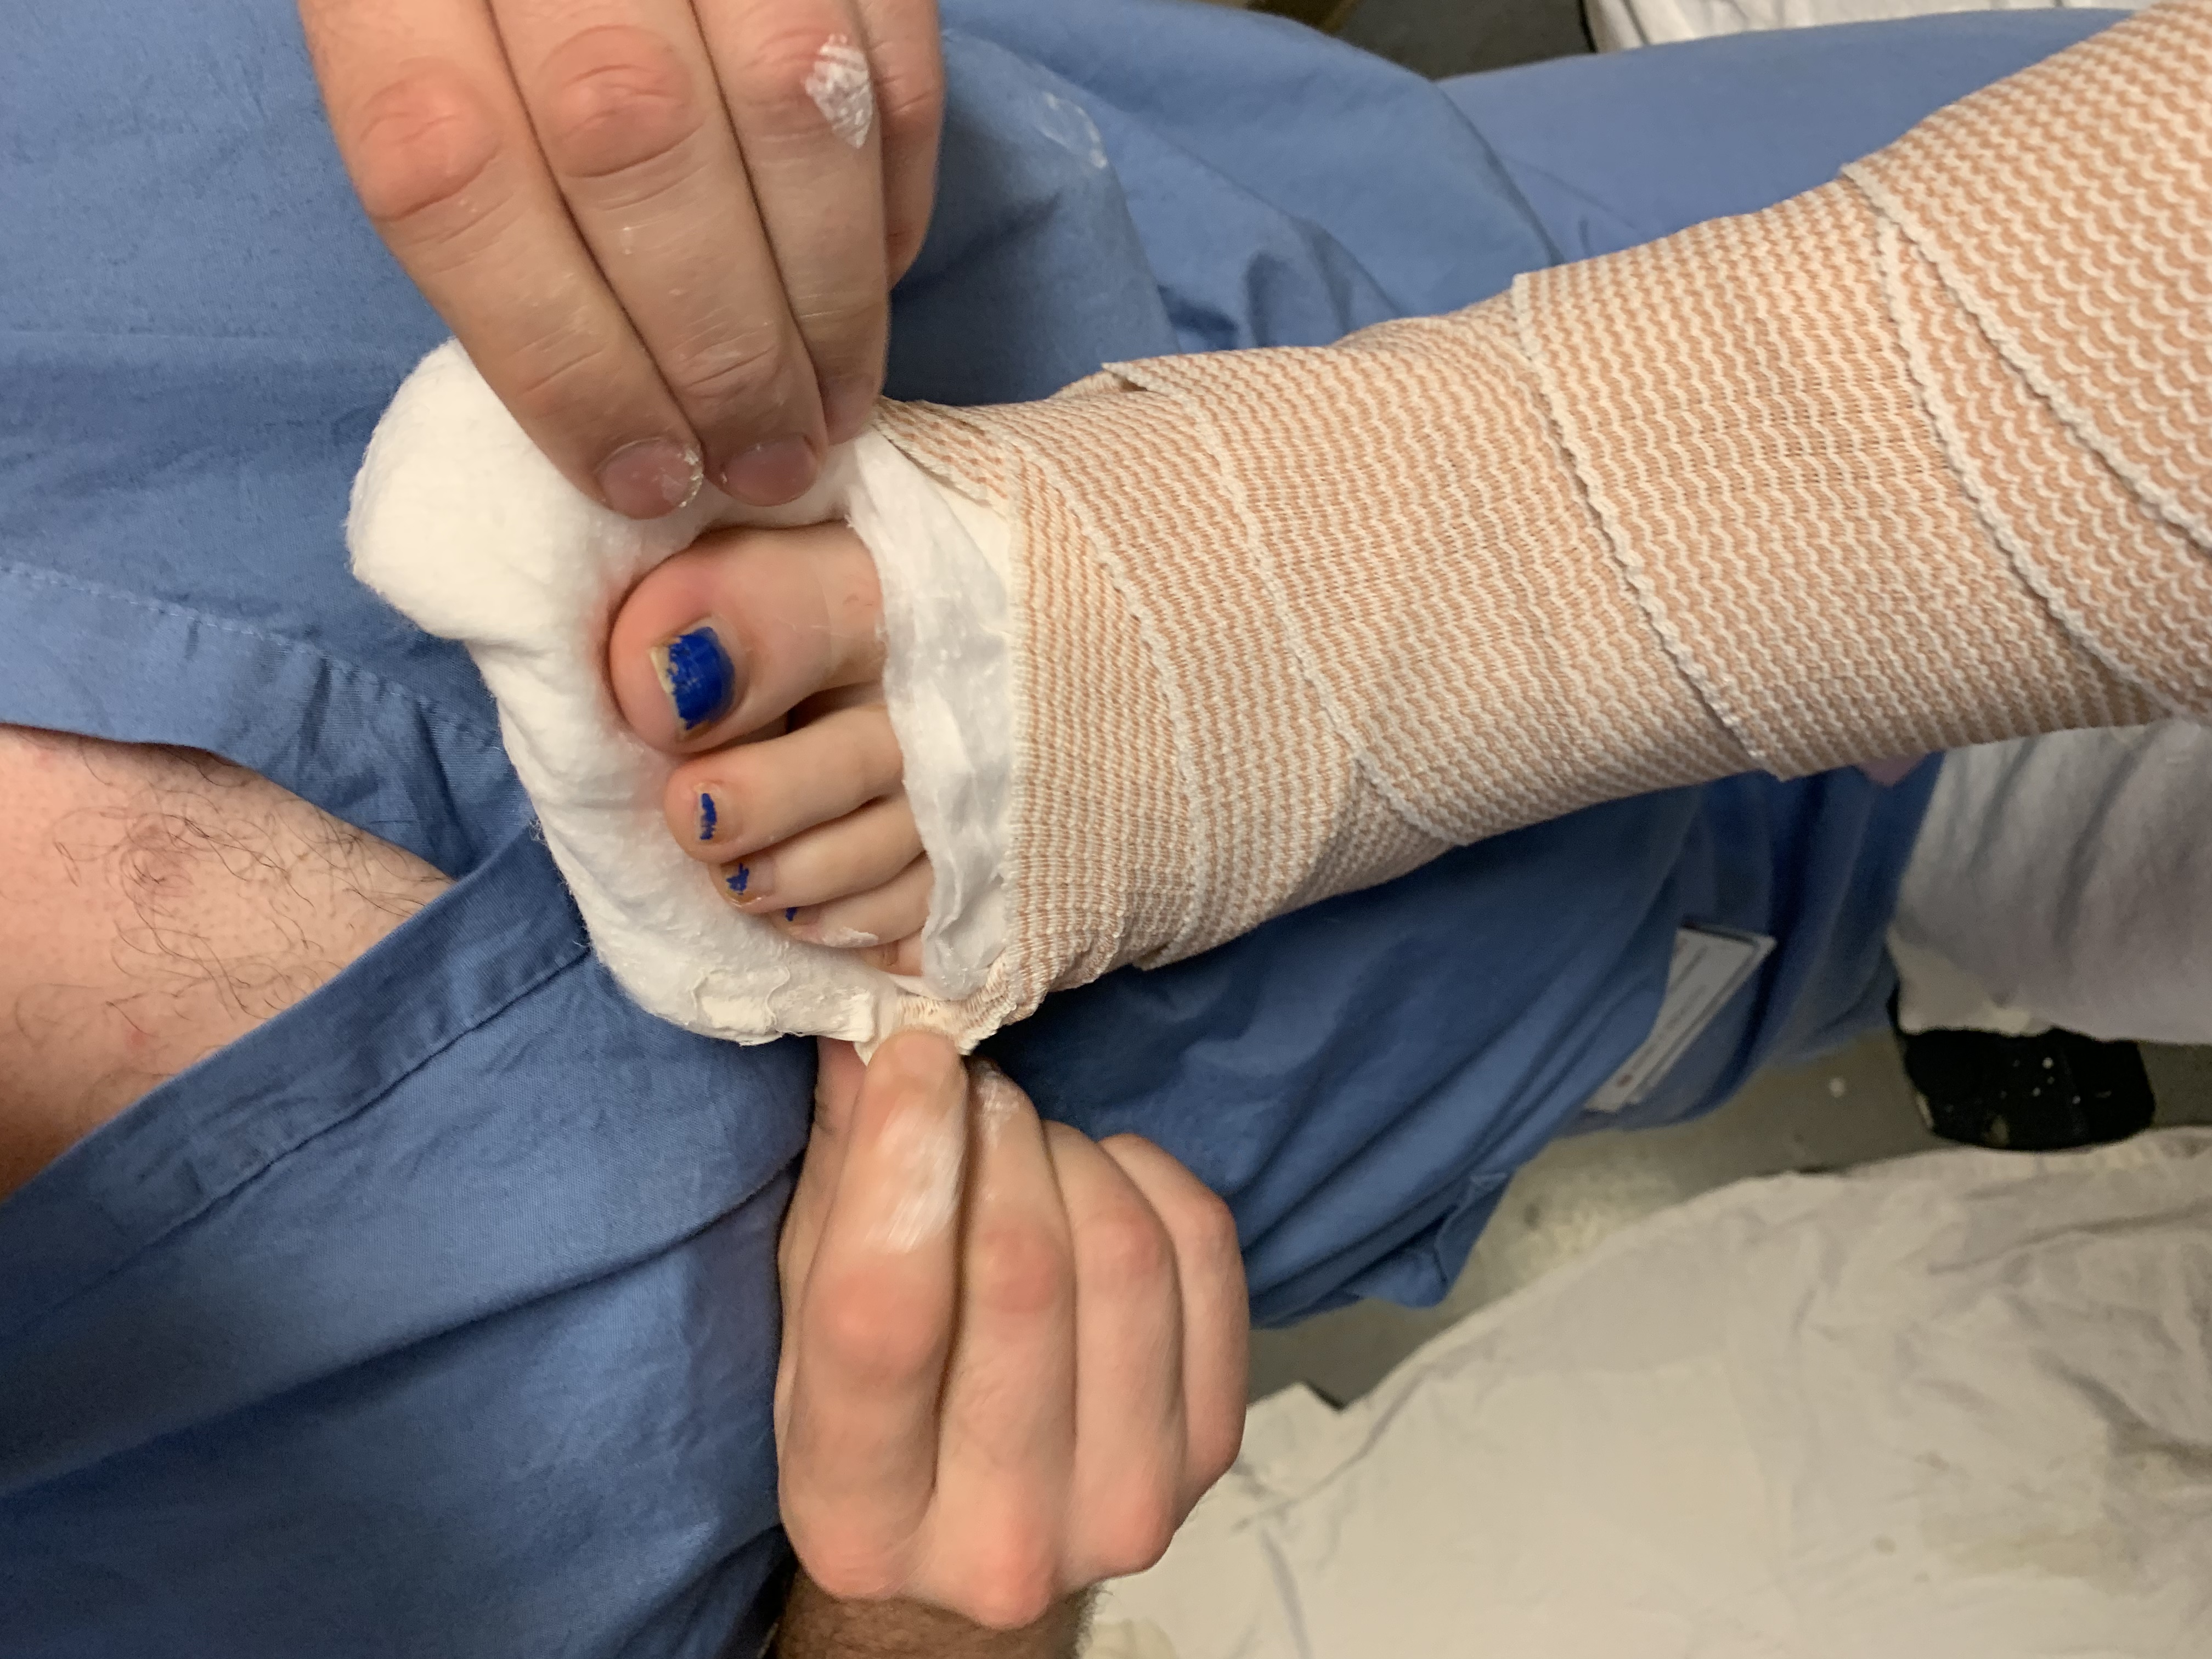
Tear any excess cotton away.
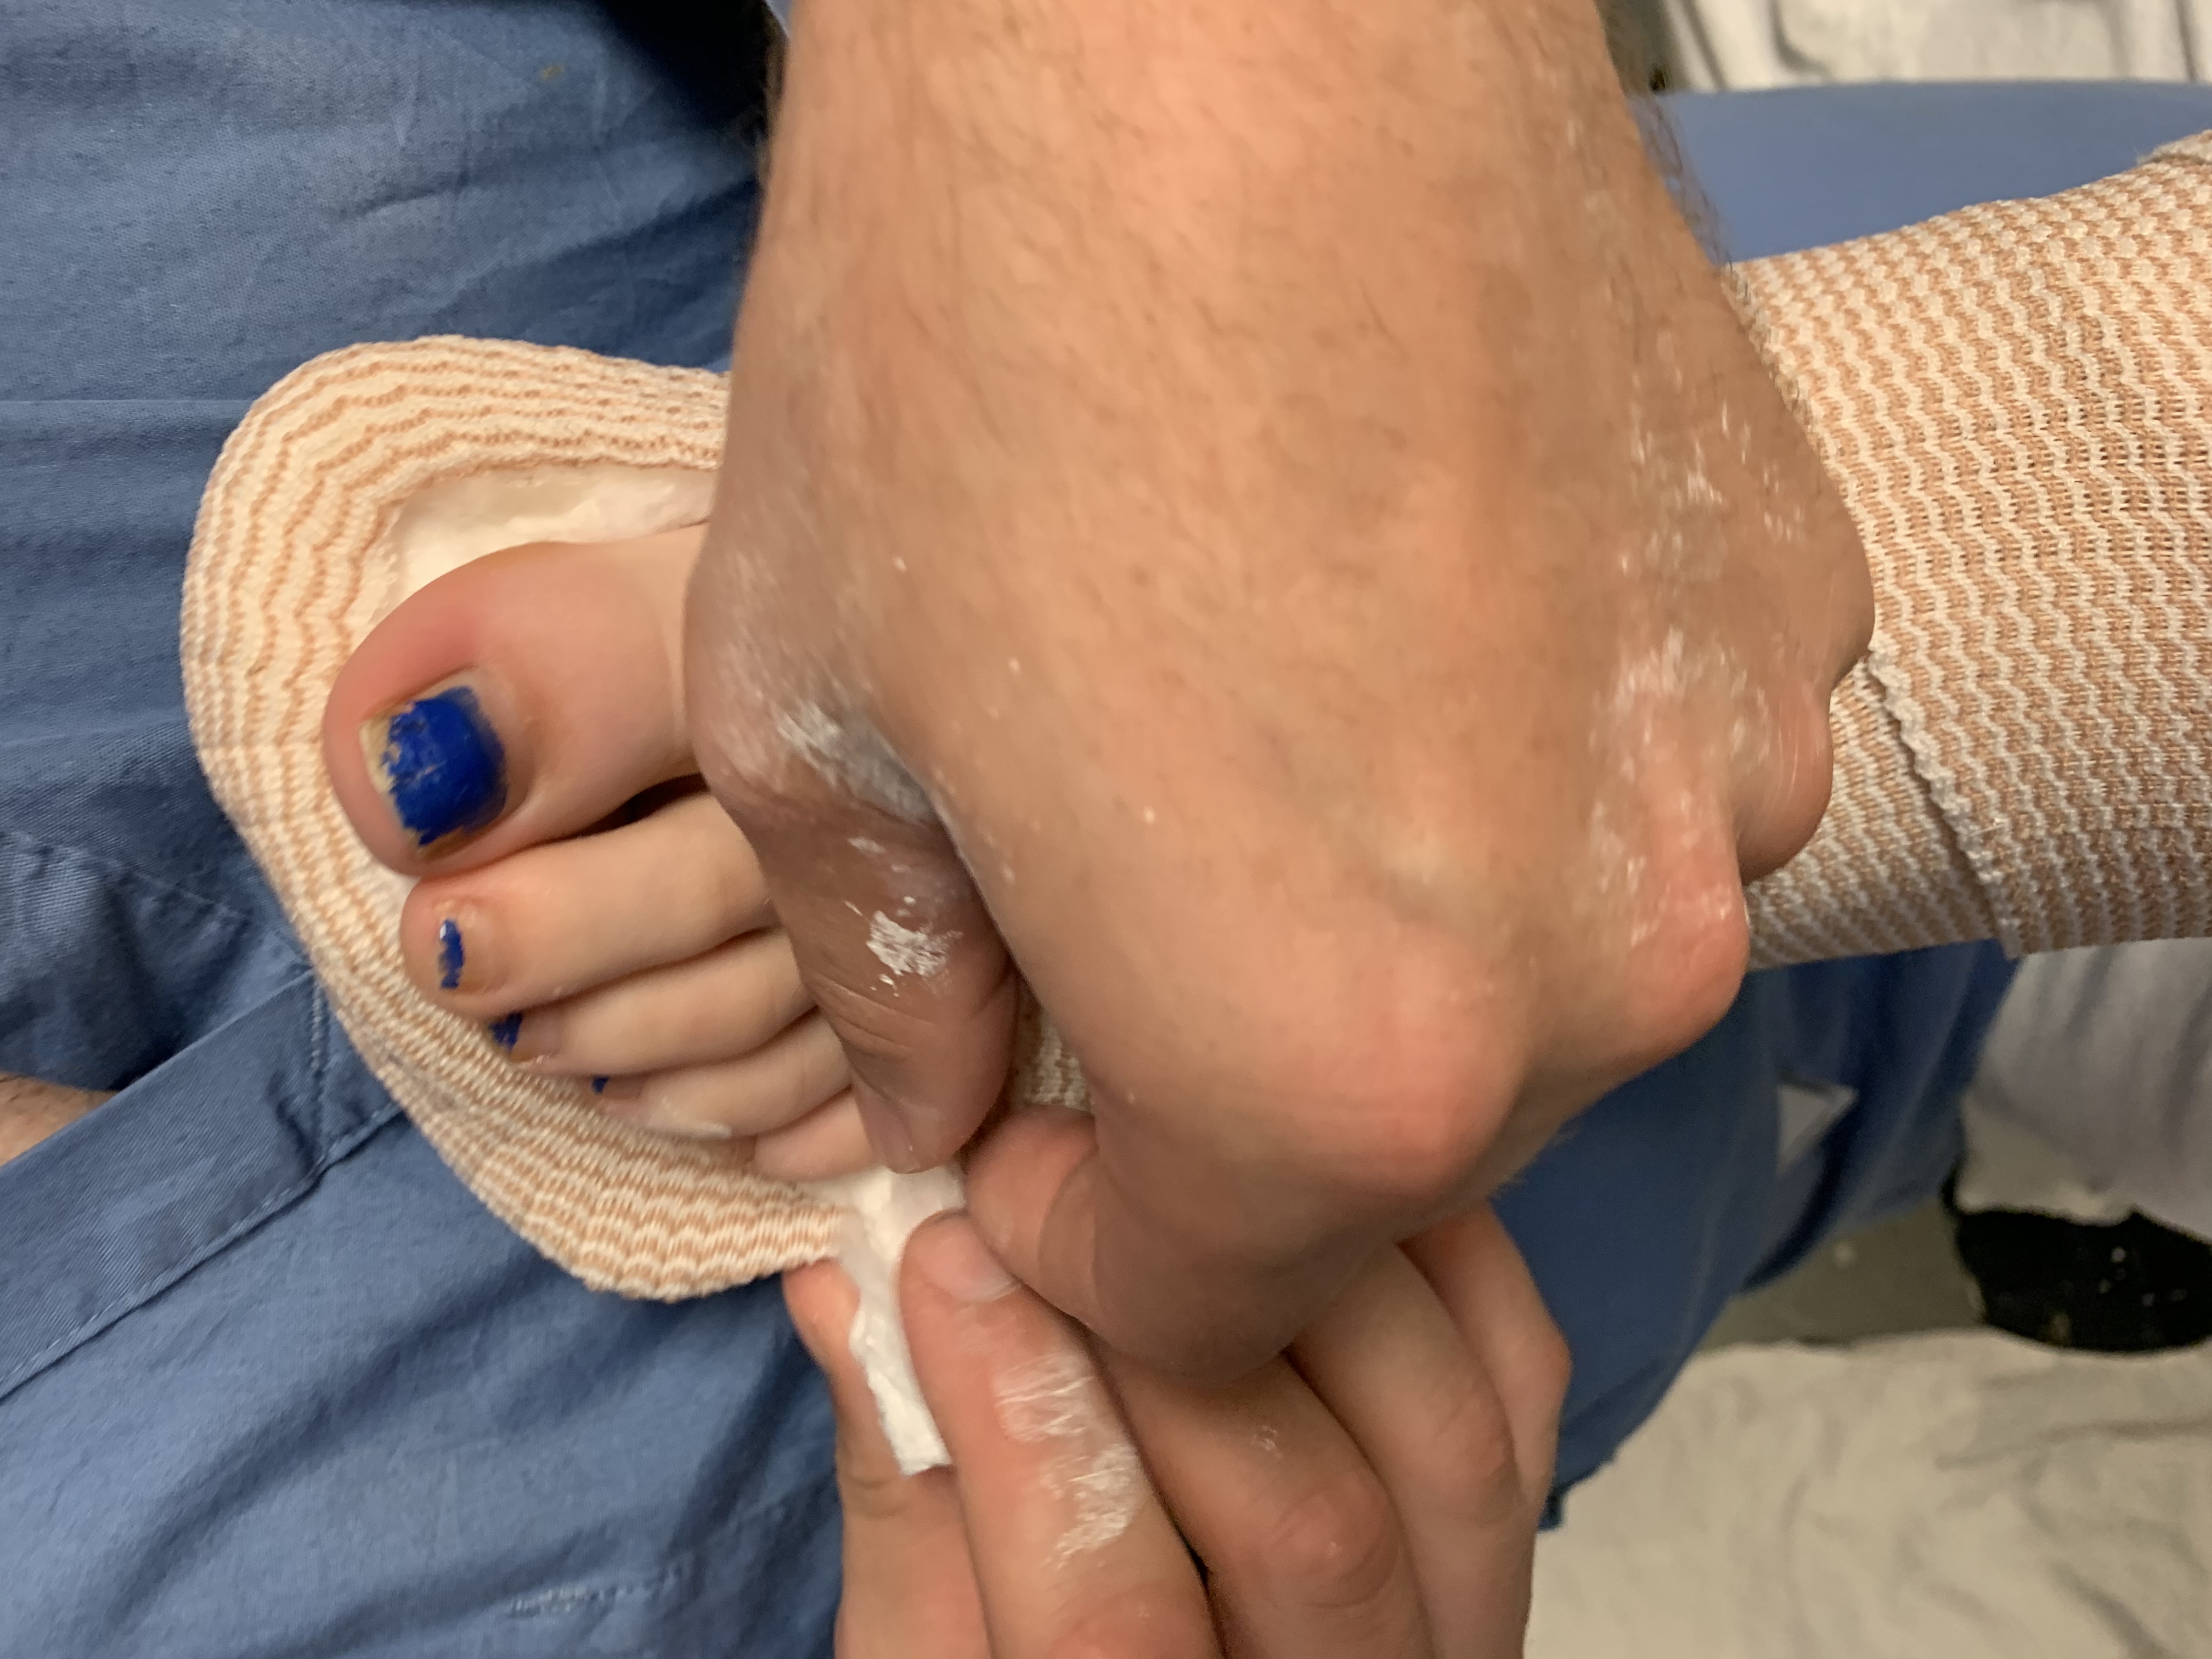
In the same position that required you to hold the ankle fracture reduced. Place your hands palm flat onto your mold points as depicted. (This is a varus mold, one of the more common directions of required molding).
The right hand goes behind the heel and just over the distal fibula, the left hand goes over top of the tibia proximal to the fracture and just proximal to the medial malleolus.
Right hand pushing medial and anterior, left hand pushing lateral and posterior.
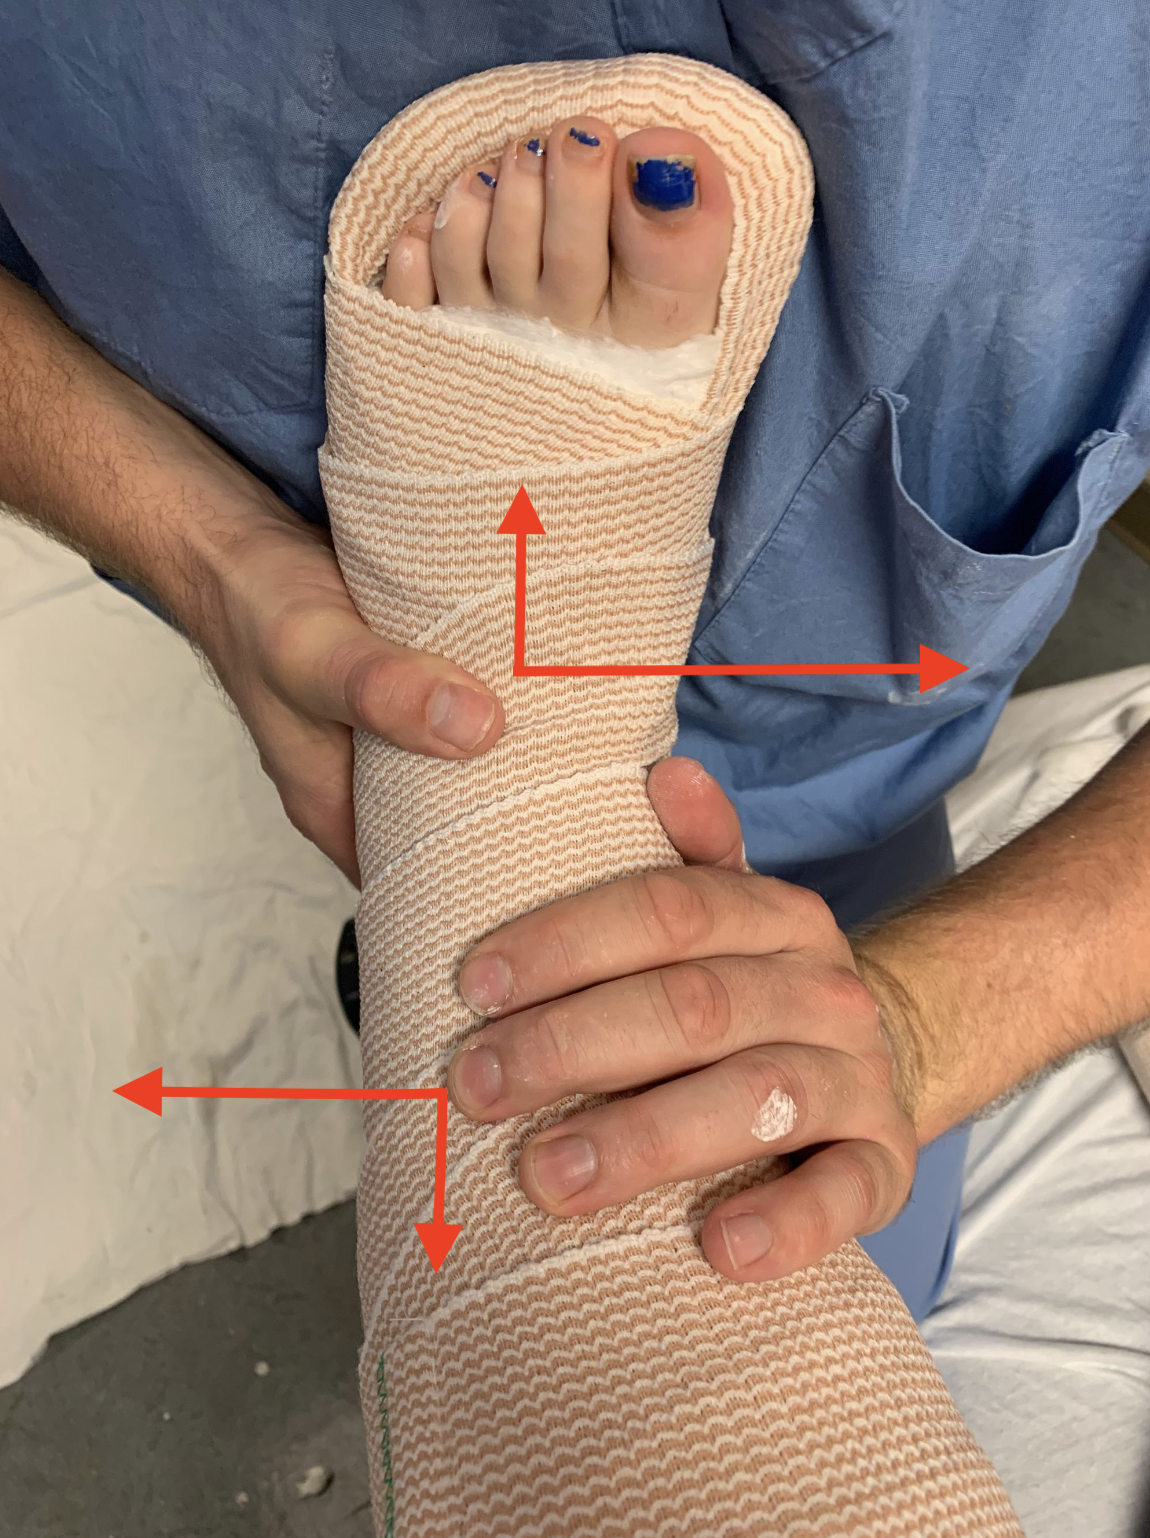
Having your assistant push the foot into your chest, will help stabilize the extremity while you’re molding and help the your splint stay dorsiflexed (if you leave your splint plantarflexed at the ankle, the patient may develop a plantarflexion “equinus” contracture). There are some exceptions where you do not want to dorsiflex the ankle, such as in large unstable posterior malleolus fractures, calc fractures, distal tibia fractures, sometimes unstable midfoot dislocations).
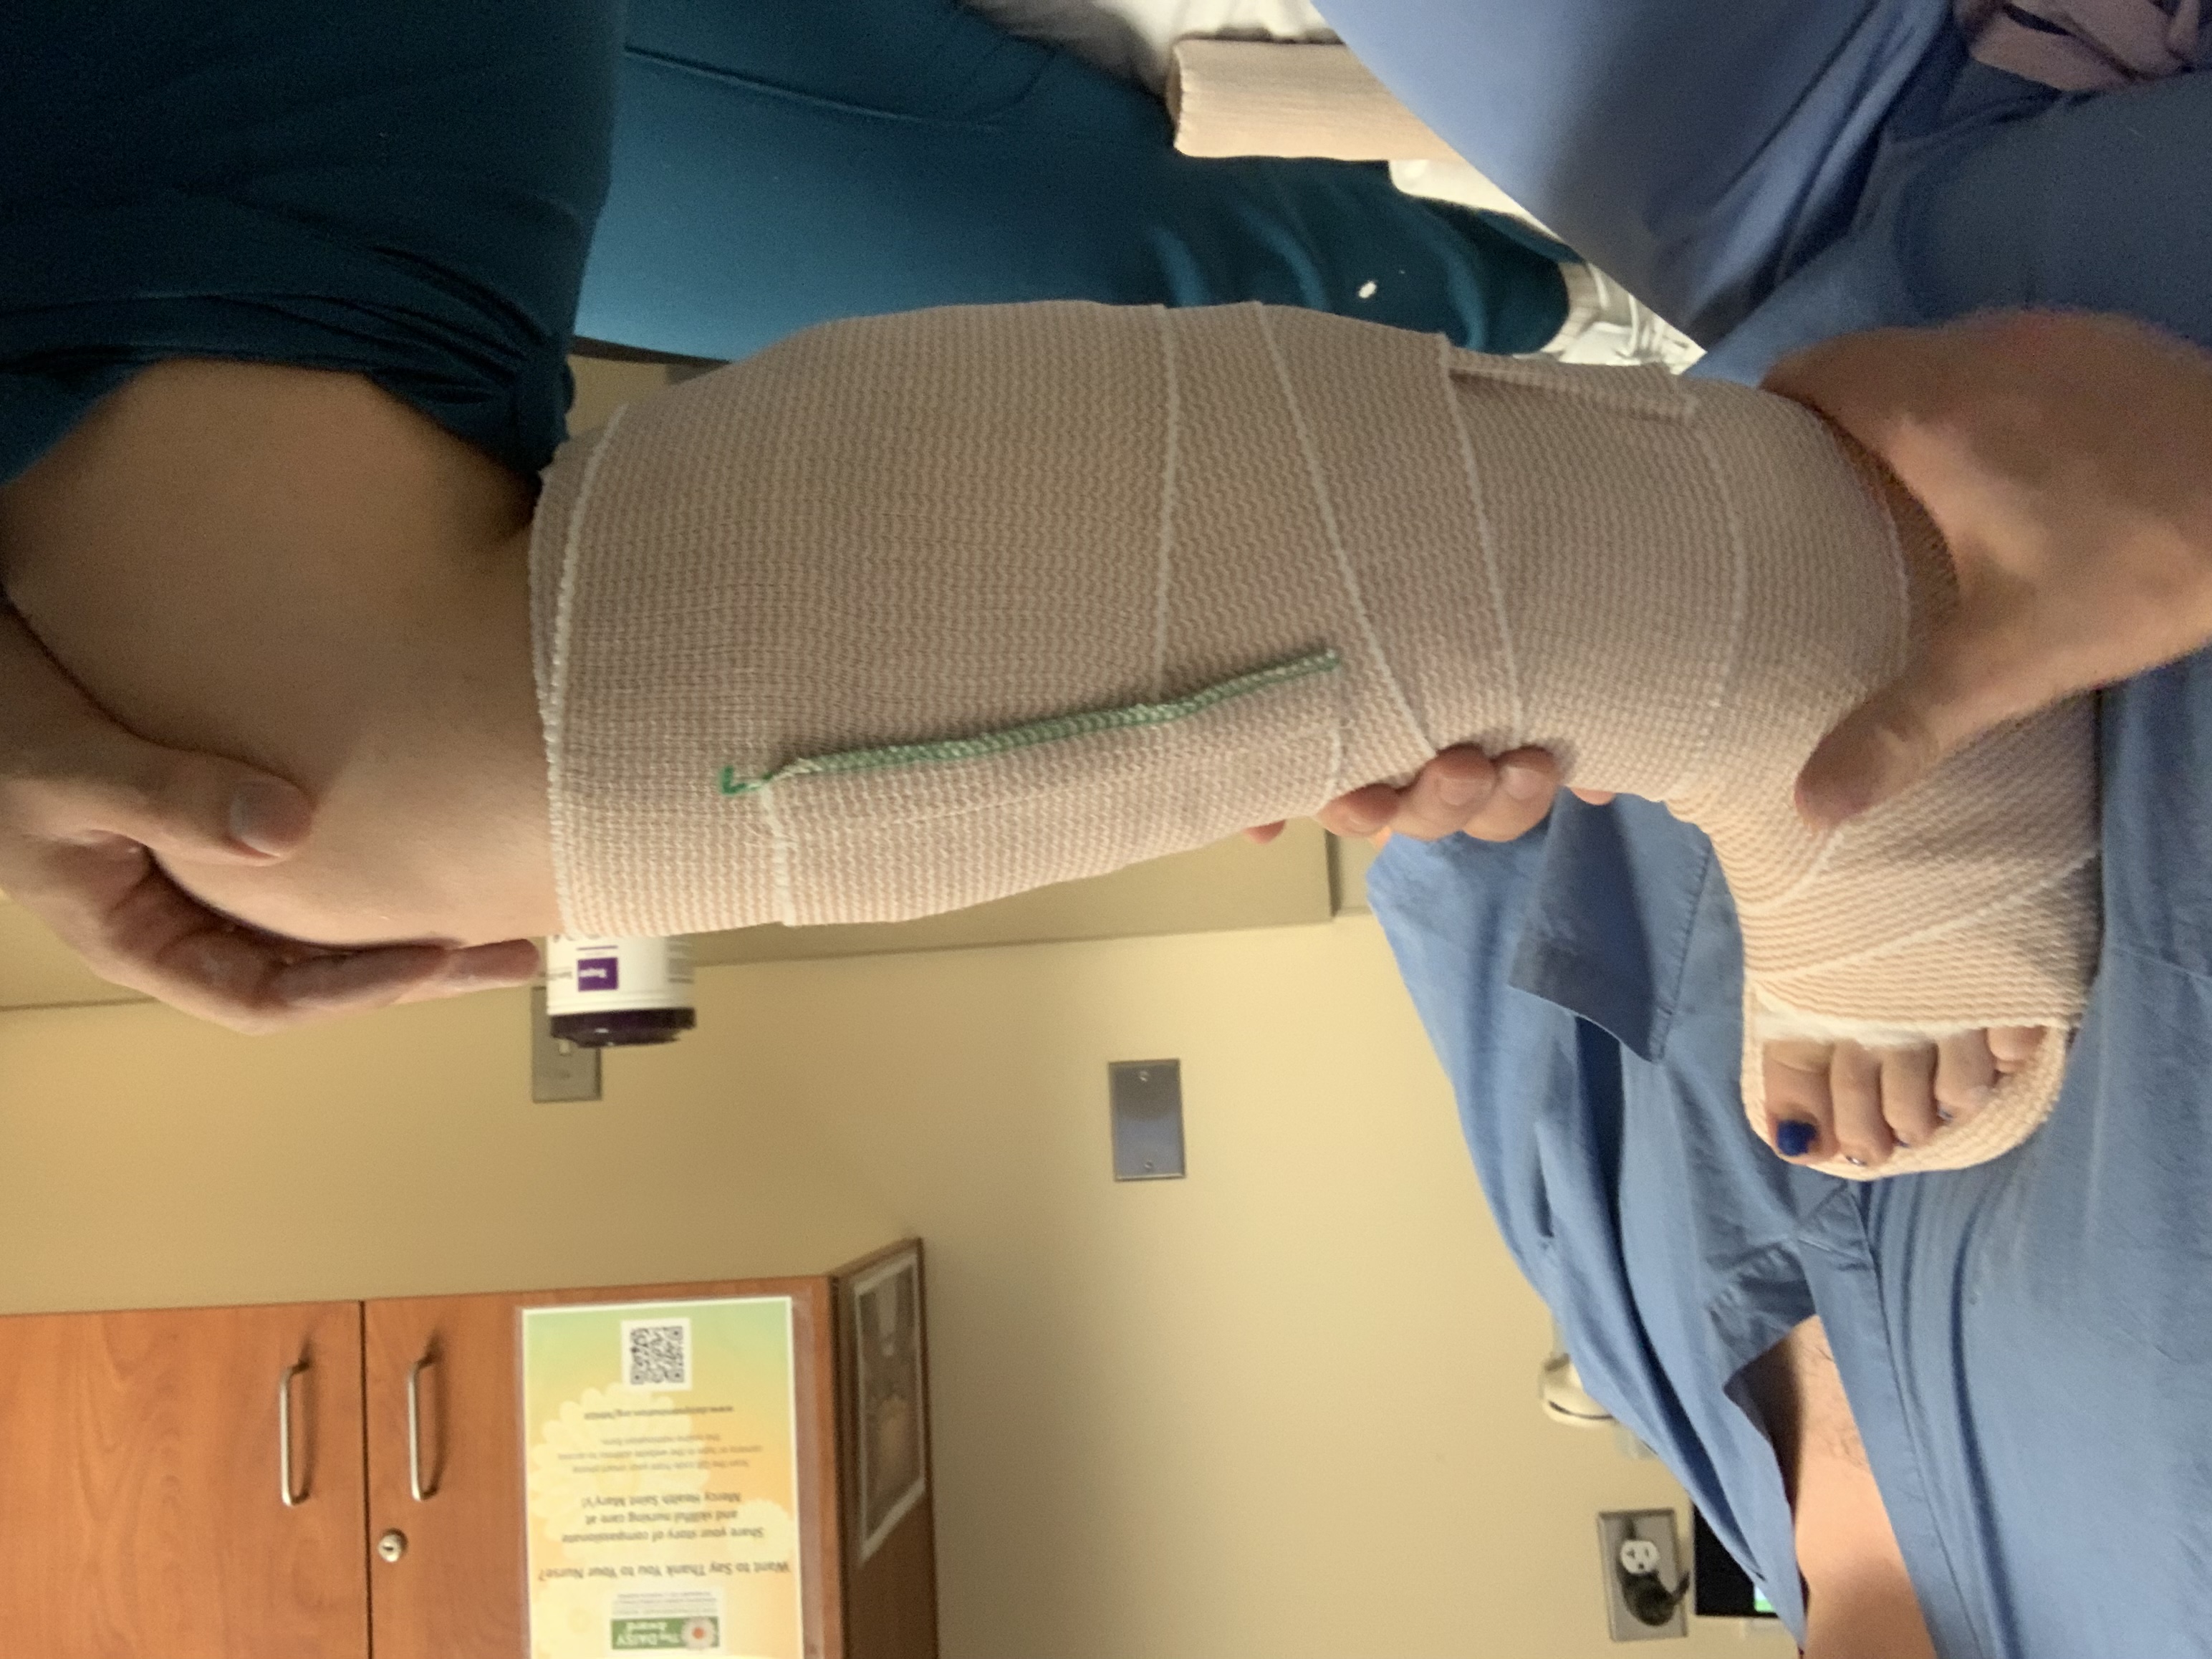
You can get Mortise and Lateral xrays to ensure your fracture is perfectly reduced prior to the splint fully drying. (Depending on the type of ankle fracture, you can “over-reduce” the fracture. Try not to let go of your mold if your splint is not hard.
Here is a mortise view (remember ankle is internally rotated by 15 degrees, coaching your assistant at the knee ahead of time can be helpful).
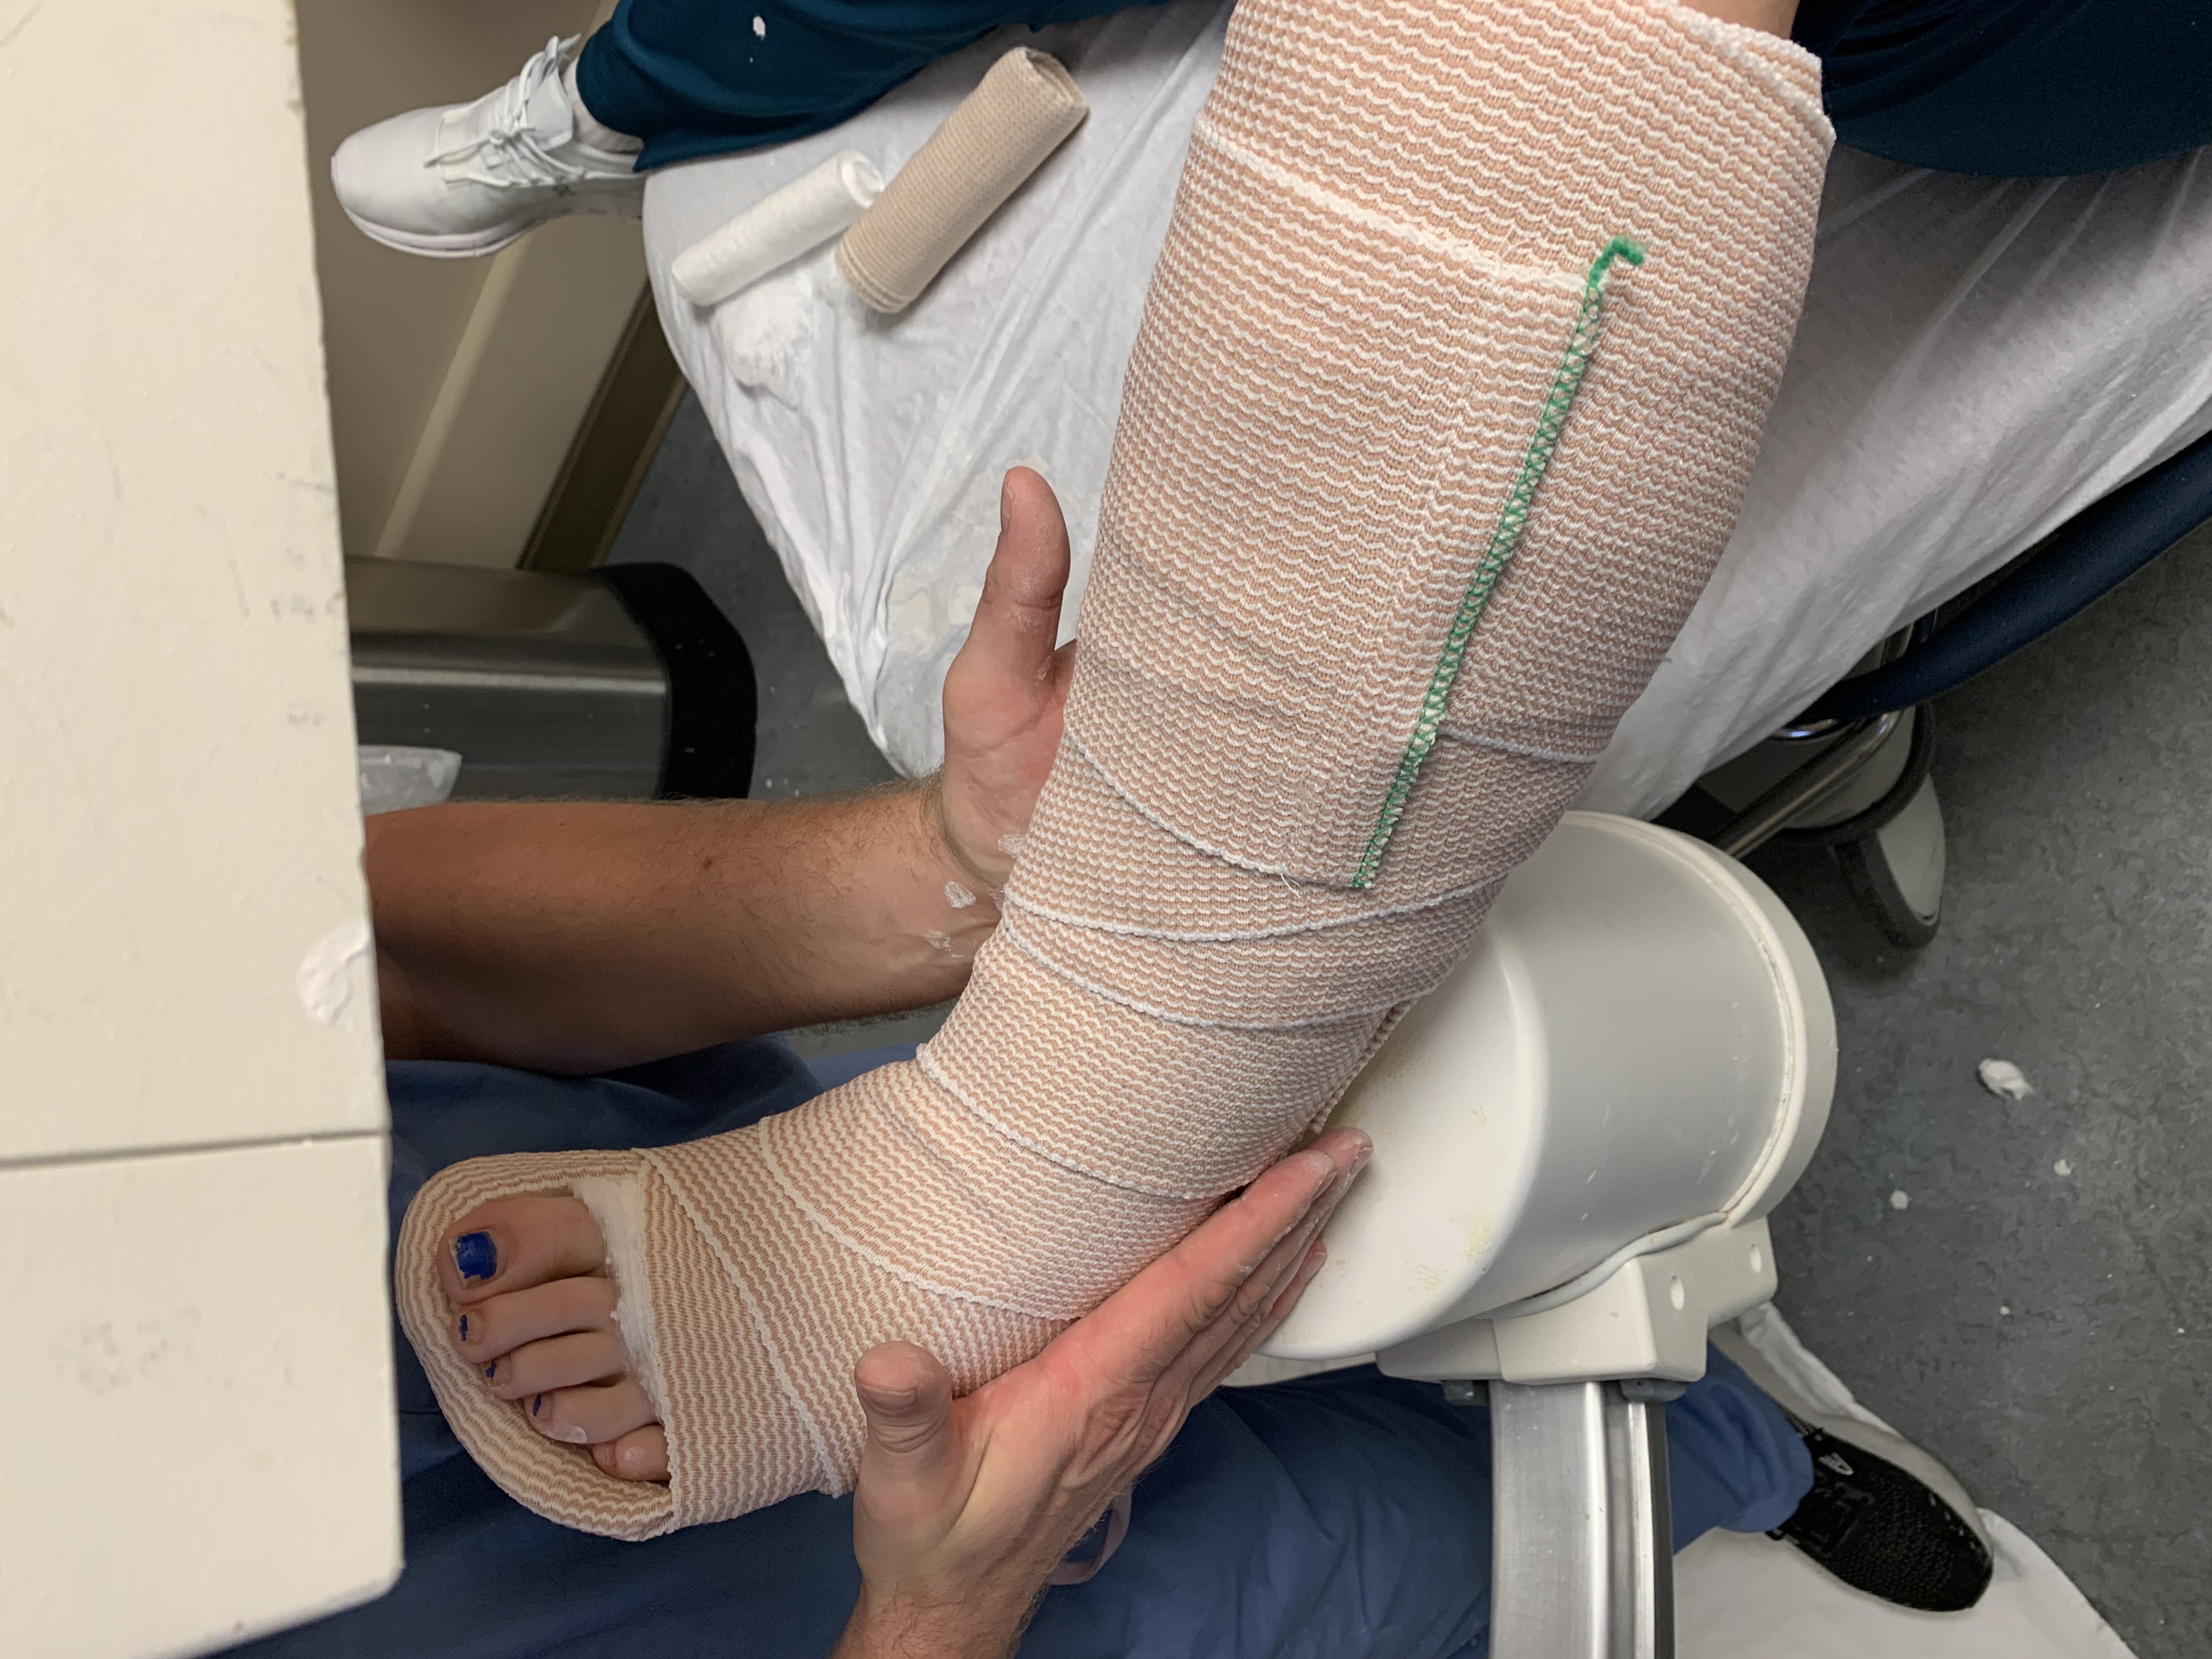
Here is a lateral xray, letting the hip fall into external rotation I found to be faster than moving the C-arm around.
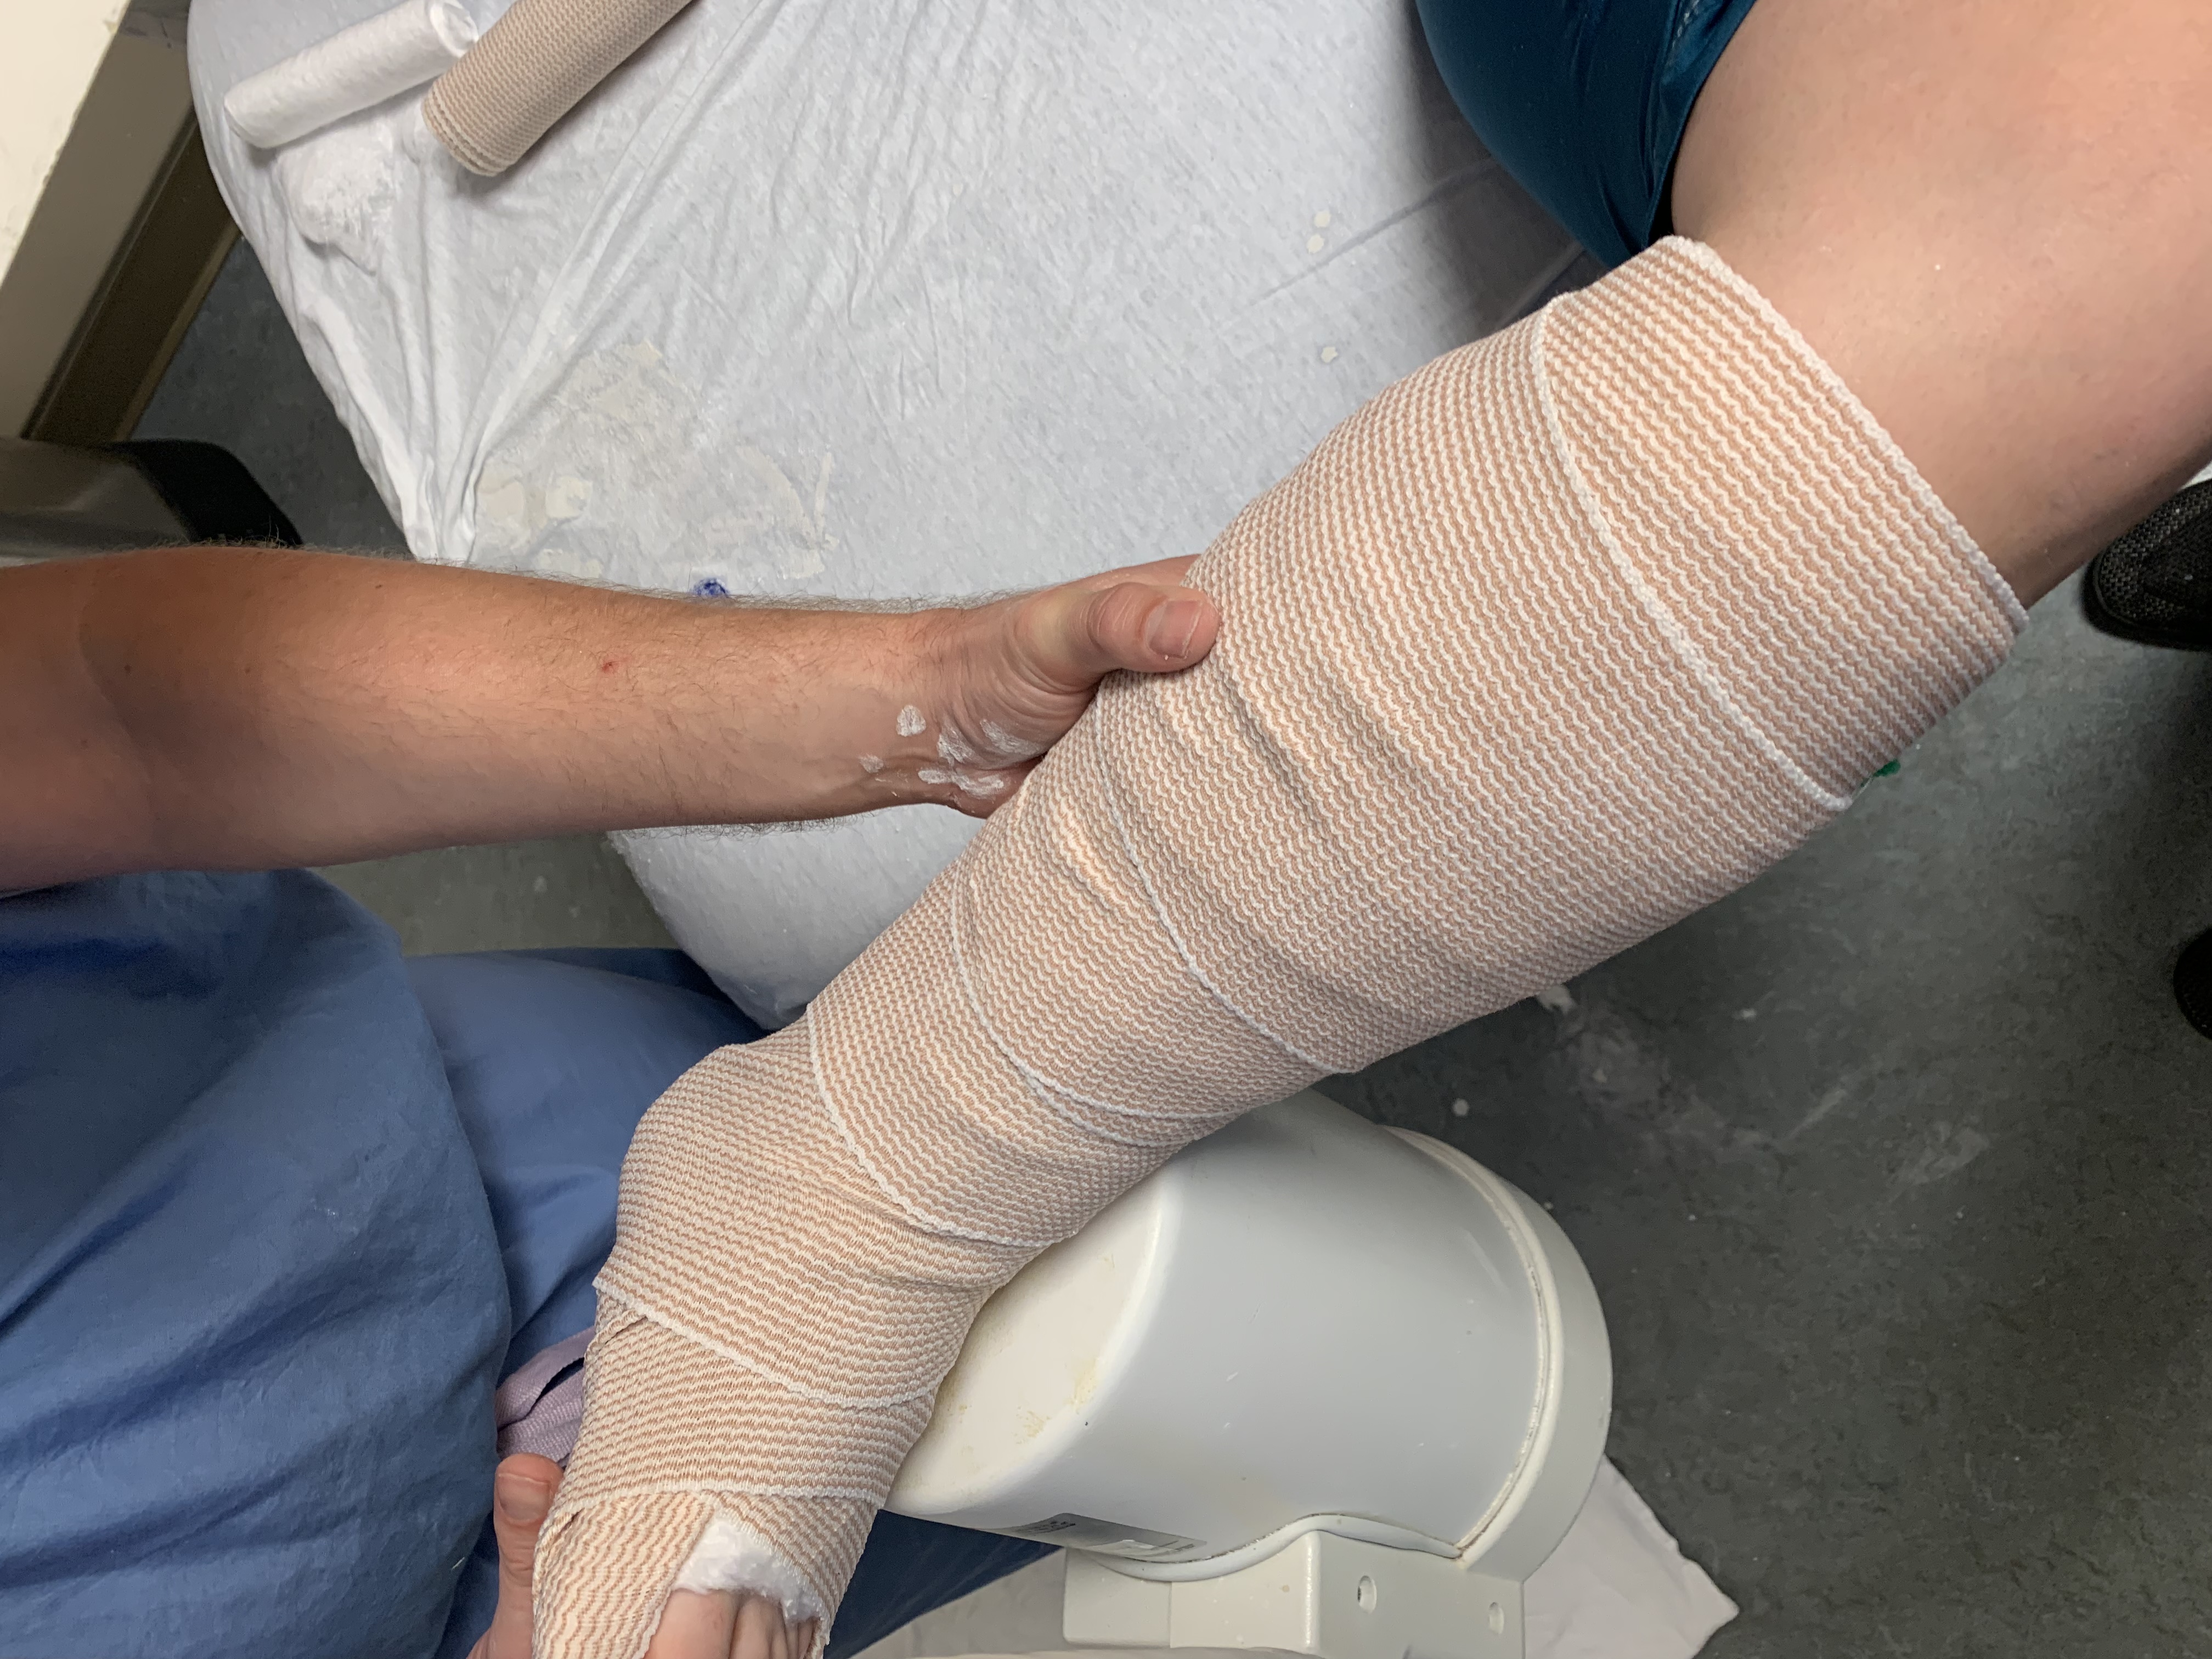
“Hold the mold until it is cold.” The biggest mistake new splinters make is letting go of their splint molds too early, if you let go too early the plaster is not hard and you can lose your reduction. After having to redo your whole reduction and splint after seeing your malreduced ankle, will teach you to never let go too early.
I hold my splints until I can’t easily bend a corner of the plaster.
Warmer water, a more thorough “squeegee”, will help your plaster dry faster (don’t burn people with hot water).
Remember your plaster should never touch someones skin, ensure your plaster ends at your webril cuff. (If you’re going fast it is easy to misplace the plaster past your cuff. Cut back the plaster with your trauma sheers if you have too, just realize this dulls your scissors and it is faster to put it in the correct place rather than always cutting plaster back.
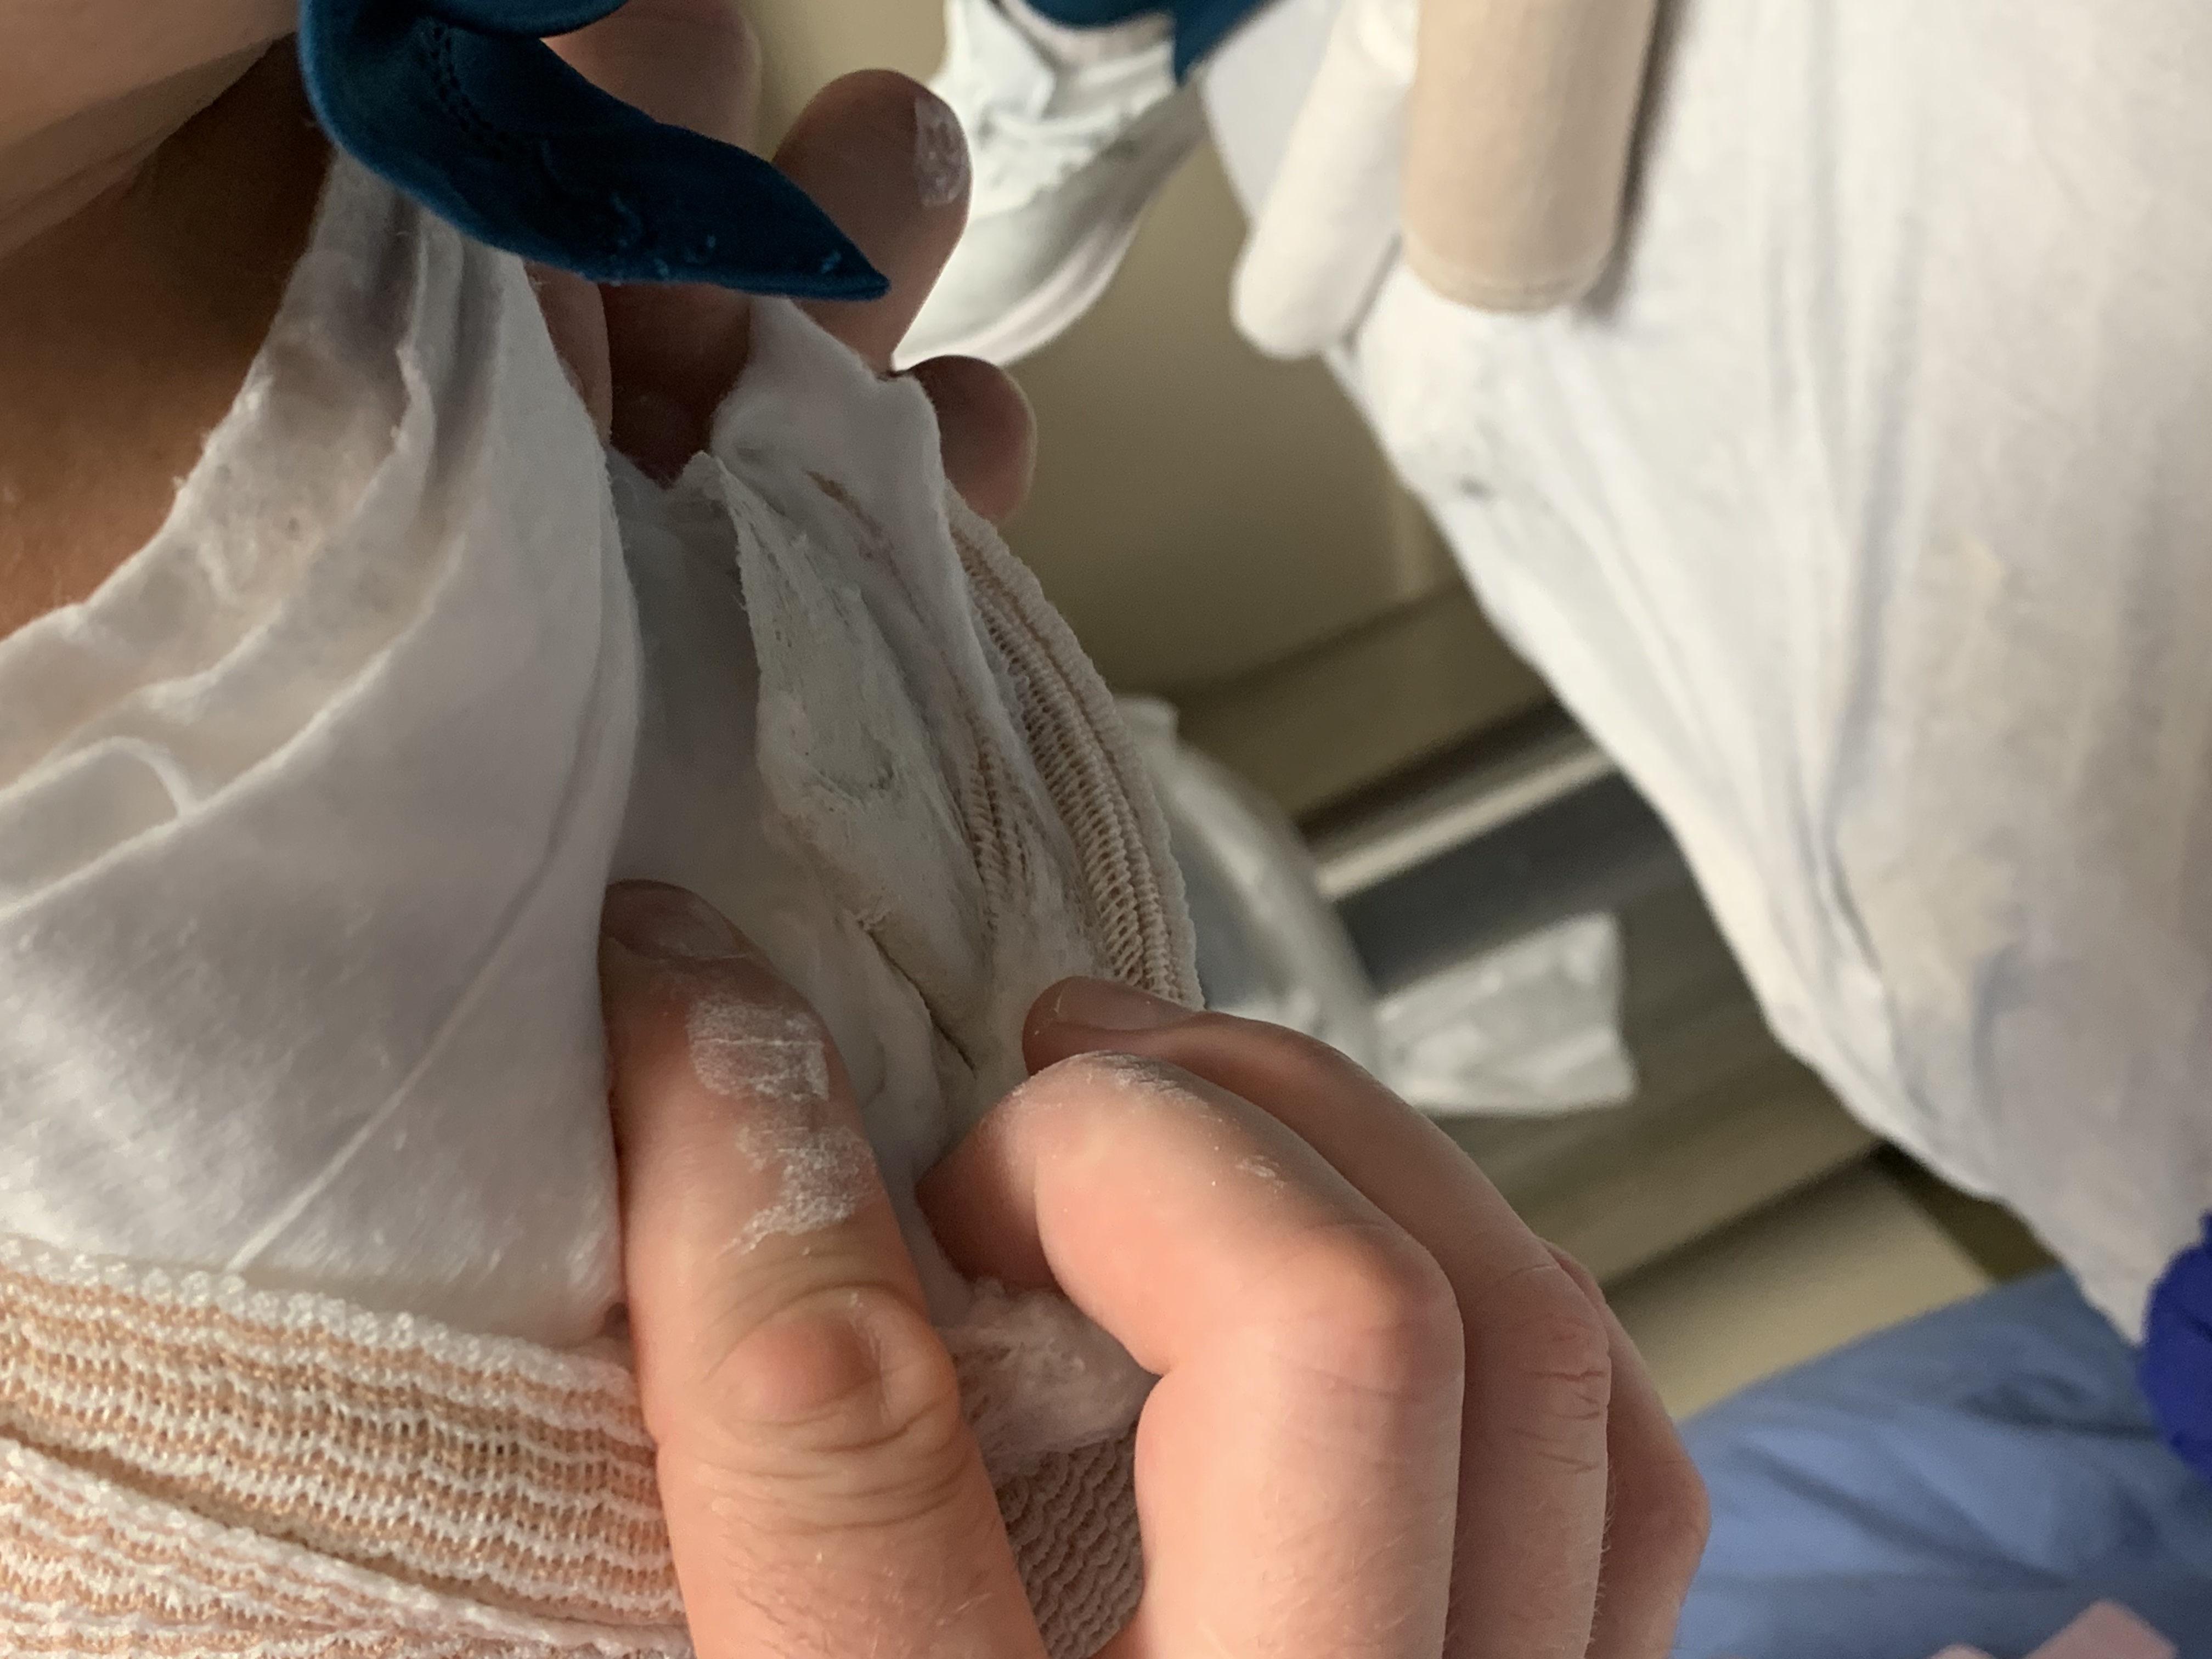
You can move the ace wrap, allowing you to access the skin over the anterior ankle. Pulling out the webril here as depicted does not destabilize your splint, and you can check someones skin to see if they are amenable to surgery. (Too swollen = no surgery). Look for skin wrinkling.
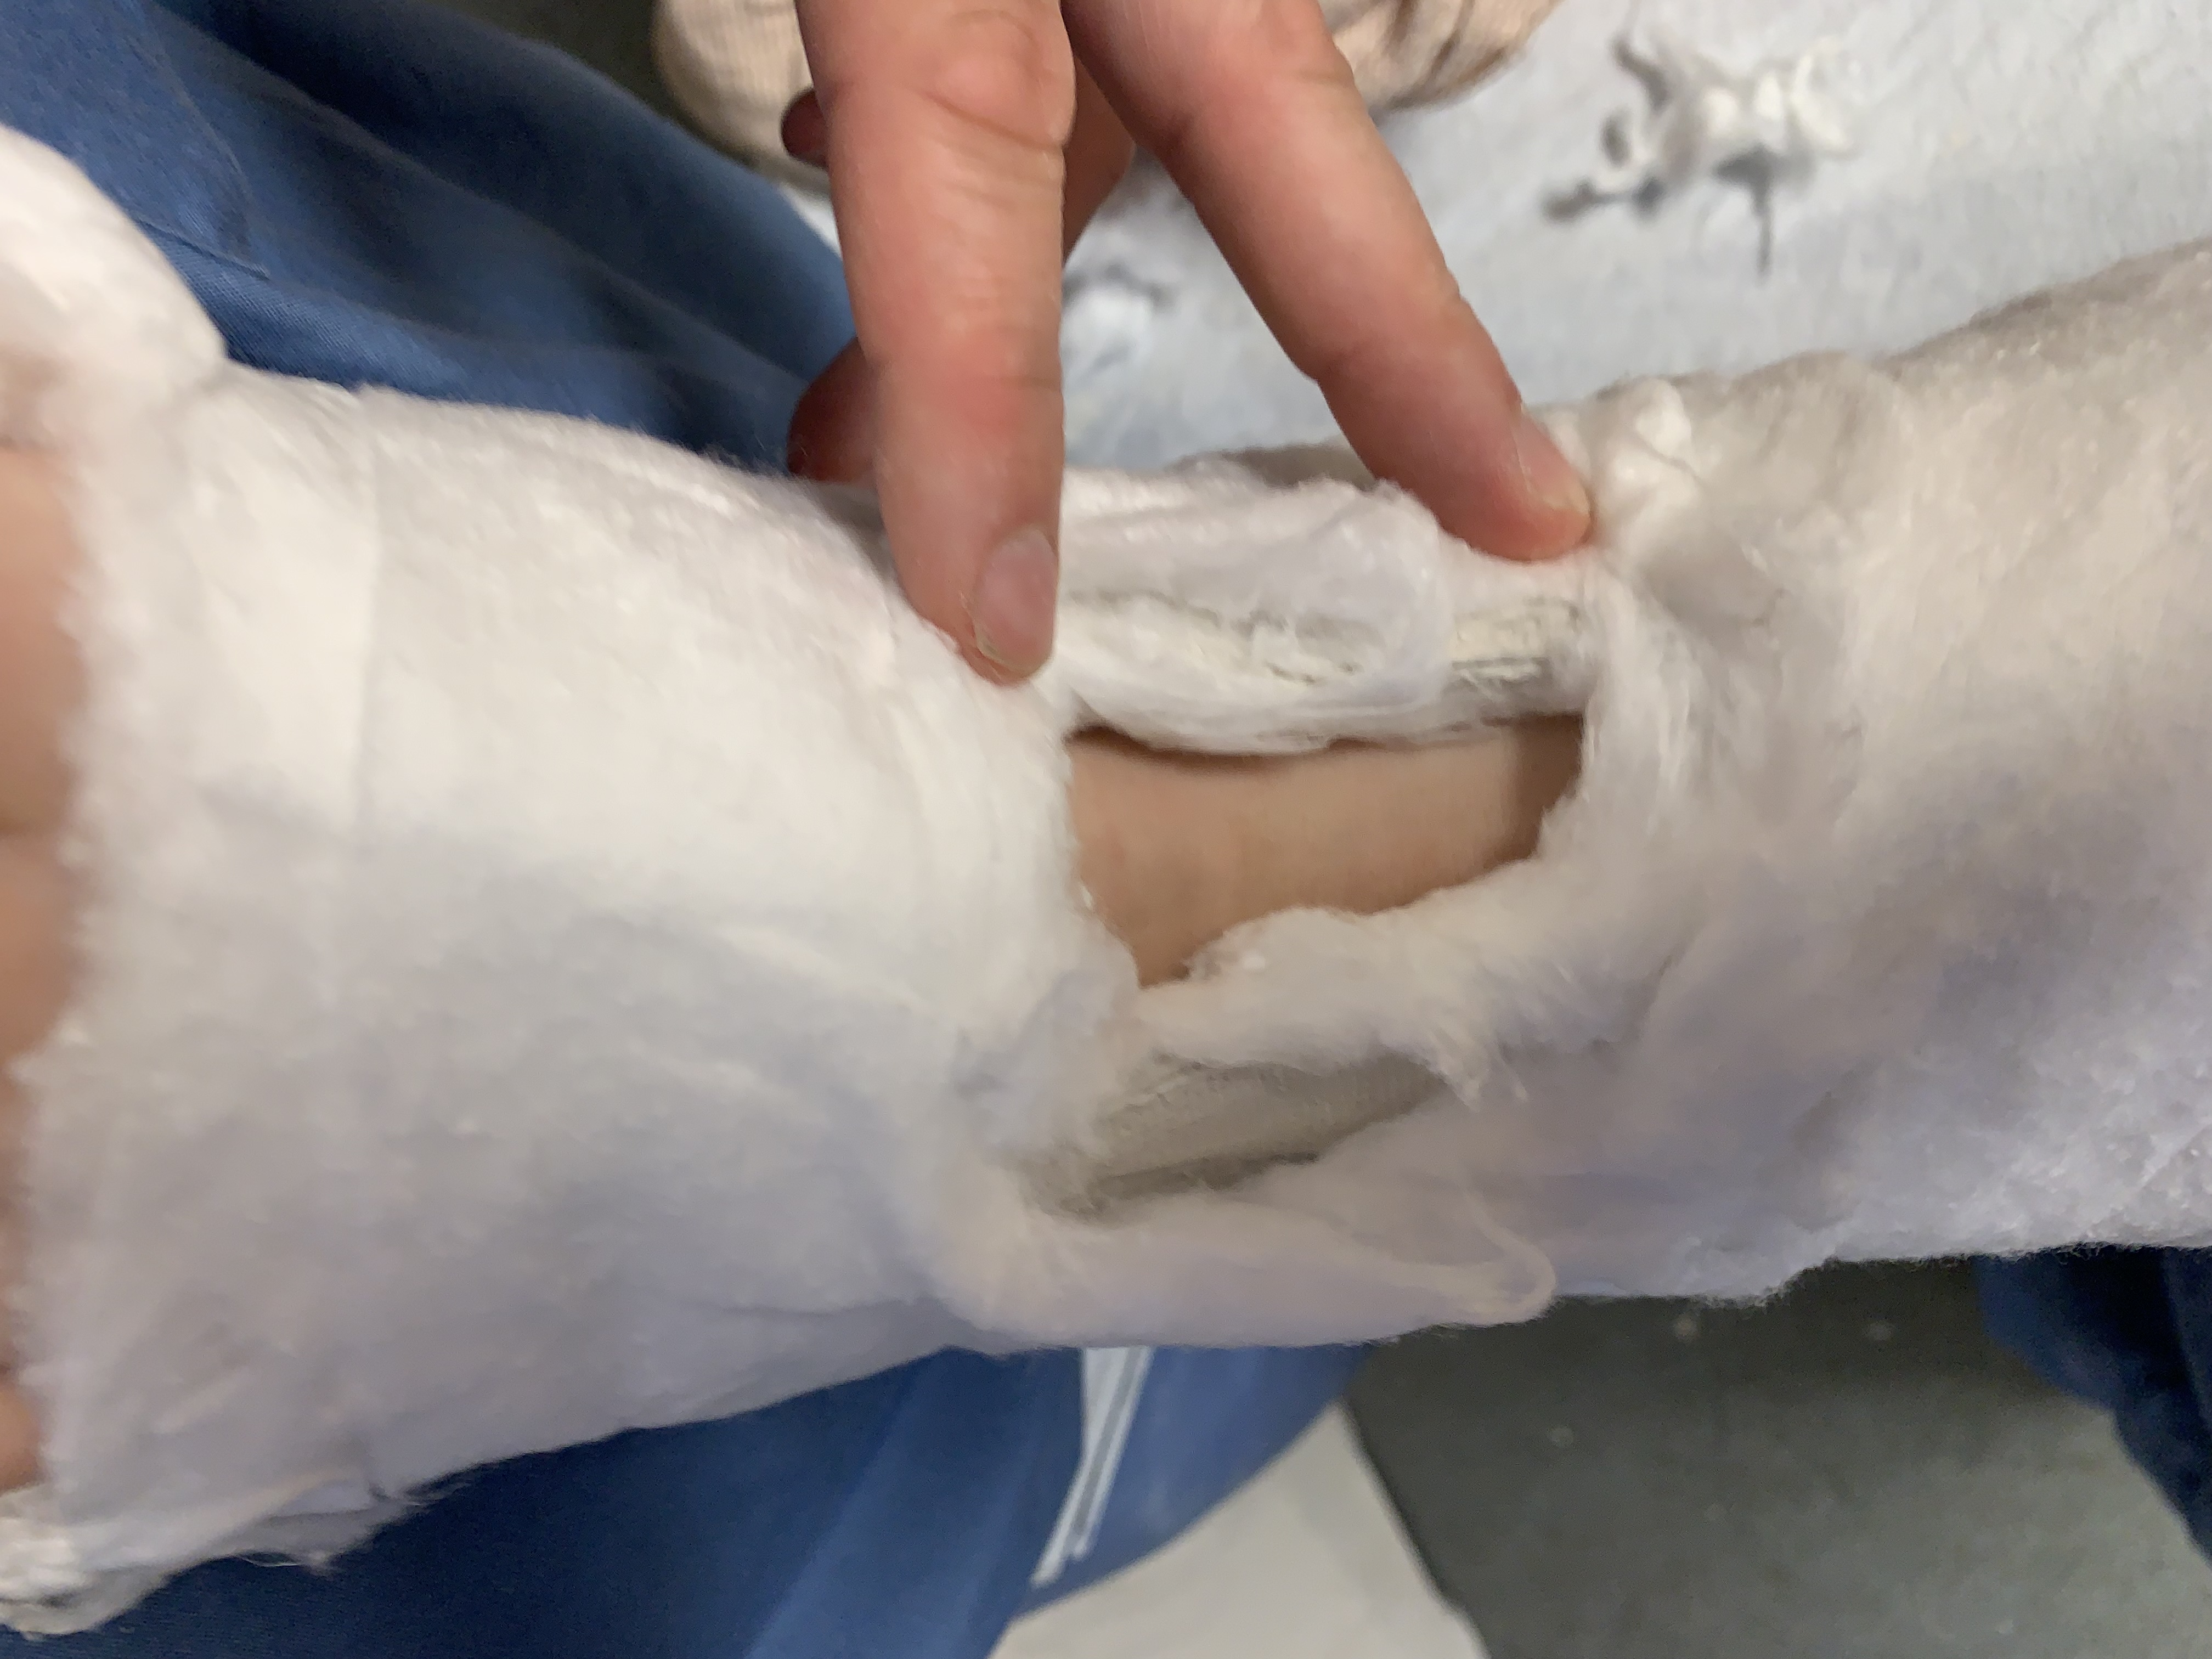
Look for skin wrinkling as depicted below.
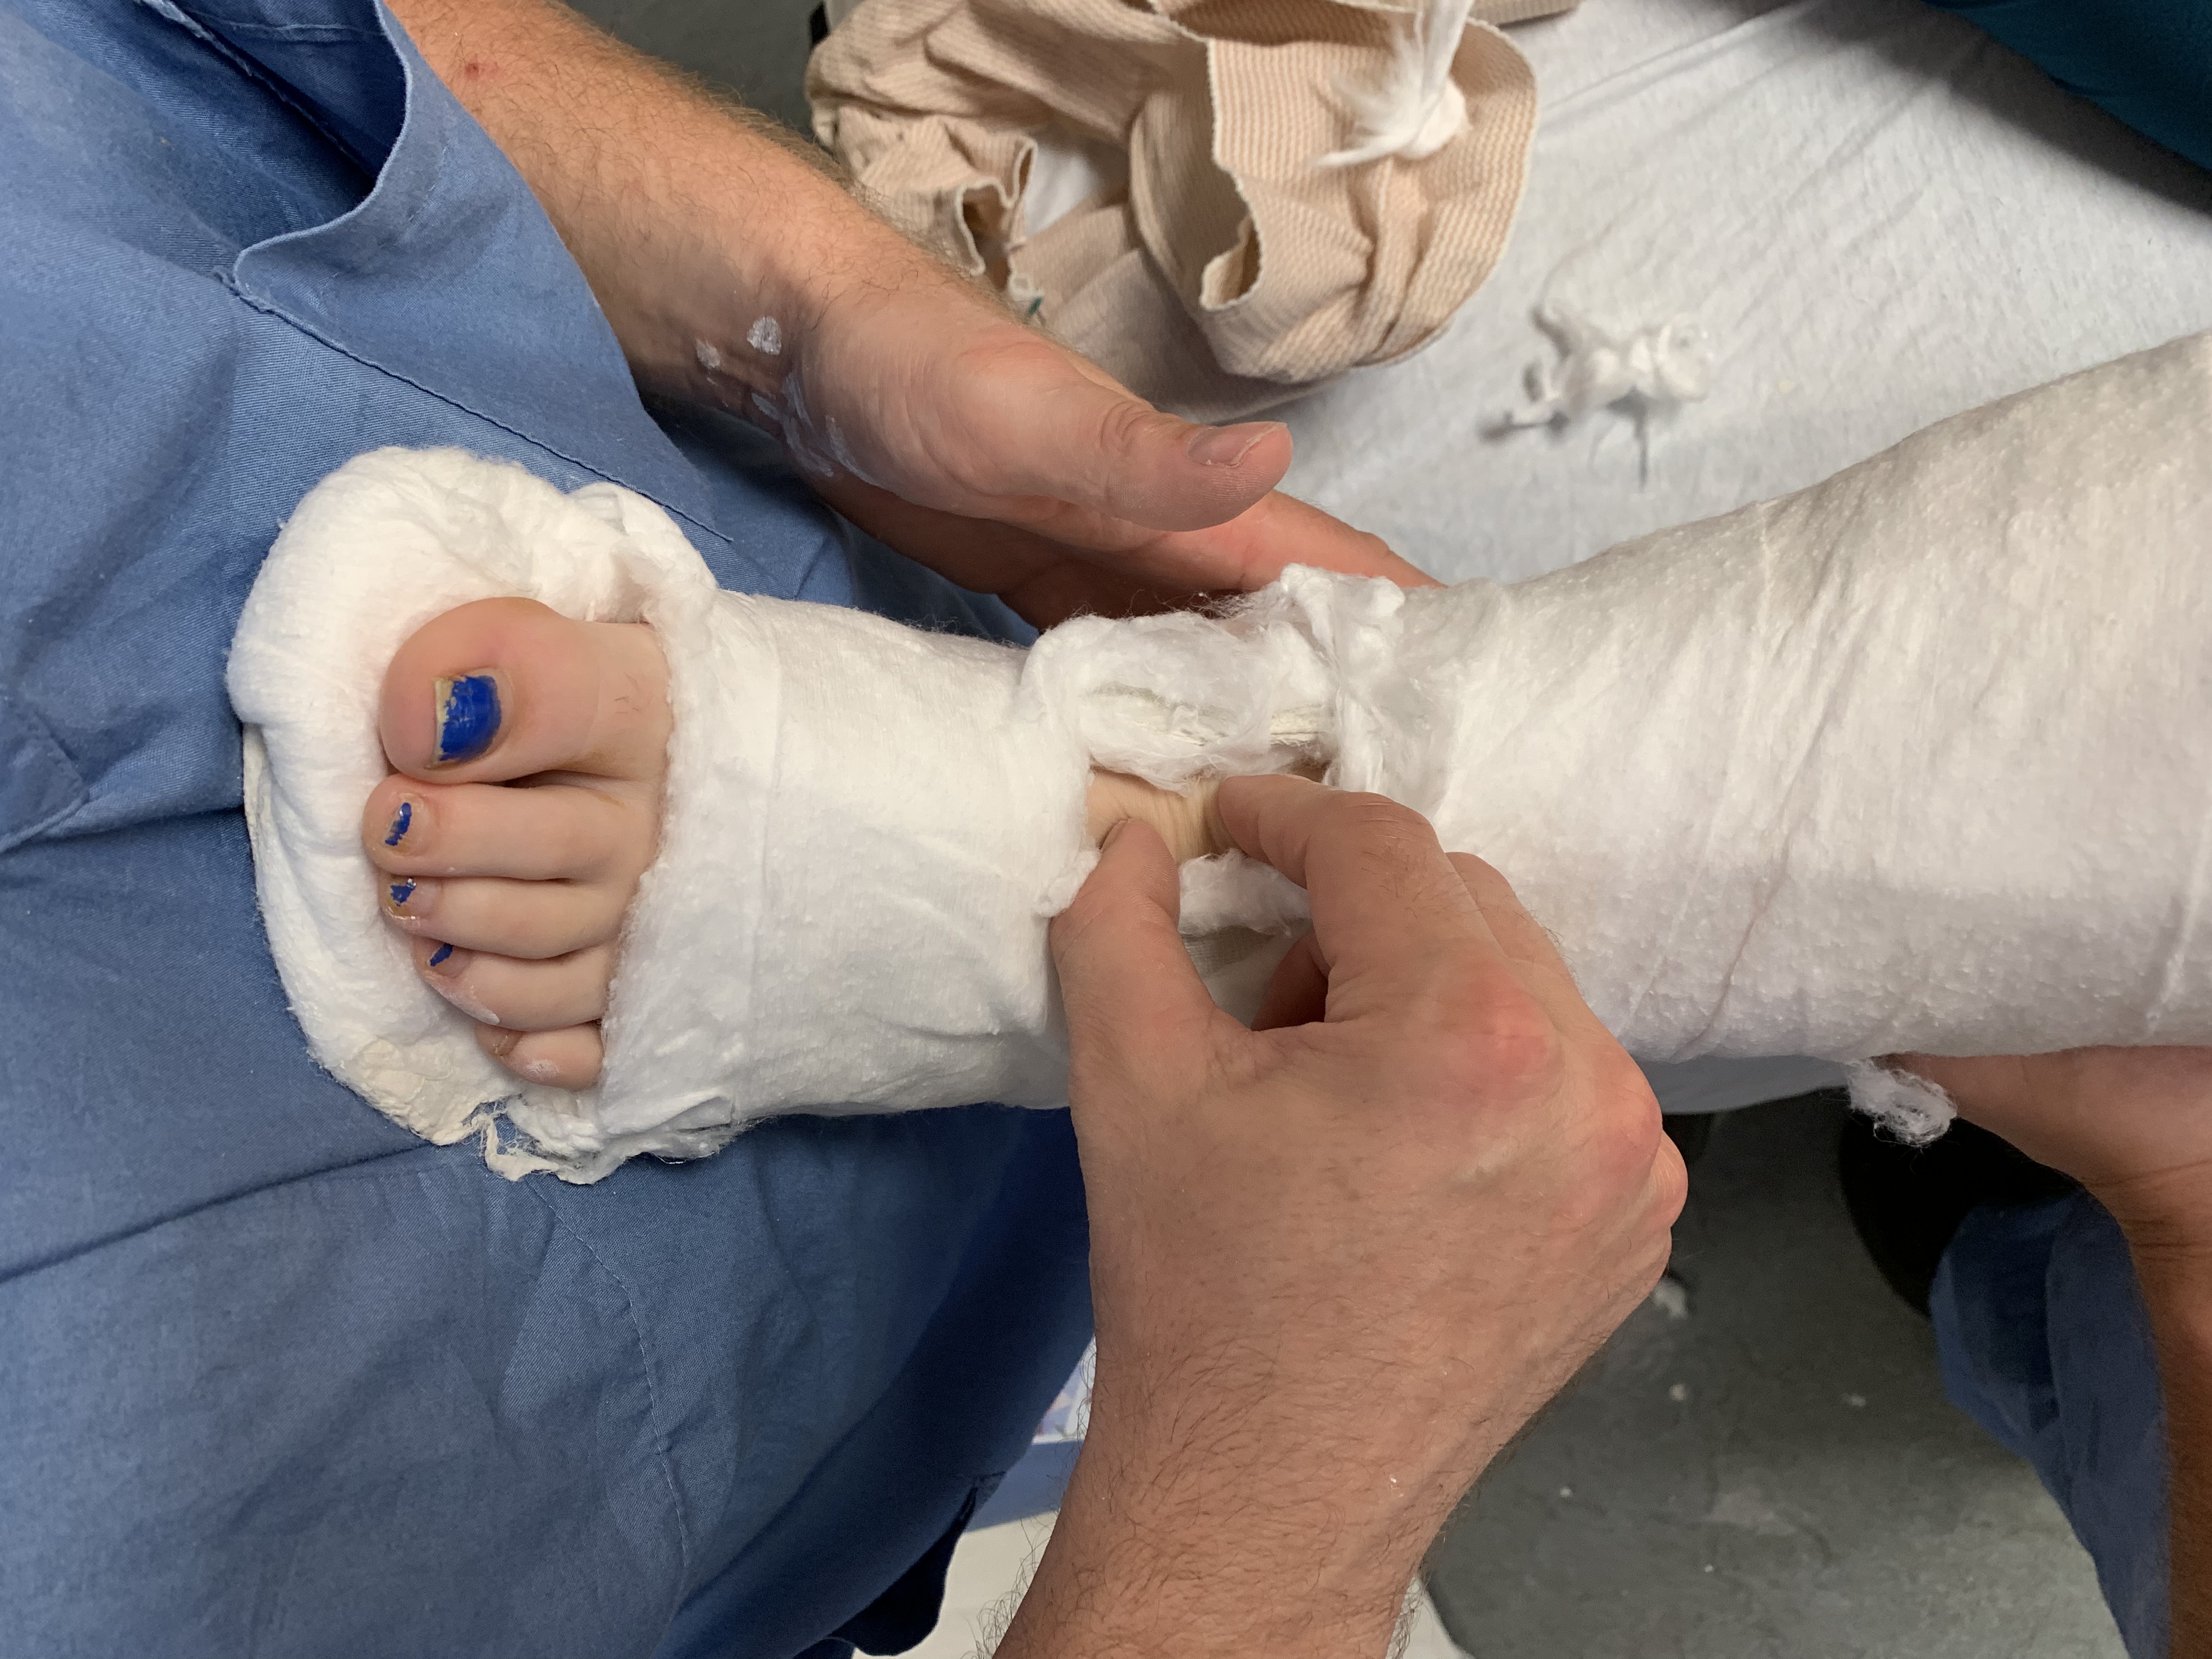
Foot position and knee for subtalar dislocation reductions.
Fully flexed knee and fully plantarflexed ankle. (Relax grastroc and get full motion across the ankle/foot.) This will help you get more motion during your reduction.